Showing posts with label chocolate. Show all posts

Monday, December 20, 2010

Chocolate Hazelnut Truffles


From the kitchen of One Perfect Bite...This confection is private stock, served only to BFF's or shared with my daughters as we sip pear brandy and talk late into the night. While not quite as good as the Ferrero Rocher chocolates after which they're patterned, I must say, with all due modesty and a drum roll or two, that these are PDG. They are also embarrassingly easy to assemble and for that reason I make them throughout the year. The truffles take about 30 minutes to prepare, but the chocolate mixture used to form them must be chilled before they can be shaped, so, despite ease of preparation, you'll have to build wait time into your game plan. I found the recipe on the Taste of Home website several years ago and I've made no changes to it, save for altering the time the chocolate must be refrigerated. I've found that the overnight chill suggested in the recipe produces an unworkable mass that must sit for an hour before the truffles can be shaped. A three hour chill is all that's really need. I am currently using milk chocolate candy bars to make these, but come the first of the year I want to make these using Nutella. I like the thought of triple hazelnut truffles. I hope you'll give these a try. They really are delicious. Here's the recipe.

Chocolate Hazelnut Truffles...from the kitchen of One Perfect Bite, courtesy of Debra Pedrazzi and Taste of Home magazine

Ingredients:
3/4 cup confectioners' sugar
2 tablespoons baking cocoa
4 milk chocolate candy bars (1.55-oz. each)
6 tablespoons butter
1/4 cup heavy whipping cream
24 whole hazelnuts
1 cup very finely chopped hazelnuts, toasted

Directions:

1) In a large bowl, sift together confectioners' sugar and cocoa; set aside. In a saucepan, melt candy bars and butter. Add the cream and reserved cocoa mixture. Cook and stir over medium-low heat until mixture is thickened and smooth. Pour into an 8-in. square dish. Cover and refrigerate for about 3 hours or overnight.
2) Using a melon baller or spoon, shape candy into 1-in. balls; press a hazelnut into each. Reshape balls and roll in ground hazelnuts. Store in an airtight container in refrigerator. Yield: 2 dozen.

You might also enjoy these recipes:
Easy and Festive Peppermint Bark Candy - Sugar and Spice
Candy Cane Fudge - What's Cookin Chicago?
Dark Chocolate-Covered Peanut Butter Cups - Verses from My Kitchen
Honey Cream Caramels - Eat Good 4 Life
Peanut Butter Fudge - Brown Eyed Baker
Chocolate Covered Toffee - Petit Foodie
Rocky Road Fudge Candy - Baking and Boys
Easy Chocolate Turtles - Culinary Cory
Sunday, October 31, 2010

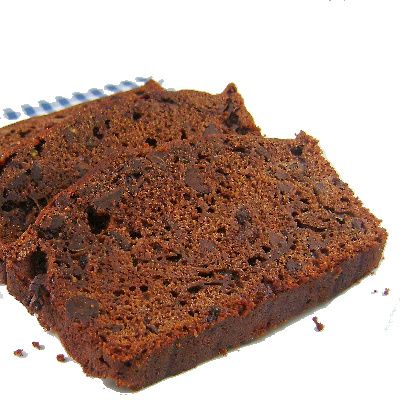
Double Chocolate Zucchini Bread


When things are quiet here, I browse through food blogs the way others do magazines. I admire some and learn from others, always gleaning tips and tidbits that have the potential to make our next meal something really special. As a result, my bookmark folder is an embarrassment of riches that I'd be ashamed to let others see. While not talking numbers, I can happily report that I'm now current through the summer of 2009. While it took a while, I was finally able to make this wonderful Double Chocolate Zucchini Bread, originally featured at Baking Bites that summer. If you're not familiar with the site, stop by and see what's happening. You'll be happy that you did. This lovely cake-like bread was worth waiting for. It is moist. It is flavorful. It is chocolate. I know you'll love it, so rather than gab I'll get right to it. Here's the recipe for one of the best zucchini breads I've ever had. I did say chocolate, didn't I?


Double Chocolate Zucchini Bread
...from the kitchen of One Perfect Bite, courtesy of Baking Bites

Ingredients:
2 cups all purpose flour
1/2 cup unsweetened cocoa powder, sifted
1 cup sugar
2 teaspoons baking powder
1/2 teaspoon salt
2 large eggs
1/3 cup vegetable oil
3/4 cup buttermilk
1 teaspoon vanilla extract
2 medium zucchini, shredded to equal 1-1/4 cups
1 cup chocolate chips

Directions:
1) Preheat oven to 350F. Lightly grease a 9×5-inch loaf pan. Set aside.
2) Sift flour, cocoa powder, sugar, baking powder and salt into a large bowl.
3) Whisk eggs, vegetable oil, buttermilk and vanilla together in a medium bowl.
4) Add wet to dry ingredients and stir until almost fully combined. Add zucchini and chocolate chips and stir until evenly distributed in batter (batter should be fairly thick).
5) Bake for 50-55 minutes, or until a toothpick inserted into center comes out clean or with only moist crumbs attached. Turn loaf out of pan and cool on a wire rack before slicing. Yield: 1 loaf.

You might also enjoy these recipes:
Chocolate Zucchini Cake - One Perfect Bite
Double Chocolate Zucchini Bread (Low Card Gluten Free) - All Day I Dream About Food
Chocolate Zucchini and Sweet Potato Bread - Anna's Table
Chocolate Zucchini Muffins - Cookie Madness
Vegan Chocolate Banana and Zucchini Bread - Anja's Food 4 Thought
Chocolate Zucchini Bread - Closet Cooking
Chocolate Zucchini Spelt Cake - Anja's Food 4 Thought

Thursday, October 28, 2010

Chocolate Peanut Crinkles


From the kitchen of One Perfect Bite...This cookie recipe kept making the rounds and each time I saw it I became "curiouser and curiouser." Chocolate crinkles, I call them snowballs, are a favorite of mine, so it was only a matter of time before I actually tried the recipe. It was developed by Bill Yosses, a White House pastry chef, and I wanted to see how his cookies differed from the old classic I've grown to love. They are, indeed, different. Their texture is far more cakelike than what I'm familiar with. They are also huge in size. Whether that's good or bad is a subjective call. The nuts add a subtle taste to the finished cookie, but they don't overpower the chocolate, and the bit of added texture they provide is not unpleasant. I'm glad I made these cookies, though I don't plan on making them them again. They are delicious to be sure, but delicious comes on a sliding scale. The classic recipe I use can be found here. I think it makes a better cookie. I don't want to dissuade you from trying Chocolate Peanut Crinkles. Your opinion my differ from mine. Here's the recipe.

Chocolate Peanut Crinkles...from the kitchen of One Perfect Bite, courtesy of Bill Yosses and Melissa Clark

Ingredients:
2/3 cup toasted, skinned unsalted peanuts
2 tablespoons granulated sugar
6 ounces bittersweet chocolate, coarsely chopped
2-3/4 cup all-purpose flour
2 tablespoons Dutch-processed unsweetened cocoa powder
2 teaspoons baking soda
3/4 teaspoon salt
1-1/2 cups light brown sugar
8 tablespoons unsalted butter, softened
2 large eggs, room temperature
1/4 cup whole milk
1 teaspoon pure vanilla extract
3/4 cup confectioners’ sugar

Directions:

1) Place nuts and granulated sugar in bowl of a food processor fitted with a blade attachment. Pulse to finely chop.
2) Melt chocolate in the top of a double boiler set over a pot of simmering water.
3) Sift flour, cocoa powder, baking soda and salt together in a large bowl. Place butter and brown sugar in bowl of an electric mixer fitted with a paddle attachment. Cream until light and fluffy. Add eggs, one at a time, until incorporated. Beat in the melted chocolate, stopping mixer to scrape down sides before beating again. Mix in milk and vanilla. Add flour mixture in three additions, and mix until just combined. Fold in nuts.
4) Form dough into a ball and cover tightly with plastic wrap. Refrigerate dough for 3 hours or overnight.
5) When you are ready to bake, preheat oven to 350°F. Line two baking sheets with parchment paper, or lightly butter them, and set aside.
6) Place confectioners’ sugar in a wide, shallow bowl. Scoop out a heaping tablespoon of dough and roll into a ball. Coat generously with sugar and transfer to a baking sheet, placing them at least 2-inches apart. Repeat with remaining dough and sugar.
7) Bake cookies, turning sheets from back to front and swapping racks halfway through, until cracked but not completely firm, 12-15 minutes. Cool cookies on the sheets for about 2 minutes, then use a spatula to transfer to wire racks to cool further. They may be stored airtight at room temperature for up to 2 days. Yield: 3-1/2 dozen.

You might also enjoy these recipes:
Chocolate Cookies n' Cream Cookies - Baking Bites
Dark and Bitter Orange Chocolate Cookies - The Technicolor Kitchen
Flourless Peanut Chocolate Cookies - Culinary in the Country
Double Chocolate Dream Cookies - Cookie Madness
Chocolate Sables: World Peace Cookies - Deep South Dish
Triple Chocolate Cookies - Une Gamine dans la Cuisine
Totally Chocolate Chocolate Chip Cookies - Sweet and Savory Tooth
Thick and Chewy Triple Chocolate Cookies - Brown Eyed Baker

Friday, October 15, 2010

Cherry Cupcakes - Pink Saturday


Photo courtesy of Photobucket - Creative Commons Attribution

From the kitchen of One Perfect Bite...A bit of chocolate is good for the soul and mine is happy right now. These cupcakes go together quickly and are better for you than most. That's not to say they're better for you than an apple might be, but the folks at Eating Well have managed to reduced the fat and calories and still deliver something you'll enjoy. If you need to take the edge off a sweet tooth, give these a try. I'm happy to report that despite what's been taken from them, enough remains to make these a really nice snack. If you object to the use of food coloring, by all means omit it. It adds nothing but a lovely pink hue to the cupcakes. It is Pink Saturday, so I decided to use it. Here's the recipe.

Chocolate Cherry Cupcakes...from the kitchen of One Perfect Bite courtesy of Eating Well

Ingredients
:
Cake
3/4 cup whole-wheat pastry flour (see Note)
3/4 cup cake flour
1/2 cup unsweetened cocoa powder
1-1/2 teaspoons baking powder
1/2 teaspoon baking soda
1/2 teaspoon salt
3/4 cup granulated sugar
1/4 cup canola oil
1 large egg
1 teaspoon vanilla extract
1/2 cup nonfat buttermilk
1-1/2 cups chopped pitted cherries, fresh or frozen (thawed and drained), plus 12 fresh cherries with stems for garnish
Frosting
6 ounces reduced-fat cream cheese (Neufchâtel), at room temperature
1 /2 cup reduced-fat sour cream
1 cup packed confectioners’ sugar
Red Food coloring
Milk for thinning

Directions:
1) Preheat oven to 350 degrees F. Line 12 (1/2-cup) muffin cups with paper liners.
2) Whisk whole-wheat flour, cake flour, cocoa, baking powder, baking soda and salt in a medium bowl.
3) Beat granulated sugar and oil in a large mixing bowl with an electric mixer on medium speed until combined. Beat in egg and vanilla until well combined. With mixer on low, alternately mix in dry ingredients and buttermilk, starting and ending with dry ingredients and scraping sides of the bowl as needed, until just combined. Fold in chopped cherries until just combined. Divide batter among prepared cups (they will be full).
4) Bake the cupcakes until a toothpick inserted into the center comes out clean, 22 to 26 minutes. Transfer to a wire rack and let cool completely.
5) Meanwhile, beat cream cheese, sour cream and confectioners’ sugar with an electric mixer until smooth. Add a drop or two of red food color to tint icing. Refrigerate frosting until very cold, about 2 hours. Thin with milk if necessary to spread on cooled cupcakes. Garnish with a cherry on top. Yield: 12 cupcakes.

You might also enjoy these recipes:
Pumpkin Cupcakes with Maple Cream Frosting - One Perfect Bite
Boston Cream Pie Cupcakes - Sugar Plum
Raspberry Cup Cakes - My Kitchen Treasures
Red Velvet Cupcakes - What's for Dinner Across State Lines
Carrot Cupcakes - Christine's Cuisine
Owl Cupcakes - Sinfully Southern Sweets
German Chocolate Cupcakes - Barbara Bakes

This post is being linked to:
Pink Saturday, sponsored by Beverly at How Sweet the Sound.

Monday, October 4, 2010

Chocolate Zucchini Cake


From the kitchen of One Perfect Bite...This is a wonderful cake, but it's one that falls into my "hate to love it" category. The cake is delicious and fairly easy to make, but I have a problem with its baking time. I've made it several times and on each occasion the baking time has varied. In all three instances, it has taken longer to bake than the recipe suggests. My oven has just been recalibrated, so I doubt there is a problem with the thermostat, and I'm using the specified pan-size, so I know there is no problem there. I can tell you that my cakes still shimmy at the end of the 30 minute time suggested by the recipe. Mine require a minimum of 50 minutes to assure a stable center. I suspect the difference is attributable to the amount of moisture in the zucchini, but I really don't know for sure. At any rate, the cake is good enough that I'm willing to keep an eye on it while it bakes. The cake is based on a recipe developed in the Ghiradelli kitchens and the original recipe can be found here. This version of the cake, created by Kate Westburg, was a winner in a Ghiradelli competition held at the DuPage County Fair this past summer. I've changed the recipe slightly and if you'd like to see the original it can be found here. The cake is delicious, even if it drives me crazy. I hope you will try it. It's worth the aggravation. Here's the recipe.

Chocolate Zucchini Cake ( 3-G Stealth Zucchini Cake)...from the kitchen of One Perfect Bite, inspired by Kate Westburg

Ingredients:

3 large eggs
1 cup + plus 1/2 teaspoon vegetable oil, divided use
2 teaspoons vanilla extract
2 cups sugar
1/2 cup unsweetened cocoa
2 cups all-purpose flour
2 teaspoons baking soda
1 teaspoon baking powder
1 teaspoon salt
1 tablespoon cinnamon
2 cups grated zucchini
1 cup semisweet chocolate chips
4 ounces baking milk chocolate

Directions:

1) Preheat oven to 350 degrees F. Lightly grease bottom and sides of (9-by-13-inch) pan or 2 (3-by-6-by-9-inch) loaf pans.
2) Combine eggs, 1 cup vegetable oil, vanilla, and sugar in a large bowl. Beat to combine, about 1 to 2 minutes.
3) Sift together cocoa, flour, baking soda, baking powder, salt and cinnamon; add 1/2 cup at a time to wet ingredients. Mix until well combined.
4) Stir in zucchini and chocolate chips. Pour into prepared pan; bake 30 minutes for (9-by-13-inch) cake pan (approximately 50 minutes for loaf pans), or until cake tester comes out clean. Using a 9 x 13 x 2-inch pan, I still needed a minimum of 50 minutes to bake the cake.
5) Melt baking milk chocolate in double boiler or in microwave over water (being careful not to scorch). Whisk in 1/2 teaspoon canola oil. Drizzle ribbon topping over cooled cake. Yield: 16 servings.

You might also enjoy these recipes:
Zucchini Cookies - The Local Cook
Hazelnut Zucchini Cake - My Kitchen in the Rockies
Chocolate Zucchini Cake - Eat At Allie's
Zucchini Cake with Lime Cream Cheese Frosting - Baking Bites
Chocolate Streusel Zucchini Cake - Let's Dish
Zucchini Cake with Crunchy Lemon Glaze - David Lebovitz
Apple Zucchini Cake with Walnuts - Anja's Food 4 Thought

Tuesday, June 1, 2010

(Almost) Cherry Garcia Ice Cream


From the kitchen of One Perfect Bite...Had the gods of mythology sampled this Ben and Jerry favorite, there would have been no talk of ambrosia and an ice cream parlor would have, instead, been opened on the top of Mount Olympus. It is remarkably good and it's Bob's ice cream of choice. It's hard to find Cherry Garcia ice cream in many parts of the world, so, each year before we leave, Bob has his fill of it while we are still in DEFCON 1. It is remarkably easy to prepare and I have only one caution should you decide to make it. It's important not to overwork the chocolate and cherry mixture when folding it into the cream. It's also important to keep the chocolate shavings thick enough to retain their shape during the process. Now to the real question. Does it actually taste like Cherry Garcia ice cream? Kinda. Sorta. Maybe. A lot depends on the flavor of the Bing cherries you use. That can vary from one pint to another, so I've started using a tablespoon of kirsch to assure that wonderful cherry flavor. The recipe is Tom and Jerry's own, so I have not included kirsch in the ingredient list. Here's how they do it.

Cherry Garcia Ice Cream...from the kitchen of One Perfect Bite, courtesy of Ben and Jerry's Homemade Ice Cream and Dessert Book

Ingredients:
1/4 cup shaved plain chocolate (we prefer Hershey's Special Dark Chocolate candy bars)
1/4 cup fresh Bing cherries, halved and pitted (you may use canned cherries, but be sure to drain the syrup)
2 large eggs
3/4 cup sugar
2 cups heavy or whipping cream
1 cup milk

Directions:
1) Place shaved chocolate flakes and the cherries in separate bowls. Cover and refrigerate.
2) Whisk eggs in a mixing bowl until light and fluffy, 1 to 2 minutes. Whisk in sugar, a little at a time, then continue whisking until completely blended, about 1 minute more. Pour in the cream and milk and whisk to blend.
3) Transfer mixture to an ice cream maker and freeze following the manufacturer’s instructions.
4) After ice cream stiffens (about 2 minutes before it is done), add chocolate and cherries, then continue freezing until ice cream is ready. Yield: 1 quart.

You might also enjoy these recipes:
Ice Cream Crunch Cake - One Perfect Bite
Fresh Mint Ice Cream - One Perfect Bite
Lemon Buttermilk Ice Cream - One Perfect Bite
Cherry Ice Cream with Chocolate Chips - Simply Recipes
Snickerdoodle Ice Cream - The Recipe Girl
Salted Butter Caramel Ice Cream - David Lebovitz

Tuesday, April 6, 2010

Chocolate Flans


From the kitchen of One Perfect Bite...This is a chocolate pudding unlike any you've ever had before. It's a signature dessert at Cibrèo, a well-known trattoria near the outdoor market in Florence. Unlike most puddings, this silken, barely sweet budini is served warm with sweet cream on the side. The flavor is rich, the texture is creamy and the bittersweet taste of good chocolate will bring cioccolato fans to their knees. It is that good. It is, alas, despite the true ease with which its made, not something you'll prepare often. The silken texture of the baked custard comes from copious quantities of cream and eggs that only marathon runners can handle on a regular basis. I've tried to make healthier substitutions for the more egregious ingredients but it simply doesn't work. So, Bob and I have this once a year, in smaller portions than recommended in the recipe, and, when I make this for us, I cut the recipe in half to make four 6-ounce servings. There's no reason to give temptation free reign in the refrigerator. If you like chocolate you'll love this dessert. Here's the recipe for the pudding as it is served at Cibrèo.

Chocolate Flans ...from the kitchen of One Perfect Bite, inspired by Patricia Wells

Ingredients:

Nonstick spray or butter to prepare ramekins
8 ounces top quality bittersweet chocolate, finely chopped
2/3 cup whole milk
2 cups heavy cream
1/4 cup espresso or strong coffee
1 teaspoon vanilla extract
1 tablespoon granulated sugar
2 large eggs, room temperature
2 large egg yolks, room temperature
Optional garnish: whipped cream, cocoa powder

Directions:

1) Preheat oven to 325 degrees F. Spray or butter six (1-cup) ramekins and place them in a roasting pan large enough to hold them without their sides touching. Put a kettle of water on to boil.
2) Combine chocolate and milk in a heavy bottomed saucepan. Cook over low heat to melt chocolate. Remove from heat source and let cool for 5 minutes.
3) Whisk remaining ingredients into pan until blended. If you wish, strain custard before pouring into ramekins. Transfer roasting pan, containing ramekins, to oven. Add boiling water to roasting pan until it reaches halfway up sides of ramekins. Bake until edges of flans are set but center still trembles, about 45 to 50 minutes.
4) Carefully remove custards from oven. Serve warm or at room temperature. Garnish with heavy cream and cocoa powder if desired. Yield: 6 servings.

You might also enjoy these recipes:
Lemon Pudding - One Perfect Bite
Double Chocolate Pudding - One Perfect Bite
Butterscotch Pudding - One Perfect Bite

Thursday, February 11, 2010

Forget Me Not Fudge - Foodie Friday


From the kitchen of One Perfect Bite...This is a really simple recipe and because candy is such an integral part of our Valentine's Day celebrations, I thought this would be the perfect time for this delicious spiked fudge to make its debut. The recipe uses just six ingredients and consistently produces a rich, smooth fudge that's never grainy. The recipe was developed by Maker's Mark Kentucky Bourbon Whiskey. If you prefer, you can substitute one teaspoon of vanilla extract for the small amount of bourbon used in the recipe. If you're looking for a chocolate confection to make for someone special, look no further. Once you've assembled the ingredients, you'll need about 10 minutes to make the fudge. It's necessary to keep it in a cool spot for 6 to 8 hours to set before cutting. This recipe makes a lot of fudge, so round up friends to share it with or cut the recipe in half. Here's how the fudge is made.

Forget Me Not Fudge...from the kitchen of One Perfect Bite adapted from a recipe by Maker's Mark

Ingredients:
4-1/2 cups granulated sugar
1 (13-oz.) can evaporated milk
9-oz. bittersweet chocolate morsels
9-oz. semi-sweet chocolate morsels
1/2 pound butter, cut in 1/2-inch pieces
1 tablespoon Kentucky bourbon
2 cups coarsely chopped pecans

Directions:
1) Combine sugar and evaporated milk in a large (4-quart) saucepan. Bring to a boil over moderate heat. Boil for exactly 6 minutes, stirring constantly. Remove from heat.
2) Add chocolate morsels, butter, bourbon and pecans. Mix well with a wooden spoon.
3) Pour into a well-greased 9 x 13-inch pan. Smooth top. Allow to set in a cool place for 6 to 8 hours. Cut into 1 x 1-inch squares.

You might also enjoy:

Candied Orange and Lemon Peel
Pink Peppermint Patties
White Chocolate Truffles

This recipe is being linked to:
Designs By Gollum - Foodie Friday

Sunday, January 31, 2010

Self-Frosting Chocolate Cake - Blue Monday


Two ways to have fun.


From the kitchen of One Perfect Bite...If you're looking for a dessert to serve on Valentine's Day, you might want to try this self-frosting chocolate cake. It's really easy to do and can be made as one large, or eight smaller, portion controlled, cakes. I always opt for the latter. It helps prevent me from overeating, which I have, on occasion, been known to do. The cake can be made a day before serving as long as you follow the directions for reheating that are in the recipe. If you decide to make this, be sure to use the finest bittersweet chocolate and raspberry jam available to you. This is one of those recipes where quality really pays off. If you like ease of preparation, the taste of bittersweet chocolate and raspberries, you'll love this treat. Just remember this is a dessert that should be served warm, and that means the cakes, large or small, can't be unmolded until you are ready to serve them. If you carefully follow the recipe instructions and say a prayer or two or three, you'll have no problems. I make these for family and good friends. I have, over the years, become a very relaxed hostess. If you do a great deal of formal entertaining, I have a caution for you. While these are luscious, they are probably too homely for a more formal dinner party. Here's the recipe.

Self-Frosting Chocolate Cake...from the kitchen of One perfect Bite, inspired by Epicurious.com

Ingredients:
Frosting
3 ounces fine-quality bittersweet chocolate (not unsweetened)
1/2 cup seedless raspberry jam (about 5 ounce)
1/2 cup heavy cream
Cake Batter
1/2 cup boiling water
1/3 cup plus 2 teaspoons unsweetened cocoa
powder (not Dutch process)
1/4 cup whole milk
1/2 teaspoon vanilla extract
1/3 cup seedless raspberry jam (about 3 1/2 ounce)
1/2 cup (1 stick) unsalted butter, softened
1/3 cup packed light brown sugar
1/3 cup granulated sugar
2 large eggs
1 cup all-purpose flour
3/4 teaspoon baking soda
1/4 teaspoon salt
1 pint raspberries (for garnish)

Directions:
1) Preheat oven to 350 degrees F. Generously butter a 9 x 2-inch round cake pan or 8 (8-oz.) custard cups. Set aside.
2) To make frosting: Break chocolate into small pieces. Place in a small saucepan with raspberry jam and cream. Bring to a simmer, stirring occasionally, until smooth. If making one large cake, pour mixture into prepared pan. If making individual cakes, pour an equal portion of mixture into each custard cup. Set aside.
3) To make cake batter: Whisk boiling water and cocoa powder together until smooth. Whisk in milk, vanilla extract and jam. Place butter and both sugars in a large bowl Beat with an electric mixer until light and fluffy. Add eggs, one at a time, beating well after each addition. Sift flour, baking soda and salt into another bowl. Add to egg mixture in batches alternately with cocoa mixture, beginning and ending with flour mixture. Beat well after each addition. Pour an equal portion of batter over frosting. If making one large cake, bake in center of oven for 30 to 35 minutes. If making individual cakes, bake for 20 to 25 minutes. Use a cake tester to check for doneness. Remember frosting will still be liquid. Transfer pan or custard cups to a wire rack. Let cool for 10 to 20 minutes. Cake may be made 1 day ahead, cooled completely in pan and left in pan, covered, at room temperature. Reheat cake, uncovered, at 350 degrees F for 10 to 15 minutes.
4) To unmold: Run a thin knife around edge of pan and twist pan gently back and forth on a flat surface to loosen cake. Invert a cake plate with a slight lip over cake pan and holding pan and plate together with both hands, invert cake onto plate. Serve cake garnished with raspberries if desired. Yield: 8 servings

This post is being linked to:
Smiling Sally - Blue Monday

Friday, January 22, 2010

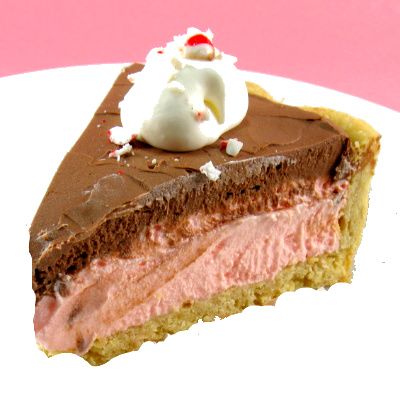
Chocolate Peppermint Pie - National Pie Day - Pink Saturday


From the kitchen of One Perfect Bite...I've been looking for a new dessert to serve on Valentine's Day. While searching for recipes for National Pie Day, which coincidentally is today, I found this lovely Chocolate Peppermint Pie on the Wisconsin Milk Marketing Board web site. It would be perfect for Valentine's Day and I knew I had to try it. Any recipe that combines white and dark chocolate with peppermint and cream cheese gets my attention immediately. I must tell you I wasn't disappointed, but there are things I'd change the next time I make the pie. Forget the crust. It doesn't add much to the pie. Use a prepared chocolate crumb shell instead. It will add another layer of flavor and save a lot of time as well. I'd also make the pie 24 hours before I plan to serve it. If you look at my photo, you'll see that the layers "bled" together when the pie was sliced. I think that can be avoided with longer chilling. You might also want to add a touch of red food coloring as the crushed peppermint adds only a hint of color to the white chocolate layer. It's sinfully rich and very sweet, but it's a dessert meant for a special day, so, I gave myself absolution and will atone with an extra hour on the treadmill. I do hope you'll try it. The verdict of my tasters was "most excellent". Here's the recipe.

Chocolate Peppermint Pie...from the kitchen of One Perfect Bite courtesy of the Wisconsin Cheese Board

Ingredients:
Crust:
2 cups all-purpose flour
2 tablespoons powdered sugar
1 teaspoon salt
3/4 cup (1 1/2 sticks) cold butter, cut into 1/2-inch cubes
1 teaspoon vinegar
5 to 6 tablespoons ice water
Chocolate Peppermint Pie:
1/2 cup (1 stick) butter, softened
1 cup (8 ounces) cream cheese, softened
3/4 cup sugar
1/2 cup pasteurized egg product*
1/2 cup whipping cream
1 cup white chocolate chips, melted and cooled
1/2 cup (20) peppermint candies, crushed
1/2 cup semi-sweet chocolate chips, melted and cooled
1 9-inch baked pie crust (press-in or fancy), cooled
Optional garnish: sweetened whipped cream, crushed peppermint

Directions:
Pie Crust:
1) In a bowl, stir together flour, sugar and salt. Using a pastry blender, cut butter cubes into flour mixture until pieces are pea-size. Sprinkle vinegar over flour mixture, tossing with a fork. Sprinkle 5 to 6 tablespoons cold water, 1 tablespoon at a time, over flour mixture, tossing with a fork each time until dough is moistened and crumbly. Gather dough into a ball, flatten into a disk, wrap in plastic wrap and refrigerate at least 4 hours.
2) Preheat oven to 400ºF.
3) Roll dough into a 12-inch circle. Gently fold the crust into quarters, center over 9-inch pie plate and unfold. Ease crust into the plate. Trim pastry, leaving a 1-inch overhang beyond plate edge. Fold crust edge under and crimp or flute the edge using a fork or your fingers.
4) Prick pastry with a fork. Line bottom and up sides of crust with foil and add dried beans or pie weights. Bake for 15 minutes, remove foil. Bake an additional 10 to 15 minutes, until crust is golden. Remove to a wire rack; cool completely.
Filling:
5) In a bowl, beat butter, cream cheese and sugar together. Combine egg product and whipping cream in a separate bowl; gradually add to butter mixture while beating, scraping bowl often. Beat until light and fluffy, about 5 minutes. Reserve half of mixture in a small bowl. Add cooled white chocolate to remaining half of mixture; beat well. Stir in crushed candy. Spread in baked pie crust; chill 10 minutes.
6) Return reserved butter mixture to bowl, add cooled semi-sweet chocolate; beat well. Spread over white chocolate layer. Refrigerate at least 2 hours. Garnish and serve. Yield 8 servings.

*Note: Pasteurized egg products are available in the supermarket. The reason the recipe calls for this product is that the filling is not cooked, and there is a salmonella risk associated with eating raw eggs.

This post is being linked to:
Pink Saturday, sponsored by Beverly at How Sweet the Sound

Sunday, November 1, 2009

Bittersweet Chocolate Snowballs - Blue Monday


Photobucket Creative Commons

A forest snowfall in blue light.


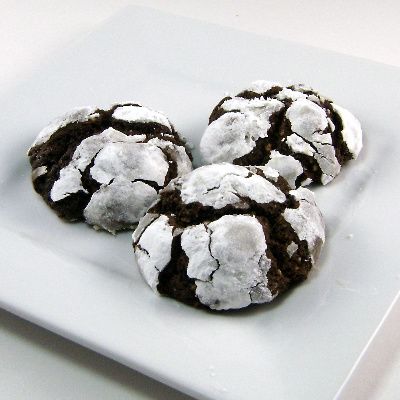
Bittersweet Chocolate Snowballs


From the kitchen of One Perfect Bite...I needed a recipe to tie in with a photo I wanted to share with you today. The closest I could come was a recipe for snowballs - chocolate snowballs. In some areas of the country these are called crinkles. This recipe is an adaption of one developed by Martha Stewart. These fudgy morsels are a delight and the only problem you will have is limiting the number of them you eat. I use three types of chocolate in my version of the recipe. I also replace vanilla with hazelnut extract. The recipe is quite simple to make, but you'll have to build wait time into your schedule. The cookie dough needs to sit for at least 2 hours before baking. I actually make it the night before I plan to shape and bake the cookies. The cookie dough is quite loose when it is first mixed, but a long chill will allow you to shape the cookies with a minimum of mess. I think you like this version of an old favorite. Here's the recipe.

Bittersweet Chocolate Snowballs...from the kitchen of One Perfect Bite

Ingredients:
4 ounces unsweetened chocolate, melted and cooled
4 ounces bittersweet chocolate, melted and cooled
1-1/2 cups all-purpose flour
1/2 cup unsweetened Dutch process cocoa powder
2 teaspoons baking powder
1/4 teaspoon salt
1/2 cup (1 stick) unsalted butter, room temperature
1-1/3 cups light-brown sugar, firmly packed
2 large eggs
1 teaspoon hazelnut or vanilla extract
1/3 cup milk
1 cup granulated sugar (for rolling)
1 cup confectioners' sugar (for rolling)

Directions:
1) In a medium size bowl whisk together flour, cocoa, baking powder, and salt until well blended.
2) In a large bowl, beat butter and brown sugar with an electric mixer on medium high speed until light and fluffy, 3 to 4 minutes.
3) Add eggs and hazelnut extract; beat until well combined. Add melted chocolate and beat until blended.
4) With mixer on low speed, alternate adding flour mixture and milk until just combined.
5) Divide the dough into quarters, wrapping each with plastic wrap, and chill in refrigerator until firm, about 2 hours.
6) Preheat oven to 350 degrees F. Line cookie sheets with parchment paper or silicone liners. Place each sugar in a separate shallow dish.
7) Remove portions of cookie dough from refrigerator one quarter at a time. Divide dough into 16 1-inch balls. Roll each ball in granulated sugar and then in confectioners' sugar to coat completely. Place cookies 2 inches apart on prepared baking sheets.
8) Bake, one cookie sheet at a time, until cookies flatten and tops form cracks, about 12 to 15 minutes. Remove from oven and place baking sheets on wire racks to cool. Store in an airtight container, between layers of parchment or wax paper for up to 1 week. Yield: 5 dozen cookies.


This post is being linked to:

Smiling Sally - Blue Monday

Monday, October 26, 2009

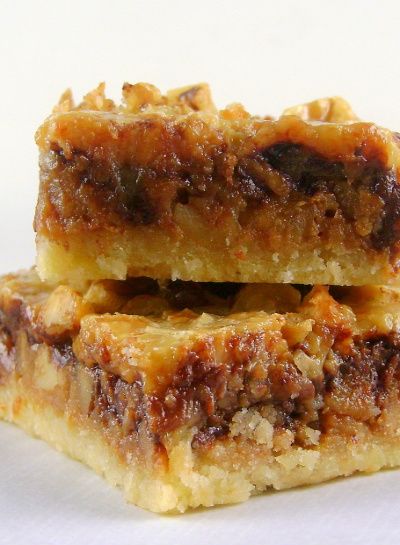
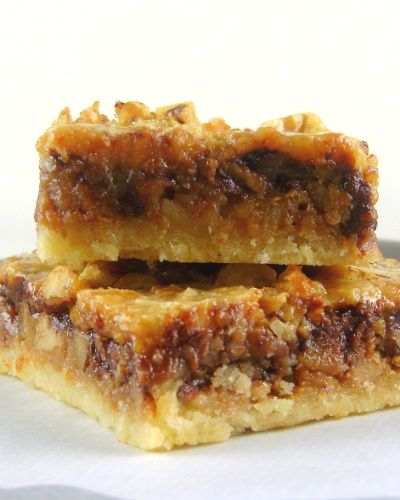
Maple Chocolate Walnut Bars


From the kitchen of One Perfect Bite...We spent most of Sunday at a Mushroom Festival held at the arboretum in our area. This is a yearly event and I really look forward to it. Many of the Master Gardeners volunteer for the event. I'm not among them because I want the day to peruse and learn and touch base with folks I haven't seen since the last show. If you're into mushrooms there are some prestigious elbows to be rubbed here and that's hard to do when you are manning an exhibit. My guilty conscience is assuaged by donating baked goods for the cold wet volunteers who do what I should be doing. This Sunday I made several pans of these wonderful bar cookies. They are embarrassingly easy to make and I have yet to meet anyone who doesn't like them. I'd love to tell you it's a gourmet creation. It's not. The recipe comes the Eagle Brand test kitchen. I don't know if my experience is unique, but I have extremely good luck with recipes from these kitchens and I never hesitate to try the ones they feature. Today's recipe requires no special equipment and it's very easy to do. The bars are wonderfully flavorful and they are crowd pleasers. Nuff' said. Here's the recipe.

Maple Chocolate Walnut Bars
...from the kitchen of One Perfect Bite courtesy of Eagle Brand Test Kitchen

Ingredients:
1-1/2 cups Pillsbury BEST® All Purpose Flour
2/3 cup sugar
1/2 teaspoon salt
3/4 cup cold butter
2 large eggs
1 (14 oz.) can Eagle Brand® Sweetened Condensed Milk
1-1/2 teaspoons maple flavoring
2 cups chopped walnuts
1 cup (6 oz. pkg.) semi-sweet chocolate chips

Directions:
1) Heat oven to 350 F. Combine flour, sugar and salt in large bowl. Cut in butter with pastry blender or 2 knives until mixture resembles coarse crumbs. Stir in 1 egg. Press evenly into an ungreased 13 x 9-inch baking pan.
2) Bake 25 minutes. Beat sweetened condensed milk, remaining 1 egg and maple flavoring in medium bowl. Stir in walnuts. Sprinkle chocolate chips evenly over partially baked crust. Top with walnut mixture, spreading evenly to edges.
3) Bake an additional 20 to 25 minutes or until golden. Cool. Cut into bars. Yield: 36 bars.

Saturday, October 17, 2009

Old Fashioned Double Chocolate Pudding


I had the good fortune to be raised in the company of wonderful cooks. My mother, bright and beautiful, was a woman of many talents, but cooking wasn't one of them. She had ten recipes in her rotation and never met a dessert, save for her lemon pie, that didn't come from a box. Fortunately, Jello puddings became available in 1936 so we did have dessert at our table, but imagination, taste and skill were learned in other kitchens. As a matter of fact, if it weren't for the visits of my paternal grandmother, Maude, I'd probably still think pudding came from a box. Maude had raised a large, boisterous family, and while she lived with her only daughter she spent most of the year visiting the homes of her "boys." She called it taking turns. When she stayed with us, dessert was her responsibility and this pudding is based on one she taught my sister and I how to make. It really is quite lovely and vastly improved by the wonderful chocolates that are available to us now. I make the pudding with whole milk and really good chocolate. While not as smooth as a mousse, or as intensely chocolate as a pot de creme, this is, nonetheless, delicious. It's easy to do and a perfect family dessert. Here is Grandma Maude's recipe for old-fashioned double chocolate pudding.


Old Fashioned Double Chocolate Pudding
...from the kitchen of One Perfect Bite

Ingredients:
2 (1-oz.) squares, unsweetened baking chocolate
1 cup granulated sugar
1/8 teaspoon salt
2 cups milk, divided
3 tablespoons cornstarch
3 tablespoon Dutch process cocoa powder
2 tablespoons unsalted cold butter, cut in small pieces
1/2 teaspoon vanilla extract

Directions:
1) Grate chocolate squares into top of double boiler that's been placed over simmering water. Add sugar, salt and 1-2/3 cups milk. Heat, stirring constantly, until chocolate melts and mixture is well-blended.
2) Sift cornstarch and cocoa powder together onto a sheet of waxed paper. Add to reserved 1/3 cup milk; stir until well combined.
3) Add cocoa mixture to chocolate in double boiler. Continue to cook, stirring gently, until pudding thickens and almost mounds, about 8 minutes. Cover pan; cook without stirring for 10 minutes. Remove top of double boiler from water. Gently stir in butter. Cool for about 10 minutes before adding vanilla; stir well. Pour into dessert dishes. Cover tops with plastic wrap and allow to cool completely before refrigerating. Chill for several hours before serving. Yield: 4 to 6 servings.

Thursday, September 17, 2009

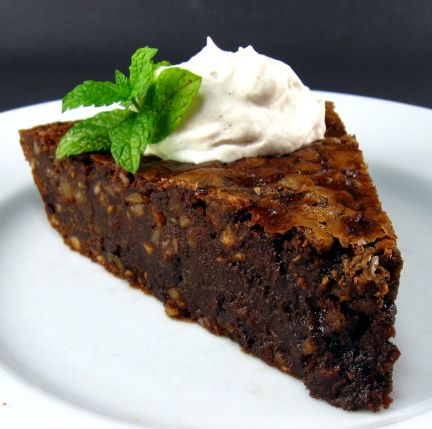
Chocolate and Hazelnut Pie with Vanilla Cream


I hope you're ready for a treat. This pie is chocolate, rich and decadent. It's also easy to make. As with all things chocolate, the better the poison the better pie. Spring for the best chocolate you can get your hands on. If you can't get hazelnuts use toasted almonds or pecans instead. Toasting the nuts, whatever type you use, is important because it really does improve their flavor. When the pie is taken from the oven it has the crackle crust of a brownie, but it's texture is more like a cross between a chocolate mousse and a brownie. It's almost a confection. Delicious doesn't begin to describe how good this really is. The recipe was developed by Giada De Laurentis who is an admitted chocolate addict and she has taken no shortcuts here. While the pie is simple to make there is a fairly significant wait time before it can be served. By my estimate, it takes 20 minutes to make but needs 3 hours to cool and chill. I suspect you'll like this one - a lot.

Hazelnut and Chocolate Pie...from the kitchen of One Perfect Bite

Ingredients:
Pie:
8 ounces semi-sweet chocolate chips
1 cup hazelnuts, skinned and toasted
1/4 cup all-purpose flour, plus more to dust the pie dish
3/4 cup sugar
1/4 cup hot water
4 eggs
1 stick butter, cut into 3/4-inch pieces, at room temperature, plus more to grease the pie dish
2 teaspoons vanilla extract
1/2 teaspoon ground cinnamon
Vanilla Cream:
1 cup heavy whipping cream
2 tablespoons powdered sugar
2 teaspoons vanilla extract
1/4 teaspoon ground cinnamon

Directions:

1) Position an oven rack in lower 1/3 of the oven and preheat to 350 degrees F.
2) Put 1/2 of chocolate chips, hazelnuts, and flour in bowl of a food processor. Pulse until hazelnuts are coarsely chopped. Pour hazelnut mixture into a small bowl and set aside. Combine remaining chocolate chips and sugar in food processor. Blend until mixture is finely ground. With machine running, gradually add hot water until chocolate is melted and mixture is smooth. Add eggs, butter, vanilla and cinnamon. Pulse until mixture is blended. Return hazelnut mixture to food processor and pulse to incorporate. Pour mixture into a buttered and floured 9-inch pie dish.
3) Bake for 35 minutes. Place pie on a cooling rack and cool for 1 hour. (Top may crack during cooling.) Refrigerate for 2 hours. (Pie can be made 1 day in advance and stored in the refrigerator). Allow pie to return to room temperature for 30 minutes before serving.
4) In a large mixing bowl, beat cream until it forms soft peaks. Add powdered sugar, vanilla, and cinnamon. Continue to beat until cream holds stiff peaks.
5) To serve, cut pie into slices and dollop with the vanilla cream. Yield: 8 servings.

This recipe is being linked to:
Designs By Gollum - Foodie Friday
My Toes are Claustrophobic

Monday, August 31, 2009

Mud Slide Chocolate Cake with Coffee and Kahlua


From the kitchen of One Perfect Bite...It's not the best cake I've ever tasted. It's not the easiest cake I've ever made. That being said, this cake has a lot going for it. It's intensely chocolate with a flavor that's enhanced with coffee and kahlua and, while not simple, it's relatively easy to make. It also wins extra points because it's easy for lovers of picnics and potlucks to transport. This rich cake received it name because of its dark color and the way the glaze runs down the side of the cake as it's poured or painted on. If you decide to make this, use the best quality chocolate available to you. Nothing miraculous will happen in the oven to improve the flavor of inferior ingredients. A good brandy can be used to replace the Kahlua. The finished cake is a moist, chocolate marvel that will stay fresh for days after it's made. It can be made in 15 minutes , but it bakes longer than most and takes a while to cool, so plan accordingly. I like it best a day after it's been made. Here's the recipe.

Mud Slide Chocolate Cake with Coffee and Kahlua
...from the kitchen of One Perfect Bite

Ingredients:
2 cups unbleached flour
1 teaspoon baking soda
1/4 teaspoon salt
1-3/4 cup strongly brewed coffee
1/4 cup Kahlua or brandy
5 ounces unsweetened chocolate
1 cup (2 sticks) butter
2 cups granulated sugar
2 eggs
1 teaspoon vanilla extract
Optional Glaze:
3 ounces semisweet chocolate
2 tablespoons strongly brewed coffee

Directions:
1) Preheat oven to 275 degrees F. This is not an error. This cake bakes at a very low temperature. Butter a 10-inch Bundt pan and dust sides and bottom with cocoa. Set aside.
2) Sift together flour, sugar and salt. Set aside.
3) Place coffee and liqueur in a medium sauce pan set over medium heat. Heat for 5 minutes. Add chocolate and butter, stirring until melted and smooth. Add sugar and stir until dissolved. Remove from heat and allow to cool for several minutes.
4) Transfer chocolate mixture to a large bowl. Using an electric mixer, add flour mixture in two parts, beating after each addition until smooth. Add eggs and vanilla and beat for 1 minute more. Pour into prepared Bundt pan.
5) Bake in middle third of oven for 1-1/2 hours, or until cake pulls away from sides of pan and springs back when middle is touched. Allow cake to cool in pan for 10 minutes. Invert cake onto a platter, but do not remove pan until cake is completely cool.
6) In a small saucepan set over low heat, melt chocolate and coffee. Brush on surface of cooled cake. Yield: 12 servings.

Recipe adapted from Cook-off America.

Thursday, August 6, 2009

Mediterranean Chocolate Cake with Lemon and Olive Oil


This is the finished cake, warm and waiting to be cut.


A single slice of this delicious, but different chocolate cake.


Light olive oil is lighter only in color and taste. It is not a diet version of olive oil.


From the kitchen of One Perfect Bite...This cake is unusual in its simplicity and the ingredients that are used to make it. It's flavored with unsweetened cocoa, olive oil and lemon zest. It's a great family dessert and because it does not require an electric mixer, the youngest members of the family can help make it. Light olive oil, seen in the picture above, is lighter in color and flavor than regular or extra-virgin olive oil, so it's perfect for baking certain desserts and dishes in which the taste of olive oil is not desired. It can be purchased in any well-stocked grocery store. This cake tastes best when served warm. It should be glazed just before serving. I hope you're willing to experiment and give this cake a try. You will not be disappointed.

Mediterranean Chocolate Cake with Lemon and Olive Oil...from the kitchen of One Perfect Bite

Ingredients:
Cake
3/4 cup all-purpose flour
1/2 cup unsweetened cocoa powder
1/4 teaspoon baking soda
1/4 teaspoon ground cinnamon
4 large eggs
1/4 teaspoon salt
1 cup sugar
2 teaspoons finely grated lemon zest
2/3 cup light olive oil
Glaze
1 cup confectioners' sugar
2 tablespoons water
1/2 cup unsweetened cocoa powder
Pich salt
1 tablespoon light olive oil
1 to 2 teaspoons water

Directions:
1) Preheat the oven to 350 degrees F. Grease a 9-inch springform pan or a deep 9-inch round cake pan with light olive oil. Set aside.
2) Combine flour, cocoa, baking soda and cinnamon in a medium-sized bowl.
3) Place eggs and salt in a large bowl. Whisk to combine. Gradually whisk in sugar and lemon zest.
4) Sift flour mixture into egg mixture. Fold in until the mixture is smooth.
5) Gradually fold in olive oil. When mixture is smooth, fold into prepared pan.
6) Bake in center of oven for 40 to 45 minutes, or until cake tester inserted into center of cake comes out clean.
7) Cool on a rack for 10 minutes. Remove cake from pan and continue to cool on a rack.
8) For glaze, combine confectioners' sugar and water in a small saucepan and stir until smooth.
9) Mix cocoa and salt in a small bowl. Stir into sugar mixture and blend well. Add olive oil and stir until combined.
10) Place pan over medium heat and cook, stirring, until mixture is just warm. Add 1 to 2 teaspoons water to thin mixture to glaze consistency.
11) Drizzle glaze over top of cake. Let stand for 10 minutes before slicing. Yield: 8 to 10 slices.

Recipe courtesy of North American Olive oil Association

This recipe is being linked to Designs By Gollum - Foodie Friday

Saturday, July 11, 2009

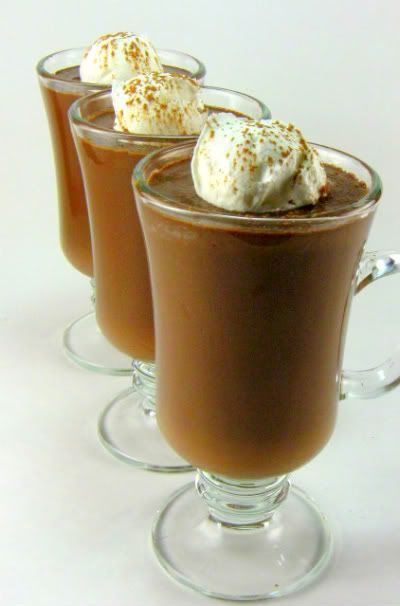
Chocolate Soup


From the kitchen of One Perfect Bite...If you are looking for something out of the ordinary to intrigue your guests try a dessert soup. This one's a cross between a thick, rich hot chocolate and pudding. It's a lovely way to end a special meal or surprise the book club. The recipe comes from Cuisine At Home and it has much to recommend it, not the least of which is ease of preparation. It can be topped with an optional fruit salsa or whipped cream. The "soup" can be made well ahead of serving time, but the "salsa" should be prepared just before serving to keep it fresh and crisp. Here's the recipe.

Chocolate Soup...from the kitchen of One Perfect Bite

Ingredients:
4 cups whole milk
1 can sweetened condensed milk (14 oz)
1 bag Ghirardelli bittersweet choc chips (11 1/2 oz)
1/4 cup Kahlua or other coffee-flavored liqueur, optional
1/2 tsp salt
2 teaspoons vanilla extract
1 teaspoon espresso powder, optional
.Optional Fruit Salsa
1/2 cup strawberries, diced
1/2 cup fresh pineapple, diced
1/2 cup kiwi, diced
1 teaspoon sugar
Whipped cream

Directions:
1) Combine whole milk, condensed milk, choc chips, liqueur, and salt in a saucepan.
2) Bring to a simmer over medium-low heat, whisking constantly. Reduce heat to low and cook, whisking ofter, until chocolate melts and mixture is smooth, 20-25 minutes (as the chocolate melts, it may look a little grainy but don't worry-it will smooth out, but whisk it often as it heats). Remove soup from heat.
3) Whisk vanilla and espresso powder together in a small bowl until dissolved; stir into the "soup."
4) If using salsa, toss strawberries, pineapple, kiwi and sugar together in a bowl
5) Serve soup warm and top with "salsa" and a dollop of whipped cream, if desired.

Cook's Note: You can make the "soup" ahead and reheat (over LOW heat) but make the "salsa " right before serving so it is fresh.

Recipe courtesy of Cuisine at Home - Splendid Soups and Spectacular Sides

Monday, May 11, 2009

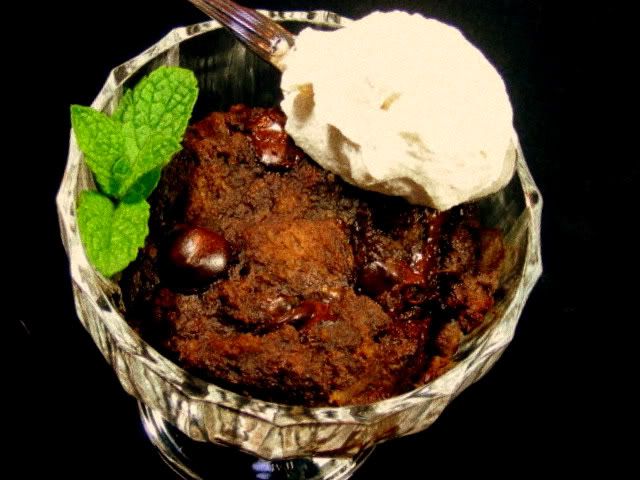
Chocolate Bread Pudding


I suspect the kitchen version of planned obsolescence is leftovers for which there is a purpose. I made a loaf of chocolate bread last week and, while I knew the first few slices would be delicious with hazelnut spread, an expanded plan was also in order. There would, of course, be French toast but I was most anxious to see if the bread would work in an old-fashioned pudding. I wanted a simple dessert and I was determined to keep ingredients and calories to an absolute minimum. What follows is a really simple version of bread pudding with real chocolate flavor. I made the pudding twice; once with, and once without chocolate bread. While the flavor is more intense when the pudding has a chocolate base, I can happily report the recipe also works with a slightly stale white bread. The pudding is perfect for family and really good friends, but I wouldn't recommend it for occasions when you need to impress. This is a homely pleasure, best not served to the boss or queen.


Chocolate Bread Pudding

Ingredients:
5 to 6 cups chocolate or white bread, cut in 1-inch cubes
1/2 cup semi-sweet chocolate chips
2 large eggs, lightly beaten
2 cups whole milk
1/4 cup granulated sugar
1/4 teaspoon salt
1 teaspoon vanilla extract
2-1/2 tablespoons unsweetened cocoa powder
1 teaspoon cinnamon
Optional: whipped cream for garnish

Directions:
1) Preheat 350 degrees F. Place bread in a buttered 9 x 9-inch baking pan. Sprinkle with chocolate chips. Set aside.
2) Place eggs, milk, sugar, salt, vanilla, cocoa and cinnamon in a medium bowl. Whisk to combine. Pour over bread and mix gently. Let sit for 15 minutes.
3) Bake for 40 minutes until firm but not dry. Serve warm or at room temperature. Garnish with whipped cream if desired. Yield: 8 servings.

Thursday, March 26, 2009

One Bowl Vegan Chocolate Cake


My youngest grandson has an allergy problem that has caused my daughter to change the way her family eats. A few months ago a friend gave her a recipe for a vegan chocolate cake. She loved the cake. I asked her to send the recipe to me and I must admit I was surprised at just how good it is. It's a one bowl wonder and very easy to do. There are many versions of this cake in cyberspace. Unfortunately, none of them credit the original source. I've done some searching and as far as I can tell the recipe is a variation of a cake that first appeared in the Moosewood cookbook. Oops, time for an update. Thanks to one of our readers, I can now tell you that this should be called a Wacky Cake. It was developed for the bare bones kitchens of the depression or WWII - sources are not in agreement as to which. A big thanks to laurelvb for letting us know. Hopefully, we're inching closer to the original creator of the Wacky Cake. I've made the cake twice. Once exactly as it was written and the second time with a few variations of my own. It's a nice cake! Even our little guy likes it and that really delights us because, as you can see, he didn't care at all for his first birthday cake. It's nice to know that he'll be able to celebrate his second birthday with a cake and a big smile. My changes to the recipe are small. I decided to add espresso powder and almond extract to heighten the flavor of the cake. The cake has a nice crumb and is remarkably moist. It keeps well.

Vegan Chocolate Cake

Ingredients:
3 cups all-purpose flour
2 cups granulated sugar
2 teaspoons baking soda
1/2 cup Dutch processed cocoa
1 teaspoon salt
1 tablespoon espresso powder or crystals
2 teaspoons white vinegar
1 cup canola oil
2 teaspoons vanilla extract
1/2 teaspoon almond extract
2 cups cold water
Confectioners' sugar for dusting

Directions:
1) Preheat oven to 350 degrees F. Grease and flour a 9 x 13 x 2-inch pan. Set aside.
2) Combine flour, sugar, baking soda, cocoa, salt and espresso in a large bowl. Add vanilla and almond extract to water in a two cup measure. Combine with oil and vinegar and gradually add liquid to dry ingredients. Beat with an electric mixer for 2 minutes. Pour into prepared pan.
3) Bake in center of oven for 40 minutes, or until a toothpick inserted into center of cake comes out clean. Remove from oven. Sprinkle with confectioners' sugar just before serving. Yield: 12 to 16 pieces.

Tuesday, November 11, 2008

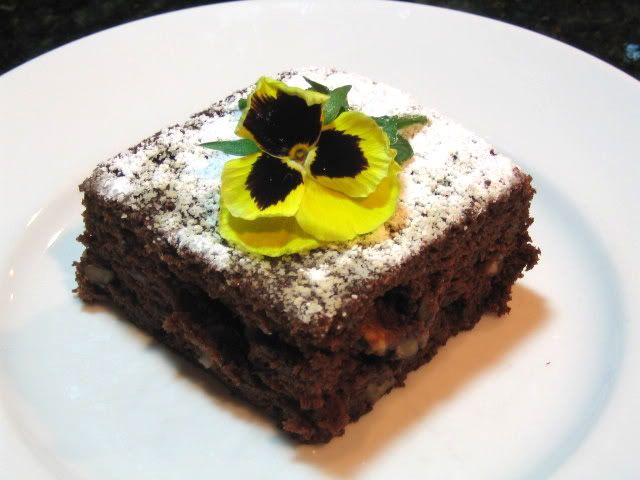
Ohana Snack Cake

Photobucket

Ohana is a Hawaiian word that, roughly translated, means extended family; this cocoa, banana and macadamia nut cake is decidedly homely and perfect for gatherings of family and good friends. Bananas, macadamia nuts and small crops of cacoa, from the slopes of Hualalai Mountain, are indigenous to the big island of Hawaii and this cake makes perfect use of those ingredients. The cake is not Hawaiian but because the ingredients used to make it are and because it's designed to be served at simple gatherings of family and friends I named it an ohana cake. One of the elements of a green kitchen is the avoidance of waste; that's why I freeze overripe bananas. I use thawed, frozen bananas in this cake; if fresh, unblemished bananas are used you won't get the flavor that's needed here. The predominant flavor in this cake should be the banana, so please go with frozen, overripe bananas. You can swap any toasted nutmeat for the macadamias. Other hints...serve the cake warm. It begs for a dollop of cream or small scoop of ice cream. If you make the cake early in the day, warm it it the oven or microwave before serving. Warm makes a difference.

Ohana Snack Cake

Ingredients:
1-1/2 cups all-purpose flour
1/2 cup Dutch process cocoa
1 teaspoon baking powder
1 teaspoon baking soda
1/2 teaspoon salt
1-1/2 cups mashed ripe banana (preferably frozen, thawed)
1 cup milk
8 tablespoons unsalted butter, melted
2 large eggs
1 to 2 teaspoons vanilla extract
1 cup chopped, toasted macadamia nuts (walnuts or pecans may be substituted)
Confectioners' sugar

Directions:
1) Spray a 9-inch square cake pan with nonstick cooking spray. Preheat oven to 350 degrees F.
2) Sift flour, cocoa, baking powder, baking soda and salt into a large bowl. Stir in sugar and whisk to incorporate.
3) Combine bananas, milk, butter, eggs and vanilla in another large bowl. Mix well. Stir in flour until just combined. Stir in nuts.
4) Pour into prepared pan. Bake for 30 minutes, or until cake tester comes out clean. Remove from oven. Cool on a rack for 10 minutes. Unmold.
5) Warm cake before serving. Sprinkle top with confectioners' sugar. Cut into squares. Yield: 9 servings.