Tuesday, November 30, 2010

Cranberry Layered Cheesecake


From the kitchen of One Perfect Bite...I was seduced by its color and because I'm weak, this five layered cranberry confection ended up on my table. I normally don't make desserts that are this involved. As a matter of fact, I rarely make cheesecakes at all. I love them, mind you. I just can't convince myself that the protein packed into all that cream cheese offsets the fat and calories that keep the protein company. The first time I saw this cake was on the table of an accomplished cake decorator. It was gorgeous and its garnet glow snared me before reason could take hold. I made a homely version of the cake, one precious time consuming layer at a time, and thought that would be the end of it. I never dreamed Bob would like it. He did and now I'm dealing with a case of unintended consequences. I'll have to make the cake again. The cake begins with an almond flavored crust that is partially filled with a sweetened cheese custard and then topped with a cranberry filling. The garnet layer is then smothered with the rest of the custard before being topped with sweetened sour cream. The cake bakes a considerable while, and then is cooled and chilled for a considerable while, before a final layer of cranberries crown the cake and decorations of almond whipped cream are applied. It is a lovely tangy cake that provides irresistible color on the holiday table. The recipe was developed by Teri Rasey for Taste of Home magazine. Despite the work, I'm glad to recommend this cake to you. I've made a few changes to the original recipe. which you can find here. My version of the recipe appears below. I suggest that you add salt and almond extract to the crust and that you eliminate the ground almonds from the whipped cream. Let the cake chill for 24 hours before serving. This is a very nice recipe and, if you like cheesecake, it will be a great addition to your files. Here's how it's made.

Cranberry Layered Cheesecake...from the kitchen of One Perfect Bite courtesy of Teri Rasey and Taste of Home magazine

Ingredients:
Pastry Layer
1/2 cup dried cranberries
2 cups cake flour
1/2 cup ground almonds
1/4 cup confectioners' sugar
1/4 teaspoon salt
1/4 teaspoon almond extract
1/2 cup cold butter, cubed
Cranberry Layer
3/4 cup sugar
2 tablespoons cornstarch
1/4 cup cranberry juice
2 cups fresh or frozen cranberries
Cream Cheese Layer
4 packages (8 ounces each) cream cheese, softened
1-1/2 cups sugar
1 teaspoon vanilla extract
4 eggs, lightly beaten
Sour Cream Topping
2 cups (16 ounces) sour cream
1/4 cup sugar
2 teaspoons vanilla extract
Whipped Cream Topping
1 cup heavy whipping cream
1 tablespoon sugar
1/4 teaspoon almond extract

Directions:
1) In a food processor, finely chop dried cranberries. Add flour, almonds and confectioners' sugar, salt and almond extract; process until blended. Add butter; pulse just until crumbly.
2) Press onto the bottom and 1-1/2 in. up sides of a greased 10-in. springform pan. Place on a baking sheet. Bake at 350° for 10 minutes.
3) In a small saucepan, combine 3/4 cup sugar and cornstarch; stir in cranberry juice until smooth. Add berries. Cook and stir until thickened and bubbly. Set aside.
4) In a large bowl, beat cream cheese, vanilla and sugar until smooth. Add eggs; beat just until combined. Pour half of batter into crust. Carefully spoon 3/4 cup berry mixture over batter; top with remaining batter.
5) Bake for 45 minutes. Reduce heat to 250°. Bake 25-30 minutes longer or until center is almost set. Combine sour cream, sugar and vanilla; spread over top. Bake 20-30 minutes or until set. Cool on a wire rack for 10 minutes. Run a knife around edge of pan to loosen; cool 1 hour longer. Spread remaining berry mixture over the top. Refrigerate overnight.
6) Beat cream with sugar and almond extract until stiff peaks form. Pipe around top edge of cheesecake. Yield: 16 servings.

You might also enjoy these recipes:
Caramel Cheesecake - Wild Yeast
Mini Bourbon Pumpkin Cheesecakes - Dessarts
Caramel Apple Cheesecake Pie - The Sweet's Life
German Cheesecake - Anja's Food 4 Thought
Pumpkin Toffee Cheesecake - The Other Side of 50
Pumpkin Cheesecake - Simply Recipes
Monday, November 29, 2010

Stuffed Mushrooms


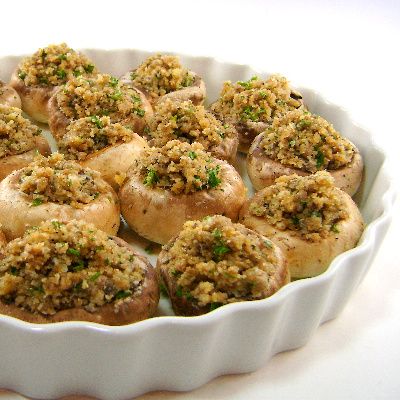
From the kitchen of One Perfect Bite...Stuffed mushrooms are one of my favorite hot appetizers. I've collected an impressive assortment of recipes for them and, over time, you'll probably get to see them all. However, today I'm only going to feature one. I chose this one to serve over the weekend because it's so easy to do, and, when you're into day four of a long weekend, easy assumes an importance it might otherwise not have. I think the original recipe, found here, was developed by Giada De Laurentis, but I found another that is similar in an online book, called Almost Italian, which is a compilation of recipes and stories from Italian immigrant communities across America. Those of you who love Italian food might find the book really interesting. I know I did. I've changed the recipe slightly to avoid waste. I've included finely chopped mushroom stems in my stuffing and changed the herb mix a bit. I think the mushrooms help keep the stuffing, which can be dry, moist and I replaced the mint, which I found to be off-putting, with additional parsley. Here's my version of the recipe.

Stuffed Mushrooms...from the kitchen of One Perfect Bite inspired by Giada De Laurentis

Ingredients:

28 large (2 1/2-inch-diameter) white mushrooms, stems removed and finely chopped
5 tablespoon extra-virgin olive oil, divided use
2 garlic cloves, peeled and minced
1/2 cup Italian-style dried bread crumbs
1/2 cup grated Parmesan cheese
1/4 cup chopped fresh Italian parsley
Salt and freshly ground black pepper


Directions:

1) Heat 1 tablespoon olive oil in a frying pan. Add chopped mushroom stems and cook just until softened, about 3 minutes. Stir in garlic and cook until fragrant, about 15 seconds longer. Remove from heat and cool to room temperature.
2) Preheat the oven to 400 degrees F.
3) Add 2 tablespoons olive oil, bread crumbs, cheese, parsley and salt and pepper to taste to mushroom mixture in skillet. Mix with a spoon to blend.
4) Coat bottom of a large baking sheet with about 1 tablespoon olive oil. Spoon filling into the mushroom cavities and arrange on baking sheet, cavity side up. Drizzle remaining oil over filling in each mushroom. Bake until mushrooms are tender and filling is heated through and golden on top, about 25 minutes. Serve immediately. Yield: 7 servings.

You might also enjoy these recipes:
Caprese Skewers - Culinary Cory
Savory Herbed Glazed Nuts - Mz. Tasty Kitchen
Parmesan Crusted Baked Zucchini Strips with Marinara Sauce - Closet Cooking
Easy Olive Tapenade - Annie Bakes
Honey Walnut and Brie Tartletts - What's Cookin, Chicago?
Tiny Gougeres with Scallions Parsley and Lemon - She's in the Kitchen
Parmesan Cheese Sticks - Easy Appetizers

Saturday, November 27, 2010

Chocolate Rosettes


From the kitchen of One Perfect Bite...It's sometimes a mistake to try and improve on an old favorite recipe. Last year, I shared my recipe and memories of Christmas Rosettes with you. I know that these cookies have lost cache, but they will forever remain one of my favorite treats. My love for them is enhanced, of course, by the sweetness of memory. I think that's OK. We all are creations of time and place and those memories are what make us unique and set our place at the table. Several years ago, Bob and I were in Hawaii for several weeks leading up to the Christmas holiday. The people of the islands know how to celebrate the holiday in an unabashed fashion and it is impossible not to get into the spirit of the season if you are there. Let's say Hawaii, unconcerned with political correctness, bolstered my somewhat flagging Christmas spirit with its exuberant sense of season. We arrived home on Christmas Eve and, despite the hour, I decided we couldn't have Christmas without rosettes on the table. One of the beauties of these cookies is that they require no special ingredients. Another is the ease with which they come together. Ease and simplicity made the cookies possible that Christmas, so I'm not quite sure what possessed me to try this gussied up version of the recipe. It was a mistake. Truth be told, this chocolate version is lacking in flavor and, save for color, has nothing to commend it. It is neither sweet nor chocolatey. Please view me as your early warning system. If you are tempted to try this recipe, pinch yourself and move on. You deserve better.

Chocolate Rosettes...from the kitchen of One Perfect Bite

Ingredients:
1/2 cup cornstarch
2 tablespoons all purpose flour
1 teaspoon cocoa powder (any type)
2 teaspoons sugar
1/2 teaspoon salt
1 egg
1/4 cup milk
Vegetable shortening
Powdered sugar

Directions:
1) Combine cornstarch, flour, cocoa, sugar and salt in a bowl. Beat egg lightly, combine
with milk, and add to dry ingredients. Stir until smooth.
2) Heat rosette iron in deep, hot oil (350 to 375 F) for two minutes. Drain excess oil from iron; dip in batter about 1/2 way. Fry rosette while counting to 10. Wiggle iron so rosette falls off into oil and continue to fry until golden brown. Lift out with tongs. Drain on paper towels. Reheat iron 1 minute before making next rosette. Yield: 18 rosettes.

You might also enjoy these recipes:
Stained Glass Cookies - Baking and Boys
Pecan Strips - Louanne's Kitchen
Lemon Glazed Christmas Wreath Cookies - Barbara Bakes
Chocolate Chip Biscotti - Mom's Cooking Club
Chocolate Peppermint Bark Cookies - The Recipe Girl
Peppermint Meringue Cookies - Sugarcrafter

Friday, November 26, 2010

Marionberry Muffins - Blue Monday


From the kitchen of One Perfect Bite...Each summer I freeze at least one flat of Marionberries to use during the winter months. Marionberries are a blackberry cultivar with a sweetness and complexity that has led the folks who grow and market them to dub them the "Cabernet of Blackberries." That may be an overreach, but I must tell you they do make delicious cobblers, scones and muffins and they are a wonderful addition to sauces for beef and lamb. Those of you who garden might want to know more about how the berry was developed and additional information can be found here. Marionberry muffins have become a part of our holiday celebrations and I made them for our breakfast yesterday morning. The muffins are delicious, easy to make and, while the recipe calls for Marionberries, any type of caneberry can be used to prepare them. There are no hints needed to make these successfully and the recipe is straightforward. Here's how the muffins are made.

Marionberry Muffins...from the kitchen of One Perfect Bite

Ingredients:
1 cup butter, room temperature
1 cup sugar
2 teaspoons vanilla
4 large eggs
2 cups sour cream
4 cups all-purpose flour
2 teaspoons baking powder
2 teaspoons baking soda
1/2 teaspoon salt
2-1/2 cups Marionberries (blackberries, raspberries or blueberries may be substituted)
Melted butter and sugar for topping

Directions:
1) Preheat oven to 400 degrees F. Grease and flour muffin cups or line with paper liners. Set aside.
2) In a large mixing bowl, cream together butter, sugar and vanilla. Add eggs and beat until incorporated. Blend in sour cream and set aside.
3) In a separate mixing bowl, stir together flour, baking powder, baking soda and salt; fold into creamed mixture gently (DO NOT OVER MIX).
4) Fold in Marionberries and spoon batter into muffin pans, filling them 3/4 full.
5) Bake muffins 24 to 26 minutes. Test for doneness with a toothpick. Muffins are done when toothpick comes out clean.
6) Transfer to cooling racks and while still warm, dip muffin tops in melted butter and then into granulated sugar. Yield: 16 to 20 muffins.

You might also Enjoy these recipes:
Banana Crunch Muffins - What's Cookin Chicago?
Pumpkin Muffins with Maple Cream Cheese Frosting - Plain Chicken
Perfect Blueberry Muffins - The Sophisticated Gourmet
Cranberry Upside Down Muffins - Back to the Cutting Board
Lemon Cranberry Muffins - The Food Republik
Oatmeal Muffins with Raisins, Dates and Walnuts - Simply Recipes
Whole Orange Muffins - Food and Whine

This post is being linked to:
Smiling Sally - Blue Monday

Apple Cake with Caramel Glaze


Joshua, who brought a catalog along for his visit to Santa, knows exactly what he wants for Christmas. I hope Santa was taking notes!

From the kitchen of One Perfect Bite...Earlier this week I had to make a cake for a morning coffee. I wanted to bake something that was seasonal, easy to make and just a little different than standard holiday fare. I found one in the book Southern Cakes, written by Nancie McDermott, that was exactly what I was looking for. I thought the cake would be too sweet for my own taste, but I knew others would love the apple and caramel confection. To my great surprise I found that I like it, too. The small piece I'd cut for myself was delicious and the caramel glaze that covered the top of the cake was amazingly good. The cake is definitely a keeper and, if you have not tried it, I hope you will soon. Here's the recipe.

Apple Cake with Caramel Glaze...from the kitchen of One Perfect Bite, inspired by Nancie McDermott

Ingredients:
Cake
3 cups all purpose flour
2 cups sugar
1 teaspoon baking soda
1 teaspoon salt
3 eggs
1 cup vegetable oil
1/2 cup unsweetened applesauce
2 teaspoons vanilla extract
3 cups finely chopped apples
1 cup coarsely chopped pecans or walnuts
Brown Sugar Glaze
1 cup tightly packed light brown sugar
1/3 cup butter
1 teaspoon vanilla extract
2 tablespoons heavy cream

Directions:
1) Preheat oven to 350 degrees F. Grease a 13 x 9-inch pan. Set aside.
2) Combine flour, sugar, baking soda and salt in a medium bowl. Stir with a fork to mix everything together well.
3) In a large bowl, beat eggs with a wooden spoon or a mixer at low speed until pale yellow and foamy. Add oil, applesauce and vanilla and beat well. Stir in flour mixture with a wooden spoon and continue stirring batter just until flour disappears. Add apples and nuts, stir to mix them into the batter until fairly uniform. Scrape batter into prepared pan.
4) Bake for 45-50 minutes, or until the cake is golden brown, springs back when touched lightly and is beginning to pull away from sides of the pan. Place cake (still in the pans) on a wire rack and spoon over the glaze while still hot.
5) To make glaze: Combine brown sugar, butter, vanilla and cream in a medium saucepan. Cook over medium heat, stirring often, until mixture comes to a gentle boil. Then cook for 3-5 minutes.
6) Spoon hot glaze all over hot-from-the-oven cake. Let glazed cake cool completely before serving straight from the pan. Yield: 12 - 16 servings.

You might also enjoy these recipes:
Healthy German Apple Cake - Honey and Soy
Butterscotch Apple Cake - Sugar Plum
Cranberry and Apple Cake - Christie's Corner
French Apple Cake - David Lebovitz
Marie-Helene's Apple Cake - Sea Salt with Food
Cinnamon Apple Cake - Elana's Pantry
The Apple Lady's Apple Cake - One Perfect Bite

Wednesday, November 24, 2010

It's Thanksgiving Day

Thanksgiving Day 2010: I treasure your friendship and hope you're enjoying this holiday and sharing its abundance with those you love. Bob and I have had a special year and have much to be thankful for. Our yearly journey has taken us from quiet mountain lakes to the cremation ghats of Kathmandu and included a unique trip to the top of the world, where we circled Everest and learned just how small we really are. I wanted to share a few of our special moments and blessings with you. We are supremely grateful for...


the beauty of the earth


the glory of the skies


and the gift of seeing it made new through Connor's eyes.


Many of you, on learning our feast would be non-traditional, asked about the menu. Here's what I plan to serve. Have a wonderful day!


Fresh Corn Soup


Endive, Pear and Watercress Salad


Pan Seared Beef Filet with Jus Lié and Wine Sauce


Japanese-Style Potatoes


Braised Brussels Sprouts with Bacon and Golden Raisins


Pumpkin Panna Cotta with Orange Caramel Sauce


Cranberry Apple Crisp

Tuesday, November 23, 2010

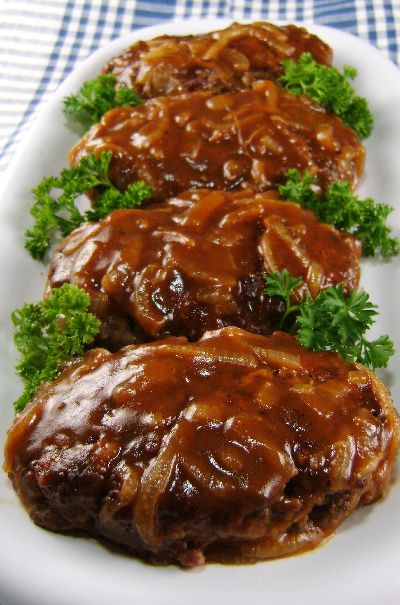
Salisbury Steak with Caramelized Onion Gravy


From the kitchen of One Perfect Bite...Salisbury Steak is one of the retro foods that has made a comeback in American kitchens. It was named for James Salisbury, a 19th-century physician, who prescribed it for battlefield patients who, in addition to their wounds, were suffering from digestive problems. His diet recommended serving chopped beef patties three times a day, and the oval-shaped patties, informally dubbed the poor man's steak, came to bear his name. In its purest form, the steak consists only of seasoned beef. However, frugal depression housewives and those cooking in the meat-rationed kitchens of WWII began to add extenders to the chopped beef in order to feed more people. I am no stranger to Salisbury Steak. It was a regular feature on my Mother's table and I made it in the early days of our marriage when then was more love than money. Versions of the steak that are currently popular use wine and mushrooms in the sauce that is served with the steak. The original versions of the recipes did not, for obvious reasons. A budget meal does not lend itself to auxiliary ingredients that cost more than its main components. The newer versions are delicious and I can heartily recommend them. I want, however, to share with you a really old-fashioned version of the steak. Here's the recipe.

Salisbury Steak with Caramelized Onion Gravy...from the kitchen of One Perfect Bite

Ingredients:
Onion Gravy
2 large red onions, thinly sliced
2 tablespoons unsalted butter
2 tablespoons all-purpose flour
3 cups low-sodium beef broth
1/2 cup dry red wine (optional)
1 tablespoon tomato paste
1 teaspoon cider vinegar
Salt and pepper
Meat Patties
1 pound lean ground beef
1/2 cup cooked white rice
1 egg yolk
1 teaspoon salt
1/4 teaspoon pepper
1 clove minced garlic
1 teaspoon Worcestershire sauce
3 tablespoons chopped parsley
1/2 teaspoon dried thyme
1 tablespoon olive oil

Directions:
1) To make gravy: Heat butter in a large sauté pan. Add onions and cook over medium-high heat, until onions start to brown, stirring occasionally. When onions are slightly softened and turning a deep honey brown, add 1/4 cup broth. Reduce heat, cover and continue cooking, adding more broth as needed to prevent caramelized bits at the bottom of the pan from burning. It should take at least 25 to 30 minutes to properly caramelize onions. Stir in flour and cook for about 2 minutes. Add wine and reduce by half. Stir in remaining beef broth and tomato paste. Stir in cider vinegar. Simmer for 10 minutes. Add salt and pepper to taste. Reduce heat to low and keep warm.
2) To make patties: Mix ground beef, rice, egg yolk, salt, pepper, garlic, Worcestershire sauce, parsley and thyme in a bowl. Shape into 4 oval patties about 3/4-inch thick. Heat olive oil in a large nonstick skillet set over medium-high heat. Sear patties about 3 minutes per side, or until a brown crust forms. Pour gravy over patties and simmer for an additional 10 minutes. Serve warm with mashed potatoes or noodles. Yield: 4 Servings.

You might also enjoy these recipes:
Ground Beef Stroganoff - Real Mom Kitchen
Easy Ground Beef Dinners: Holiday Time Savers - Are You Hungry?
Red Bean Chili - The Red Spoon
Stuffed Cabbage - Living the Gourmet
Meatballs with Gravy - Seasalt with Food
Shepherd's Pie - Annie Bakes

Monday, November 22, 2010

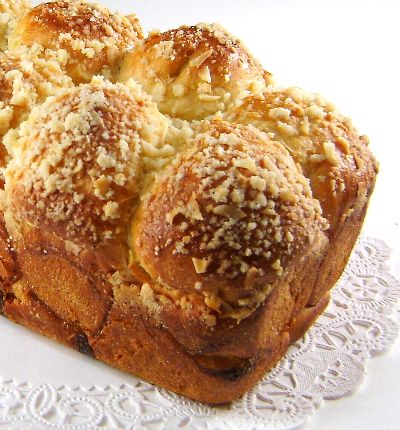
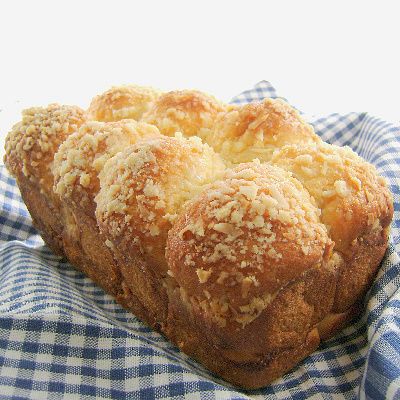
Coconut Bubble Bread


From the kitchen of One Perfect Bite...I've been searching for something new to serve for the Thanksgiving and Christmas holidays. When you've cooked as long as I have, novelty can be a problem. I've whisked and woked my way through lots of kitchens and have seen food fads come and go, then come and go again. Ming Tsai, Emeril Lagasse and, worse yet, Jamie Oliver have aged before my eyes, so perhaps you can understand why I'm vexed that it's so hard to find something really new for the holidays this season. It once was a very easy thing to do. Alas, that is no longer true. I decided I'd have to cast a wider net to find what I was looking for this year. If it could be eaten, didn't bite back and came with a readable recipe, it became fair game in my hunt for the new or novel. A fairly general query led me to a wonderful site called The Knead for Bread and there I found this lovely yeasted coconut bread. While there are many recipes for coconut quick breads, this was the first I'd seen for one leavened with yeast. I wanted a sweet bread that could be toasted for a holiday breakfast and this recipe was perfect for my needs. I did make some minor changes to the recipe after tasting the first of the loaves I baked. I added coconut extract to the ingredient list to give the bread a more pronounced coconut flavor. I also removed the grated coconut from the dough but left it in the topping. The bread is delicious and it has a wonderful crumb. It makes marvelous toast and will be perfect for a holiday breakfast. If you prefer, the bread can be pulled off in hunks and eaten out of hand, gorilla style. I know you will like this. Here's the recipe.

Coconut Bubble Bread...from the kitchen of One Perfect Bite, courtesy of The Knead for Bread

Ingredients:
Dough
2/3 cup coconut milk
2/3 cup lukewarm water
2 tablespoons melted butter
1 to 2 teaspoons coconut extract
1/2 cup sugar
2 tablespoon milk powder
4 teaspoons instant yeast
1 teaspoon salt
1 beaten egg
4 cups all-purpose flour
Topping
1 egg white
1 tablespoon water
3 tablespoon flour
2 tablespoon sugar
2 tablespoon butter, soft
2 tablespoon coconut(finely chopped)

Directions:
1) In a large bowl add coconut milk, lukewarm water, butter, coconut extract, sugar, milk powder, yeast, salt and egg. Mix well with a wooden spoon. Add half of flour and continue to mix till smooth. Gradually add in remainder of flour. When it becomes difficult to mix, dump onto a work surface and knead for 8 to 10 minutes. Oil bottom and sides of a bowl. Add dough and turn to coat all sides with oil. Cover with plastic wrap and let rise for about 1 hour, or until double in bulk. Cut dough into two equal pieces. Take one piece and cut into 16 more pieces. Roll the first eight piece of dough into a ball and place into the bottom of an 4-1/2 X 8 greased loaf pan. Now, roll out the other 8 pieces of dough and place them on top of those already in pan. Do the same with the other large piece of dough and you should end up with two loaves. Cover with plastic wrap and allow to rest for about an hour or till the dough reaches about 1 inch from the top of the pan.
2) To make the topping, mix flour, butter, sugar and coconut together in a small bowl. Using your fingers mix till the mixture becomes a crumble. In a separate bowl combine the egg white and the tablespoon of water. Beat with a wire whisk till foamy. Brush the tops of the loaves with the foam and then sprinkle with the crumble topping. Place into a 350 degree preheated oven for about 25-30 minutes. Remove from pan and cool on a wire rack. Yield: 2 loaves.

You might also enjoy these recipes:
Christmas Stollen - The English Kitchen
Cranberry Orange Cinnamon Rolls - Two Peas and Their Pod
Lemon Pull-Apart Loaf - Buttercream Barbie
Quick Brioche - Piece of Cake
Day Before Cinnamon Rolls - Cookie Madness
Hot Cross Buns - Buttercream Barbie

This post is being linked to:
Wild Yeast - Yeast Spotting

Sunday, November 21, 2010

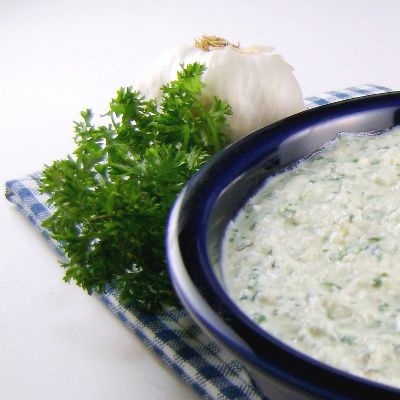
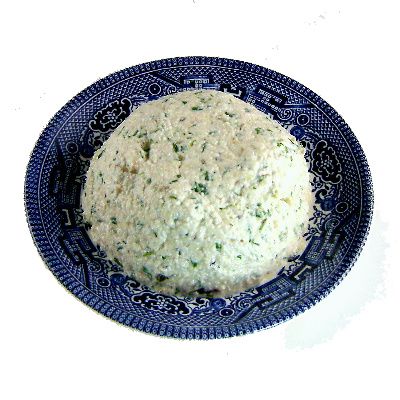
Herb Cheese Dip - Blue Monday


From the kitchen of One Perfect Bite...It's drip and dip season here in Oregon. Rain and football seem to go hand in hand and those games are a great excuse to make a dip whose roots can be found in Lyons, France. There the dip is made with fromage blanc. Rest easy in the knowledge that cottage cheese will work nearly as well and that the herbs needed to make it can all be found in your neighborhood grocery store. It was originally intended to be used as a dip for raw vegetables, but I've found it to be a wonderful sandwich spread as well. As you scan the recipe ingredients you'll find it to be a healthy and figure friendly addition to your snack repertoire. The recipe, developed by Patricia Wells, is easy to make, but the cheese needs to drain for a day or two before it is served, so wait time will have to be factored into your game plan. This also gives the flavors of the herbs an opportunity to permeate the cheese. If you have a particularly macho crew for game day, you might want to omit the vegetables and serve the dip as a spread on rounds of rye bread that are topped with salami or other deli meats. It would also be wonderful as a spread on thick slices of crusty peasant bread. The dip can be made several days in advance of serving and you probably won't have leftovers to worry about. Here's the recipe.

Herb Cheese Dip
...from the kitchen of One Perfect Bite courtesy of Patricia Wells

Ingredients:

2 cups full-fat or low-fat cottage cheese
2 shallots, peeled and minced
1 plump, fresh garlic clove, peeled and minced
3 tablespoons fresh chives, snipped with a scissors
3 tablespoons fresh tarragon leaves, snipped with a scissors
3 tablespoons fresh parsley leaves, snipped with a scissors
1/2 teaspoon fresh thyme leaves, carefully stemmed
Fine sea salt and freshly ground black pepper to taste
1 tablespoon dry white wine
1 teaspoon best-quality sherry wine vinegar
1 tablespoon extra-virgin olive oil
Mixed fresh herbs, for garnish (optional)

Directions:
1) Place cottage cheese in bowl of a food processor and pulse once, just long enough to break up cheese curds. Add shallots, garlic, chives, tarragon, parsley, and thyme, and process very briefly, pulsing only to blend. Season to taste with salt and pepper. Pulse once again to distribute the seasonings.
2) Transfer mixture to a cheesecloth-lined large sieve set over a bowl. Cover and refrigerate for at least 24 hours and up to 48 hours.
3) Remove cheese from refrigerator. Discard any liquid that has drained from the sieve. Transfer cheese to bowl of a food processor. Add wine, vinegar, and oil, and pulse to blend. Taste for seasoning. Transfer to a small bowl. Serve at room temperature. Yield: 2 cups.

You might also enjoy these recipes:
Blue Cheese and Bacon Dip - Easy Appetizers
Smoked Salmon Cheese Spread - Drick's Rambling Cafe
Hummus - Anja's Food 4 Thought
Taramosalata - Kalofagas
Warm Black Bean Dip - One Perfect Bite
Blue Cheese Dip - One Perfect Bite

This post is being linked to:
Smiling Sally - Blue Monday

Saturday, November 20, 2010

Quick and Creamy Pumpkin Pudding


From the kitchen of One Perfect Bite...I've been known to joke that my house is always ready for company, except when it's not. The phone rang at one of my most "not" moments and left me with about three hours to sanitize, beautify and cook for folks we don't see often, but whose company we really enjoy. In the midst of the ensuing chaos, a plan for an easy but festive meal came together. I fell back on my three fall P's of pork, potatoes and pumpkin. Years ago, I made an icebox cake that was always well received. While I had no time to make or set the cake portion of the dessert, I could make the filling and serve it as a creamy, almost mousse-like, pudding. I think you'll really like this one. It is a novel way to serve pumpkin, but it still is in keeping with the spirit of the season. I've used whole milk and heavy cream to make the dessert, but low-fat and non-dairy products can also be used. I love to serve this with my favorite Swedish gingersnaps. A crackling fire and great coffee are also wonderful accompaniments. Here's the recipe.

Creamy Pumpkin Pudding...from the kitchen of One Perfect Bite

Ingredients:

1 envelope unflavored gelatin
2 cups cold milk, divided
1 package (8-oz.) cream cheese, softened and at room temperature
2 packages (3.4-oz. each) instant vanilla pudding
1 can (15-oz.) pumpkin puree
Spice Mix:
...1 teaspoon ground ginger
...1 teaspoon ground cinnamon
...1/4 teaspoon ground mace
...1/4 teaspoon nutmeg
...1/8 teaspoon ground cloves
1 tablespoon fresh orange zest
1 cup whipped cream

Directions:
1) Place 1/2 cup milk in a small microwave container. Add gelatin. Allow to soften for 2 to 3 minutes. Heat in a microwave oven for about 30 seconds on high power, or until until gelatin is dissolved. Set aside.
2) Beat cream cheese in a large bowl until light and airy. Beat in dissolved gelatin, 1-1/2 cups milk, dry pudding mix, pumpkin, all of spice mix and orange zest. Beat on low speed for 2 minutes until well-blended. Fold in whipped cream. Spoon mixture into individual serving dishes. Chill for at least two hours, or until set. Yield: 4 to 6 servings.

You might also enjoy these recipes:
Pumpkin and Chocolate Layer Cake - Baking Bites
Pumpkin Nut Bars - Eating Out Loud
Rum Spiked Pumpkin Pie - My Gourmet Connection
Spiced Pumpkin Walnut Cake - Little Corner of Mine
Pumpkin Toffee Cheesecake - The Other Side of Fifty
Raisin Pumpkin Bread - The Food Addicts
Pumpkin Roll - What's Cooking Mexico?

Friday, November 19, 2010

Nānkhatāi - Diwali - Pink Saturday


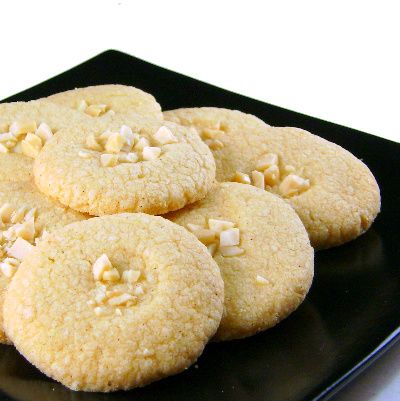
From the kitchen of One Perfect Bite...All of today's pictures are linked to Diwali, the Hindu holiday that celebrates the return of Lakshmi, the goddess of prosperity. The holiday is much like our Christmas with odd bits of Independence Day and Halloween thrown in. Please understand, I mean no disrespect. Lanterns are lit, families gather and gifts are exchanged during this joyous celebration of light. Firecrackers are used to frighten away evil spirits that might threaten the return of the goddess and children go door to door seeking a reward for the entertainment they provide. The cookie, called a Nānkhatāi, is an eggless shortbread that has a sandy texture. It is sold during the holiday by street vendors who specialize in sweetmeats and other treats. The pigeon is another story. The bird is not a mutant. He is one of many that have been tinted for Diwali. Why? I'm clueless and have been unable to find anyone who can give me a sensible answer. The design being created on the street outside the fence is called a rangoli and it's meant to welcome visiting deities. It, and thousands like it in other Hindu homes, will be lit at night with myriad small lanterns that will give streets the appearance of being swarmed by fireflies or glow worms. It is quite a sight. While I was able to sample most of the foods associated with Diwali, I missed these cookies and wanted to try them once I returned home. I made them today and I must say I'm not thrilled with the results. The cookie is fine, but, with so much good shortbread around, it merits only a lukewarm review. I decided to post it with reservations because it is a Indian dessert and I wanted to conclude my tour of India with something sweet. I'll let you be the judge of its merits. Here's the recipe.

Nānkhatāis...from the kitchen of One Perfect Bite courtesy of Culinary Annonations

Ingredients:

1/2 cup confectioners’ sugar
1/2 cup refrigerated ghee (clarified butter) or unsalted butter
1/2 teaspoon pure vanilla extract
1/2 cup unbleached all-purpose flour (maida)
1/2 cup semolina flour (rava)
3/4 teaspoon ground cardamom [or 1/4 teaspoon ground nutmeg]
3/4 teaspoon baking powder
2 tablespoons chopped nuts for topping

Directions:
1) Line a cookie sheet with parchment or wax paper. Pre-heat oven to 325 degrees F.
2) Sift confectioners' sugar into a mixing bowl. Add refrigerated ghee/butter and cream mixture until fluffy. Add vanilla and mix to incorporate.
3) Sift flour, semolina and baking powder into another bowl. Whisk in cardomom. Add flour mixture to creamed mixture in two parts. Once a cookie dough forms, transfer it to a cold working surface and knead a few times. Break dough into 20 equal-sized portions and shape into flattened rounds. Make a thumb impression in center of each and press in a few pieces of nuts.
4) Bake cookies for about 20 to 25 minutes. Check at 20 minute interval to ensure that cookies do not brown or develop any deep color. Be aware that these cookies will crack slightly. That is as it should be. Cool on wire racks. Store airtight. Yield: 18 to 20 cookies.

You might also enjoy these recipes:
Semolina and Almond Salwa - eCurry
Gulab Jamun - Phem Fatale
Strawberry Busundi - Food Lyrics
Milk Cake - The Vegetarian Way
Pumpkin Kulfi - Eggless Cooking
Rasmalai - The Inner Gourmet

This post is being linked to:
Pink Saturday, sponsored by Beverly at How Sweet the Sound.

Thursday, November 18, 2010

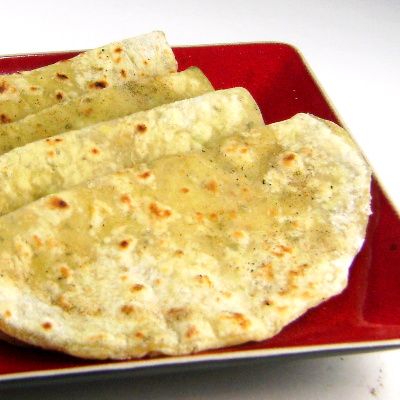
Paratha


From the kitchen of One Perfect Bite...While we were in India, Bob and I were entertained by three young families who opened their homes and kitchens to us. These were atypical families and the meals we shared with them were those that would be found on the tables of the upper middle class. They were all marvelous hosts and I learned a great deal about the Indian kitchen during visits in their homes. One of our hostesses was a cooking instructor who loved to share her knowledge with other people. She was a woman with a mission. Most visitors to India don't realize that an average Indian homemaker spends at least a third of her day preparing meals for her family. She wanted to help reduce that time by simplifying classic recipes and techniques. The Indian kitchen bears no resemblance to yours or mine. Freshness is of paramount importance, so refrigerators are quite small. Fruits and vegetables are purchased daily from vendors who bring produce to the homes for selection. Meats and dairy products are purchased in the same fashion. That means that the Indian kitchen is also very seasonal. There are no peas if peas are not in season. The kitchens in which the cooking is done are Spartan. The ones I saw did not have built-in ovens or cooktops. Meals were cooked on portable gas burners or in small ovens that were set on countertops. Each of the kitchens had an auxillary table, a running bank of lower cabinets and a large sink. Family meals were always served in the dining room. Our hostesses all had help to assist with cooking and serving when they had guests. The help was generally male, though the children's nannies might be called on to cook treasured family recipes. While members of the family wore shoes, the kitchen help and servers did not. It was an interesting distinction. We quickly learned that curry is a sauce, not a powder and that masala is a combination of spices that can very from one region to another. I personally learned that the breads of India are the glory of its tables. Served hot from the grill, these breads can make grown men weep and put women on perpetual diets. They are really lovely. Today's recipe is for an Indian flatbread called paratha. You may have seen it stuffed. This is a much simpler version of that bread. I hope you'll give it a try.

Paratha...from the kitchen of One Perfect Bite

Ingredients:

2 cups all-purpose flour + 1/2 cup for dusting
2 cups whole wheat flour
3/4 cup scallion, cut up into 1 inch pieces
3 tablespoons mint leaves
1/2 teaspoon red pepper flakes
1 teaspoon freshly cracked black pepper
1 teaspoon salt
1-1/2 cups warm water
1 tablespoon oil
2 tablespoons ghee for brushing parathas

Directions:

1) Place both flours, scallions, mint leaves red pepper flakes, black pepper and salt in bowl of a food processor. Pulse until mixture is thoroughly mixed and onions and mint are finely chopped. Add warm water through feed tube and pulse until dough gathers into a ball. Remove, knead and rub with oil. Cover and let rest at room temperature several hours before proceeding.
2) Form dough into 12 equal size balls. On a well floured surface, roll dough into a very thin disc. Heat a cast iron griddle or frying pan over medium-high heat and cook paratha until brown spots appear on both sides. Brush with ghee and stack. Serve hot. Yield: 12 pieces.

You might also enjoy these recipes:
Puffy, Fluffy Spinach and Green Chili Puris - KO Rasoi
Tandoori Rotis - Healthy and Delicious
Whole Wheat Chapati - Anja's Food 4 Thought
Naan - Closet Cooking
Multi-Grain Roti/Chipati - A2Z Vegetarian Cuisine
Chapatis and Pooris - One Perfect Bite

Wednesday, November 17, 2010

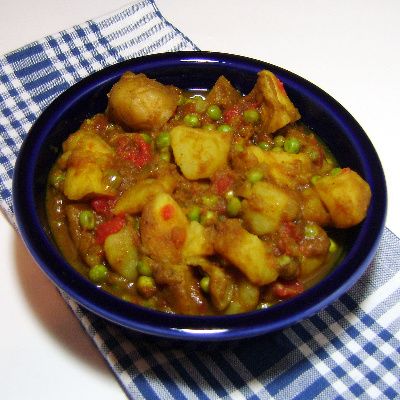
Aloo Matar Rasedaa - Curried Potatoes and Elephant Safari


Aloo Mater Rasedaa - Curried Potatoes.


They don't get much cuter, but she was a surprise. Her Daddy was a rogue.


This is her teen-age mother.


At home in the jungle.


Conference room.


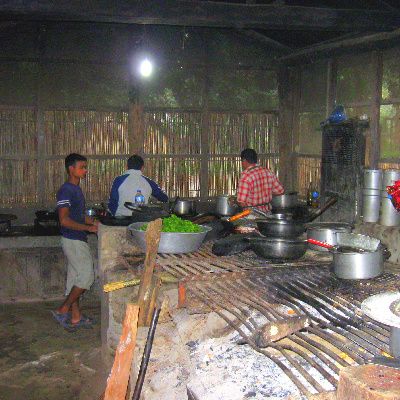
Kitchen.


Termite Colony.


Tiger


Rhino.


Crocodile.


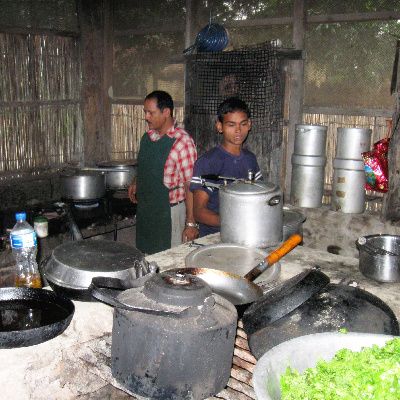
From the kitchen of One Perfect Bite...The Silver Fox loves nature. I love the Silver Fox. The bit about jungles and safari was buried in the fine print of our marriage contract. I missed it. He didn't. That's how I ended up in the middle of a jungle on the back of an elephant who cared a good deal more about her offspring than me or my welfare. We had signed on for a four day stay at a Nepali eco-lodge, hoping that would be enough time to see at least some on the wildlife the camp was famous for. As luck would have it, we got to see everything our first morning on safari. That was wonderful. Folks can spend years trying to catch glimpses of the tigers or white rhinos in the reserve. We hit a homer our first time at bat. Our good luck, however, meant we had to come up with other plans to fill the time we had left in camp. Four days can be an eternity in a place that has only intermittent electricity and hot water. It does not encourage the reading or writing of the great American novel and bubble baths are not de rigueur. I spent my time in the primitive kitchen and at the elephant camp watching the antics of a two year old who was such a minx you couldn't help but love her. She's now old enough to walk behind her mother on expedition. If she's hungry she nurses and everyone waits till she's had her fill. If she finds a pile of dirt or an especially lush leaf, she'll stop and play. Everybody waits. If they're lucky they'll escape the dirt she blows their way as an invitation to play. It's also interesting to watch the behavior of the other elephants when she is around. If they scent boar or other animals that might be dangerous, they close ranks and form a protective circle around her. When I tire of the elephants, I wander down to the primitive kitchen and watch them prepare meals for 40 or so guests. There are no appliances to speak of. There are 5 cooks who report to head chef who barks orders but also cooks. The six of then produce breakfast and two large buffets every day. The food they cook must be walked uphill to the dining room. When the meals are over, dishes are walked to another facility to be washed and stored away. The arrangement is uniquely inefficient but the job gets done, even in rainy season. Eco-tours are not for everyone, but if you love nature and being outdoors you'd love to spend some time on jungle safari. I glad I did it. Once!

The food prepared in the kitchen at Temple Tiger was, of necessity, easy to make. It lacked refinement, but it was delicious and there was always plenty of it. I especially like their recipe for curried potatoes and peas. It can be served with any meal, but it is a wonderful addition to the Nepali set I've been talking about building. It perfectly fits the curry component of the dish. Here is the recipe.


Aloo Matar Rasedaa - Curried Potatoes and Peas...from the kitchen of One Perfect Bite

Ingredients:

2 pounds baby Yukon Gold potatoes, unpeeled and quartered
2 tablespoon ghee or olive oil
1 medium onion, finely minced
1 teaspoon finely minced ginger
1/4 teaspoon salt
1-1/2 teaspoon turmeric
1-1/2 teaspoon cumin powder
1 teaspoon ground coriander
1/4 to 1/2 teaspoon cayenne or ground red pepper
1 teaspoon cumin seed
1 can (15-oz.) chopped tomatoes, undrained
1/4 teaspoon sugar
1 cup frozen peas, thawed
1/4 teaspoon garam masala

Directions:
1) Boil potatoes in lightly salted water until barely tender, about 10 minutes. Drain and set aside.
2) Heat oil in a large pot. Add onions and ginger and cook until softened. Stir in turmeric, cayenne, cumin powder, coriander and cumin seed and cook until fragrant.
3) Add potatoes to skillet and stir to coat with spices. Add tomatoes and sugar and simmer until potatoes are tender, about 20 minutes. Stir in peas and garam masala. Cook 5 minutes longer. Add additional water if sauce becomes too thick. Season with salt to taste. Serve hot. Yield: 4 servings.

You might also enjoy these recipes:
Curried Vegetables With Whole Wheat and Couscous - Simply Recipes
Indian Style Curried Vegetables - What's Cookin, Chicago?
Curried Potato and Vegetable Soup - Simply Recipes

Aloo Gobi - No Recipes
Fresh Vegetable Curry - The Whole Life Nutrition Kitchen
Mixed Vegetable Curry - What's Cooking Today

Tuesday, November 16, 2010

Alu Ki Tikki (Potato Patties) - Kalakho and Camel Caravans


Alu Ki Tikki.


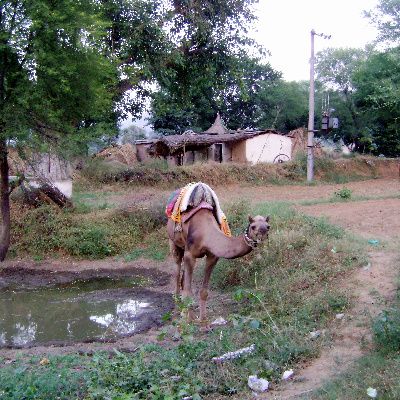
From the kitchen of One Perfect Bite...There are two Indias. One is modern and vibrant, the other is mired in poverty and tradition. My first real exposure to the dichotomy came while visiting a farm village outside the town of Kalakho in the state of Rajasthan. The villagers invited us into their homes and the men entertained us with local music and dancing. While much of what we saw was well orchestrated showmanship, the journey to and from local villages gave some insight into what was really happening in these remote areas of the country. We traveled in camel caravans and the slow pace made close observation possible. Despite best efforts by the government, much work still needs to be done. Women here are little more than chattels and a headcount while at a local school confirmed an unintended male bias. Old ways die very hard, yet these people do not seem to be unhappy. Television, with its exposure to undreamed of freedom and material goods, has not reached their villages and they remain a serene and patient people, seemingly lost in another century. I don't know how much longer that can last.

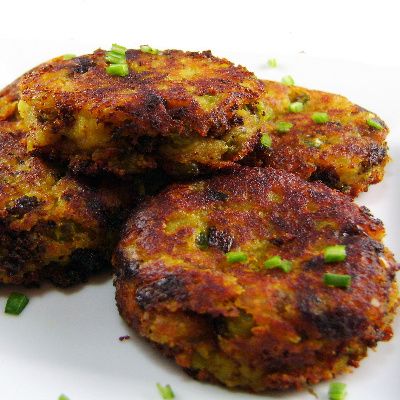
In the midst of all that, we were housed in a lovely resort that overlooked a monsoon lake. Our meals were regular and delicious and I brought several recipes home with me. These potato patties were part of our breakfast buffet each morning. They are a simple mix of seasoned potatoes, combined with peas and spices, that is held together with chickpea or all-purpose flour. Despite their appearance they really are delicious. Here's the recipe.


Alu Ki Tikki...from the kitchen of One Perfect Bite

Ingredients:
1 pound potatoes, peeled and cut in 1-inch cubes
2 teaspoons salt
1 bay leaf
1 cup frozen peas, thawed
1/2 teaspoon salt
1/2 red onion, finely diced
1 (1-inch) piece ginger, peeled and finely diced
1/4 to 1/2 teaspoon dried red pepper flakes
1 tablespoon vegetable oil
1 teaspoon ground cumin
1 teaspoon ground coriander
1 teaspoon ground turmeric
2 tablespoons chickpea (besan) flour (all-purpose flour can be substituted)
1 tablespoon lemon juice
1/2 teaspoon garam masala
3 tablespoons vegetable oil or a mixture of vegetable oil and ghee

Directions:
1) Cover potatoes with cold water, add salt and bay leaf and bring to a boil. Then turn heat down to a simmer and let cook until soft enough to mash, about 15 minutes or so. Drain potatoes and return to pot.
2) Heat 1 tablespoon oil in a saute pan. Add onions, ginger and pepper flakes. Saute until soft. Add salt, cumin, coriander, turmeric and cook for a few seconds longer.
3) Mash potatoes. Gently fold in peas, onion-spice mixture, chickpea flour and lemon juice.
4) Using a 1/4 cup measures, form into patties.
5) Heat 3 tablespoons oil in a large nonstick skillet. When hot, add patties and cook until a deep golden brown, turn and continue cooking until reverse side is golden. Remove and drain on several layers of paper toweling. Serve warm or at room temperature with tomato or mint chutney. Yield: 12 to 14 patties.

You might also enjoy these recipes:
Aloo Palak - eCurry
Spicy and Seedy Indian Potatoes - Herbivoracious
Chickpea Potato Curry - Simply Recipes
East Indian Potato Chops - Foodista

Monday, November 15, 2010

Dal Bhat - Pokhara


Dal Bhat


From the kitchen of One Perfect Bite...Pokhara is a small Nepalese city tucked into the foothills of the Annapurna range of the Himalayas. Things, including time, move slowly here. Cars are not yet a problem, television transmission is intermittent and the air is fresh and clear. While the area tries to keep a low profile, 100,000 travelers arrive here every year. The city is a mecca for climbers and trekkers who account for 80% of its visitors. The area is also a retirement haven for Gurkha officers whose presence, coincidentally, keeps the crime rate low and the economy healthy. Those who come are charmed and pampered. Many stay. Hence, I can happily report it is possible to get fabulous pizza in the foothills of the Himalayas. The old city is much like the Kathmandu of my imagination, but accommodations are first-rate and are a welcoming place to train for, or recover from, strenuous outdoor activity. Part of the daily panoply is watching helicopters evacuate trekkers who have underestimated the toll that altitude will take on their bodies. Most recover poolside and still have the time of their life. I was completely charmed by Pokhara and its residents. If you are lured by the unusual and enjoy back roads and byways, Pokhara will enchant you as well.
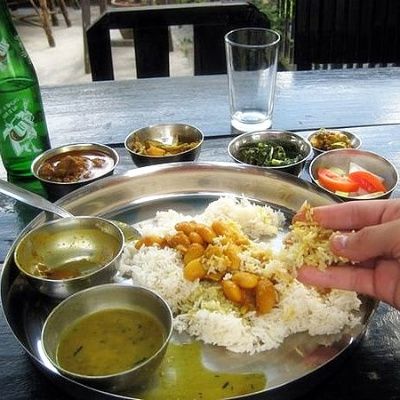
In Nepal there's a entree called a Nepali set. It is an assortment of dishes arranged on a plate especially designed to feature each component of the meal. I'd like to take you through those components a step at a time and, today, we'll start with the two most basic elements of the dish. Rice and lentil are the staples of the Nepali people. They are eaten twice a day in a dish that's called Dal Bhat. The dish may be supplemented with curried vegetables, called Tarkari and pickles, but rice and lentils are always part of the meal. They will also appear on our expanded versions of the Nepali set that we'll build a step at a time. Here is the recipe for the rice and lentils that form the base of the Nepalese diet.


Dal Bhat...from the kitchen of One Perfect Bite

Ingredients:
Plain Rice (Bhat)
2 cups rice (Basmati or Long grain preferred)
4 cups (1 lt) water
1 teaspoon butter (optional)

Lentils (Dal)
1-1/2 cups lentil (any kind)
4 to 5 cups of water (depends preference of your consistency of liquid)
1/2 teaspoon turmeric
1 teaspoon garlic, minced
6 tablespoons clarified butter (ghee)
3/4 cup sliced onions
2 chillies (dried red chilies preferred)
Salt to taste
1 tablespoon fresh ginger paste (optional)

Directions:
1) To prepare rice: Wash rice and soak for 5 minutes. Boil the rice over medium heat for about 10 -15 minutes. Stir once thoroughly. Add butter. Turn the heat to low and cook, covered, for 5 more minutes until done
2) To prepare lentils: Wash lentils and soak lentil for 10 minutes. Remove anything that floats and drain. Place lentil in fresh water and bring to a boil. Add all spices. Reduce heat and simmer, covered, for 20 to 30 minutes until lentils are soft and have the consistency of oatmeal. In a small pan, heat remaining butter and fry onions, chilies and garlic. Stir into lentils a few minutes before you stop boiling. Serve with rice.

You might also enjoy these recipes:
Nepali Dal Bhat - Zack's Travel Musings
Dal Bhat - Experiments in My Kitchen
Dal Bhat - Yeti-Zone Trekking