Monday, August 31, 2009

Mud Slide Chocolate Cake with Coffee and Kahlua


From the kitchen of One Perfect Bite...It's not the best cake I've ever tasted. It's not the easiest cake I've ever made. That being said, this cake has a lot going for it. It's intensely chocolate with a flavor that's enhanced with coffee and kahlua and, while not simple, it's relatively easy to make. It also wins extra points because it's easy for lovers of picnics and potlucks to transport. This rich cake received it name because of its dark color and the way the glaze runs down the side of the cake as it's poured or painted on. If you decide to make this, use the best quality chocolate available to you. Nothing miraculous will happen in the oven to improve the flavor of inferior ingredients. A good brandy can be used to replace the Kahlua. The finished cake is a moist, chocolate marvel that will stay fresh for days after it's made. It can be made in 15 minutes , but it bakes longer than most and takes a while to cool, so plan accordingly. I like it best a day after it's been made. Here's the recipe.

Mud Slide Chocolate Cake with Coffee and Kahlua
...from the kitchen of One Perfect Bite

Ingredients:
2 cups unbleached flour
1 teaspoon baking soda
1/4 teaspoon salt
1-3/4 cup strongly brewed coffee
1/4 cup Kahlua or brandy
5 ounces unsweetened chocolate
1 cup (2 sticks) butter
2 cups granulated sugar
2 eggs
1 teaspoon vanilla extract
Optional Glaze:
3 ounces semisweet chocolate
2 tablespoons strongly brewed coffee

Directions:
1) Preheat oven to 275 degrees F. This is not an error. This cake bakes at a very low temperature. Butter a 10-inch Bundt pan and dust sides and bottom with cocoa. Set aside.
2) Sift together flour, sugar and salt. Set aside.
3) Place coffee and liqueur in a medium sauce pan set over medium heat. Heat for 5 minutes. Add chocolate and butter, stirring until melted and smooth. Add sugar and stir until dissolved. Remove from heat and allow to cool for several minutes.
4) Transfer chocolate mixture to a large bowl. Using an electric mixer, add flour mixture in two parts, beating after each addition until smooth. Add eggs and vanilla and beat for 1 minute more. Pour into prepared Bundt pan.
5) Bake in middle third of oven for 1-1/2 hours, or until cake pulls away from sides of pan and springs back when middle is touched. Allow cake to cool in pan for 10 minutes. Invert cake onto a platter, but do not remove pan until cake is completely cool.
6) In a small saucepan set over low heat, melt chocolate and coffee. Brush on surface of cooled cake. Yield: 12 servings.

Recipe adapted from Cook-off America.

Asparagus and Lemon Grass Risotto - Recipes to Rival


August has flown by and the posting date for Recipes to Rival managed to sneak up on me. I wish I could juggle. Baring that, I wish I paid better attention to my calendar. Fortunately, I'm an experienced multitasker and while I can't turn water into wine, I can hide my mistakes and turn lemons into lemonade - sometimes. This months recipe is Asparagus and Lemon Grass Risotto from Veganomicon by Isa Chandra Moskowitz and Terry Hope Romano. It was selected by Debyi of the Healthy Vegan Kitchen. It's not a traditionally prepared risotto. The broth contains no meat and is made, instead, with lemon grass and other Asian flavorings. The finished rice has no added cheese. While a suggestion and recipe for a side dish was provided for us, we were free to use one of our own choosing. I had planned to use a soy glazed salmon, but because the rice was strongly flavored I opted to serve plain grilled chicken instead. I followed the recipe as it was written. The only changes I would make are to reduce the cooking time and the amount of red pepper flakes used. My rice was ready to serve in about 25 minutes rather than the 35 suggested in the recipe. Unless you love heat, I'd also suggest you start with 1/4 teaspoon pepper flakes until you've determined what your heat tolerance might actually be. If you are an adventurer or just trying to serve less meat and moving towards a vegetable based diet, I think you'd like this dish.


Asparagus and Lemongrass Risotto


Ingredients:
Lemongrass Broth:
3 cloves garlic, whole and unpeeled
1 1-inch piece fresh ginger, sliced into 1/4-inch slices
1 small stalk lemongrass, or 1 tablespoon dried, chopped lemongrass
3 cups vegetable broth
3 cups water
3 tablespoons tamari (or soy sauce, or more broth)

Risotto:
1/2 cup cooking sherry or white wine or water
1 pound asparagus
2 tablespoons vegetable broth
1 cup basil leaves (Thai, if you can find it), sliced into thin strips
2 tablespoons chopped fresh mint
6 large shallots, thinly sliced
4 cloves garlic, minced
1 serrano red chile, sliced very thinly (or 1/2 – 1 teaspoon crushed red pepper flakes)
1-1/2 cups Arborio rice
1 teaspoon sugar (optional)
2 tablespoons lime juice
Chopped roasted peanuts and lime wedges, for garnish (you can use pine nuts or sliced almonds instead of the peanuts)

Directions:
1) If using fresh lemongrass, peel away and discard any brown stems from the stalk. Slice stalk in half lengthwise and cut into 3” to 4” lengths, then julienne.
2) Give garlic and ginger a good whack with a clever or back of a spoon.
3) Place all broth ingredients in a large stockpot and bring to a boil, then lower the heat and simmer for 10 minutes. Strain broth, discarding the vegetables and herbs. Pour broth back into pot, cover and simmer over as low a heat as possible to keep warm.
4) Slice asparagus into 1/2-inch pieces, discarding any tough parts from bottom of e stems. Separate tips from stems and place each in separate bowls.
5) In a medium-sized heavy-bottomed pot, saute asparagus in 1 tablespoon vegetable broth over medium heat until bright and crisp tender, 5 to 6 minutes. Add basil and mint, saute for 30 seconds, remove from heat and set aside.
6) Add remaining tablespoon vegetable broth to pan. Saute shallots and garlic, stirring occasionally, until shallots are very soft, about 6 to 8 minutes. Stir in serrano and rice, saute for about 8 minutes, until rice smells slightly toasted. Add wine and stir constantly until liquid is absorbed.
7) Now, time for relaxation and stirring. Get a glass of your favorite beverage, turn on some soothing music, or a good movie. Ladle about 1/2 cup of broth at a time into rice, stirring constantly until each addition is absorbed. Stir and cook until the rice is creamy but center is still somewhat firm.
8) When broth is almost gone, stir sugar and lime juice into remaining broth before adding it to pot. You may add more water or vegetable broth in 1/4 cup increments if needed. This will take about 35 minutes.
9) Stir asparagus stems into risotto and cook for another 5 to 10 minutes, until asparagus has reached desired tenderness.
10) Garnish each serving with asparagus tips, chopped roasted peanuts, and lime wedges. Yield: 4 to 6 servings.

Sunday, August 30, 2009

Creamy Winter Squash Soup


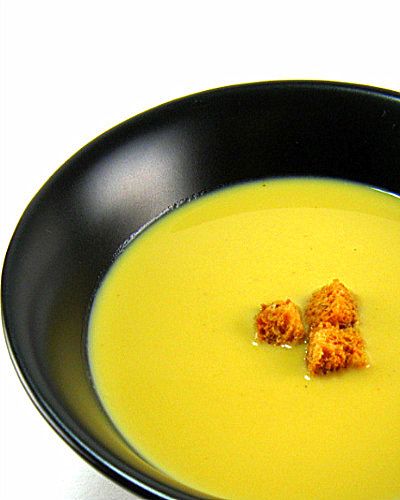
From the kitchen of One Perfect Bite...Butternut squash and pumpkin have started to appear in our farmer's markets. I'm delighted. I've been waiting for their arrival so that I could try a recipe I found earlier this summer. I'd been looking for a soup to replace the corn chowder I normally serve with our Thanksgiving meal and I had the good fortune to stumble on this recipe develop by Ed Chamberlain. The use of cardamom and allspice leads me to believe the soup has Scandinavian origins. It's delicious, simple to make and freezes well. The next time I make it I plan to use acorn squash. The butternut squash is delicious but I want more depth of color than it provides. You'll need about 3 pounds of squash to make this soup. I simmer it in stock, but it could also be baked and pureed before adding it to the soup pot. While I used fresh pumpkin, it was overkill and unnecessary work. Canned pumpkin can be substituted. As a matter of fact, frozen squash could also be used. I finished the soup with heavy cream but whole milk or light cream would also work for those who prefer their soup on the lighter side. There is, however, no substitute for the cardamom.

Creamy Winter Squash Soup
...from the kitchen of One Perfect Bite

Ingredients:
2 medium (1-1/2 pounds each) butternut squash
4 cups low-sodium chicken broth
2 cups canned or fresh pumpkin puree
1/2 cup honey
1 tablespoon chopped fresh ginger
1 teaspoon ground cardamom
1/4 teaspoon ground allspice
Salt and pepper to taste
2 cups heavy cream, light cream or whole milk
Optional Garnish:
Croutons
Creme fraiche

Directions:
1) Peel the squash; cut into chunks. Place in a soup pot. Add chicken broth and bring to a boil over high heat. Reduce heat to low and simmer until tender, about 30 minutes. Transfer squash and some chicken broth to bowl of a food processor; puree until smooth.
2) Return squash puree to soup pot. Add pumpkin puree, honey, ginger, cardamom, allspice, salt and pepper. Heat, stirring until smooth and heated through. Add heavy cream and stir until blended. If desired, garnish soup with creme fraiche and croutons. Yield: 8 servings.

This post is being liked to Mellow Yellow Monday.

Saturday, August 29, 2009

Sweet and Spicy Watermelon Rind Pickles


From the kitchen of One Perfect Bite...Not much was wasted in the summer kitchens of my childhood. When sugar was available, even the rind of watermelon became fodder for the good cook's table. With a bit of effort and a handful of spices, it was transformed into sweet and spicy pickles that, once tasted, would not be forgotten. This week, in a fit of what Bob calls a green attack, I decided to use the rind for pickles rather than add it to compost heap. Processed pickles are fine, but because I prefer the crispness of refrigerated pickles, I decided to use a tried and true recipe from Bon Appetite magazine. I was pleased enough with the results that I thought you might like the recipe. The pickles are easy to make but you'll need to start them three days before you plan to use them. I usually serve them as a condiment, but they are also delicious wrapped in bacon and served as hors d'oeuvre. Here's the recipe.


Sweet and Spicy Watermelon Rind Pickles
...from the kitchen of One Perfect Bite

Ingredients:
1 4-pound piece watermelon, quartered
8 cups water
2 tablespoons plus 2 teaspoons coarse salt
2 cups sugar
1 1/4 cups apple cider vinegar
8 whole cloves
8 whole black peppercorns
2 cinnamon sticks
1/2 teaspoon pickling spice
1/4 teaspoon ground allspice
1/4 teaspoon ground ginger

Directions:
1) Cut watermelon pulp from rind, leaving thin layer of pink on rind (reserve pulp for another use). Cut green outer skin from rind; discard. Cut enough rind into 1 x 1/2-inch pieces to measure 4 cups. Combine 8 cups water and 2 tablespoons salt in large pot; bring to boil. Add rind pieces and boil until tender, about 5 minutes. Strain. Transfer rinds to large metal bowl.
2) Combine remaining 2 teaspoons salt, sugar, vinegar, cloves, peppercorns, cinnamon sticks, pickling spice, allspice and ginger in heavy large saucepan. Bring to boil, stirring until sugar dissolves. Pour over watermelon rinds in bowl. Place plate atop rinds to keep rinds submerged in pickling liquid. Cover and refrigerate at least 8 hours or overnight.
3) Strain liquid from rinds into saucepan; bring to boil. Pour over rinds. Cover and refrigerate overnight. Repeat straining and boiling of liquid and pour over rinds 1 more time. Store in covered jars and refrigerate for up to 2 weeks. Refrigerate. Yield: 3-1/2 cups.

Recipe adapted fromn Bon Appetite Magazine.

Friday, August 28, 2009

Leche Asada - Peru - Pink Saturday


From the kitchen of One Perfect Bite...My post today is a bit more personal than usual. The now pink toned wall hanging is the first purchase I made as young woman. It's Peruvian, and has traveled with me all these years, covering walls as disparate as you can imagine. It held a place of honor in a basement flat and now graces the high wall of the house on the hill. It's worn and faded and should be retired, but it's a reminder of a time when my world was very young and the defining line that separates sky and sea was blurred. A reminder of times when anything was possible and spirits, set free, soared. It's also a reminder of a once exotic place. There is, of course, Machu Picchu and the mysteries of the Inca trail, but I'll wager that every mother, with a child who loves to read, can tell you that Paddington Bear comes from "deepest, darkest Peru" and that anyone returning from Peru would concur that one of the finest of the world's creme caramel can be had there. I hope you'll try it so you can join the chorus of those who sing its praises. Leche Asada is simple to make and guaranteed to please. I think you'll like it. Here's the recipe.

Leche Asada...from the kitchen of One Perfect Bite

Ingredients:
1-2/3 cups milk
1 cup heavy cream
1 tablespoon vanilla extract
1 cup sugar, divided use
5 large eggs + 2 egg yolks
1/4 cup water

Directions:
1) Preheat oven to 350 degrees F. Bring 2 quarts of water to a boil.
2) Combine milk and cream in pan. Add vanilla extract and bring mixture to a simmer over medium heat. Remove from heat. Let sit until lukewarm, about 20 minutes.
3) Place eggs and yolks in a large bowl. Add 1/2 cup sugar and beat with an electric mixer until pale and creamy, about 3 minutes. Reduce mixer speed to low and beat in milk and cream. Strain mixture and set aside.
4) Combine reserved 1/2 cup sugar and 1/4 cup water in a saucepan with a heavy bottom. Cook over moderate heat until it becomes syrupy and caramel colored.
5) Carefully pour caramel into 6 (6-oz. each) custard cups. Pour an equal measure of custard into each cup.
6) Place custard cups into a large pan. Transfer to oven. Pour boiling water around cups to come halfway up the sides. Cover with foil. Bake for 25 to 30 minutes, or until custard is just set. A knife inserted into custard should come out clean. Remove from water, leave to cool and chill overnight.
7) Unmold, using a knife to loosen custard from edges of cups. Invert and serve. Yield: 6 servings.


They post is being linked to Pink Saturday, sponsored by Beverly at How Sweet the Sound.

Thursday, August 27, 2009

Whole Wheat Olive Flat Bread - Focaccia alle Olive


Photo by i,max - Creative Commons License


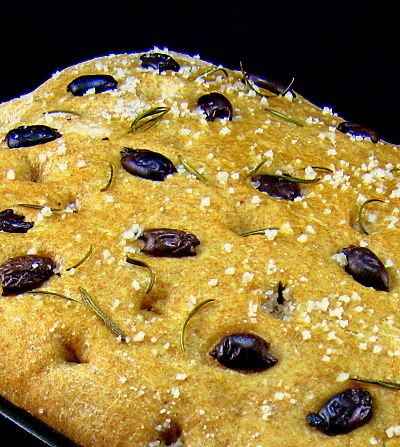
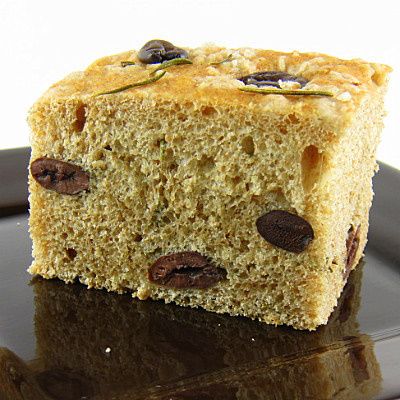
From the kitchen of One Perfect Bite...This wonderful olive bread comes from Judy Francini's new book, Secrets from My Tuscan Kitchen. I won the book in a random drawing held by the folks at the Foodie Blogroll and it has since become the gift that keeps on giving. The bread is easy to make, requires no special equipment and uses ingredients that are available in any well-stocked grocery store. I used kalamata olives for my bread but any ripe, brine cured olive could be used. The beautiful blue olives at the top of the page come from an evergreen tree that's native to the Mediterranean, Asia and parts of Africa. It is short and squat with a gnarled, twisted trunk and leaves that are a silvery green. These trees bare small white flowers and fruit that slowly ripens from green to the rich purple color we associate with black olives. The olives, rosemary and whole wheat flour used in this bread give it enormous flavor. I love to serve it with a hearty soup and salad. It is best served warm with a dipping sauce of olive oil and black pepper. While the bread stales quickly, leftovers can be frozen and reheated. This is a great recipe for beginners and seasoned pros. I hope you'll try it. It will not disappoint.

Whole Wheat Olive Flat Bread
...from the kitchen of One Perfect Bite and Judy Francini

Ingredients:
2-1/4 teaspoons dried yeast
2-1/2 cups water, divided use
2-1/2 cup unbleached flour
2-1/2 cups whole wheat flour
1-1/2 teaspoons salt
1 cup black olives + olives for garnish, patted dry
1/4 cup chopped fresh rosemary + rosemary for garnish
Olive oil
Sea salt or other coarse salt for garnish

Directions:
1) Dissolve yeast in 1/2 cup water.
2) Mix unbleached and whole wheat flour in a large bowl. Whisk in salt. Add dissolved yeast. Stir in 1-1/2 to 2 cups reserved water, adding enough to form a firm dough.
3) Turn dough onto a lightly floured board; knead for a few minutes, adding flour if dough is very sticky. Let rest 10 minutes. Resume kneading until a smooth dough is formed.
4) Place in a greased bowl; cover and let rise until double in size, about 1 hour. Turn onto lightly floured board and knead in olives and rosemary. Roll out dough and press into a 9 x 12-inch baking pan. Cover and let rise until double in height, about 45 minutes.
5) Preheat oven to 375 degrees F. Brush dough with olive oil. Lightly pat olives and rosemary into surface of dough. Sprinkle with sea salt. If desired, make indentations in dough with finger tips. Bake until golden brown, about 20 to 25 minutes. Serve warm. Yield: 1 (9 x 12 X 2-inch) flat bread.

This post is being linked to the following sites:

Designs By Gollum - Foodie Friday

Smiling Sally - Blue Monday

Wild Yeast - Yeast Spotting

Nick - imafoodblog BBD # 23

Wednesday, August 26, 2009

Summer Cabbage Rolls with Leeks, Mushrooms and Slivered Almonds


From the kitchen of One Perfect Bite...
Mama S. worked furiously at this time of year. Any grass remaining in her backyard had long been overrun by a garden that teemed with with vegetables; tomatoes and peppers were especially abundant. She also grew herbs that were completely foreign to the rest of the neighborhood. Fresh garlic, basil and rosemary were still exotics and would not appear in most kitchens for another 20 years. I had my first taste of pesto in her fragrant, summer kitchen. Mama refused to work in the basement though a stove had been provided for her there. As a result her kitchen, already sweltering in the heat of a Midwestern August, became a furnace when water in canning kettles came to a boil. She had a routine. She also had a shtick and I, around the age of ten, became her audience and her tomato peeler. There were days when her sisters would join her and, for lack of space, I'd be relegated to the porch to complete my task where I, fascinated by the antics of this large and boisterous family, would shamelessly eavesdrop. By September her pantry, huge by today's standards, was lined with jars of jewel toned tomatoes, peaches, pears, corn and beans. Very little was wasted in that kitchen. Water boiling in those kettles was used to blanch cabbage leaves for rolls much lighter than their winter cousins. I came across a recipe similar to Mama's in an old issue of Taste Italia and decided to give it a try. These summer rolls take about 20 minutes to prepare and an additional 50 minutes or so to cook, so plan accordingly. I served these with a plain roast chicken. They'd also be great with a pork roast. If you're looking for something a little different, you might want to give this recipe a try.

Summer Cabbage Rolls with Leeks, Mushrooms and Slivered Almonds
...from the kitchen of One Perfect Bite

Ingredients:
1 small Savoy cabbage
8 ounces leeks, white and tender green, washed, trimmed and finely chopped
8 ounces wild mushrooms, cleaned and finely chopped
2 tablespoons butter
2 large garlic cloves, minced
1/2 cup slivered almonds
1 tablespoon lemon juice
2 teaspoons sweet paprika
1 large egg, lightly beaten
1 cup low-sodium vegetable broth
Salt and pepper to taste

Directions:
1) Preheat oven to 400 degree F.
2) Remove 8 large outer leaves from cabbage. Bring 6 quarts of water to a boil. Blanch leaves for 1 to 2 minutes to soften slightly. Plunge into cold water to retain color. Drain. Remove tough lower spine.
3) Finely chop 2 cups of remaining cabbage. Melt butter in a large skillet over medium-high heat. Add cabbage, leeks, garlic and mushrooms and saute for about 10 minutes, stirring frequently. Add almonds, lemon juice and paprika to mixture and cook for an aditional 5 minutes. Remove pan from heat and allow to cool. Add egg and salt and pepper to mixture. I used 1/2 teaspoon pepper and 1 teaspoon of salt, but these really should be added according to individual taste. Mix well.
4) Divide stuffing between blanched cabbage leaves. Roll leaves tightly. Place, seam-side down and tightly packed, in a single layer in an ovenproof pan. Pour vegetable broth around the rolls. Cover pan with foil and bake for 20 minutes. Serve piping hot. Yield: 8 cabbage rolls.

Tuesday, August 25, 2009

Ginger Tea - The Yangtze - Outdoor Wednesday


Lesser Three Gorges - Daning Tributary to the Yangtze River


Thai-Style Ginger Tea

From the kitchen of One Perfect Bite...
I think we've all experienced an instant connect with a stranger at one time or another in our lives. This photo, captured at a bend in the Yangtze river, was taken beneath the parasol of such a friend. She called Singapore home but was Thai by birth. A career and several marriages had, quite literally, taken her around the world and she knew a thing or two about comfort on the road. Her purse was a veritable magician's hat and on this particular day, unhappy with the flavorless tea being served on board our small excursion ship, she pulled two packets from her bottomless "hat" and proceeded to make two cups of the best tea I had ever had. The tea was actually a Thai Ginger Drink that is very popular in Asia. While ginger is used in cooking throughout the world, you may be surprised to learn that it has health benefits as well. Many, especially in Asia, consider it to be a cure-all. Health benefits aside, my main interest in using fresh ginger is to make tea. While I haven't been able to create an exact duplicate of the ginger drink, I've come very close and have been serving it, hot or cold, ever since. This is how it's done.

Ginger Tea...from the kitchen of One Perfect Bite

Ingredients:
8 cups water
1/2 cup peeled and thinly sliced fresh ginger
1 lemon or lime thinly sliced
1/4 to 1/2 cup dark honey

Directions:
Bring water to a rolling boil. Remove from heat. Add ginger and lemon. Cover pot and let sit for 20 to 40 minutes. The tea becomes stronger the longer it steeps. Strain. Stir in honey. Serve hot or cold. Yield: 8 cups.

This recipe is being linked to Outdoor Wednesday, an event sponsored by Susan at A Southern Daydreamer.

Monday, August 24, 2009

Apple Custard Pie with Streusel Topping


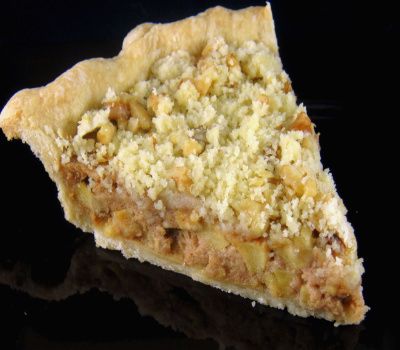
From the kitchen of One Perfect Bite...This is a lovely pie, don't get me wrong, but I sometimes think those of us who love food and cooking gild the lily. Most folks, when asked to name a typically American food, would choose apple pie. There are even some among us who believe that Abraham Lincoln, somewhere between the Emancipation Proclamation and the Gettysburg Address, first coined the phrase as "American as Apple Pie." Funny thing is that apples aren't native to the United States and "our" apple pie was popular in Europe centuries before it appeared here. Over time we became the world's largest apple producer and apple pie became associated with our life style and cuisine. Truth be told, hard cider was more popular than pie and was probably the reason our forefathers chose to grow so many apples. Somewhere, in some kitchen, someone with unused custard they didn't want to waste, decided that sugar, apples and cinnamon buried in a crust - called a coffin in merry old England - made too plain a dessert for a forward looking nation. So, they took the custard and poured it over the apples only to discover they had created another problem. The crust used to cover the apples made no sense with a custard filling. Fortunately, American ingenuity surfaced and deduced that a crumbly streusel with a gazillion calories would be a perfect topper for the pie. That's my take on how apple custard pie with streusel topping came to be. I hope you'll take it with a grain of salt. I use cheese custard and caramel syrup in my pie, so it's richer than some and a bit like apple cheesecake. The recipe is a prize winner and was developed by Shelby Thomas for the Georgia Apple Festival. If you have a sweet tooth or know and love someone with one that needs to be assuaged, you'll love this pie. If you're a purist, come back in September for my Mile-High Apple Pie..

Apple Custard Pie with Streusel Topping
...from the kitchen of One Perfect Bite

Ingredients:
1 9-inch pastry lined pie pan
1 (3-oz.) package cream cheese
1/4 cup caramel ice cream topping
1/4 cup granulated sugar
1 tablespoon all-purpose flour
1/2 to 1 teaspoon ground cinnamon
1 teaspoon vanilla extract
1/8 teaspoon salt
1 egg
2 cups diced apples (I use Golden Delicious or Granny Smith)
Streusel Topping:
1/3 cup golden brown sugar
1/3 cup all-purpose flour
1/4 cup butter
1/3 cup chopped pecans or walnuts

Directions:
1) Preheat oven to 400 degrees F.
2) Combine cheese, caramel topping, sugar, flour, cinnamon, vanilla and salt in a medium bowl and beat until a smooth batter is formed. Add the egg and beat until well-combined. Fold in apples. Pour into pastry lined pan.
3) Place on center rack in oven and bake for 20 minutes. Reduce heat to 350 degrees F. and bake for 10 minutes longer.
4) Meanwhile combine sugar, butter and flour in a small bowl. Cut ingredients together until crumbly. Stir in pecans.
5) Sprinkle topping evenly over top of pie. Bake until golden, about 15 to 20 minutes longer, for 15 to 20 minutes longer. Allow to cool slightly. Serve warm. Yield: 8 servings.

Sunday, August 23, 2009

Blue Cheese Steak Sandwich - Crater Lake - Blue Monday


The Romantic in me could easily be persuaded that God was standing in Oregon when he created the world. We are blessed with incredible natural beauty. Crater Lake is one of the most magnificent sites in the United States. It is a favorite destination for visiting family and friends who are curious to see its blue waters. Actually, the water in the caldera is colorless and the fabled blue is the result of blue light in the sun's spectrum being scattered by water molecules before returning to the surface of the lake. I promise no more lessons in optics if you promise to put Crater Lake put it on your bucket list. It's gorgeous.

There are a limited number of places to eat in the Crater Lake area. We've fallen into a pattern of having one meal in and one meal out and the al fresco meal is, by far, everyone's favorite. We pack several salads, cheese and fruit for a cheese board, something sweet for dessert and the fixings for spectacular sandwiches that are served on incredibly good bread. Men have been sent to the moon with fewer provisions than we take for a picnic. I like to vary the sandwiches we make; the only requirement is they be uncommonly good. They are usually assembled and warmed just before eating. This steak sandwich is one I love to make for our picnics. The combination of blue cheese, roasted peppers and arugula is an undeniable treat. We warm or grill the beef just before its piled on warm, crusty rolls. Regular readers know I have a "thing" for flatiron steak and I use it whenever possible. As luck would have it, none were available for our picnic. It was time for the "mother of invention" to step to the plate. Having been called worse things, I took it in my stride. I had the butcher trim and slice a boneless rib roast into paper thin slices. The meat was seasoned and quickly sauteed in a mixture of garlic flavored olive oil and butter until it was just rare. I warmed the beef on site. It goes without saying that we used an Oregon blue cheese that just happened to be named Crater Lake Blue. I hope you enjoy this sandwich as much as we do. Here's the recipe.

Blue Cheese Steak Sandwich
...from the kitchen of One Perfect Bite
Ingredients:
1/3 cup crumbled blue cheese
1/3 cup mayonnaise
1 teaspoon Worcestershire sauce
1 teaspoon white wine vinegar
4 crusty hard rolls or bread of your choice, warm
1-1/2 pounds rare, thinly sliced steak
1 cup fresh arugula or watercress
1 cup bottled roasted red sweet pepper, drained and patted dry

Directions:
1) In a small bowl combine blue cheese, mayonnaise, Worcestershire sauce, and vinegar.
2) Spread one side of warm rolls with blue cheese mixture. Top each with an equal portion of arugula, roasted pepper and sliced steak. Yield: 4 sandwiches.

I'm linking this to Smiling Sally for her Blue Monday event.

Thursday, August 20, 2009

Sunrise and Sunset in Southeast Asia for Pink Saturday


The indescribably beautiful sunrise at Angkor Wat in Cambodia.


Sunset as seen from the temple mount above Luang Prabang in Laos.

They are being linked to Pink Saturday, sponsored by Beverly at Home Sweet the Sound.

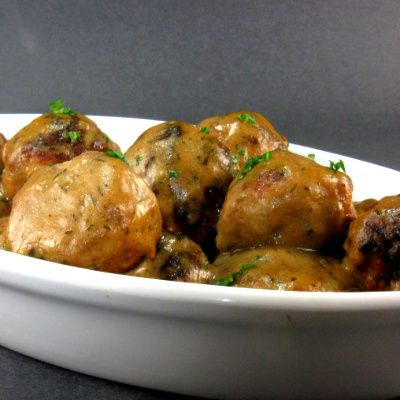
Swedish Meatballs - A Scandinavian Festival for Foodie Friday


Every year the folks in Junction City, Oregon, gather to celebrate their Scandinavian heritage. They throw quite a party. It's a four day celebration and visitors to the Scandinavian Festival never go home hungry. There's a day for Sweden, a day for Norway, a day for Finland and one for Denmark. Before we tour the fair and its food, I'd like to share a recipe for the best Swedish meatballs I've ever had. They are simple to make, but I guarantee they'll enhance your reputation as a cook. Additional pictures of the fair follow the recipe. Have fun and try not to eat too much.


Swedish Meatballs

Ingredients:
4 large eggs, slightly beaten
2 cups milk
1 cup packaged bread crumbs
4 tablespoons butter, divided use
1 cup very finely chopped onion
3 teaspoons salt + salt to taste
2 pounds 85% lean ground beef
1/2 pound ground pork
1-1/2 teaspoons dried dill weed, divided use
1/4 teaspoon allspice
1/4 teaspoon nutmeg
1/2 teaspoon cardamom
2 (10.5-oz.) can condensed beef broth, undiluted
1/3 cup flour
1/4 teaspoon freshly cracked pepper
1 cup light cream or half-and-half
Garnish: fresh dill or parsley

Directions:
1) Combine eggs, milk and bread crumbs in a medium bowl.
2) Place 2 tablespoons butter in a large skillet and saute until onion is soft, about 5 minutes.
3) Remove onions from skillet and add to crumb mixture with 3 teaspoons salt, beef, pork, 1/2 teaspoons dill weed, allspice, nutmeg and cardamom. Mix to combine (don't overdo this). Refrigerate, covered, until mixture can be shaped, about 1 hours.
4) Preheat oven to 325 degrees F. Shape meat mixture into 45 meatballs.
5) Heat reserved 2 tablespoons butter. Saute meatballs in batches until browned on all sides. Transfer to a large baking pan or roaster with 2-inch sides.
6) Pour off all but 1/4 cup pan drippings. Stir in flour and pepper. Slowly add beef broth and bring to a boil, stirring constantly. Add cream and reserved 1 teaspoon dill weed. Pour gravy over meatballs.
7) Bake, uncovered for 30 minutes. Garnish with fresh dill. Yield: 6 servings.

Recipe adapted from The New McCall's Cook Book


This recipe is being linked to Designs By Gollum - Foodie Friday

Wednesday, August 19, 2009

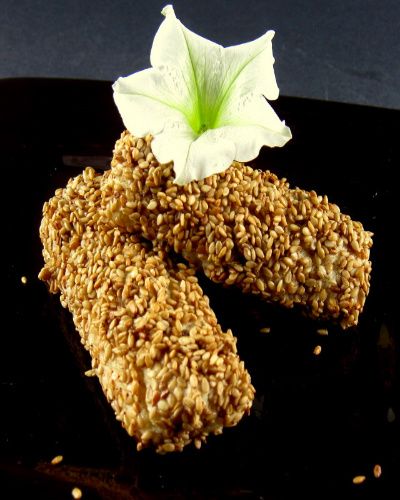
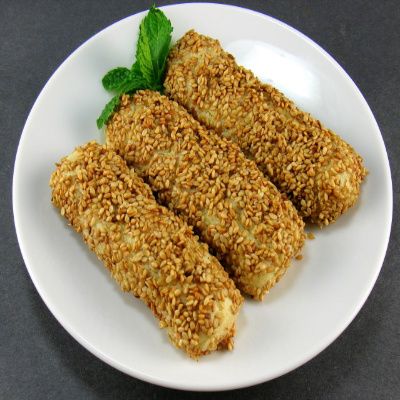
Biscotti Regina


From the kitchen of One Perfect Bite...If you like a not too sweet cookie with your coffee or tea, you'll enjoy this lovely treat that's reminiscent of the sesame seed cookies you'd get in an Italian bakery. The recipe belongs to Dan Smith and Steve McDonagh, who you probably remember from the first FNTV Next Food Network Star program. I happen to be a fan of theirs. Their food is "doable" but fancy enough to impress. I first tried this recipe because an over zealous shopping expedition left me with a surplus of sesame seeds and I wanted to use them before they spoiled. The recipe was quick and easy to assemble and I was so pleased with the results that I try to keep a supply of the cookies on hand for my own enjoyment. The cookies improve with age, so I like to make them a couple of days before I intend to serve them. I toast the sesame seeds used to roll the cookies in. I think it adds an additional layer of flavor. If you prefer a paler cookie don't toast them. Them store well in an airtight container. I hope you'll enjoy them too. Here's the recipe.

Biscotti Regina (Sesame Seed Cookies)...from the kitchen of One Perfect Bite courtesy of Dan Smith and Steve McDonagh

Ingredients:
4 cups all-purpose flour
1 tablespoon baking powder
1/2 teaspoon salt
2 sticks butter, at room temperature
1 cup sugar
3 large eggs
1 teaspoon vanilla extract
1 cup heavy cream
2 cups sesame seeds

Directions:
1) Preheat oven to 350 degrees F.
2) Combine flour, baking powder and salt in a small bowl and set aside.
3) Put butter and sugar into bowl of a mixer and cream until fluffy. Add eggs, one at a time while mixer is running and beat until smooth. Add vanilla and beat. Add e flour mixture and beat until well incorporated.
4) To form cookies, divide dough in half and roll into logs 1-inch in diameter. Cut logs into 3-inch lengths. Dip each piece of dough into cream and then roll in sesame seeds. Place cookies on a baking sheet and bake until golden brown, about 15 to 20 minutes. Let cool and serve. These will keep in an airtight container for up to 2 weeks. Yield : 30 cookies.

Tuesday, August 18, 2009

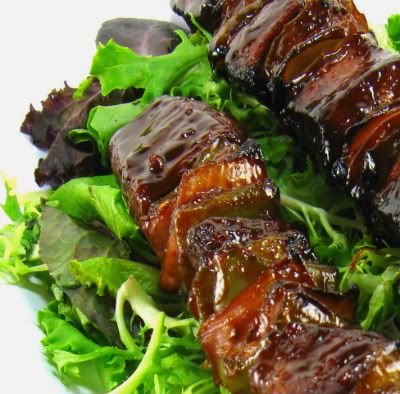
Kona Coffee Kebabs - The Kona Coast for Outdoor Wednesday


From the kitchen of One Perfect Bite...
Hawaii will steal your heart if you allow it to. Each of the islands has a special lure just waiting to ensnare the unsuspecting tourist. I suspect these islands are where the art of fusion cooking was first honed. Today's recipe uses native ingredients to produce a truly unique mop sauce for quick cooking kebabs or London broil. I've made a few changes to the recipe, but the original won third place honors for Bill and Lianne Magness at the Kona Coffee Cultural Festival a few years ago. As to my changes, I thought the lemon juice and mustard flavors were too bold. I substituted vinegar for the lemon and reduced the mustard by half. This is a very mellow sauce that will give gorgeous color to your meat. It's not necessary to slavishly follow ingredients for the kebabs. Use what you like to assemble them. This sauce will not work for chicken or pork, so don't be tempted. I think you'll love it for beef and I hope you'll enjoy the photos of the Kona coast. Here's the recipe.

Kona Coffee Kebabs...from the kitchen of One Perfect Bite

Ingredients:
Mop Sauce:
2 cups Kona coffee, strong brew
1 cup brown sugar
1 tablespoons honey mustard
1 tablespoons mustard
1 tablespoon Worcestershire sauce
1/3 cup apple cider vinegar
1/4 teaspoon hot pepper sauce
2 teaspoons minced garlic
1 teaspoon cornstarch
1/4 cup water
Kebabs:
2 pounds beef loin strips, cut in 1-inch cubes
2 red bell peppers, cut into 1-inch squares
1 red onion, cut into 1-inch squares
20 cherry tomatoes

Directions:
1) For Mop Sauce: Combine all of the ingredients, except cornstarch and water, in a saucepan and bring to a boil. Whisk together cornstarch and water in a small bowl to make a slurry. Add the slurry to the mixture and stir well. Bring back to boil and cook for 5 minutes. Let cool.
2) Combine beef and the toss with half of marinade. Refrigerate for 24 hours. Refrigerate remaining sauce for basting.
3) Preheat a grill. Skewer beef cubes, red bell peppers, red onion and cherry tomatoes. Skewer each item separately as cooking times vary. Barbecue over low heat, turning and basting with reserved mop sauce for 20 to 30 minutes or until done. Yield: 4 to 5 servings.


This recipe is being linked to Outdoor Wednesday, an event sponsored by Susan at A Southern Daydreamer.

Monday, August 17, 2009

Roasted Red Pepper and Sun-Dried Tomato Spread


From the kitchen of One Perfect Bite... Prepare yourselves. Memories of gnarled and ancient trees whose boughs are bent with gold and hillsides flaming in the glow of a setting Tuscan sun are about to be unleashed. Some call it a spread or dip. Others call it a sauce. Whatever you call it, this dish is so good that it's hard to grasp it can be made from a handful of ingredients in so little time. Strange, maybe, but undeniably true. Well-drained, oil-packed sun-dried tomatoes and roasted red peppers are thrown into a blender and spun to a puree that is thinned with a bit of olive oil and flavored with garlic and pepper flakes. That's it. It's served with flatbread or with pasta. Si mangia bene. Here's the recipe.

Roasted Red Pepper and Sun-Dried Tomato Spread
...from the kitchen of One Perfect Bite

Ingredients:

1 cup well-drained, coarsely chopped, roasted red bell peppers from a jar
3 tablespoons olive oil
1 large clove garlic, minced
1/2 teaspoon dried basil
1/4 to 1/2 teaspoons red pepper flakes
1 cup well-drained sun-dried tomatoes packed in olive oil and herbs

Directions:
1) Combine peppers,oliveoil,garlic, basil,red pepper flakes and tomatoes in the jar of a blender or food processor. Pulse or process until desired consistency is reached.
2) Transfer to a serving bowl and serve with flatbread or toss with hot pasta. Yield: 6 to 8 servings.

Sunday, August 16, 2009

Twice-Baked Blue Cheese Potatoes - Oregon Coast Views of Sea and Sky for Blue Monday


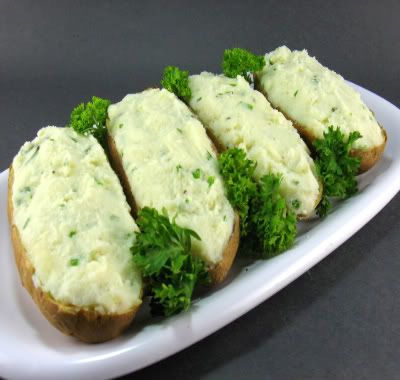
A very busy day with an early start to the Oregon coast required some advance preparation for dinner. I decided to use the blue cheese in the refrigerator to make double stuffed potatoes to pair with steaks I planned to grill. I chose the less expensive crumbles for this recipe. This recipe is about as healthy as one for double stuffed potatoes can get. Low-fat buttermilk replaces most of the butter and cream found in other recipes.


Potatoes assembled in the morning can be refrigerated or frozen for later use. This recipe can be doubled if desired.


Today our destination is a look-out post on one of the Oregon coast trails. The trail gradually ascends the headlands and as you can see the scenery is stunning.


This tower is a relic from WWII. The structure was used to provide shelter for submarine spotters during the war.


Today the shelter is used by folks who use its unique perch to view magnificent stretches of the Oregon coast line. On a clear day it really does seem you can see forever. If ever you hear folks speak of Oregon blue, this is what they mean. Isn't it gorgeous?

Twice-Baked Blue Cheese Potatoes...from the kitchen of One Perfect Bite

Ingredients:
4 (12-oz. each) baking potatoes
1-1/2 cups low-fat buttermilk
1/4 cup crumbled blue cheese
1/4 cup fresh chives, finely chopped
2 tablespoons butter
1-1/4 teaspoons salt
1/4 teaspoon freshly ground black pepper
4 slices bacon, cooked and crumbled

Directions:

1) Preheat oven to 375 degree F. Bake potatoes until tender, about 1 hour. Cool until cool enough to handle, about 10 minutes. Cut each potato in half lengthwise. Scoop pulp into a food mill or ricer and process. Place in a large bowl. Add buttermilk, blue cheese, chives, butter, salt, pepper and bacon; beat with a mixer just until blended. Do not over beat.
2) Spoon an equal portion of mixture into each shell. Arrange on a baking sheet; bake until thoroughly heated through, about 20 minutes. Potatoes can be made and refrigerated 48 hours before serving. An additional 5 minutes should be added to cooking time if potatoes have been chilled. Yield: 8 servings.

Recipe adapted from the CDKitchen.

I'm linking this to Smiling Sally for her Blue Monday event.

Shrimp Scampi with Cumin, Paprika and Sherry Vinegar


Zach, my grandson, has returned home full of enthusiasm and raring to treat his family to Lucullean delights. I received an email from my daughter yesterday with pictures of Zach making shrimp scampi. Not bad for an eleven year old! Other sites have guest bloggers. We have guest recipe testers. Zach, by the way, gives this recipe 2 very large thumbs up.

Shrimp Scampi...from the editors of Cook's Illustrated

Ingredients:
2 tablespoons extra virgin olive oil
2 pounds extra large shrimp (21 to 25 per pound) peeled and deveined
3 tablespoons unsalted butter
4 medium cloves garlic, minced or pressed through a garlic press
2 tablespoons juice from 1 lemon
1 tablespoon dry vermouth
2 tablespoons minced fresh parsley leaves
Pinch cayenne pepper
Salt and ground black pepper

Directions:

Heat 1 tablespoon of the oil in a 12-inch skillet over high heat until shimmering. Swirl to coat the pan bottom. Add half the shrimp and cook, stirring occasionally until opaque and just cooked through, about 2 minutes. Transfer the shrimp to a medium bowl. Repeat with the remaining oil and shrimp.

Return the now-empty skillet to medium-low heat. Melt 1 tablespoon of the butter in the pan. When the foaming subsides, add the garlic and cooking, stirring constantly until fragrant, about 30 seconds. Off the heat, ad the lemon juice and vermouth. Whisk in the remaining 2 tablespoons butter, add the parsley and cayenne, and season with salt and black pepper to taste. Return the shrimp and accumulated juices to the skillet. Toss to combine and serve immediately.

Variation: Shrimp Scampi with Cumin, Paprika and Sherry Vinegar

Follow the recipe for Shrimp Scampi, sautéing 1 teaspoon ground cumin and 2 teaspoons paprika with the garlic, substituting an equal amount of sherry vinegar for the lemon juice, and omitting the cayenne.

Source: The New Best Recipe: From the Editors of Cook's Illustrated

Thursday, August 13, 2009

Thai Lemon Grass Pork


From the kitchen of One Perfect Bite...This is one of the hundred or so dishes in my permanent recipe rotation. I've made it for years because it's fast, easy and a bit elegant. We had this at least once a month when I was working and it's still one of my go-to recipes when my world starts to wobble and threatens to leave orbit. The ingredients are no longer hard to find and you should be able to pick them up in a any well-stocked grocery store. In the unlikely event that you're in an outpost on the Sahara desert, you may feel the need to find a substitute for lemon grass. Many suggest the zest of one lemon mixed with several sprigs of cilantro will do the trick. Please don't be fooled. Lemon zest mixed with cilantro tastes like what it is and bares no resemblance to the real thing. While it won't hurt most recipes, it won't help them either. You can try frozen or reconstituted dried lemon grass, but they, too, are lacking in flavor. The closest I've come to an adequate substitute follows the recipe below, but because it requires forethought I don't use it often. If I don't have fresh lemon grass I usually bypass it and move on to the next ingredient. One drawback to this dish is the color of quickly cooked pork. It can, however, be overcome. Your meat will have better color if you sprinkle it with a quick-blending flour before browning. Served with quick cooking rice noodles, this makes a wonderful meal for the end of a hectic day.

Thai Lemon Grass Pork
...from the kitchen of One Perfect Bite

Ingredients:

1-1/2 pounds (2 small) pork tenderloin, trimmed
2 lemon grass stalks, finely chopped
4 scallions (white and tender green), thinly sliced
1 teaspoon salt
1/2 teaspoon black pepper corns, coarsely cracked
Quick-blending flour (optional)
2 tablespoons vegetable or peanut oil
3 cloves garlic, chopped
1/4 to 1/2 teaspoon red pepper flakes
1 teaspoon light brown sugar
2 tablespoons Thai fish sauce
2 tablespoons fresh lime juice
Black pepper to taste
1/4 cup toasted, unsalted peanuts, coarsely chopped
Cilantro for garnish

Directions:
1) Slice pork, crosswise, into 1-inch pieces. Place pork in a bowl with lemon grass, scallions, salt and crushed pepper corns. Toss to mix well. Cover with clear wrap; marinate for 30 minutes before continuing.
2) Remove pork and sprinkle medallions wit flour if using. Heat oil in a heavy bottomed skillet. When almost smoking, add pork and cook until lightly browned, 2 to 3 minutes per side.
3) Add garlic and pepper flakes; saute until garlic is fragrant, about 1 minute. Add sugar, fish sauce and lime juice. Continue cooking for 6 minutes more, turning once, until pork is done. Season with pepper to taste. Garnish with peanuts and coarsely torn cilantro. Yield: 4 to 6 servings.

Lemon Grass Substitute
6-8 mint leaves, finely chopped
2 teaspoons lime juice
1/4 teaspoon granulated sugar
1/4 teaspoon chopped fresh ginger

Squeeze lime juice in a bowl; add sugar and stir until dissolved. Add chopped ginger and finely chopped mint leaves. Mix well.

This recipe is being linked to Designs By Gollum - Foodie Friday

Shades of Pink in Southeast Asia

These images, all in pink, come from Southeast Asia. I hope you will enjoy them. They are being linked to Pink Saturday, sponsored by Beverly at Home Sweet the Sound.