Showing posts with label pie. Show all posts

Thursday, September 16, 2010

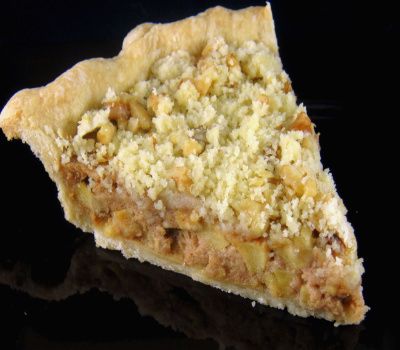
Mincemeat Tart with Apple annd Streusel Topping


From the kitchen of One Perfect Bite...It stands to reason that those who make and preserve mincemeat would have plans to use it. That's pretty much the case here, save for this one tart. I never plan to make it, but it always ends up on our table, You see, Bob and I are of two minds when it comes to desserts like this. He loves them and I don't. Don't get me wrong, I love mincemeat, but I have a barely sweet tooth and find this particular pie almost treacly in its sweetness. I snipped the recipe from Family Circle magazine some thirty years ago, but I suspect is roots are firmly planted in the kitchens of Mennonite and Amish communities. On reflection, it is very much like the Funeral Pie I featured here several months ago. Over the years, less and less mincemeat seems to make it into the jars that are sold for the holidays. There was a time when a jar could make a lovely 9-inch pie, but when you shave an ounce here and an ounce there, pies that are suppose to celebrate abundance get mighty stingy. I'm convinced that the apples and streusel that are piled onto this tart were devised to camouflage the scant amount of filling in the pie shell. The original recipe called for piling apples onto the mincemeat and then covering them with streusel. It was a bit of a mess to look at , so I decided to use spirals of overlapping apple slices and less of the streusel topping. It's still awfully sweet , too sweet for my tastes, but at least it looks more planned and festive. I use two, rather than the three, apples called for in the original recipe and I cut the streusel ingredients in half. Those among you who love mincemeat and highly sweetened desserts will love this tart. Here's the recipe.

Mincemeat Tart with Apples and Streusel Topping...from the kitchen of One Perfect Bite inspired by Family Circle magazine

Ingredients:
1 unbaked pastry shell for a 9-inch pie or tart pan
2 cups homemade or bottled mincemeat
2 apples, pared cored and thinly sliced
6 tablespoons granulated sugar
1 tablespoon lemon juice
1/4 cup all-purpose flour
1/4 cup firmly packed brown sugar
2 tablespoons butter

Directions:

1) Preheat oven to 425 degrees F. Line a pie or tart pan with pastry.
2) Spread mincemeat evenly in pie shell. Place apples in a medium bowl. Add lemon juice and granulated sugar and toss to coat. Spread in an overlapping pattern of concentric rings on top of mincemeat filling.
3) Combine flour and brown sugar in a small bowl. Cut in butter until coarse crumbs form. Sprinkle over apples.
4) Place pie or tart pan on a baking sheet to catch spills. Bake for 40 to 50 minutes. Yield: 6 to 8 servings.

You might also enjoy these recipes:
Mince Pies - The English Kitchen
Mincemeat Gingerbread - Cooking with K
Mincemeat - Felice in the Kitchen
Christmas Flavor Ice Cream - Antics of a Cycling Cook
Cranberry Port Mincemeat Brioche Rolls - What's for Lunch Honey?
Funeral Pie - One Perfect Bite
Green Tomato Mincemeat - One Perfect Bite

Thursday, September 9, 2010

Plum Tart with Streusel Topping


From the kitchen of One Perfect Bite...We do our green market loop every weekend when farm stands are open. The trail begins in the produce section of our Saturday Market and then heads past the city limits to farms, where we can actually measure the growth of food from one week to the next. The weekly run for provisions usually works well, but I occasionally find fruits and vegetables ganging up on me. This week I had to deal with surplus corn and plums before new stores could be brought in. I decided to use the plums to make a tart, and because I was using red and blue varieties of varying sweetness, I thought it best to use a streusel topping to assure they would not be too tart when baked. Even with that, you'll find this to be a just sweet tart and scheduling trumpet practice following dessert would be unwise. In order to proceed you will need pastry for a one crust pie. Homemade is, of course, best, but use whatever is easiest and most convenient for you. This dessert is about the plums, not the pastry. This is really easy to do and if you are fond of European desserts you'll love this tart tart. It is very juicy and I think it's best served warm. Here's the recipe.

Plum Tart wit Streusel Topping...from the kitchen of One Perfect Bite, inspired by The Cookworks

Ingredients:

Pastry for 1 9-inch tart or pie pan
8 large purple plums, pitted and thinly sliced
1/3 cup brown sugar
1 teaspoon ground cinnamon
Streusel Topping
1 cup all-purpose flour
1/3 cup sugar
1 teaspoon ground cinnamon
1/2 cup unsalted butter, cold

Directions:
1) Preheat oven to 425 degrees F. Line a pie or tart pan with pastry. Set aside.
2) Toss plums with brown sugar and cinnamon. Pile plum mixture into pastry shell.
3) Combine flour, sugar and cinnamon together in a bowl. Cut butter into flour mixture until it resembles cornmeal. Sprinkle streusel evenly over plums.
4) Bake for 20 minutes. Reduce oven temperature to 350 degrees F and bake for 20 minutes longer. Serve warm. Yield: 6 to 8 servings.

You might also enjoy these recipes:
Plum Jam with Ginger and Vanilla - Cotto e Crudo
Plum Honey - How I Cook
Plum Buckle - One Perfect Bite
Plum Custard Pie with Almond Crust
Cinnamon Streusel Plum Cake - My Kitchen in the Rockies
Double Crusted Plum Crisp - Two Peas and Their Pod
Plum and Raspberry Clafouti - Cafe Leilee

Thursday, May 27, 2010

Funeral Pie


From the kitchen of One Perfect Bite...One of the desserts that we considered for Bob's birthday was an Amish funeral pie. Bob was intrigued by its name and its resemblance to a mincemeat tart I serve for the holidays. Many of our friends are older than Bob and me, and I was not sure they'd appreciate being served something called a funeral pie at a birthday celebration. Bob, nonetheless, wanted to give it a try. After some negotiation, my inner diplomat successfully reasoned with his inner child and we deferred serving the pie until later in the week. The pie is traditionally served at funerals of Old Order Mennonites and Amish. It was served at so many funeral suppers that it was given the name "funeral pie." It became a favorite of Mennonite cooks because the ingredients were always available and the pie kept well. That meant it could be made a day or two before the funeral supper and freed hands for other tasks. The pie is not unpleasant, and if you love raisins or mincemeat I suspect you'll love it. One caution. It is very sweet. Susan, who writes The Well-Seasoned Chef, let us know that the pie is deliberately made cloyingly, almost painfully, sweet to allow mourners to forget, if only for a moment, the pain of their grief. If I make this again, I'll reduce the sugar by half. I would also make a lattice crust to improve its appearance. As you can see from the photo above, Bob enjoyed his pie as written. We have a Mennonite community in our area and I used a recipe given to me by one of their best bakers to make the pie. Here's the Smith family recipe.

Funeral Pie
...from the kitchen of One Perfect Bite, inspired by the cooks of the Smith family

Ingredients:
2 cups raisins
1 cup water
Finely grated zest of 1 large orange
1 cup orange juice
3/4 cup + 1 tablespoon granulated sugar, divided use
2 tablespoons cornstarch
3/4 teaspoon ground allspice
1/4 teaspoon freshly grated nutmeg
1 tablespoon lemon juice
1/2 cup chopped walnuts
1 egg, beaten
Pastry for 2 crust pie

Directions:
1) Preheat oven to 425 degrees F.
2) Combine raisins, water, orange zest and juice in a saucepan. Bring to a boil, reduce heat and simmer for 5 minutes.
3) Meanwhile, combine 3/4 cup sugar, cornstarch, allspice and nutmeg in a small bowl.
Stir slowly into raisin mixture. Cook, stirring constantly, until thickened, about 2 minutes. Remove pan from heat. Stir in lemon juice and walnuts.
4) Roll out half the pie dough on a lightly floured surface. Fit into an 8 or 9-inch pie pan. Pour filling into pie shell.
5) Roll out remaining pastry and place over pie. Seal and flute edges. Cut several slashes into top of pie to release steam. Brush with beaten egg and sprinkle with reserved tablespoon of sugar. Bake until golden, about 20 to 25 minutes. Serve warm. Yield: 8 servings.

You might also enjoy these recipes or information:
Sister Sarah's Apple Pudding - One Perfect Bite
Apple Butterscotch Grunt - Simply Annes
Shoo-Fly Pie - Not So Humble Pie
Old Order Mennonite Blog - Old Fashioned Net
Sweet Sorrow - Rosino Pie - The Well-Seasoned Chef

This recipe is being linked to:
Designs By Gollum - Foodie Friday

Saturday, May 15, 2010

Blueberry Glacé Pie - Blue Monday


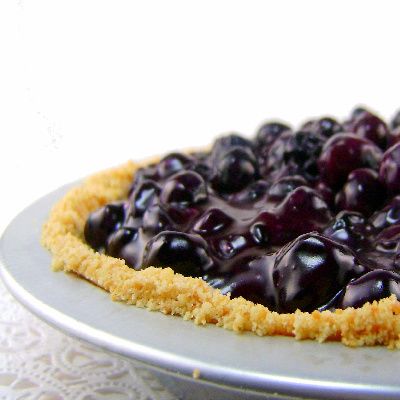
From the kitchen of One Perfect Bite...I am readying myself for a feast of epic proportions. Tomorrow is Bob's birthday and I've spent a good part of the day preparing for the celebration. Bob is a pie person, so, while there will be a token cake holding a passel of candles, the real emphasis will be on some of his favorite pies. The pie I'm featuring today has been around for quite awhile. Before image consultants took it uptown, it was called an icebox pie. For better or for worse, it's now referred to as a glacéd pie. Fortunately, it has remained easy to do and it's a wonderful recipe to have on hand for berry season. It is a pure berry tart and, unlike many icebox pies, this one has no custard filling. While I used a crumb crust for this occasion, short crusts are also wonderful with this tart. Be sure to use fresh berries when making this pie. Frozen berries exude too much liquid and will keep the filling from setting properly. Those of you who love fruit will love the zen-like simplicity of this pie. Here's the recipe.

Blueberry Glacé Pie...from the kitchen of One Perfect Bite

Ingredients:

1/2 to 3/4 cup sugar
2-1/2 tablespoons cornstarch
1/4 teaspoon salt
2/3 cup water
3 to 4 cups fresh blueberries
2 tablespoons unsalted butter
1-1/2 tablespoons fresh lemon juice
1-1/2 tablespoons orange liqueur
1 8 or 9-inch pastry shell, baked
Optional: whipped cream for garnish

Directions:
1) Combine sugar, cornstarch and salt in a saucepan. Whisk in water. Stir in 1 cup blueberries. Bring to a boil, stirring constantly, and cook until very thick, about 15 minutes. Remove from heat. Stir in butter, lemon juice and orange liqueur. Let cool.
2) Fold reserved blueberries into blueberry sauce. Refrigerate for 1 hour. When chilled, spoon into cooked pastry shell and refrigerate for 1 hour longer. Garnish with whipped cream if desired. Yield: 6-8 servings.

You might also enjoy these recipes:
Strawberry Glace Tart - One Perfect Bite
Chocolate and Hazelnut Pie with Vanilla Cream - One Perfect Bite
Apple Custard Pie with Streusel Topping

This post is being linked to:
Smiling Sally - Blue Monday

Wednesday, May 12, 2010

Greek-Style Yogurt Pie with Fruit Preserves


From the kitchen of One Perfect Bite...Tonight, out of an abundance of yogurt, I have yet another custard dessert to share with you. Not all stores in this area carry Greek yogurt, so, when it's available, I've been known to buy more than I really need and then end up scrambling to use it before it goes bad. This pie is an example of where my over exuberance in the dairy aisle leads. It's a Greek-style yogurt pie that, despite similar ingredients, is creamier and slightly sweeter than the yogurt pie we made and posted here a few days ago. It also has an interesting crust that is made from a mixture of white and whole wheat flour that is fortified with wheat germ. There are no berries in the pie but it is topped with a copious quantity of fruit preserves. You may prefer to use macerated fruit as a topping. You will find the pie needs the sweetness the fruit provides. While it is easy to make, there is significant wait time before the pie can be served. It's best to make the pie the night before you plan to serve it. It's worth the wait. Here's the recipe.

Greek-Style Yogurt Pie with Fruit Preserves
...from the kitchen of One Perfect Bite, courtesy of Kyra at TasteBook

Ingredients:
Crust
2/3 cup all-purpose flour
1/3 cup whole-wheat flour
3 tablespoons wheat germ
1/2 teaspoons salt
1/4 teaspoon ground cinnamon
1/2 cup (1 stick) unsalted butter, softened
1/3 cup packed light-brown sugar
Filling
2 cups whole-milk Greek yogurt
1 teaspoon vanilla extract
1/2 teaspoon finely grated lemon zest
1/4 cup unsalted butter, melted
4 large egg yolks
1 cup sugar
1/4 cup all-purpose flour
1/4 teaspoon salt
2 cups fruit preserves, such as plum or strawberry

Directions:

1) To make crust: Preheat oven to 350 degrees F. Place flours, wheat germ, salt, and cinnamon in food processor bowl. Process to combine. Add butter and sugar; process until dough holds together. Press crust mixture into bottom and up sides of a 9-inch pie plate. Freeze 15 minutes. Cover edge with foil. Bake until beginning to dry out, about 15 minutes. Transfer to a wire rack; let cool completely. (Leave oven on.)
2) To make custard: Stir yogurt, vanilla and zest in a bowl. Stir in butter and yolks. Stir sugar, flour, and salt in a bowl; stir into yogurt mixture until smooth. Pour into crust.
3) Bake, with foil covering edge of crust, until just set in center, 45 to 55 minutes. Transfer to a wire rack; let cool 1 hour. Spread jam over center of pie. Refrigerate at least 3 hours (up to overnight). Yield: 10 servings.

You might also enjoy these recipes:
Frozen Lemon Yogurt - One Perfect Bite
Yogurt Cheese Cake - One Perfect Bite>
Raspberry Yogurt Parfait - One Perfect Bite
Peach and Cream Fraiche (or Greek Yogurt Pie) - Smitten Kitchen
Yogurt Panna Cotta - Taste with the Eyes

Friday, May 7, 2010

Strawberry Yogurt Pie (Mansikkapiiras) - Pink Saturday


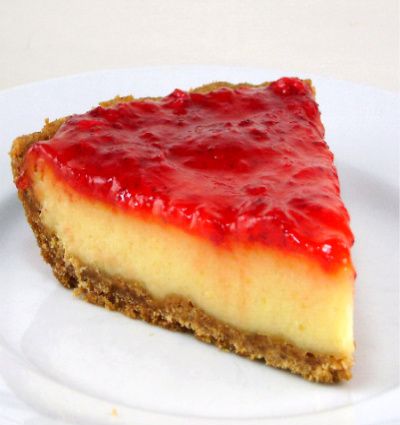
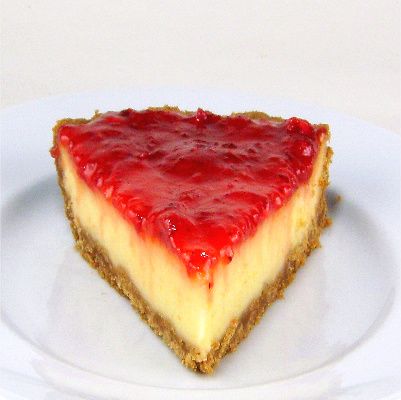
From the kitchen of One Perfect Bite...It's been a while since we've had a real "peasant" style dessert. While local berries won't be in markets for another six to eight weeks, the strawberries that are available to us are passably good. Years ago, I regularly made a dessert from Finland that used thick yogurt and blueberries to make a light custard pie called Mustikkapiiras. The custard filling covered a layer of berries that was baked in a cookie crust. It was light and not too sweet. The recipe I used came from the Moosewood Restaurant. I must admit I've played with this one. The recipe, as written, produced a scant amount of custard, so I've doubled the ingredients to produce a thicker layer of filling that gives this homely dessert more eye appeal. While any type of berry can be used, it's especially nice with seedless blackberries or strawberries. When strawberries replace blueberries, the Mustikkapiiras becomes a Mansikkapiiras. Here's the recipe I've adapted from the Moosewood original.

Strawberry Yogurt Pie...from the kitchen of One Perfect Bite, inspired by a recipe from Sunday at the Moosewood

Ingredients:
Crust
1/3 cup unsalted butter
1/4 cup granulated sugar
1 large egg
1 cup all-purpose flour
1/2 teaspoon baking powder
Custard (this portion of the recipe has been doubled)
4 large eggs
1/2 cup granulated sugar
2 cups thick Greek-style plain yogurt
2 tablespoons lemon juice
2 teaspoons pure vanilla extract
1 teaspoon almond extract
2 tablespoons cornstarch
Berries
2 cups sliced strawberries or other fresh berries

Directions:
1) To make crust: Butter and flour a 9-inch quiche pan with 1-1/2-inch sides. Preheat oven to 350 degrees. Using an electric mixer, cream butter and sugar. Add egg, and blend well. Combine flour and baking powder and sift into wet ingredients to form a soft dough. With flour dusted fingers, pat dough into bottom of prepared pan. Push dough up to cover sides of the pan. Refrigerate while making custard.
2) To make custard: Mix eggs, sugar, yogurt, lemon juice, vanilla extract, almond extract and cornstarch in a medium bowl. Beat until smooth. Place berries in bottom of pie shell. Pour in filling and smooth to coat berries. Bake for 50 - 60 minutes, until crust is browned and custard has set. Chill well before serving. Yield: 8 - 10 servings.

You might also enjoy these recipes:
Frozen Lemon Yogurt - One Perfect Bite
Yogurt Cheese Cake - One Perfect Bite
Raspberry Yogurt Parfait - One Perfect Bite

This post is being linked to:
Pink Saturday, sponsored by Beverly at How Sweet the Sound.

Friday, January 22, 2010

Chocolate Peppermint Pie - National Pie Day - Pink Saturday


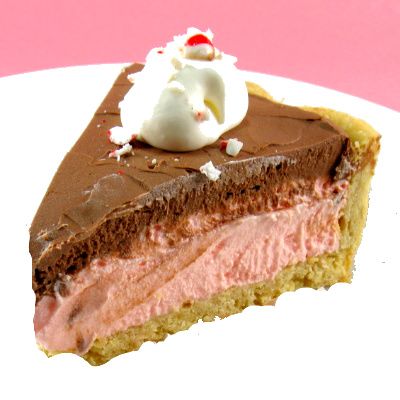
From the kitchen of One Perfect Bite...I've been looking for a new dessert to serve on Valentine's Day. While searching for recipes for National Pie Day, which coincidentally is today, I found this lovely Chocolate Peppermint Pie on the Wisconsin Milk Marketing Board web site. It would be perfect for Valentine's Day and I knew I had to try it. Any recipe that combines white and dark chocolate with peppermint and cream cheese gets my attention immediately. I must tell you I wasn't disappointed, but there are things I'd change the next time I make the pie. Forget the crust. It doesn't add much to the pie. Use a prepared chocolate crumb shell instead. It will add another layer of flavor and save a lot of time as well. I'd also make the pie 24 hours before I plan to serve it. If you look at my photo, you'll see that the layers "bled" together when the pie was sliced. I think that can be avoided with longer chilling. You might also want to add a touch of red food coloring as the crushed peppermint adds only a hint of color to the white chocolate layer. It's sinfully rich and very sweet, but it's a dessert meant for a special day, so, I gave myself absolution and will atone with an extra hour on the treadmill. I do hope you'll try it. The verdict of my tasters was "most excellent". Here's the recipe.

Chocolate Peppermint Pie...from the kitchen of One Perfect Bite courtesy of the Wisconsin Cheese Board

Ingredients:
Crust:
2 cups all-purpose flour
2 tablespoons powdered sugar
1 teaspoon salt
3/4 cup (1 1/2 sticks) cold butter, cut into 1/2-inch cubes
1 teaspoon vinegar
5 to 6 tablespoons ice water
Chocolate Peppermint Pie:
1/2 cup (1 stick) butter, softened
1 cup (8 ounces) cream cheese, softened
3/4 cup sugar
1/2 cup pasteurized egg product*
1/2 cup whipping cream
1 cup white chocolate chips, melted and cooled
1/2 cup (20) peppermint candies, crushed
1/2 cup semi-sweet chocolate chips, melted and cooled
1 9-inch baked pie crust (press-in or fancy), cooled
Optional garnish: sweetened whipped cream, crushed peppermint

Directions:
Pie Crust:
1) In a bowl, stir together flour, sugar and salt. Using a pastry blender, cut butter cubes into flour mixture until pieces are pea-size. Sprinkle vinegar over flour mixture, tossing with a fork. Sprinkle 5 to 6 tablespoons cold water, 1 tablespoon at a time, over flour mixture, tossing with a fork each time until dough is moistened and crumbly. Gather dough into a ball, flatten into a disk, wrap in plastic wrap and refrigerate at least 4 hours.
2) Preheat oven to 400ºF.
3) Roll dough into a 12-inch circle. Gently fold the crust into quarters, center over 9-inch pie plate and unfold. Ease crust into the plate. Trim pastry, leaving a 1-inch overhang beyond plate edge. Fold crust edge under and crimp or flute the edge using a fork or your fingers.
4) Prick pastry with a fork. Line bottom and up sides of crust with foil and add dried beans or pie weights. Bake for 15 minutes, remove foil. Bake an additional 10 to 15 minutes, until crust is golden. Remove to a wire rack; cool completely.
Filling:
5) In a bowl, beat butter, cream cheese and sugar together. Combine egg product and whipping cream in a separate bowl; gradually add to butter mixture while beating, scraping bowl often. Beat until light and fluffy, about 5 minutes. Reserve half of mixture in a small bowl. Add cooled white chocolate to remaining half of mixture; beat well. Stir in crushed candy. Spread in baked pie crust; chill 10 minutes.
6) Return reserved butter mixture to bowl, add cooled semi-sweet chocolate; beat well. Spread over white chocolate layer. Refrigerate at least 2 hours. Garnish and serve. Yield 8 servings.

*Note: Pasteurized egg products are available in the supermarket. The reason the recipe calls for this product is that the filling is not cooked, and there is a salmonella risk associated with eating raw eggs.

This post is being linked to:
Pink Saturday, sponsored by Beverly at How Sweet the Sound

Friday, October 16, 2009

Mile High Apple Pie with Cranberries - Pink Saturday


This is a wonderfully rosy pink pie that's perfect for the fall season. It can be made at other times of year without the cranberries. The apples in the pie will retain their shape as they bake, but they will be reduced in volume and there will be a void between the apples and the crust. If you prefer softer apples or don't care for the hollow, I urge you to partially cook them before they're placed in the pastry shell. I use Golden Delicious or Granny Smith apples to make the pie because they retain their shape and are not overly sweet. When I make the pie without cranberries I cut way back on the amount of sugar used in the filling, so the measurement for sugar that is shown in the recipe is variable. We serve this warm with really good vanilla ice cream. Here's the recipe.


Mile High Apple Pie with Cranberries
...from the kitchen of One Perfect Bite

Ingredients:
8 cups apples, pared, quartered, cored and thinly sliced
1 to 2 cups cranberries (optional)
1/3 to 3/4 cup firmly packed light brown sugar
1/3 to 3/4 cup granulated sugar
3 tablespoons cornstarch
1 teaspoon ground cinnamon
1/4 teaspoon ground mace
1/4 teaspoon ground nutmeg
2 tablespoons butter
Pastry for a 2 crust pie
Glaze:
1 egg yolk + 1 teaspoon milk

Directions:
1) Preheat oven to 425 degrees F.
2) Place apples and cranberries(if using) in a large bowl. Mix sugars, cornstarch, cinnamon, mace, nutmeg and salt in a small bowl to combine. Sprinkle mixture over apples and let sit until juices begin to form, about 15 minutes.
3) While apples rest, roll half of pastry to fit a 9-inch pie plate with 1/2-inch overhang. Roll remaining dough to form top crust for pie, folding into quarters.
4) Pile apple mixture into pastry. Dot with butter. Moisten edge of pastry with water. Place folded pastry on apples with point in the center. Unfold. Press edges together to seal. Flute. Make several holes or slits in crust to allow steam to escape.
5) Mix yolk with milk and brush top of pastry with mixture. Bake pie for 1 hour, or until crust is deep golden brown and juices are bubbling through slits. If crust browns too rapidly, cover with foil. Yield: 6 to 8 servings.

This post is being linked to Pink Saturday, sponsored by Beverly at How Sweet the Sound.

Thursday, October 15, 2009

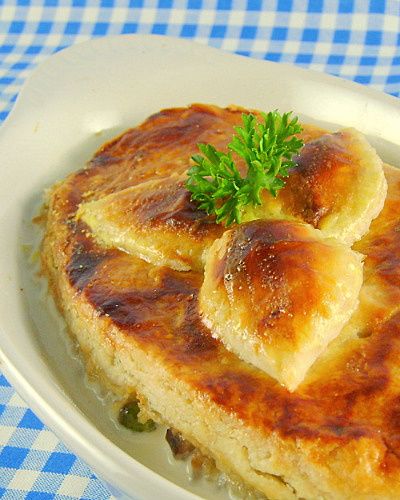
Chicken Pot Pie - Foodie Friday


I had a wonderful surprise yesterday. I learned that my Apple Custard Pie with Streusel Topping was being featured on Saveur's Best of the Web page and, that as a result, One Perfect Bite would be included in their "Sites We Love" list. My thanks to all of you for your support. Your daily visits and kind words helped make this happen. A group hug is in order.

The Coach House Restaurant in New York City closed in the late 90's, but during it's hay day some wonderful food could be had there. I was fortunate enough to get their recipe for Chicken Pot Pie before they closed their doors. It was a lunchtime favorite of mine and when I make pot pie at home, this is the recipe I use. It has, however, been simplified and deconstructed over the years. While purists will argue, I think the changes have made a wonderfully homey dish even better. The original recipe called for stewing a chicken to produce meat and stock for the pie. I've replaced the sometimes less than tender bird with poached chicken thighs or a deli-style chicken. I also use canned chicken broth and frozen vegetables to make quick work of required mise en place. The most noticeable change is the technique I use for the pastry that tops the pie. While I make my own pie crust, I hasten to add that ready-made crust or puff pastry can, of course, be used. I use the bottom of the dish or dishes in which I plan to bake the pie as a form to cut pastry that will fit over the filling without crimping the edges. I carefully move it to a baking sheet that's been covered with parchment or waxed paper and bake it until it's a deep golden brown and then set it aside. I make the sauce stove top, then add the chicken and vegetables and cook until everything is piping hot. It's then spooned into individual casseroles that are carefully topped with an already baked and crisp pastry crust. It goes back in the oven to assure everything is warm before it's served. Here are the recipe specifics.

Chicken Pot Pie
...from the kitchen of One Perfect Bite

Ingredients:
12 tablespoons butter
2/3 cup all-purpose flour
4 cups chicken broth
1 tablespoon fresh tarragon or parsley
Salt and pepper to taste
Pinch of nutmeg
Juice of 1/2 lemon
12 large white mushrooms, quartered
1 cup frozen diced peas and carrots, thawed and drained
1/2 cup frozen pearl onions, thawed
4 cups cooked chicken, shredded in spoon size chunks
Pastry for a two crust pie
1 egg yolk
1 tablespoon cream or milk

Directions:
1) Preheat oven to 400 degrees F. Line a baking sheet with parchment or waxed paper. Set aside.
2) Melt butter in a large, heavy bottomed sauce pan. Stir in flour; cook, stirring, over medium heat for 3 minutes, until bubbly but not brown. Gradually add chicken broth and cook stirring constantly until sauce thickens and bubbles. Add mushrooms, pearl onions and peas and carrots; simmer, stirring occasionally, for 10 minutes. Add chicken. Set aside.
3) Roll out pastry on a lightly floured surface to about 1/4-inch thickness. Use bottom of individual casseroles to cut pastry topping. Carefully move to prepared baking sheet. Mix egg yolk with cream or milk. Brush pastry with glaze. Bake for 20 to 25 minutes, or until a deep golden brown. Set aside. Reduce oven to 350 degrees F.
4) Spoon chicken mixture into 6 individual greased baking dishes. Carefully cover with pastry toppers. Bake for 20 minutes to warm or until sauce is bubbly. Serve hot. Yield: 6 servings.

This recipe is being linked to:
Designs By Gollum - Foodie Friday

Sunday, September 20, 2009

Half Moon Pies, Harvest Moon Pudding and Blue Moons for Blue Monday


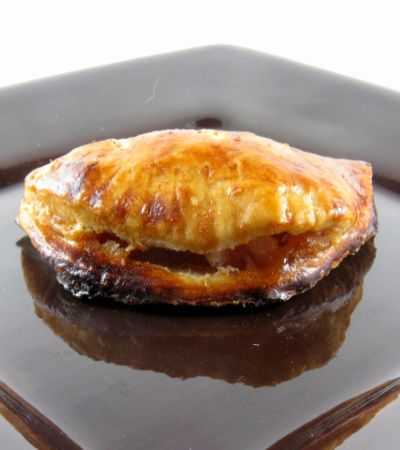
We're talking about moons today - real, imagined or edible. Be sure to see the blue moon following the recipes. The first recipe is for a half moon fruit pie and it's wonderful for picnics, tailgating or events that require you to tote your food. I use apples to make these, but peaches, pears or berries could also be used. This is an easy, straight forward recipe. No special skills or equipment is required. I opt to use Golden Delicious apples in nearly all recipes that call for apples. Feel free to substitute your favorite, but make sure to use one that keeps it shape as it cooks. I dice the apples because I find them easier to work with than slices. If you prefer slices, go for it. This recipe will make sixteen 4-inch or eight 6-inch hand pies. You can make your own pastry or use ready made pie crust or puff pastry. You will, however, need enough pastry for a two crust pie. If you don't want to bake off all the pies, they can be frozen and used as your fancy strikes. Let's get to it.


Half Moon Apple Pies

Ingredients:
Pastry for a two crust pie
1/3 cup granulated sugar
1/3 cup light or golden brown sugar
2 tablespoons cornstarch
1 teaspoon ground cinnamon
1/8 teaspoon nutmeg
1/8 teaspoon salt
4 large apples, peeled, cored and diced
2 teaspoons lemon juice
Glaze: 3 egg yolks + 3 teaspoons milk

Directions:
1) Preheat oven to 425 degrees F. Grease and flour a large baking sheet. Set aside.
2) Combine both sugars, cornstarch, cinnamon, nutmeg and salt in a small saucepan. Add apples and lemon juice; toss to coat. Bring to a boil over medium heat, stirring constantly. Reduce heat; simmer, uncovered, for 4 to 5 or until apples are tender, stirring often. Remove from the heat.
3) Divide pastry into two sections. Roll each as for a 9-inch pie. Using a 4 or 6-inch round cutter, cut dough into 4 or 6-inch circles. Using a tablespoon if for 4-inch pies or a 1/4 cup measure for 6-inch pies, spoon filling into center of circle. Moisten edges with water, fold in half and crimp with tines of a fork. Place on prepared baking sheet. In a small bowl, beat egg yolks with milk. Generously brush half moons with glaze.
4) Bake on center rack of oven for 20 to 25 minutes, or until deep golden brown. These are best if served warm. Yield: 8 to 16 servings.


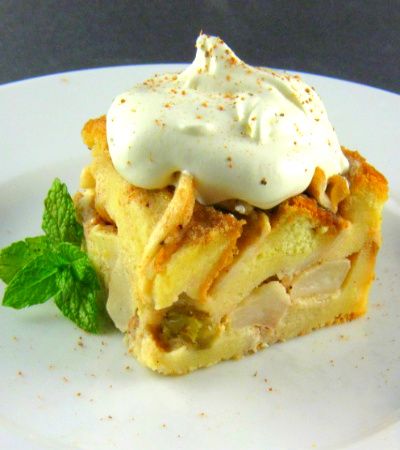
Bread pudding really lends itself to improvisation. This recipe is simple family fare. We have fancier versions to share with you as the holidays approach, but this is perfect everyday fare. I use Golden Delicious apples and any stale bread I happen to have in the house. This pudding was made with Texas toast. We, of course, serve it with a drizzle of caramel syrup and a dollop of cream or scoop of ice cream.


Harvest Moon Apple Pudding


Ingredients:
8 slices bread, crusts removed
4 Golden Delicious apples
1/2 cup golden raisins
1-1/3 cup milk
5 large eggs
3/4 cup brown sugar
1/4 cup (1/2 stick) butter, melted
1 teaspoon cinnamon
1/2 teaspoon nutmeg
1/4 teaspoon salt

Directions:
1) Heat oven to 350 degrees F. Lightly grease an 11-3/4 x 7-1/2-inch baking dish. Toast bread slices lightly and cut diagonally into quarters. Arrange a single layer of bread pieces in bottom of dish.
2) Core and slice 1 apple; reserve. Core and dice remaining apples. Spread diced apples evenly over bread in dish; sprinkle raisins on top. Arrange remaining bread in two lengthwise rows over diced apples and raisins. Place reserved apple sliced between rows of bread.
3) In large bowl, combine milk, eggs, 1/2 cup brown sugar, butter, cinnamon, nutmeg, and salt; beat until well combined. Pour over bread and fruit; sprinkle top with remaining brown sugar and bake 40 to 45 minutes or until firm. Serve warm or cold.
Yield: 10 servings.


Photo by Kostian Iftica, courtesy of NASA, taken on July 2, 2004.

In popular parlance, attributing something to a blue moon moon means that it seldom or rarely occurs. The moon shown in the photo above is blue because the photographer shot the image through a blue filter. Nonetheless, it was a blue moon and it is rare.

What is a blue moon? There are two definitions. The most recent says that a blue moon is the second full moon in a calendar month. This can occur every 2-1/2 years on average. The other, older, definition says a blue moon is the third moon in a season that has 4 full moons. This last definition is important to the ecclesiastical calendar, which needs to know when the 13th moon is going to occur in order to stay on track and determine such things as the date of Easter and Passover.

Are blue moons ever really blue? Probably not. The date of a full moon, all by itself, doesn't affect the moon's color, but volcanic activity can. Back in 1883 when the volcano Krakatoa exploded, the moon appeared to turn blue and stayed that way for years after the eruption. The particles in the ash cloud scattered particles in the visible light spectrum and allowed others to pass through, causing some objects to appear blue or green. More recently the eruptions of Mt. St. Helens and Mount Pinatubo have turned the moon blue as well. The key to having a blue moon is having lots of particles in the air that are slightly wider than the wavelength of red light. Volcanoes and forest fires can cause clouds that do that, so they can appear to be blue even if they're not. I don't want to get involved in the green cheese thing, so I'm going to move on. Hungry?


This post is being linked to Smiling Sally - Blue Monday

Thursday, September 17, 2009

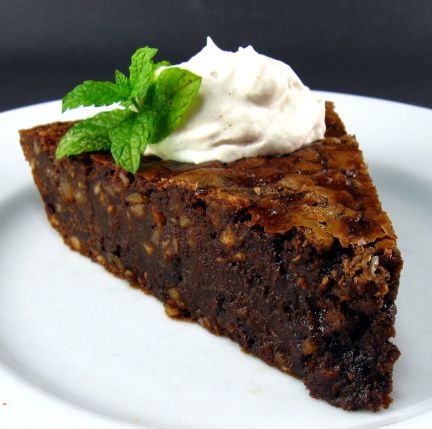
Chocolate and Hazelnut Pie with Vanilla Cream


I hope you're ready for a treat. This pie is chocolate, rich and decadent. It's also easy to make. As with all things chocolate, the better the poison the better pie. Spring for the best chocolate you can get your hands on. If you can't get hazelnuts use toasted almonds or pecans instead. Toasting the nuts, whatever type you use, is important because it really does improve their flavor. When the pie is taken from the oven it has the crackle crust of a brownie, but it's texture is more like a cross between a chocolate mousse and a brownie. It's almost a confection. Delicious doesn't begin to describe how good this really is. The recipe was developed by Giada De Laurentis who is an admitted chocolate addict and she has taken no shortcuts here. While the pie is simple to make there is a fairly significant wait time before it can be served. By my estimate, it takes 20 minutes to make but needs 3 hours to cool and chill. I suspect you'll like this one - a lot.

Hazelnut and Chocolate Pie...from the kitchen of One Perfect Bite

Ingredients:
Pie:
8 ounces semi-sweet chocolate chips
1 cup hazelnuts, skinned and toasted
1/4 cup all-purpose flour, plus more to dust the pie dish
3/4 cup sugar
1/4 cup hot water
4 eggs
1 stick butter, cut into 3/4-inch pieces, at room temperature, plus more to grease the pie dish
2 teaspoons vanilla extract
1/2 teaspoon ground cinnamon
Vanilla Cream:
1 cup heavy whipping cream
2 tablespoons powdered sugar
2 teaspoons vanilla extract
1/4 teaspoon ground cinnamon

Directions:

1) Position an oven rack in lower 1/3 of the oven and preheat to 350 degrees F.
2) Put 1/2 of chocolate chips, hazelnuts, and flour in bowl of a food processor. Pulse until hazelnuts are coarsely chopped. Pour hazelnut mixture into a small bowl and set aside. Combine remaining chocolate chips and sugar in food processor. Blend until mixture is finely ground. With machine running, gradually add hot water until chocolate is melted and mixture is smooth. Add eggs, butter, vanilla and cinnamon. Pulse until mixture is blended. Return hazelnut mixture to food processor and pulse to incorporate. Pour mixture into a buttered and floured 9-inch pie dish.
3) Bake for 35 minutes. Place pie on a cooling rack and cool for 1 hour. (Top may crack during cooling.) Refrigerate for 2 hours. (Pie can be made 1 day in advance and stored in the refrigerator). Allow pie to return to room temperature for 30 minutes before serving.
4) In a large mixing bowl, beat cream until it forms soft peaks. Add powdered sugar, vanilla, and cinnamon. Continue to beat until cream holds stiff peaks.
5) To serve, cut pie into slices and dollop with the vanilla cream. Yield: 8 servings.

This recipe is being linked to:
Designs By Gollum - Foodie Friday
My Toes are Claustrophobic

Monday, August 24, 2009

Apple Custard Pie with Streusel Topping


From the kitchen of One Perfect Bite...This is a lovely pie, don't get me wrong, but I sometimes think those of us who love food and cooking gild the lily. Most folks, when asked to name a typically American food, would choose apple pie. There are even some among us who believe that Abraham Lincoln, somewhere between the Emancipation Proclamation and the Gettysburg Address, first coined the phrase as "American as Apple Pie." Funny thing is that apples aren't native to the United States and "our" apple pie was popular in Europe centuries before it appeared here. Over time we became the world's largest apple producer and apple pie became associated with our life style and cuisine. Truth be told, hard cider was more popular than pie and was probably the reason our forefathers chose to grow so many apples. Somewhere, in some kitchen, someone with unused custard they didn't want to waste, decided that sugar, apples and cinnamon buried in a crust - called a coffin in merry old England - made too plain a dessert for a forward looking nation. So, they took the custard and poured it over the apples only to discover they had created another problem. The crust used to cover the apples made no sense with a custard filling. Fortunately, American ingenuity surfaced and deduced that a crumbly streusel with a gazillion calories would be a perfect topper for the pie. That's my take on how apple custard pie with streusel topping came to be. I hope you'll take it with a grain of salt. I use cheese custard and caramel syrup in my pie, so it's richer than some and a bit like apple cheesecake. The recipe is a prize winner and was developed by Shelby Thomas for the Georgia Apple Festival. If you have a sweet tooth or know and love someone with one that needs to be assuaged, you'll love this pie. If you're a purist, come back in September for my Mile-High Apple Pie..

Apple Custard Pie with Streusel Topping
...from the kitchen of One Perfect Bite

Ingredients:
1 9-inch pastry lined pie pan
1 (3-oz.) package cream cheese
1/4 cup caramel ice cream topping
1/4 cup granulated sugar
1 tablespoon all-purpose flour
1/2 to 1 teaspoon ground cinnamon
1 teaspoon vanilla extract
1/8 teaspoon salt
1 egg
2 cups diced apples (I use Golden Delicious or Granny Smith)
Streusel Topping:
1/3 cup golden brown sugar
1/3 cup all-purpose flour
1/4 cup butter
1/3 cup chopped pecans or walnuts

Directions:
1) Preheat oven to 400 degrees F.
2) Combine cheese, caramel topping, sugar, flour, cinnamon, vanilla and salt in a medium bowl and beat until a smooth batter is formed. Add the egg and beat until well-combined. Fold in apples. Pour into pastry lined pan.
3) Place on center rack in oven and bake for 20 minutes. Reduce heat to 350 degrees F. and bake for 10 minutes longer.
4) Meanwhile combine sugar, butter and flour in a small bowl. Cut ingredients together until crumbly. Stir in pecans.
5) Sprinkle topping evenly over top of pie. Bake until golden, about 15 to 20 minutes longer, for 15 to 20 minutes longer. Allow to cool slightly. Serve warm. Yield: 8 servings.

Monday, August 3, 2009

Rhubarb and Red Berry Pie


From the kitchen of One Perfect Bite...When the family gets together there are always requests for pie in various guises. This beauty is known to the gang as Daddy's Birthday Pie. It was Bob's favorite as a child and it was his choice for dessert on his birthday. This version of the pie won best of show at the National Pie Championship. It was created by Susan Gills. Everyone other than Bob swears they dislike it and refuse it when offered. I suspect that's not so because we have a mystery in my kitchen. Let's call it the case of the mysterious shrinking pie. When we went to bed last evening only two slices had been taken from the pie. When I pulled it out for dessert this evening less than a third of the pie remained. My family has a tendency to cut slivers of pie when they think they are unobserved and this pie had been slivered to death. Folks who like tart berry pies will love this rhubarb and red berry pie. It's incredibly easy to make, but you will need lead time, so plan to begin it the night before you intend to serve it. You can use ready-made pie crusts. I make my own but my pastry comes from a recipe on the back of a can of Crisco and it's as easy to make as the filling. Here's the recipe for the mysterious shrinking pie.

Rhubarb-Strawberry-Raspberry Pie
...from the kitchen of One Perfect Bite

Ingredients:
3/4 cup sugar
1/3 cup flour
1 cup fresh strawberry halves
1 cup fresh raspberries
2 cups rhubarb pieces, cut in 1/2-inch dice
1 tablespoon butter
1 teaspoon lemon juice
Pastry for a two crust pie

Directions:
1) Mix sugar and flour in a bowl. Add berries and rhubarb and mix well. Cover and refrigerate overnight.
2) Preheat oven to 400 degrees F.
3) Line a 9-inch pie pan with pastry. Pour berry mixture into pan, dot with butter and drizzle with lemon juice.
4) Cover top of pie with remaining pastry, crimping edges to seal and create a decorative border. Cut vents into pie and brush with milk.
5) Bake pie for 10 minutes. Reduce oven temp to 350 degrees F. and bake for 40 to 50 minutes longer, or until crust is golden brown.

Monday, December 29, 2008

Lemon Meringue Pie and Bushman

Photobucket

One Perfect Bite was meant to be a place where different recipes and stories lured you to the kitchen to try something new or make something old new again. I didn't want to repeat the old standbys you know so well. Why then am I proffering a lemon meringue pie? This one is exceptional and if you're partial to lemon desserts, you'll want to take a close look at this recipe. My first memory of lemon pie is the one made by my mother in the kitchen of our apartment on the top floor of the North Park Hotel. The folks who transferred my father to Chicago were responsible for our housing and WWII housing shortages forced them to rent the apartment while they looked for more suitable and permanent housing for our family. We weren't allowed to play in the lobby and the apartment was very small, so the hotel's location across the street from Lincoln Park Zoo was a blessing for us and a lifesaver for my mother. We had daily access to the park and to Bushman who was, at that time, the most famous gorilla in captivity. Mr. Robinson, Bushman's keeper, insisted he couldn't feed Bushman unless we were there. We believed him. We were there daily and once a month we'd return from the zoo and my mother would use what was left of her sugar ration to make a lemon meringue pie. This was no small accomplishment at a time when eggs were beaten with a rotary mixer and the kitchen literally had no counter space. Angel food cakes must have been wife killers! Mom would allow the pie to cool in a service cabinet that opened from the hall into the kitchen; it was, coincidentally, a great spot for hide-and-seek and the delivery of ice. While the pie cooled we got to lick meringue from the beater and then make bubbles in the sink by cranking its handle in the soap suds. Pie day will always be remembered with fondness and associated with happy times, including those with my buddy Bushman who is now an exhibit at the Field Museum. It seems he is doomed, like the pharaohs of old, to spend eternity on display. I think you'll like this pie. My version uses more lemon zest than most and putting the meringue onto a warm filling keeps it from weeping. My family has promised that next time they see a pie they'll ask before cutting. As it was, we came perilously close to having no pie to photograph. I hope you'll try this one. It really is delicious.

Lemon Meringue Pie

Ingredients:
1 unbaked 9-inch pie shell
2 cups sugar, divided use
1/2 cup cornstarch
1/2 teaspoon salt, divided use
2-1/2 cups water
4 eggs, separated
3 tablespoons butter
1 tablespoon grated lemon rind
1/2 cup lemon juice

Directions:
1) Preheat oven to 450 degrees F. Fit pie crust into a 9-inch pie pan. Prick shell all over with a fork. Weight crust to prevent bubbling. Bake for 15 minutes. Cool completely. Reduce oven temperature to 350 degrees F.
2) Place 1-1/2 cups sugar, cornstarch and 1/4 teaspoon salt in a large saucepan. Pour in water and stir with a wooden spoon. Cook over medium heat, stirring, until mixture thickens and bubbles. Cook for 1 minute. Remove from heat.
3) Lightly beat egg yolks. Slowly blend in 1/2 cup of hot cornstarch mixture; stir eggs mixture back into saucepan. Cook over low heat, stirring constantly, for 2 minutes. Remove from heat. Stir in butter, lemon zest and juice. Pour into pastry shell. Set aside.
4) Beat egg whites with reserved 1/4 teaspoon salt until foamy. Slowly add reserved 1/2 cup sugar, a tablespoon at a time, beating at high speed until stiff peaks are formed. Spread meringue on top of warm lemon filling. Bake until meringue is golden brown, about 15 minutes. Remove from oven. Let sit for 4 to 6 hours before serving. Yield: 6 to 8 servings.

Tuesday, November 25, 2008

Pumpkin Flan

Photobucket

A chance glimpse of a reflection showing my backfield in motion convinced me that the last thing I need this holiday is another piece of pie. This recipe is a compromise - I can enjoy a smooth and spicy custard sans some of the calories associated with a classic pumpkin pie. The flan is simple to do and it's only troublesome aspect is the caramel used to blanket it. If you overcook the caramel the flan will have a bitter taste that no amount of whipped cream can mask. We are looking for a syrup that is the color of dark honey rather than molasses. Unmold the flan just before serving. I know this adds some last minute drama to the meal, but if done too soon the flan will begin to absorb the caramel and you won't get the lovely aspect of caramel pouring out and around the flan. You also want to make sure your serving platter has a rim or well to catch the syrup as it runs. This is simple to do and it's a lovely addition to the holiday table. Enjoy!


Pumpkin Flan

Ingredients:
2 cups sugar, divided use
1 cup whole milk
12-ounces half-and-half, light cream or evaporated milk
5 large eggs
1/4 teaspoon salt
1 (15-ounce) can solid-pack pumpkin
2 tablespoons dark rum (optional)
2 teaspoons ground cinnamon
1 teaspoon ground ginger
1/4 teaspoon ground allspice
1/4 teaspoon ground nutmeg

Directions:
1) Preheat oven to 375 degrees F.
2) Heat a 2-quart souffle dish or round ceramic casserole in middle of oven.
3) Cook 1 cup sugar in a dry 2-quart heavy saucepan over moderately low heat, stirring slowly with a fork, until melted and pale golden. Cook caramel without stirring, swirling pan, until deep golden, about 5 minutes. Remove hot dish from oven and immediately pour caramel into it. Using potholders tilt dish to cover bottom and sides. Keep tilting until caramel cools enough to stay in place. Set aside. Lower oven temperature to 350 degrees F.
4) Scald milk and cream in a saucepan. Remove from heat. In a medium bowl, beat eggs and remaining cup sugar with an electric mixer until smooth and creamy. Beat in salt, pumpkin, rum, and spices. Strain milk mixture into pumpkin mixture , beating at low speed until combined.
5) Pour custard over caramel in dish and set in a water bath of 1-inch hot water. Put pan in middle of oven. Bake until golden brown on top and a knife inserted in center comes out clean, about 1 1/4 hours, possibly longer. Remove dish from water bath and transfer to a rack to cool. Chill flan, covered, until cold, at least 6 hours.
6) To unmold flan, dip bottom of dish briefly (20 to 30 seconds) in a warm water bath. Then, run a thin knife around flan to loosen from sides of dish. Wiggle dish from side to side and, when flan moves freely in dish, invert and turn onto a serving plate. Cut flan into wedges, spooning some caramel syrup over each portion. Yield: 8 to 10 servings.