Friday, November 28, 2008

Apple Kuchen

Photobucket

Photobucket

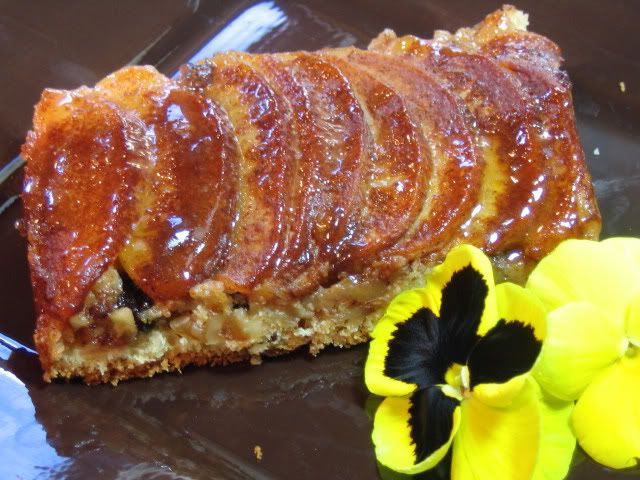
This is a lovely pastry to make for breakfast or snack. It's Viennese; not too sweet, but sweet enough to please most palates and, best of all, it makes people think you've fussed for them. Bob and I have this several times during the holiday season. We elbow crowds on Thanksgiving weekend, not to shop, but to watch the little ones visit Santa. Spirits so uplifted need nourishment and this pastry is our restorative. Bob helps with the apples, so this isn't as big a deal as it may look. We also serve this on New Year's Day along with Irish coffee and clotted cream while watching the Vienna Philharmonic's New Year's Day Concert. It's a lovely tradition; Viennese pastry to sustain the body and Strauss to free the soul and let the spirit soar. I do hope you'll try this.
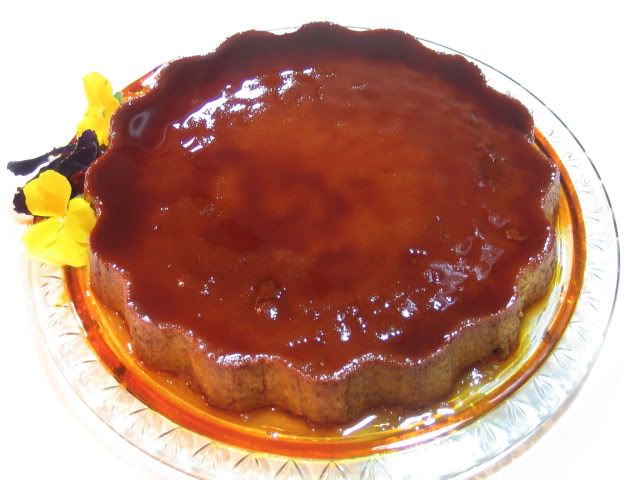
Apple Kuchen

Ingredients:
Cake:
1/3 cup raisins, light or dark
1-1/4 cups pastry or all-purpose flour
1-1/2 teaspoons baking powder
1/2 teaspoon salt
1/4 cup granulated sugar
1/4 cup unsalted butter (4 tablespoons)
1 large egg
1 teaspoon vanilla extract
3/4 cup toasted coarsely chopped walnuts
Topping:
4 large apples (i.e. Golden Delicious)
1/4 cup butter, melted
1/4 cup granulated sugar
1-1/2 teaspoons cinnamon
Glaze:
1/2 cup apricot preserves
2 tablespoons granulated sugar

Directions:
Cake:
1) Preheat oven to 400 degrees F. Spray a 9 x 13 x 2-inch pan with nonstick cooking spray. Set aside.
2) Place raisins in a microwave container with 1 tablespoon water. Cover; cook on HIGH power for 1 minute or until raisins are plumped. Set aside.
3) Place flour, baking powder, salt and sugar in a medium bowl and whisk to combine. Cut in butter until mixture resembles coarse crumbs.
4) Combine egg, milk and vanilla in a small bowl. Add to flour mixture, stirring only until dry ingredients are moistened.
5) Pat batter into prepared pan. Sprinkle top with raisins and nuts. Set aside.
Topping:
1) Peel, quarter and core apples. Cut each wedge into 6 thin pieces. Place apples, overlapping, in three rows on top of cake. Brush apple slices with melted butter. Mix sugar and cinnamon in a small bowl; sprinkle on top of apples.
2) Cover pan loosely with foil. Bake for 30 minutes. Remove foil. Bake for 5 minutes longer.
Glaze:
1) Strain apricot preserves to remove chunks of fruit. Place in a small pan with sugar. Bring to a boil and stir for 3 minutes. Remove from heat.
2) Brush glaze over surface of apples. Serve pastry while still warm: Yield: 8 to 10 pieces.

Cook's Note: This is best served warm and fresh. It does not age well.

Thursday, November 27, 2008

A Thanksgiving Story - Oregon Style


It looks like an ordinary working farm but something special happened here this past October. The farm manager, Roger Detering, with grace and goodwill, silenced the cynical curmudgeon I've been working to perfect and sidelined her for at least another year. More importantly, he treated the children and families of his community, many of whom are new to this country and don't have a lot of anything, to a month long Halloween party. Ice cream, apple crisp, balloons, pumpkins and hay rides - free every Saturday and Sunday to all who came. In past years the Deterings set aside one Saturday for their party. What you have to know is that this has been a rough year for Oregon farmers. They've had to deal with crop failures, poor yields and an economy that works against small farmers. In the midst of this Roger was quoted as saying "...there are more important things than money." And you know what? He walked the walk and put his money where his mouth was. I hope he got to see the absolute delight on the face of a tiny Hispanic girl, every bit as beautiful as she thought she was, prancing as Belle in a costume made, of course, by Mom or the Asian toddler dressed as a Power Ranger who hugged his balloon so hard it popped. I also hope he saw the families, some three generations deep, who sat at his tables enjoying each other's company and the generosity of the day. We often miss simple acts of kindness because we don't look hard enough to find them. There are probably thousands of Roger Deterings in this wonderful country of ours, but he's the one I know - the one who touched me - and I want to thank him, and by extension the others like him, for what he did. Blessings, Roger. Have a wonderful holiday.

Wednesday, November 26, 2008

Ravioli with Cream, Bay Leaf and Sage

Photobucket

This is another wonderful recipe from Patrica Wells. It's really simple to do. It falls into the category of assemble rather than cook; I relied on this often when I was working. The cream that naps the ravioli is infused with fresh bay leaves and the finished pasta is topped with fresh sage. That's all there is to it. I hope you'll enjoy this super, simple entree.

Ravioli With Cream, Bay Leaf and Sage

Ingredients:
1 cup heavy cream
6 bay leaves (fresh if possible)
Salt
1 pound fresh Cheese-filled ravioli
Large handful of fresh sage, rinsed and patted dry
Freshly ground black pepper

Directions:
1) In a large shallow skillet combine cream and bay leaves. Bring to a boil over high heat. Reduce the heat to very low and simmer gently for 3 to 4 minutes, to infuse the cream with the flavor of bay. Remove from the heat. Discard bay leaves.
2) Meanwhile, bring a large pot of water to a boil. Salt the water and add the ravioli and cook until just tender. Drain.
3) Add ravioli to cream mixture in skillet and toss to coat.
4) Divide pasta among 4 shallow serving bowls. Spoon any remaining cream sauce over pasta. Snip sage with scissors and sprinkle some on top of each serving. Sprinkle generously with pepper and serve immediately. Yield: 4 servings.

This is my entry for Presto Pasta Nights # 91 an event sponsored and created by Ruth at Once Upon a Feast. This weeks event is hosted by Daphne at More Than Words

Tuesday, November 25, 2008

Pumpkin Flan

Photobucket

A chance glimpse of a reflection showing my backfield in motion convinced me that the last thing I need this holiday is another piece of pie. This recipe is a compromise - I can enjoy a smooth and spicy custard sans some of the calories associated with a classic pumpkin pie. The flan is simple to do and it's only troublesome aspect is the caramel used to blanket it. If you overcook the caramel the flan will have a bitter taste that no amount of whipped cream can mask. We are looking for a syrup that is the color of dark honey rather than molasses. Unmold the flan just before serving. I know this adds some last minute drama to the meal, but if done too soon the flan will begin to absorb the caramel and you won't get the lovely aspect of caramel pouring out and around the flan. You also want to make sure your serving platter has a rim or well to catch the syrup as it runs. This is simple to do and it's a lovely addition to the holiday table. Enjoy!


Pumpkin Flan

Ingredients:
2 cups sugar, divided use
1 cup whole milk
12-ounces half-and-half, light cream or evaporated milk
5 large eggs
1/4 teaspoon salt
1 (15-ounce) can solid-pack pumpkin
2 tablespoons dark rum (optional)
2 teaspoons ground cinnamon
1 teaspoon ground ginger
1/4 teaspoon ground allspice
1/4 teaspoon ground nutmeg

Directions:
1) Preheat oven to 375 degrees F.
2) Heat a 2-quart souffle dish or round ceramic casserole in middle of oven.
3) Cook 1 cup sugar in a dry 2-quart heavy saucepan over moderately low heat, stirring slowly with a fork, until melted and pale golden. Cook caramel without stirring, swirling pan, until deep golden, about 5 minutes. Remove hot dish from oven and immediately pour caramel into it. Using potholders tilt dish to cover bottom and sides. Keep tilting until caramel cools enough to stay in place. Set aside. Lower oven temperature to 350 degrees F.
4) Scald milk and cream in a saucepan. Remove from heat. In a medium bowl, beat eggs and remaining cup sugar with an electric mixer until smooth and creamy. Beat in salt, pumpkin, rum, and spices. Strain milk mixture into pumpkin mixture , beating at low speed until combined.
5) Pour custard over caramel in dish and set in a water bath of 1-inch hot water. Put pan in middle of oven. Bake until golden brown on top and a knife inserted in center comes out clean, about 1 1/4 hours, possibly longer. Remove dish from water bath and transfer to a rack to cool. Chill flan, covered, until cold, at least 6 hours.
6) To unmold flan, dip bottom of dish briefly (20 to 30 seconds) in a warm water bath. Then, run a thin knife around flan to loosen from sides of dish. Wiggle dish from side to side and, when flan moves freely in dish, invert and turn onto a serving plate. Cut flan into wedges, spooning some caramel syrup over each portion. Yield: 8 to 10 servings.

Monday, November 24, 2008

Caramelized Corn Chowder

Photobucket

If you're looking for a new twist to an old favorite you'll love this caramelized version of corn chowder. While the recipe calls for frying corn until it begins to caramelize, the chowder was really named to grab your attention - I didn't think something called fried corn chowder would faze you. If you're still with me, it's wonderful by the cup as a Thanksgiving starter. It's better still by the bowlful on a damp winter night. It's easy to do and truly delicious, so build a fire, light the candles, uncork the wine and enjoy some chowder Oregon-style.


Caramelized Corn Chowder

Ingredients:
1 teaspoon canola or vegetable oil
6 slices slab bacon, diced
1 large onion, diced
4 teaspoons chopped garlic
2 tablespoons all-purpose flour
1 quart chicken stock
4 large Yukon gold potatoes, diced
1 cup heavy cream or half-and-half
1 to 2 teaspoons hot pepper sauce (i.e. Tabasco)
1 tablespoon chopped fresh basil
1 tablespoon butter
4 cups fresh corn (see cook's note regarding frozen corn)
1/4 teaspoon granulated sugar
Salt and pepper to taste
Garnish: chopped basil or parsley

Directions:
1) Heat oil in a 5 to 6-quart stockpot. Add bacon and cook until bacon is brown and crisp. Transfer to paper toweling. Set aside.
2) Add onion to pan and cook until onions are tender, about 5 minutes. Stir in garlic and cook until fragrant, about 1 minute. Blend in flour and cook until it begins to brown. Whisk in stock. Add potatoes and cook until tender, about 10 minutes. Add cream, hot pepper sauce to taste and basil. Keep warm.
3) Meanwhile, heat butter in a large skillet. Add the corn and sugar; stir to distribute sugar. Cook, without stirring, until underside is brown, about 4 minutes. Turn and cook until reverse side is brown, about 4 minutes longer.
4) Add corn and reserved bacon to soup. Adjust salt and pepper to taste. Simmer for 10 minutes. Garnish with parsley or basil. Yield: 6 generous servings.

Cook's Note: Thawed frozen corn may be used if patted dry.

Friday, November 21, 2008

Refrigerator Potato Rolls

Photobucket

This is a great recipe to have at the ready for holiday meals. Once the dough is made it sits in the refrigerator for one to three days. It's removed from the refrigerator and shaped into rolls about two hours before baking. I love to put these in the oven just before guests arrive. The aroma drives them absolutely insane. The shape the rolls take is up to you. Here's a link with suggestions and instructions for shaping dinner rolls. I should point out that this dough can also be used to make cinnamon rolls, so the same batch can do double duty and be served for breakfast and dinner. This is really simple to do. Enjoy!


Refrigerator Potato Rolls

Ingredients:
1-1/2 cups warm water
2 packages active dry yeast
1/2 cup granulated sugar
1 tablespoon kosher salt
1/2 cup instant, reconstituted warm mashed potatoes, prepared without butter and salt
2 large eggs, room temperature
1/2 cup butter, softened
6-1/2 cups all-purpose flour
Glaze: melted butter or egg wash (1 egg beaten with 2 tablespoons water)
Poppy or sesame seeds (optional)

Directions:
1) Pour warm water into a medium size bowl. Sprinkle yeast over water; add sugar and salt; stir to combine. Let sit until mixture begins to bubble, about 5 minutes.
2) Add eggs, soft butter, warm mashed potatoes and 3 cups flour. Beat with a portable mixer until just smooth. Using a wooden spoon, beat in 2 additional cups of flour until just mixed into dough. Add remaining 1-1/2 cups flour, using hands to mix dough until it's smooth and leaves the sides of bowl. Brush top with oil or melted butter. Cover with plastic wrap and let rise in refrigerator until doubled in bulk, about 2 hours. Punch down. Cover and return to refrigerator for one to three days, punching down once each day.
3) Remove dough from refrigerator 2 hours before serving. Punch down and shape rolls on a lightly floured board - clover leaf, fan-tans and pan rolls are the easiest to do, but you can use any shape you wish. Cover rolls with a towel; let rise until double in bulk, about 1 hour. Brush with butter or egg wash and seeds. Bake until golden, about 12 minutes. Serve warm if possible. Yield: 36 rolls.

Thursday, November 20, 2008

Spaghetti Marco Polo - A Chitalian Stir-Fry

Photobucket

This is a mongrel dish that refuses to be claimed by a specific cuisine; the ingredients are Italian but the cooking method is decidedly Chinese. Here's my bad... while on a train, my ears perked up when I heard folks talking food - actually I was eavesdropping - and while I didn't catch all the particulars I heard just enough to get the jist of this recipe and put it on my must try list. While I suspect the dish has its origins in Australia or New Zealand (these folks were Aussies), I'm going to call it Chitalian and let it go at that. You'll need a pasta with a slight bite, shrimp, and a tube of sun-dried tomato paste (not to be confused with concentrated tomato paste) to make this super fast and easy entree. Some basil and sun-dried tomato strips make a nice garnish. I've probably missed some ingredients, but based on what I heard this is it and it's so tasty I haven't tried to improve it. It's a wonderful family meal that's also good for casual entertaining. I think you'll enjoy this.

Spaghetti Marco Polo

Ingredients:
12-ounces Chinese style noodles or spaghetti
3 tablespoons olive oil, divided use
1 pound shrimp, shelled and deveined
1 to 2 teaspoons freshly minced garlic
3 to 4 tablespoons sun-dried tomato paste (supplier link)
Pasta water
Salt and pepper to taste
Garnish: fresh basil leaves, oil packed sun-dried strips

Directions:
1) Bring 4 quarts of salted water to a rolling boil. Cook pasta per package directions. Drain, reserving 1 cup pasta water.
2) Meanwhile, heat 2 tablespoons olive oil in a wok or large deep-sided frying pan. Add shrimp and stir-fry for 3 minutes. Add garlic and continue cooking until the shrimp turn pink, about 2 minutes longer.
3) Stir in 1 tablespoon sun-dried tomato paste. Toss to coat. Transfer to a bowl. Keep warm.
4) Add reserved 1 tablespoon oil to wok. Stir in remaining sun-dried tomato paste. Add noodles and toss to coat. Add pasta water, a tablespoon at a time, to form a glistening sauce. Return shrimp to pan; toss again to combine. Adjust salt and peppper to taste. Turn onto a serving plate. Garnish with basil and sun-dried tomato strips. Yield: 4 servings.

I'm sending this recipe on to Nilmandra of Soy and Pepper who is hosting Presto Pasta Nights , an event created by Ruth at Once Upon A Feast.

Wednesday, November 19, 2008

Chicken and Lemongrass Rissoles

Photobucket

This is a quick and easy family meal designed to please those looking to make something outside the pale for dinner. You'll need a few special ingredients (lemon grass and sweet chile sauce) but you should be able to find them in any large grocery store. The rissoles take 15 minutes to prepare and can be on the table in less than an hour. They can also be frozen prior to cooking and pulled from the freezer as needed. If you prefer a lightly colored rissole, scratch the sesame oil and use untoasted sesame seeds. It goes without saying that these are delicious deep fried - we, alas, no longer do that. Children like them, though, in the interest of complete transparency, I must say I watched in amazement as one of my Grandson's picked every single sesame seed from his rissole before going on to eat it and then repeated the procedure with two more. Go figure! Serve on a bun or, if you prefer, with rice or sesame noodles. Simple, quick and inexpensive. Highly recommended.

Chicken and Lemongrass Rissoles

Ingredients:
1-1/4 pounds ground chicken
1 cup panko bread crumbs
1/4 cup egg substitute
1-1/2 teaspoons salt
1/4 teaspoon freshly cracked pepper
1/4 cup Thai sweet chile sauce (i.e. Mae Ploy) + additional sauce to serve as a condiment
1/4 cup finely minced lemongrass
1 teaspoon minced garlic
1 tablespoon fresh orange zest
2 tablespoons chopped cilantro
1 cup toasted sesame seeds
2 tablespoons vegetable oil
1 tablespoon dark sesame oil
Garnish: lightly dressed greens, grape tomatoes, orange slice

Directions:
1) Preheat oven to 400 degrees F.
2) Combine chicken, panko, egg substitute, salt, pepper, chile sauce, lemongrass, garlic, orange zest an cilantro in a large bowl; mix just to combine. Divide the mixture into 8 equal portions (about 1/3 cup each) and shape into oval rissoles. spread sesame seed in a flat plan. Coat both sides of rissoles with sesame seeds.
3) Heat vegetable and sesame oil in a large nonstick saute pan. When oil begins to shimmer add rissoles to pan and cook for 2 minutes per side. Transfer to a large baking sheet and bake for 15 minutes.
4) Line a serving platter with lightly dressed greens. Top with rissoles. Scatter with grape tomatoes. Top with an orange wheel. Yield: 8 rissoles.

Tuesday, November 18, 2008

Wild Rice and Mushroom Soup

Photobucket

You are in for a treat if you hear the siren's song and actually try this recipe. Here in the Pacific Northwest we have access to some absolutely incredible ingredients; wild rice, grown locally in the Willamette Valley, and wild mushrooms, free for the picking in the BLM forests surrounding us, are among them. This is not your Mama's mushroom soup. The recipe was developed by Caprial Pence who has a unique ability to transfer the flavors of the Pacific Northwest from head to pot to table with deft surety. I have made a few changes to the recipe and I do want to add a caution for those who decide to make this. The caution - red wine; it can produce a soup with wonderful depth of flavor but the color leaves something to be desired. You might want to substitute a dry white wine for the red or simmer the mushrooms until the red wine has nearly disappeared. Pence uses a lot of wine in her recipes (it's another locally available ingredient) and she uses the good stuff. I'm a "two buck Chuck" gal (for cooking anyway), so I have to be a little more careful and make sure that the wine is reduced until nearly evaporated. I love to serve this with an endive salad and fresh bread on a rainy night. I justify it's extravagance with the argument that wild rice (actually a grain producing grass) is high in fiber, low in sugar and contains no saturated or trans fats. If I'm still feeling guilty I bolster my argument with its protein content - it contains up to 50% more protein than white rice. If you're poor as a church mouse and can't continence such extravagance, use brown rice and swap criminis for the wild mushrooms. You'll have an equally delicious and reasonable facsimile. Give this one a try!


Wild Rice and Mushroom Soup

Ingredients:
Rice:
2 teaspoons olive oil
2 cloves garlic, chopped
1 shallot, chopped
1 cup wild rice
3 cups chicken stock
Salt
Freshly ground black pepper
Mushroom Soup:
1 tablespoon olive oil
1 onion, diced
3 cloves garlic, chopped
3 cups sliced button mushrooms
3 cups sliced wild mushrooms
2 cups red wine
3 potatoes, peeled and diced
6 cups chicken stock
1 cup heavy whipping cream
1 tablespoon chopped fresh rosemary
2 teaspoons chopped fresh thyme
2 tablespoons dried mushroom powder (optional, see Cook's Note below)
2 teaspoons hot pepper sauce (i.e. Tabasco)
Salt
Freshly ground black pepper

Directions:
1) To prepare the rice, heat the oil in a saucepan over high heat. Add the garlic and shallot and sauté one minute. Add the rice and sauté 1 to 2 minutes. Add the stock and season to taste with salt and pepper. Cover, decrease the heat to medium-low, and simmer for 40 minutes, or until tender.
2) Heat the remainder of the olive oil in a stockpot over high heat until very hot. Add the onion and garlic and lightly sauté for about 2 minutes. Add the mushrooms and sauté until tender, about 5 minutes. Add the red wine and reduce until about 1/2 cup of liquid remains. Add the potatoes and stock and cook until the potatoes are very tender, 10 to 15 minutes.
3) Puree the soup with an immersion blender, or in batches in the bowl of a food processor or in a blender, and then return the soup to the stock pot. Add the cream, rosemary, and thyme and cook for about 15 minutes. Add the rice and hot pepper sauce and season to taste with salt and pepper. Makes 6 servings.

Cook's Note: To make mushroom powder, preheat oven to 275 degrees F. Spread the contents of a 1-1/2-ounce package of dried mushrooms (porcini if possible) on a baking sheet and bake in the oven until completely dried, about 12 minutes. Remove from the oven, let cool and grind in a spice mill until you have a fine powder. Store in a jar for up to six months.

Monday, November 17, 2008

Arroz con Pollo

Photobucket

Only serendipity can explain how this treasure made it from Latin America to my permanent recipe roster. About a decade ago I was asked to participate in a cooking demonstration for folks receiving food stamps. The dish, obviously, had to be inexpensive and easy to prepare, but I also wanted to come up with something that fell outside the pale of the usual "101 Ways to Cook" recipes. I was thumbing through an unfamiliar magazine looking for inspiration when I stumbled on this recipe by Sarah Jay. It is a no longer buried treasure, and that unfamiliar magazine went on to become a must read --- Fine Cooking. I've served this dish to friends and family for years now, and chances are if you've eaten at my table you've had this at least once. One caution - be sure to remove the skin from the chicken. While the bones help define the shape of chicken pieces, exposure to steam and stock will cause the skin to become limp and unappealing. Arroz con Pollo stole the show at the demonstration and it has remained a favorite of mine. All the ingredients are readily available and it is still inexpensive to prepare. I know you'll like this one. It's great family fare.

Arroz con Pollo

Ingredients:
2 tablespoons olive oil; more as needed
6 - 8 bone-in, skinless chicken thighs, liberally seasoned with salt and
pepper, then lightly dredged in flour
1/2 to 1 pound sweet Italian sausage, cut in 2-inch pieces
1 small onion, chopped
1 medium green or red bell pepper, cut in 1/2-inch dice
4 cloves garlic, minced
1 teaspoon ground cumin
1/4 teaspoon sweet smoked Spanish paprika(optional)
1/4 teaspoon chili powder
1/2 teaspoon ground turmeric
1/2 cup peeled, fresh or canned crushed tomatoes
1/2 cup dry white wine or beer (optional)
1 bay leaf
2 cups medium-grain rice
2-1/4 cups chicken stock or water

Directions:
1) Saute chicken in a large (12-inch) skillet until golden on all sides, about 7 to 10 minutes. Transfer chicken to a platter.
2) Saute sausage until browned, about 3 minutes. Transfer sausage to platter. Pour off and discard excess oil, leaving about 1 tablespoon in pan.
3) Saute onion, pepper, and garlic until softened, about 5 minutes. Return chicken and sausage to pan; add cumin, paprika (if using), chili powder, and turmeric, and cook for 1 minute, stirring to distribute spices. Add tomatoes, wine (if using), and bay leaf and cook for another 2 minutes.
4) Add rice and water. Bring to a boil, cover, and reduce the heat to a simmer. Cook until the rice is done and liquid is absorbed, about 25 minutes. Lightly toss mixture; let sit for 5 minutes before serving. Yield: 4 to 6 servings.

Friday, November 14, 2008

Two Potato Make-Aheads Plus Gravy

Photobucket

My kitchen is positioned in the center of our home. No walls separate it from the living or dining room (right click on photograph for an expanded view). I love the views, the bright and open space and the accessibility it gives me to visitors in our home. I'm not shy about cooking in front of others - truth be told, I'm a real ham - but there are certain dishes I like to prepare before my guests arrive so they can be spared the noise of appliances and the unsightly mess of dirty pans. Today's recipes are some of the make-aheads I prepare for our Thanksgiving dinner. I hope you'll be able to use them as well.

Make-Ahead Swedish Potato and Rutabaga Casserole

Photobucket

Ingredients:
2 pounds unpeeled Yukon Gold potatoes
2 tablespoon salt, divided use
1 pound rutabagas, peeled and cut in 1-inch cubes
1/4 cup all-purpose flour
2 large eggs, lightly beaten
1/2 cup half-and-half or whole milk
1 tablespoon softened butter
1/4 cup dried bread crumbs

Directions:

1) Place the potatoes in a large saucepan. Cover with water; add 1 tablespoon salt to pan. Bring to a boil and simmer for 20 to 25 minutes, or until potatoes are tender. Drain, peel and mash the potatoes.
2) Meanwhile, place rutabagas in another large pan. Cover with water; add 2 teaspoons salt. Bring to a boil and cook for 25 to 30 minutes, or until tender. Drain and mash; add to potatoes. Beat with an electric mixer until smooth and well combined. Add flour, eggs and milk. Beat until smooth. Taste for salt; adjust with reserved 1 teaspoon salt as required.
3) Butter a shallow 3-quart casserole. Spoon potatoes into casserole; dot with butter and sprinkle with bread crumbs. Cover with plastic wrap and refrigerate.
4) When ready to cook bring casserole to room temperature. Preheat oven to 350 degrees F. Bake, uncovered, for 1 hour or until very lightly browned. Yield: 12 servings.

Cook's Note: Potato casserole can be assembled the day before serving.

Make-Ahead Mashed Potatoes

Photobucket

Ingredients:
5 pounds waxy potatoes, peeled and cut in 1-inch cubes
Salt
1-1/2 cups reduced fat sour cream
5 tablespoons butter, divided use
1-1/2 teaspoons salt
1/2 teaspoon pepper
1/4 cup dried bread crumbs

Directions:
1) Place potatoes in a large pan. Cover with water; add 1 teaspoon salt per quart of water. Bring to a boil and cook for 20 to 25 minutes or until potatoes are tender. Drain. Put potatoes through a ricer and scape into a large bowl. Add sour cream, butter, salt and pepper. Beat with an electric mixer until light and fluffy. Adjust salt and pepper to taste.
2) Butter a 3-quart casserole; add potato mixture. Cover and refrigerate until ready to bake.
3) Bring casserole to room temperature. Preheat oven to 325 degree F. Bake, covered, for 1 hour. Toss breadcrumbs with reserved 1 tablespoon butter. Sprinkle over surface of potatoes. Bake, uncovered, for 30 minutes. Yield: 12 to 14 servings.

Cook's Note: Potatoes can be assembled the day before serving.

Make-Ahead Turkey Gravy

Photobucket

Ingredients:
4 turkey wings (about 3 pounds)
2 medium onions, peeled and quartered
1 cup water
8 cups chicken broth, divided use
3/4 cup chopped carrot
1/2 teaspoon dried thyme
3/4 cup flour
2 tablespoons butter
1/2 teaspoon ground black pepper

Directions:
1) Preheat oven to 400 degrees F. Arrange wings in a single layer in a large roasting pan. Scatter onions over wings. Roast, uncovered, for 1-1/4 hours, or until wings are brown.
2) Place wings and onions in a 5-to-6 quart pot. Pour water in roasting pan and stir, scraping up brown bits from bottom. Add to pot with wings and onions. Add 6 cups broth (refrigerate remaining 2 cups), carrot and thyme. Bring to a boil; reduce heat and simmer, uncovered, 1 1/2 hours.
3) Remove wings to cutting board. When cool, pull off skin and meat. Discard skin; save meat for another use.
4) Strain broth into a large container, pressing vegetables to extract as much liquid as possible. Discard vegetables; refrigerate broth and allow fat to rise to top. Skim off fat. Transfer broth to 3 quart pot and set on stove.
5) In a bowl, whisk flour into remaining 2 cups broth until blended and smooth. Bring broth in pot to a gentle boil. Whisk in broth-flour mixture and boil 3 to 4 minutes to thicken gravy and remove floury taste. Stir in butter and pepper. Serve or pour into containers; refrigerate up to 1 week or freeze up to 6 months. Yield: 8 cups.

Cook's Note: This recipe has appeared in Farm Journal and Woman's Day magazine.

Thursday, November 13, 2008

Stuffed Delicata Squash

Photobucket

Delicata is a thin-skinned winter squash with a nutty taste and fine grained texture. It's unusual within the squash family because its skin can be eaten. It's perfect for holiday meals and its small size make it a natural for stuffing. This rich version can be prepared early in the day and reheated just before serving. The nut stuffing sets it apart from ordinary fare and puts it in the category of harvest treat - perfect for Thanksgiving.

Stuffed Delicata Squash

Ingredients:
3 small Delicata squash
1-1/2 teaspoons salt, divided use
1 teaspoon freshly ground pepper, divided use
2 teaspoons olive oil + additional oil for drizzling
1/2 cup finely minced onion
1 cup finely diced celery
1 tablespoon freshly chopped garlic
1/2 cup dry sherry
3 stale, dry English muffins, cut in 1/4-inch dice
1 cup finely chopped toasted hazelnuts
1/2 cup finely chopped toasted pecans
1 teaspoon dried thyme
1/4 teaspoon dried sage
1/4 to 1/2 cup stock (vegetable or chicken)
2 large pasteurized eggs, lightly beaten

Directions:
1) Cut squash in half crosswise. Scoop out centers. Place in a large microwavable container. Drizzle with olive oil and sprinkle with 1 teaspoon salt and 1/2 teaspoon pepper. Place 2 teaspoons water in bottom of container; cover with a lid or parchment paper. Microwave on HIGH power for 5 to 7 minutes, or until squash is tender. Remove and let sit for 10 minutes.
2) Heat 2 tablespoons olive oil in a large saute pan until hot. Add onions and celery and saute until softened, about 3 minutes. Add garlic and saute until fragrant. Add sherry and cook until reduced by half. Set aside to cool. Add diced muffins, hazelnuts, pecans, thyme, sage, reserved 1/2 teaspoon salt and 1/2 teaspoon pepper; toss to combine. Stir in eggs and enough stock to bind mixture. Mix well. Spoon into squash cavities. Carefully transfer to an oven-to-table pan. Refrigerate until ready to proceed.
3) Preheat oven to 350 degrees F. If squash has been refrigerated, bring to room temperature. Bake for 30 minutes, or until stuffing is heated through. If you prefer the squash can also be finished in a microwave (5 minutes on HIGH). Yield: 6 servings.

Wednesday, November 12, 2008

Pumpkin Panna Cotta with Orange Caramel Sauce


I love Thanksgiving. We join hands with those we love and unloose from memory the spirit of those who once occupied chairs now empty at our table. We give thanks, we celebrate, we eat and, when you've lived as long as I have, you remember. We lived in a basement flat the first year we were married. Papa and Mama S. lived above us and while Papa embraced us quickly it took Mama a bit longer. Once that embrace occurred she was determined to pass on what she thought every girl should know - life, men and the world were all fair game. Mama's world was full of ghosts, border guards and fears held, just barely, at bay. I made the mistake, that first Thanksgiving, of sharing with her my desire to leave school. Oh, my! I have an ear for languages and dialect but I won't use either to color portraits of the people I've loved. It can, too, easily be seen as sport, so I'll share only the anglicized version of the advice I received from Mama S. In her world babies did not have babies, women wore all their jewelry all the time (as bankable as cash) and those fortunate enough to receive an education did not leave school because they were tired. The keystone of her argument..."assure your future lest you have to move your tent to another village." God bless her; that wise old survivor, whose tent had moved to many villages, predated the women's movement by a decade. All of this was said over the components of a custard the night before Thanksgiving. Mama made a pumpkin flan that was not to be believed, but the flan, unusual back then, is common now, so I thought I'd share this with you instead. Pumpkin custards --- made rich with cream, flavored with orange and spices, and stiffened with gelatin --- are served with a sauce of brown sugar, butter, and orange. It's an easy, elegant alternative to pumpkin pie, it's gorgeous to look at and the recipe can be doubled. What's not to like?

Pumpkin Panna Cotta with Orange Caramel Sauce


Ingredients:
1 cup cooked pumpkin puree or canned pumpkin
1/2 cup sugar
1 teaspoon ground cinnamon
1 teaspoon ground ginger
1/4 teaspoon ground mace
1/4 teaspoon ground nutmeg
1/8 teaspoon ground cloves
1/4 teaspoon salt
1-1/2 cups half-and-half, divided use
1 cup heavy cream
1 envelope unflavored gelatin
1 teaspoon vanilla
1 tablespoon freshly grated orange zest
1 cup sour cream
Orange Caramel Sauce
4 tablespoons butter or margarine
1/3 cup light brown sugar
1/4 cup orange juice
1 tablespoon freshly grated orange zest

Directions:
1) Grease six 6-ounce ramekins or custard cups with butter or vegetable spray. Set aside.
2) Process pumpkin puree, sugar, cinnamon, ginger, mace, nutmeg, cloves and salt in a food processor fitted with a metal blade for 1 minute. Add 1 cup of the half-and-half and process for 1 minute longer. Transfer the pumpkin mixture to a 3-quart heavy-bottomed saucepan. Whisk in 1 cup heavy cream and cook over medium-low heat until the mixture comes to the simmer. Cook for an additional 3 minutes, stirring occasionally. Remove from the heat.
3) Meanwhile, in a small microwave container, combine 1/2 cup half-and-half and the gelatin. Allow gelatin to soften for 2 to 3 minutes, then heat in a microwave about 30 seconds on high-power until the gelatin has dissolved. Add the gelatin to the pumpkin mixture along with the sour cream, vanilla and orange zest; mix well. Pour the mixture into prepared molds and refrigerate for at least 4 hours.
4) Shortly before serving, melt butter and brown sugar together in a small saucepan set over medium heat. Add the orange juice and simmer until the mixture is thick and smooth. Stir in the orange zest and set aside.
5) To serve, unmold and turn the panna cotta onto dessert plates. Drizzle with warm Orange Caramel Sauce. Yield: 6 servings.

Tuesday, November 11, 2008

Ohana Snack Cake

Photobucket

Ohana is a Hawaiian word that, roughly translated, means extended family; this cocoa, banana and macadamia nut cake is decidedly homely and perfect for gatherings of family and good friends. Bananas, macadamia nuts and small crops of cacoa, from the slopes of Hualalai Mountain, are indigenous to the big island of Hawaii and this cake makes perfect use of those ingredients. The cake is not Hawaiian but because the ingredients used to make it are and because it's designed to be served at simple gatherings of family and friends I named it an ohana cake. One of the elements of a green kitchen is the avoidance of waste; that's why I freeze overripe bananas. I use thawed, frozen bananas in this cake; if fresh, unblemished bananas are used you won't get the flavor that's needed here. The predominant flavor in this cake should be the banana, so please go with frozen, overripe bananas. You can swap any toasted nutmeat for the macadamias. Other hints...serve the cake warm. It begs for a dollop of cream or small scoop of ice cream. If you make the cake early in the day, warm it it the oven or microwave before serving. Warm makes a difference.

Ohana Snack Cake

Ingredients:
1-1/2 cups all-purpose flour
1/2 cup Dutch process cocoa
1 teaspoon baking powder
1 teaspoon baking soda
1/2 teaspoon salt
1-1/2 cups mashed ripe banana (preferably frozen, thawed)
1 cup milk
8 tablespoons unsalted butter, melted
2 large eggs
1 to 2 teaspoons vanilla extract
1 cup chopped, toasted macadamia nuts (walnuts or pecans may be substituted)
Confectioners' sugar

Directions:
1) Spray a 9-inch square cake pan with nonstick cooking spray. Preheat oven to 350 degrees F.
2) Sift flour, cocoa, baking powder, baking soda and salt into a large bowl. Stir in sugar and whisk to incorporate.
3) Combine bananas, milk, butter, eggs and vanilla in another large bowl. Mix well. Stir in flour until just combined. Stir in nuts.
4) Pour into prepared pan. Bake for 30 minutes, or until cake tester comes out clean. Remove from oven. Cool on a rack for 10 minutes. Unmold.
5) Warm cake before serving. Sprinkle top with confectioners' sugar. Cut into squares. Yield: 9 servings.

Monday, November 10, 2008

Valencian Chicken

Photobucket


I've been cooking for years and tried thousands of recipes - most just one time. Repeats are unusual and those that have endured the vagaries of time and trend number less than a hundred. This one is a survivor. It has been adapted, over time, from a Spanish recipe popularized by Annemarie Huste in the 70's. I love the meld of flavors that come from the orange-sherry, olive-raisin combinations in this dish. The raisins provide a hint of sweetness, the degree of which depends on the type of raisin used. I prefer Malaga, but California raisins will do nicely. A dubious bit of cooking lore to share with you - legend has it that the first raisin crop was the result of a heat wave so intense it dried grapes on the vine. Another fascinating fact, this one true - I've done repeated personal field testing so I can attest to its veracity - a raisin dropped in a glass of fresh champagne will bounce up and down continually from the bottom of the glass to the top and down again. Try it, you'll see I speak with an unforked tongue, plus it's a great excuse for champagne. I always plump raisins; they act as sponges in their dry state but if they're soused before cooking your sauces will be more predictable. The microwave has made short order of this task and can be used if your recipe does not give instructions for plumping. Simply put the raisins in a microwave container with 2 teaspoons of water and nuke, lightly covered, for 1 minute on HIGH power and you're done. Use a dry sherry and fresh orange juice to assemble the sauce for this entrée and you're on your way to a visually spectacular peasant feast. I know you'll enjoy this one.


Valencian Chicken

Ingredients:
1/2 cup Malaga or California raisins
1/2 cup Spanish pimento stuffed olives, quartered
1 teaspoon freshly grated orange zest
1 cup fresh orange juice strained to remove pulp
1 cup dry Spanish sherry
3 beef bouillon cubes
2 teaspoons minced garlic
3 teaspoons chopped cilantro
6 to 8 bone-in chicken thighs, skin removed
1/4 cup all-purpose flour
1 teaspoon kosher salt
1/2 teaspoon coarsely cracked black pepper
1 tablespoon + 1 teaspoon sweet smoked Spanish paprika (pimenton)
2 tablespoons olive oil
Garnish:
2 tablespoons toasted almond slivers
2 tablespoons pimento
1 tablespoon chopped cilantro
1 orange slice

Directions:
1) Combine raisins, olives, orange zest, juice, sherry, bouillon cubes and garlic in a medium saucepan. Bring to a simmer. Remove from heat. Set aside.
2) Combine flour, salt, pepper and 1 tablespoon paprika in a 1-gallon zip-top baggie. Shake to combine. Add chicken, a piece at a time, and shake to coat. Set aside.
3) Heat olive oil in a 12-inch nonstick skillet set over medium-high heat. When oil begins to shimmer add chicken and saute until brown, about 5 minutes per side. Transfer chicken to a plate. Stir in reserved 1 teaspoon paprika. Pour sauce into skillet; use a wooden spoon to release fond from bottom of pan. Return chicken to pan; bring sauce back to a simmer and cook, covered, over medium heat for 20 minutes, turning once to prevent sticking. Using a slotted spoon, transfer chicken to a serving platter; tent with foil to keep warm. Bring sauce to a boil and cook rapidly until it becomes syrupy. Spoon over chicken. Sprinkle with almonds, pimento and cilantro. Twist orange slice to form a wheel and place in center of platter. Yield: 4 to 6 servings.

Saturday, November 8, 2008

Shanghai Noodles

Photobucket

This dish is best made with a thick chewy noodle and finished with a generous sprinkling of white pepper. You can watch your noodles being made in the restaurants and kiosks of Shanghai - it's considered entertainment. Shanghai, an old city systematically leveled and then rebuilt to look old again, was especially welcoming to us this past May. We were in China during the May earthquake - let me quickly add that we were never in any danger and inconvenience was the only consequence we had to deal with. When the quake began we were on a train about 140 miles from the epicenter in Chengdu and, while we felt the tremor, we thought a bad patch of track had caused the violent shaking and brought the train to a stop. It wasn't until the army and local militia swarmed onto the rail beds that we had any idea that something was seriously wrong. We sat on the train for about six hours while they checked the tracks before allowing us to proceed to Xi'an. We continued our adventure but the almost European sophistication of Shanghai, the luxury of a bubble bath and a bowl of these steaming noodles was truly welcome when finally got there. These noodles are found everywhere in Shanghai. They have a warm, stick to your ribs quality that make them as comforting as Mom's chicken soup. They lack the heat of pepper and chile found in so many Chinese noodle dishes; the flavor comes, instead, from a perfect blend of oyster and soy sauce that binds tender pork and cabbage into an amalgam that warms the stomach and the heart. Chinese chefs have a unique way of cooking noodles. Water is brought to a boil, noodles are added, then cold water is added and the mixture is brought to a boil again. The procedure is repeated until the noodles are barely tender. The whole procedure takes about 3 minutes when using freshly prepared noodles. I'm not sure it improves the noodles but it's sure interesting to watch. I really shouldn't say that - anyone who has ever worked with fresh noodles knows how quickly they become paste; the addition of the cold water prevents that from happening. This is a great recipe - I hesitate to add that there as many recipes for Shanghai noodles as there are for Mom's chicken soup, so my rendering is just one of many in the pot. It's not expensive and it's easy to do.

Shanghai Noodles - Shanghai Mian
Ingredients:
1/4 cup tamari or soy sauce
2 tablespoons oyster sauce
1 tablespoon granulated sugar
1 tablespoon freshly grated ginger
12 ounces pork tenderloin, thinly sliced in strips
1 pound fresh Chinese style noodles or 1/2 pound dry pasta
3 tablespoons vegetable oil
4 cloves garlic, thinly sliced
2 green onions cut into 2-inch pieces then julienned
3 cups sliced Napa cabbage, white and green kept separate
2 teaspoons cornstarch
1/2 cup chicken stock
1 tablespoon dark sesame oil
White pepper to taste

Directions:
1) In a 1-quart bowl combine tamari, oyster sauce, sugar, ginger and pork. Toss to combine. Let sit for 10 minutes. Drain saving marinade.
2) Cook noodles per package instructions. Drain and set aside.
3) Heat vegetable oil in a wok or deep frying pan over high heat. Add pork and stir fry until lightly browned, about 1 minute. Transfer to a plate.
4) Add half the garlic slices and all the green onion and the white part of the cabbage. Stir fry until softened, about 30 seconds. Add the pork, reserved marinade and green portion of cabbage; stir fry until cabbage wilts, about 30 seconds.
5) Add noodles. Toss. Dissolve cornstarch in chicken stock and pour over noodles. Toss to coat noodles. Transfer to a serving platter.
6) Warm sesame oil in a small saucepan until smoking. Add reserved garlic and cook till fragrant. Pour over noodles. Season to taste with pepper. Yield: 4 servings.

I'm sending this recipe to Vanielje Kitchen who is hosting Presto Pasta Nights # 89.

Friday, November 7, 2008

Asian Bean Sprout Salad

Photobucket

Raw vegetables are rarely eaten in Asia. The greens that so delight us are considered fit for animal but not human consumption. For years raw vegetables were considered unsafe due to the type of fertilizers that were used, and, so, no tradition of eating salads ever developed. Even today green salads can only be found on buffet tables that cater to western and Israeli tourists. While not all vegetables are cooked, they are scalded or blanched before eating. The blanching destroys bacteria and enhances taste and color without destroying texture. Today blanched vegetables are lightly tossed with simple dressings and chilled just long enough for the dressing to impart flavor to the vegetables. The final product is an Asian salad and this recipe is one of my favorites. I love the crunch and flavor of the bean sprouts and the dressing is a wonderful palate cleanser. This is extremely easy to make, but don't skip blanching of the bean sprouts. I know you'll enjoy this.

Asian Bean Sprout Salad

Ingredients:

1 pound blanched bean sprouts (see cook's note)
1/2 cup thinly sliced green onions + 2 tablespoons sliced green onion tops, divided use
1/4 cup + 2 tablespoons drained pimento, divided use
1 teaspoon minced garlic
3 tablespoons sesame seeds
3 tablespoons rice wine vinegar
1 teaspoon kosher salt
3 tablespoon soy sauce
2 tablespoons vegetable oil

Directions:
1) Place bean sprouts, 1/2 cup green onion and 1/4 cup pimento in a medium bowl. Toss well to combine.
2) Place garlic, sesame seeds, vinegar, salt, soy sauce and oil in a small bowl.
3) Pour dressing over sprouts and chill for 1 hour or longer.
4) Line a platter with lettuce leaves. Using a slotted spoon, transfer bean sprouts to platter. Garnish with reserved 2 tablespoons pimento and 2 tablespoons green onion tops. Yield: 4 servings.

Cook's Note: To blanch bean sprouts, bring 6 quarts water to a rolling boil. Add bean sprouts, return to the boil and cook for 1 minute. Drain and plunge into cold water. Drain again before using.

Thursday, November 6, 2008

Thai Coconut Pancakes with Lime and Maple Syrup

Thai Coconut Pancakes

We're planning another trek. Bob and I'll be heading back to Asia in February - Thailand, Cambodia, Vietnam and Laos - and excited just begins to describe the way I feel. I'm getting restless again and my gypsy soul needs one last adventure to rein it in. I'm less rooted to place and things than most. What's important to me can be taken by the hand or tucked in the corners of memory to age like fine wine, so I have an open arms approach to the sights and sounds and tastes of unfamiliar places. I move and travel easily, am comfortable wherever I'm dropped and if Bob is with me I am home; it's been that way for nearly fifty years. I know that I've been blessed. As departure date approaches I moderate our diet so our palates will be ready for the street food of these countries. I gradually increase spice and heat and desserts, when we have them, become sweeter. With any luck we'll be set to eat our way through Asia like seasoned pros. These pancakes are sold by street vendors in Thailand as snacks, but they also make a great dessert for family and close friends. Maple syrup is not indigenous to Thailand, but how can you have pancakes without syrup? The maple-lime combination is one you don't want to miss. I use it here as a dessert sauce, but it can also be used in more savory dishes. One bite and your taste buds will be singing.

Thai Coconut Pancakes with Lime and Maple Syrup

Ingredients:
3/4 cups all-purpose flour
1/4 cup rice flour (cornstarch may be substituted)
1/2 teaspoon salt
1/4 cup granulated sugar
2/3 cup dried, unsweetened shredded coconut
1 large egg
1 to 1-1/2 cups coconut milk
Vegetable oil for frying
1/2 cup pure maple syrup
Zest and juice of 1 lime + additional zest and lime wedges for garnish

Directions:
1) Sift all-purpose flour, rice flour, sugar, and salt into a medium bowl. Stir in coconut. Make a well in the center. Place egg and 1 cup coconut milk in well; whisk until mixture forms a batter, using additional milk to thin to desired consistency.
2) Preheat an electric griddle to 350 to 375 degrees F. Brush griddle with oil. Using a 1/4 cup measure, scoop a scant 1/4 cup batter onto grill, Smooth surface with back of spoon and cook until bubbles appear on the surface. Turn and cook until other side is golden. Repeat. Keep warm.
3) Warm maple syrup, zest of 1 lime and 1 tablespoon fresh lime juice in a small sauce pan. Pour into a 1/2 cup pitcher.
4) Arrange pancakes on a serving platter. Drizzle lightly with syrup. Sprinkle additional lime zest over pancakes. Garnish with lime wedges. Pass remaining syrup at the table. Yield: 6 to 8 pancakes.

Wednesday, November 5, 2008

Living History


"Rosa sat so Martin could walk, Martin walked so Obama could run and Obama ran so our children can fly." - Jay-Z


Photobucket


I came across a thoughtful view of the election of 2008 written by Anna Quindlen. I thought that some of you might be interested in linking to the article Living History.

Tonkatsu

Photobucket

Click on photograph for full view of tonkatsu platter.

Tonkatsu, a Japanglish word that describes a western-style pork cutlet, is one of my all-time favorite foods. Ton is the Japanese word for pig and katsu loosely means cutlet. The Japanese call western-style Japanese dishes yohshoku. Before retirement I worked for a multinational company whose cafeteria had a section devoted to Japanese food, so I'm no stranger to yohshoku. Every tenth day tonkatsu would appear on the menu and I'd be at the head of the line to claim a portion before it wilted on the steam table. I don't make this often and because it's a rare treat I've made some changes to the recipe to guarantee that it will be moist and flavorful every single time it comes to my table. The secret is brining. The technique is not Japanese and while it lacks authenticity and adds time to preparation, it's worth the effort because it keeps the pork moist. Tonkatsu is traditionally served with plain, shredded cabbage and a commercial sauce. Plain cabbage is not appealing to all palates so I toss it with a light Asian dressing just before serving and, while I can buy tonkatsu sauce, I prefer to make my own. Panko may be trendy but it absolutely necessary for breading tonkatsu. Standard Italian-style bread crumbs just won't give the crunch that adds texture to this dish.

Tonkatsu

Ingredients:
Brine:
3 tablespoons kosher salt
3 tablespoons brown sugar
2 tablespoons vegetable oil
2 tablespoons rice wine vinegar
3 sprigs fresh rosemary
1 teaspoon freshly cracked black pepper
3 cups water
4 boned pork chops or cutlets, tenderized with a jaccard and pounded to 1/2-inch thickness
Cabbage Slaw:
1 small head Napa cabbage
1-1/2 tablespoons granulated sugar
2 tablespoons vegetable oil
1 teaspoon salt
1/2 teaspoon pepper
3 tablespoons rice wine vinegar
Tonkatsu Sauce:
2 tablespoons granulated sugar
2 tablespoons soy sauce
2 tablespoons Worcestershire sauce
2 tablespoons catsup
1 teaspoon salt
1/2 teaspoon pepper
1 cup all-purpose flour
2 large eggs, lightly beaten with 1 teaspoon cold water
1 to 2 cups panko
Peanut oil for deep frying

Directions:

1) To make brine, combine salt, brown sugar, oil, vinegar, rosemary, pepper and water in a small bowl; whisk until sugar is dissolved. Pour brine into a 1-gallon resealable plastic bag. Add pork and refrigerate for 6 to 24 hours before cooking.
2) To make slaw, finely shred cabbage. Set aside. Combine sugar, salad oil, salt, pepper and vinegar in a small bowl. Whisk to combine. Set aside.
3) To make tonkatsu sauce, combine sugar, soy sauce, Worcestershire sauce and catsup in a small bowl; whisk to combine. Set aside.
3) To prepare pork, remove from brine and pat dry. Preheat oil to 350 to 375 degrees F. Add salt and pepper to flour. Dust pork with flour, dip into beaten eggs, than into bread crumbs. Fry, two at a time, in at least 1-inch of oil, for 8 to 10 minutes, or until a deep golden brown. Drain on paper towelling.
4) To serve, toss cabbage with reserved dressing. Spoon a portion onto four individual plates. Top with a cutlet. Serve with tonkatsu sauce. Yield: 4 servings.

This entry is being sent to Wandering Chopsticks who is hosting the November Regional Recipes Round-Up Japan which is sponsored by Darlene at Blazing Hot Wok.

Tuesday, November 4, 2008

Baked Swedish Pancake - Breakfast

Photobucket

One more long day, then it's all over but the shouting. We're going to start the day with a substantial baked pancake that comes from Sweden. Pancake is really a misnomer; this is more like a baked custard or an Italian cheesecake sans cheese. I first made this years ago in an attempt to get extra calories and protein into the diet of an ill child. It's not terribly sweet, so I suggest you adjust the sugar to taste or serve it with macerated fruit or a fruit syrup. It's very easy to do. A cast-iron skillet is recommended and any type of berry can be used.

Baked Swedish Pancake

Ingredients:
2 tablespoons butter
2 cups all-purpose flour
1/3 cup granulated sugar
1 teaspoon salt
6 large eggs
4 cups milk
2 teaspoons vanilla extract
1 cup blueberries
Garnish: blueberries, powdered sugar

Directions:
1) Butter a cast iron skillet and place in oven. Preheat oven to 375 degrees F.
2) Place flour, sugar, salt, eggs, milk and vanilla extract in a 2 quart bowl. Beat with an electric mixer until combined. Fold in blueberries.
3) Pour batter into hot pan. Bake for 50 minutes or until center of pancake is set.
4) Remove from oven and let rest for 5 minutes. Serve warm with berries and syrup. Yield: 8 servings.

Cook's Note: Warmed jelly or jam makes an excellent syrup for the pancake.

Monday, November 3, 2008

Penne with Sausage and Peppers

Photobucket

On the day we delivered our youngest to her college dorm I dried my tears and made a promise to myself - I swore I'd never again sit in a moving vehicle with anyone who was under voting age. No more bickering or piercing music. No stray socks or eau de young athlete. Just Bach, van Morrison and me. I was, of course, infirm of purpose and as the grandbabies arrived I reneged. Well, I'm going to try the promise thing again. When the polls close tomorrow, I plan to swear off the telephone. You know how your right hip protrudes more than the left from hefting babies on that side? Well, my neck is beginning to skew right. For better or worse, I'm a political junkie and I've been on the phone - for 10 months now - trying to persuade folks to support my candidate. I am philosophically bound to the professor and while I admire the courage of the warrior I could not vote for him. I shared that and my reasons with all the folks I talked to. The best part of these past ten months has been the people, particularly the young people, I've met. I'm a product of the movements of the sixties; heady, special times when people felt empowered and believed they could change the world. And we did - a little - but the promise of that time was never fully realized and many of us were left with the feeling that our generation had the last of the wine. We were wrong. Something is happening; the air is charged and you can feel the static as the torch is finally passed to those who, hopefully, will finish the work that was left undone and take up that which has yet to be addressed. That whispered Yes We Can has become a roar, so, I'll be on the phone for two more days and because those with whom I share the phone bank have to eat I won't come empty handed. This casserole x 4 will feed the multitudes and make them smile. It's easy, cheap and delicious. Give it a try!


Penne with Sausage and Peppers

Ingredients:
1 tablespoon olive oil
1 pound sweet Italian sausage
1 cup thinly sliced onion
1 large red bell pepper cut in 1/2 x 2-inch strips
1 large yellow bell pepper cut in 1/2 x 2-inch strips
1 large green bell pepper cut in 1/2 x 2-inch strips
3 cloves minced garlic
1 can (15-oz.) Italian stewed tomatoes, pureed
1 teaspoon dried oregano
1 teaspoon dried fennel seed
Salt and pepper to taste
3 tablespoons kosher salt
1 pound penne
About 1 cup pasta water
Chopped parsley or basil

Directions:
1) Heat olive oil in a very large skillet until it shimmers. Add sausage and brown. Remove sausage and cut on the diagonal into 2-inch pieces. Return to skillet. Stir in onion and saute until softened, about 5 minutes. Add red, yellow and green peppers; cook until softened, about 5 minutes. Add garlic and cook for 1 minute longer or until fragrant. Add pureed stewed tomatoes , oregano, and fennel seeds. Bring to a simmer; cook for 15 minutes. Season with salt and pepper to taste. Keep warm.
2) Bring 6 quarts of water to a rolling boil in a large pot. Stir in 3 tablespoons salt and the penne. Cook until tender but firm, about 9 to 11 minutes. Drain the pasta, reserving 1 cup of the cooking water.
3) Add the pasta to the skillet containing the sausage and peppers. Toss to coat penne with sauce. If the pasta appears dry add pasta water, a tablespoon at a time, to create a smooth, clinging sauce. Garnish with chopped parsley or basil. Yield: 4 to 6 servings.

Saturday, November 1, 2008

Thai Sweet Chile Noodles

Photobucket

Today I'm moving from the Mediterranean to Southeast Asia for a delicious noodle dish. There are always noodles, in one guise or another, in my refrigerator. These mildly hot, orange-flavored Thai noodles are delicious and good as an accompaniment or a stand-alone meal. I especially like to serve them with plain grilled meat or chicken. They have the added advantage of being ridiculously easy to make. This recipe is based on one developed by the chef at Caprial's (Pence) Bistro. These are, in my opinion, best served at room temperature or slightly warm. These are worth a try and come highly recommended. They are table ready in 15 minutes.

I'm sending this recipe to Ruth at Once Upon A Feast who is hosting this week's Presto Pasta Night event.

Thai Sweet Chile Noodles

Ingredients:
12 ounces dried Chinese egg noodles or spaghetti
3 tablespoons kosher salt
1/2 cup peanut oil
3 cloves garlic, minced
1 tablespoon peeled, minced fresh ginger
1 orange, zested and juiced
1 teaspoon frozen orange juice concentrate, thawed (optional)
1/4 cup soy sauce
1/3 cup Thai sweet chile sauce (i.e. Mae Ploy)
Chopped scallions, red chiles and cilantro for garnish, optional

Directions:
1)In a stockpot over high heat, bring about 8 cups of water to a boil. Add salt and noodles; cook until al dente, 7 to 10 minutes. Drain well and place in large bowl. Set aside.
2. While noodles cook, whisk peanut oil, garlic, ginger, orange juice and zest, orange concentrate (if using), soy sauce and chile sauce in a small bowl. Pour the dressing over the noodles and toss well. Let sit at least 10 minutes before serving. Garnish with chopped scallions, chiles and cilantro, if using. Serves 4-6.