Friday, October 31, 2008

Challah

Photobucket

Photobucket

Click on pictures for a full view of the bread.

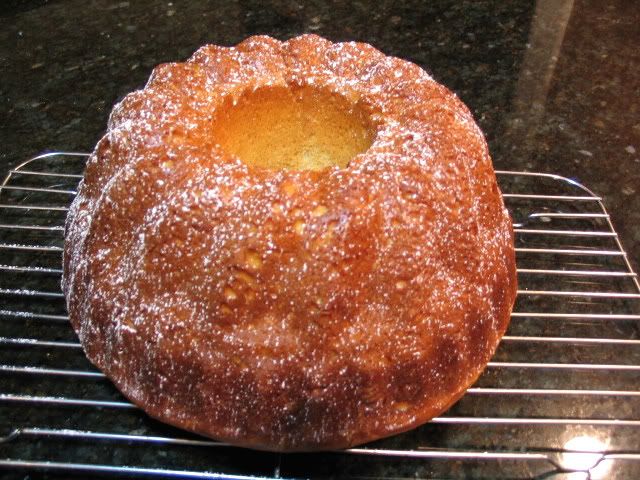
An intrepid group called
Bread Baking Babes holds a monthly baking event and, while I tried to resist, this month's recipe - a challah from The New York Times Bread and Soup Cookbook - had my name on it. I have an old dog-eared, almost spineless copy of the book and the early photos posted by BBB looked so beautiful I knew I had to participate. I decided to vary slightly from the recipe and use a six-braid technique that I had learned years ago. Everyone knows that once learned these techniques are never lost - it's like riding a bicycle, right? Not! That's why I was on the internet at a ridiculous hour searching for instructions to jog a fading memory. I fortunately found Braiding A Six Strand Challah and had so much fun braiding the first loaf that I decided not to braid the second. What could be easier than a brioche à tête? Again, drawing on an old technique, I proceeded as though I knew what I was doing. One hour later, looking much better than I hoped - I won't tell you where to look for the dropped strand in my loaf - the bread went into the oven and a wee bit later we had challah and brioche. While the brioche looked like a genetic accident, I was genuinely pleased with the challah. This is a wonderful recipe. The dough has a lovely, velvety feel and is very easy to work. The finished bread has a delightful, tight crumb with buttery flavor and a golden crust that offers a slight resistance to the bite. As an aside, I used Smart Balance Butter Blend Sticks in place of butter and it worked well. Next time I'll work on the brioche and, hopefully, come up with something a bit more comely. I'm thinking the addition of rum soaked raisins and toasted almonds would take the brioche to another level. If so, one recipe could produce challah, brioche and kugelhoph. The best part of making bread is that no matter how it looks you'll always have that wonderful aroma and something that can be eaten.

Sara of I Like To Cook is hosting this month's BBB event. Thanks Sara, this was a wonderful choice.

Challah
from The New York Times Bread and Soup Cookbook

Makes two loaves

5 1/2 to 6 1/2 cups flour, unsifted
3 TB sugar
1 1/2 tsp salt
1 package dry active yeast
1/2 cup butter or margarine, softened
pinch powdered saffron
1 cup warm water (120-130'F)
4 eggs, at room temperature
1 tsp cold water
1/2 tsp poppy seeds

Combine 1 1/4 cups of flour, the sugar, salt and yeast in a large bowl. Mix in the softened butter. Stir the saffron into the warm water until it dissolves. Add a little at a time to the flour mixture and blend thoroughly. Beat for 2 minutes with an electric mixer and medium speed, scraping the bowl occasionally. Separate the yolk and white of one egg. Blend the single egg white and the other 3 whole eggs into the batter. Reserve the single egg yolk. Stir 1/2 cup of flour into the batter and beat at high speed for 2 minutes, scraping the bowl occasionally. Blend in enough additional flour to make a soft dough. Knead the dough on a lightly floured board about 8 to 10 minutes or until it is smooth and elastic. Place the dough in a greased bowl, turning it once to grease the top. Cover and allow the dough to rise in a warm, draft free place until double in bulk (approximately one hour).

Flour a pastry board lightly and set the dough on it. Divide the dough into 2 equal portions. Divide each portion into 2 pieces, using 1/3 of the dough for one piece, and 2/3 of the dough for the other. Divide the large piece into 3 equal portions. Roll each of these into 12 inch ropes. Braid the ropes together tightly, using your fingers to press the dough together at the ends. Divide the smaller piece into 3 equal portions. Roll each of these into 10 inch ropes and braid tightly. Place the smaller braid on top of the larger one and seal the ends. Repeat this process to form the second loaf.

Place both braided loaves on a greased baking sheet. Mix the reserved single egg yolk with the 1 tsp of cold water and brush the top of the loaves with the mixture. Sprinkle with poppy seeds, and let the loaves rise until double in bulk in a warm draft free place (approximately one hour). Bake in a 400 degree oven for 20 to 25 minutes. Remove from the oven and let cool on wire racks.

Thursday, October 30, 2008

Sister Sarah's Apple Pudding

Photobucket

That final, transcendent scene of Places in the Heart always starts me thinking about how we all, in quiet ways, are touched and transformed by simple truths and the hands of those who form our better angels and teach us to forgive. A personal belief - the final me is a mix of all the people who have walked with me through the nearly seven decades of my life and my better angel, if she exists, is their creation. One of those who walked with me was Lilah. She grabbed my hand, held on tight and led me through rough patches as mental illness slowly claimed my Mother's life. Lilah was raised in a Mennonite community and while she attached a disclaimer to her past, the food of her childhood was never forgotten. Lilah gave Sister Sarah, an elder in her community, credit for this cake. I've made this cake for close to fifty years now, so, it's with a smiling sorrow that I must admit that this cake can no longer be credited to Sarah. There are just too many versions of it floating in cyberspace and Sarah didn't travel. Whatever its source, this cake is a delight and I still make it often because it is so simple. Lilah's version of Sarah's cake is a one pot wonder that requires a single bowl and a wooden spoon. I promise an original apple dessert next week, but, meanwhile, I hope you'll give this one a try.

Sister Sarah's Apple Pudding

Ingredients:
3 large eggs, room temperature
1 cup brown sugar
1 cup granulated white sugar
1 cup vegetable oil
2 teaspoon vanilla extract
2 teaspoons cinnamon
1 teaspoon mace
2 cups all-purpose flour
1 teaspoon baking powder
1/2 teaspoon salt
5 cups diced apples, cut in 1/4-inch pieces
1 cup toasted, chopped walnuts
Frosting:
3 tablespoons softened butter
6 tablespoons sour cream
3 cups confectioners' sugar

Directions:
1) Preheat oven to 350 degrees F. Grease and flour a 9 x 13 x 2-inch pan. Set aside.
2) Combine eggs, brown and white sugar, oil and vanilla in a large bowl. Beat with a wooden spoon until blended.
3) Sift flour, cinnamon, mace, baking soda and salt over the wet mixture. Mix well. Fold in apples and nuts. Bake for 50 to 60 minutes, or until cake tester inserted near center comes out clean. Cool for 15 minutes. Invert onto a rectangular serving plate.
4) Rinse bowl. Combine butter, sour cream and confectioners' sugar in bowl and beat with a wooden spoon until smooth. Spread over cooled cake. Refrigerate leftovers. Yield: 12 servings.

Wednesday, October 29, 2008

Crock-Pot: Mediterranean Pork Pot Au Feu

Mediterranean Pork Stew

Here's something out of the ordinary for crock-pot devotees - a pork pot au feu. This recipe is designed for busy cooks, but you'll have an even tastier meal if you brown the meat and onions before the caldron begins to bubble. Don't overcook - five to six hours is plenty. Add or subtract vegetables at will. I know you'll enjoy this one.

Mediterranean Pork Pot Au Feu

Ingredients:
2 tablespoons + 1 teaspoon extra virgin olive oil, divided use
1 cup chopped onion
1 tablespoon chopped garlic
3 to 4 pounds country-style pork ribs, cut crosswise in 1-1/2-inch pieces
One generous pinch each
...Cinnamon
...Black pepper
...Crushed rosemary
...Crushed thyme
1 to 2 tablespoons browning and seasoning sauce (i.e. Kitchen Bouquet)
1 tablespoon red wine vinegar
1 tablespoon Dijon mustard
1/3 cup dry white wine or dry vermouth
1/3 cup condensed chicken stock, undiluted
1 bay leaf
6 medium carrots, diagonally sliced at 1-1/2 inch intervals
1/2 cup frozen petite onions, thawed
4 tablespoons instant-blend flour
Garnish: chopped parsley

Directions:
1) Spray the interior of a 5-1/2 to 6 quart slow cooker with nonstick spray. Add onions and 1 teaspoon oil; toss to coat. Cover; microwave on HIGH power for 5 minutes. Add garlic; cook, covered, for 1 minute longer.
2) Place cinnamon, black pepper, rosemary, thyme, browning and seasoning sauce, and reserved 2 tablespoons olive oil in a medium bowl; whisk to combine. Add pork cubes and toss to coat. Transfer to slow cooker.
3) Place vinegar, mustard, wine and chicken stock in a bowl; whisk to combine. Pour over pork cubes.
4) Cover; cook on LOW for 5 or 6 hours (5 hours recommended). Add carrots last hour of cooking. Add onions last 20 minutes of cooking.
5) Remove pork and vegetables from slow cooker. Strain liquid into a two cup measure. Add water or stock to make 2 cups liquid. Pour into a saucepan. Bring to a simmer over high heat. Whisk in flour and continue cooking until sauce thickens. Adjust salt and pepper to taste. Pour sauce over meat and vegetables; toss to coat. Use a slotted spoon to transfer stew to a serving platter. Garnish with parsley. Pass extra sauce at table if desired. Yield: 6 to 8 servings.

Tuesday, October 28, 2008

Bavarian Hazelnut Cake

Photobucket

One of the glories of fall harvest is the profusion of nuts that come to market for the Halloween and Thanksgiving holidays. We are especially blessed in Oregon where walnuts and hazelnuts abound, and, fair or not, our farmer's markets provide more of both for less. Cathy, of Wives With Knives, is one of those hardworking vendors. Cathy operates the Bavarian Nut Company and has a wonderful assortment for the folks who frequent her booth at the Beaverton Farmer's Market. Stop by and see her if you can. Today's recipe - a childhood memory - comes from Hannie's kitchen. It's an exceptional snack cake and comes highly recommended. It will improve in flavor if allowed to "ripen" for a day before serving.


Bavarian Hazelnut Cake

Ingredients:
1 cup unsalted butter, room temperature
1 cup granulated sugar
3 large eggs, room temperature
1-3/4 cups all purpose flour, divided use
3/4 cup milk, room temperature
1 teaspoon hazelnut or vanilla extract
2 teaspoons baking powder
1 cup finely chopped, then toasted hazelnuts
Glaze:
8 ounces hazelnut spread (i.e. Nutella)
1/4 cup heavy cream

Directions:
1) Adjust rack to middle third of oven. Preheat oven to 375 degrees F. Lightly grease and flour a 8 x 11 x 2-inch baking pan or a 10-inch Bundt pan. Set aside.
2) In the bowl of a stand mixer fitted with a paddle attachment, cream butter and sugar. Add eggs, one at a time, mixing until batter is pale and lemon colored. Add 1 cup flour and stir to combine. Mix in milk and hazelnut or vanilla extract. The mixture will appear curdled. Combine baking powder, reserved 3/4 cup flour and toasted hazelnuts in a small bowl. Add to batter; mix until well-blended.
3) Scrape batter into prepared pan. If using an 8 x 11 x 2-inch pan bake for 35 minutes. If using a Bundt pan bake for 50 to 55 minutes. A cake tester inserted in the center of the cake should come out clean. Allow to cool for 10 minutes; invert and remove pan. Cool to room temperature.
4) Meanwhile combine hazelnut spread and cream in a small saucepan. Heat until hazelnut spread melts. Remove from heat and cool. Pour or spread over cake. Yield: 12 servings.

Monday, October 27, 2008

Warm Chanterelle Salad


Today was a nearly perfect day. Our destination - a grove of fir and hemlock in the headlands of the Oregon coast. Our goal - wild mushrooms. Poking through the duff beneath the trees were clumps of Chanterelles standing tall, inviting harvest. I won't speak of cheese or bread or wine or perfect pears shared with gulls as we perched on an ancient ledge above the edge of the world. The sight and scent of sea and the faint white noise of breaking waves only deepened the inner silence of the day. The hunt - a bonanza! A lug of Chanterelles for not a sou save labor. The first few pounds will become a favorite of mine - Warm Chanterelle Salad. Really fast. Really simple. Really good. Today was a nearly perfect day.


Warm Chanterelle Salad


Ingredients:

4 tablespoons unsalted butter

2 pounds Chanterelle or Crimini mushrooms, torn or cut in half

1/2 cup thinly sliced shallot or red onion

1 tablespoon chopped garlic

1 cup dry sherry

2 tablespoons sherry wine vinegar

2 tablespoon chopped fresh parsley

2 tablespoons drained, chopped pimento

1/2 teaspoon freshly cracked pepper

Coarse salt


Directions:.

1) Heat butter in a large skillet set over medium heat. Add mushrooms and saute until just tender, about 4 minutes. Stir in shallots and garlic and cook until fragrant, about 1 minute. Add sherry and cook until reduced to 1/4 cup, about 5 minutes. Remove pan from heat.

2) Add vinegar, parsley, pimento and pepper. Toss well. Season to taste with coarse salt. Transfer to a serving plate. Serve warm or at room temperature. Yield: 6 servings.

Saturday, October 25, 2008

Fusilli with Fennel, Sausage and Wine

Fusilli with Fennel, Sausage and Wine

Patricia Wells captures the soul of regional French cooking and transforms the ingredients of the French countryside into recipes that will work as well in your kitchen as they do in mine or hers. Here, she marries well-flavored sausage with a kiss of fennel and binds them together in a rich wine reduction that is tossed with pasta and a mixture of egg and cheese - carbonara style - just before it's served. The shimmering sauce clings to the pasta and your first bite reveals flavor that rarely comes from a sauce so spare and easy to prepare. Gather friends, uncork the wine and enjoy this simple pasta feast.Your evening will be memorable.

I've sent this recipe to Presto Pasta Nights sponsored by Ruth at Once Upon A Feast. This week's guest host is Melissa at The Cooking Diva.

Fusilli with Fennel, Sausage and Chianti

Ingredients:
1 tablespoon olive oil
1 pound sweet Italian sausage, casing removed, broken into small pieces
1 to 3 teaspoons fennel seeds
3 tablespoons concentrated tomato paste (from a tube)
2 cups Chianti or other dry red wine
2 eggs, at room temperature
1/4 cup freshly grated Parmigiano-Reggiano cheese
Freshly ground black pepper to taste
3 tablespoons kosher salt + salt to taste
1 pound dried fusilli or penne
About 1 cup pasta cooking water

Direction:
1) Heat olive oil in a very large skillet until it shimmers. Add sausage and brown. Stir in fennel seeds and tomato paste; blend well. Bring to a simmer; cook for 2 minutes to blend flavors. Add the wine; simmer, uncovered, until most of the wine cooks off, about 15 minutes. Taste for seasoning.
2) Place the eggs in a small bowl and whisk to blend. Whisk in the cheese and a generous grinding of pepper. Set aside.
3) Bring 6 quarts of water to a rolling boil in a large pot. Stir in 3 tablespoons salt and the fusilli. Cook until tender but firm, about 9 to 11 minutes. Drain the pasta, reserving 1 cup of the cooking water.
4) Add the pasta to the skillet containing the sausage meat. Toss to coat fusilli with sauce. Remove pan from heat. Pour in egg mixture. Working quickly, toss pasta with two forks to incorporate eggs and coat each piece of fusilli with the egg mixture. If the pasta appears dry add pasta water, a tablespoon at a time, to create a smooth, clinging sauce. Yield: 4 to 6 servings.

Friday, October 24, 2008

Caramelized Potatoes - Brunede Kartofler

Caramelized Potatoes

This is an unusual recipe. Potatoes are a staple of the Scandinavian diet and this caramelized version of new potatoes accompanies roast goose on the Christmas table. The potatoes also pair well with ham and pork. If you like yams or sweet potatoes, you'll like this novel dish. While the potatoes are traditionally peeled, I prefer to keep the skins on. This is simple and inexpensive to make and it's a great addition to a special meal.

Caramelized Potatoes - Brunede Kartofler

Ingredients:
2 pounds small Yukon Gold potatoes, washed and unpeeled
1/2 cup granulated sugar
8 tablespoons (1 stick) melted unsalted butter
Coarse salt
Parsley

Directions:
1) Put the potatoes in a pan and cover with heavily salted water. Bring to a boil and cook until just fork tender, about 10 to 15 minutes. Drain.
2) Melt sugar in a heavy skillet over low heat. Cook, stirring constantly, until the sugar turns light brown. Stir in melted butter. Add one layer of potatoes to pan; shake skillet to roll potatoes and coat all sides with caramel. Move potatoes to a heated platter and repeat procedure until all potatoes are coated. Sprinkle with coarse salt. Garnish with parsley. Yield: 8 servings.

Thursday, October 23, 2008

Blueberry and Lemon Batter Bread

Beaten Batter Bread

My maternal grandmother, Margaret, was a frequent letter writer whose expectations included a prompt response from her grandchildren. She stood proudly with the last of the Victorians and her letters were always proper, chatty and Aesop-like in their desire to instruct and uplift - there was always a message tucked into her lines that would make me stronger, smarter and better equipped to face the world. I adored her, so I had no problems with her hidden agenda, though there was one admonition that became the bane of my childhood. I was bragging - she would call it being prideful - and she thought I should know that "preening pigeons necks are broken fluffing feathers." God knows where that came from or even what it meant, but, having failed muster, I immediately stopped fluffing only to find the damage had been done. I was, thereafter, stuck with the nickname Pige. Her letters always began with "Pige, I had tea, toast and orange for breakfast this morning." I'm convinced that Grandma's days would have been brighter and her spine less rigid had her mornings been less Spartan. Today's batter bread would take her morning toast to a whole new level. This cake-like bread can be flavored with a lemon-blueberry or orange-cranberry combination; it's really simple to make, freezes well and toasts beautifully. She'd love it. So, here's to better breakfasts, special grandmas and preening powder pigeons......

Blueberry and Lemon Batter Bread

Ingredients:
1/2 cup sugar
Zest of 1 small lemon
1 cup milk
1/2 cup butter
1 scant tablespoon active dry yeast
2 tablespoons warm water
4 large eggs, well beaten
4-1/2 cups whole wheat pastry or unbleached flour
1 tablespoon salt
3/4 cup dried blueberries

Directions:
1) Grease a 10-inch tube or Bundt pan. Set aside.
2) Add lemon zest to sugar in a medium saucepan. Work with fingers or a fork to evenly distribute zest in sugar. Add butter and milk. Heat, stirring, until butter melts and sugar dissolves. Cool to lukewarm.
3) Sprinkle yeast over water. When softened add to milk mixture and let sit until frothy.
4) Pour milk mixture into a bowl. Add eggs, flour, salt and blueberries. Beat, by hand or with an electric mixer, until dough is smooth and shiny. Turn into a clean greased bowl and let rise until doubled, about 1 to 2 hours. Beat down and turn into prepared Bundt pan. Let rise again until doubled in volume, about 1 hour. Preheat oven to 375 degrees F.
5) Bake for 40 to 50 minutes, or until golden. Let rest 5 minutes. Remove from pan and continue cooling on a cake rack. Yield: 1 loaf.

Wednesday, October 22, 2008

Toasted Snowballs

Toasted Snowballs

This dessert was thrown together to mollify a sweet tooth - known internally to those of us who love him as he who must have candy. His craving for peanut brittle was urging a road trip that warred with common sense given the weather of the night. This sweet, neat treat kept him home. Since then I've kept a supply of this crumbly topping at the ready. It takes an ordinary scoop of ice cream to new levels and makes the simple special. Do try it!

Toasted Snowballs

Ingredients:
1 quart vanilla (preferably French vanilla) ice cream
1/4 cup light or golden brown sugar
2 cups uncooked old fashioned oatmeal
1/4 teaspoon salt
1/4 cup corn syrup

Directions:
1) Scoop ice cream into six balls. Place on a cookie sheet and freeze again until solid.
2) Melt butter in a large nonstick skillet. Stir in sugar and cook until mixture begins to bubble. Add oatmeal and salt; cook, stirring, over medium heat for ten minutes or until oatmeal is a deep golden brown. Remove from heat. Stir in corn syrup. Rinse a cookie sheet with cold water; shake off excess water but do not dry pan. Scrape oat mixture onto pan and smooth into a thin layer with a wooden spoon. Allow to cool. Break into coarse crumbs and put in a 1-gallon zip lock bag.
3) When ready to serve, add ice cream balls, one at a time, to bag and shake to coat with oatmeal topping. Transfer to dessert plates or bowls. Garnish with mint if desired. Yield: 6 servings.

Tuesday, October 21, 2008

Roast Pork with Raspberry Balsamic Glaze


I try to keep my kitchen free of gadgets or appliances that are rarely used. My resistance to bread machines, rice cookers, juicers and ice cream makers is based on limited space as well as my penny-pinching ways. Occasionally, I relent. My portable convection oven is a case in point. It has a home in my kitchen because it's an energy miser and keeps meat exceptionally moist as it roasts. I buy long, single loin pork roasts from a warehouse store in my area. I cut each loin into thirds. One section is cut into chops or cutlets and the other two are left whole to freeze as roasts. Pork, purchased this way, is still a bargain. Today's recipe is easy to do, can be cooked in a convection or conventional oven and produces a roast worthy of company. I think you'll enjoy it.

Roast Pork with Raspberry Balsamic Glaze

Ingredients:
Raspberry Balsamic Glaze:
1/4 cup balsamic vinegar
3 tablespoons seedless raspberry preserves
1/2 teaspoon Dijon mustard
1/2 teaspoon Sriracha or crushed chipotle in adobo
1 clove crushed garlic
Zest and juice of 1/2 an orange
Pork Loin:
1 center cut boneless pok loin (2-1/2 to 3 pounds)
1 tablespoon + 1 teaspoon olive oil, divided use
4 teaspoons coarse garlic salt
2 teaspoons coarsely cracked black pepper
2 teaspoons dried oregano

Directions:
1) Combine vinegar, raspberry preserves, mustard, Sriracha, garlic clove, orange zest and juice in a small microwavable bowl. Cook on HIGH power for 1 minute, or until preserves melt and sauce thickens.
2) Preheat convention oven to 325 degrees F. or preheat convection oven to 300 degrees F.
3) Using kitchen twine, tie pork loin at 1-inch intervals to form a cylinder of uniform circumference.
4) Combine garlic salt, pepper and oregano in a small bowl; toss to combine. Spread mixture on a work surface. Rub surface of meat with 1 teaspoon olive oil; roll in spice mixture.
5) Heat remaining 1 tablespoon olive oil in a large, heavy ovenproof skillet over high heat until oil begins to shimmer. Add pork; sear well, about 5 minutes per side, using tongs to roll meat until all surfaces are brown. Brush pork with glaze. Transfer skillet to oven and roast for 15 minutes. Brush again with glaze and roast for 20 minutes longer, or until pork reaches an internal temperature of 140 degrees F. Remove from oven. Brush again with glaze. Tent with foil; let sit for 10 minutes before slicing. Yield: 6 servings.

Cooks Note: Meat cooked in a portable convection oven should be removed from skillet and placed directly on the oven rack. It should be turned half way through cooking.

Monday, October 20, 2008

Swedish West Coast Salad

Photobucket

There was a time when villages did raise children. I lived in one on the south side of Chicago and the arteries that fed 83rd Street were lined with the homes of my other "moms" - Jewish, German, Swedish, Italian and Irish women - who helped my parents raise me. They would discipline, teach and bandage, then, cruel fate, drag you home for yet another round of reckoning. Housing shortages kept our neighborhood intact until the mid 50's, so I had an orchestra seat - front row center - for viewing families, traditions, and cuisine, in many hues, as I grew up. Today I made a quick trip to the mall. They are set for Christmas - only Santa Claus is missing. Stan Freeburg's parody Green Chri$tma$ - "we wish you a Merry Christmas and please buy our beer" - started running through my mind and I couldn't shake it. As a distraction, I started thinking about Christmas traditions on 83rd Street and the open house given by one of our neighbors - my Swedish "mom". It was there I first sampled gravlaux and West Coast Salad. Recipes for gravlaux abound, but a recipe for the salad was more difficult to find. I stumbled on one by Beatrice Ojakangas in Scandinavian Feasts. Her recipe uses lobster, shrimp, crabmeat, mussels and caviar; it's absolutely delicious, but prohibitively expensive. My version captures the spirit and freshness of the salad but is more affordable. This is a light, uptown supper. Enjoy!

Swedish West Coast Salad

Ingredients:
Dill Dressing:
1/2 cup vegetable oil
3 tablespoons white wine vinegar
1 drop dill oil or 6 tablespoons fresh dill
1/2 teaspoon salt
1/4 teaspoon pepper
Salad:
1-1/2 to 2 pounds shrimp, peeled and deveined
1/4 pound white mushrooms, sliced
1 English cucumber, cut in 1/2-inch dice
1/4 cup pimentos, drained
3 hard boiled eggs, cut into wedges
1/2 cup frozen petite peas, thawed
Garnish: Boston lettuce leaves, fresh dill or parsley

Directions:
1) Combine oil, vinegar, dill oil or fresh dill, salt and pepper in a small bowl. Whisk until blended. Set aside.
2) Bring a large pot of salted water to a boil. Add shrimp and cook for 3 minutes, or until shrimp curl and turn pink. Drain. Toss with dill salad dressing. Chill for at least 1 hour.
3) Add mushrooms, cucumber, pimentos, eggs and peas to shrimp. Toss lightly. Line a platter with lettuce leaves. With a slotted spoon, transfer salad to platter. Garnish with fresh dill or parsley. Yield: 4 to 6 servings.

Cook's Note: I use dill oil rather than fresh dill. This is an essential oil that allows you to control the flavor's intensity. Fresh dill is not always available in my area. The oil, which I also use for canning, is available at farm stands or can be ordered through online grocers. I have included a link for you.

Saturday, October 18, 2008

Capellini Capricciosi


This hearty pasta comes from Lidia Bastianich whose unlikely history is the "stuff dreams are made on." Beating incredible odds, this Yugoslavian refugee become a respected restaurateur, chef and cooking instructor; her specialty - Italian food. Her programs air on PBS and, while she's not an entertainer, Lidia is a teacher and she sure can cook. Some of her recipes are outstanding. The lure of Capellini Capricciosi begins with a siren's song - the aroma of bacon. Onions are added to the pan and as they begin to caramelize the chorus swells. Just before the coda, hot pickled peppers (pepperoncini), Italian tomatoes and copious quantities of Parmigiano Reggiano are folded into the mix. A final toss with steaming capellini and a ready fork brings us very close to the one perfect bite of our quest. This is a 40 minute wonder!

Sent to Presto Pasta Night hosted by Ruth at Once Upon A Feast.


Capellini Capricciosi

Ingredients:
1/4 cup olive oil, divided use
6 slices bacon, chopped
2 onions, thinly sliced
10 pepperoncini, drained, seeded and chopped
1 (35-oz.) can whole, peeled Italian tomatoes, drained and roughly chopped
1/2 teaspoon Kosher salt + salt to taste
12 ounces dried angel hair pasta
1 cup freshly grated Parmigiano Reggiano cheese
1/3 cup + 2 tablespoons chopped Italian parsley

Directions:
1) Heat 2 tablespoons oil in a large skillet set over medium heat. Add bacon and cook until brown, about 10 minutes. Add onions and cook until golden, about 15 minutes. Add pepperoncini, tomatoes and salt and cook for 10 minutes longer.
2) While sauce simmers, bring 4 quarts of salted water to a boil. Add pasta and cook, per package directions, until al dente. Drain, reserving 1 cup of cooking water for sauce. Toss pasta with reserved 2 tablespoons olive oil. Stir into sauce with cheese and 1/3 cup parsley. If pasta appears dry, add some reserved cooking water. Toss well to combine. Transfer to warm serving bowl. Garnish with reserved 2 tablespoons parsley. Yield: 4 servings.

Food for thought...."food for me was a connecting link to my grandmother, to my childhood, to my past. And what I found out is that for everybody, food is a connector to their roots, to their past in different ways. It gives you security; it gives you a profile of who you are, where you come from." Lidia Bastianich

Friday, October 17, 2008

Catsup, Carla and Me


I harbor a secret desire to homestead. I'm not a survivalist, but I'm drawn, at least conceptually, to the prospect of producing my own food. Not just jams and jellies or the odd jar of tomatoes, I'd like to be responsible for everything that makes it to my table for a year or so. Carla Emery, a leader in the modern homesteading movement, once categorized me as an urban homesteader. It was a fair assessment, not a shot. I'd excel my first year on a homestead, but I'm not temperamentally suited to the daily grind and "same ole, same ole" of a longer commitment. I know I'd eventually need a larger canvas on which to paint my dreams. Carla saw that, too. A recipe brought Carla and I together and we corresponded until her sudden death a few years ago. Her first version of The Encyclopedia of Country Living was a mimeographed affair and chapters were mailed to subscribers as they were completed. The book ultimately went through nine printings and Carla, whose down to earth mien and quick intelligence made her a natural, became a television personality. The early version of her book contained a catsup recipe that was simpler than any I'd seen before; unpeeled tomatoes, onions and peppers were pureed, baked for hours and then processed in a hot water bath. It was wonderful, but I mistakenly trashed the recipe during a bout of overzealous cleaning. It did not appear in later versions of the book so I began my search for Carla and her recipe. Once I found her we'd talk five or six times a year. I remember how touched she was when I recounted how my oldest daughter, sans my input, had found her book and enjoyed it as much as I had years before. I made catsup last week and want to share Carla's recipe with you. If you're tempted to farm or homestead Carla's encyclopedia will help smooth the way. If you're given to bouts of the Walton syndrome (i.e. a yearning for a simpler life) Carla's book will cure your romantic notions. Shortly before her death Carla wrote down how she wanted to be remembered. "She was responsible. She loved a job. She loved being a wife, a mother, and a writer. She worked hard and did her best." Blessings, Carla. Rest well.

Carla's Catsup

Ingredients:
8 pounds Roma tomatoes
2 large red bell peppers, seeded, coarsely chopped
2 large green bell peppers, seeded, coarsely chopped
3 cups coarsely chopped onions
3 cups white vinegar
3 cups granulated sugar
3 tablespoons salt
1-1/2 teaspoons allspice
3 teaspoons dry mustard
1/4 teaspoon cloves
1-1/2 teaspoons cinnamon
Hot pepper flakes to taste

Directions:
1) Preheat oven to 325 degrees F.
2) Wash and quarter tomatoes. Using a blender and working in batches, puree tomatoes, red and green peppers, onions with vinegar.
3) Pour into a large, shallow roaster. Add sugar, salt, allspice, mustard, cloves and pepper flakes to taste. Mix well.
4) Bake uncovered for 4 to 6 hours, or until mixture is reduced by half.
5) While catsup cooks, sterilize 6 pint jars, rings and seals. Set aside.
6) Pour catsup into jars, adjust lids and seal. Process in a boiling water bath for 20 minutes. Remove and set aside to cool. Yield: 6 pints.

Thursday, October 16, 2008

Thai Tamarind Shrimp


When our children were small and sitters scarce, we began having date nights in the kitchen. The theme was bistro or cucina, complete with stubby candles, spindly carnations and a checkered tablecloth. I would cook, and, Bob, who does a spot on improv of a continental waiter, would serve and pour. We had such a good time that you'll still find us in the kitchen on date night, sampling dishes from kitchens around the world. We move, on whim, from Europe to Asia or Africa and today's recipe is very much like one that would come from a restaurant - raan aharn - in Thailand. It requires a few Asian ingredients that will put me on your bad list, but I've provided links to where they can be ordered if they're not locally available. This is fast and easy to make, though I must warn you - it's addicting.

Tamarind Shrimp

Ingredients:
3 tablespoons (about 2 oz.) tamarind paste
2/3 cup boiling water
2 tablespoons vegetable oil
2 tablespoons chopped scallions + slivers for garnish
2 tablespoons golden or light brown sugar
2 tablespoons chicken stock
1 tablespoon nahm plah fish sauce
6 dried Thai chillies + chillies for garnish
1 pound shrimp, shelled and deveined
1 tablespoon Asian fried garlic from a can (mail order)
2 tablespoons Asian fried shallots (mail order)

Directions:
1) Place tamarind paste in a small bowl. Cover with boiling water. Stir well; let sit for 30 minutes. Stain; reserve 6 tablespoons of juice for sauce and refrigerate remainder for another use.
2) Heat oil in a large nonstick skillet. Add onion and cook until softened and beginning to brown.
3) Stir in sugar, stock, fish sauce, reserved 6 tablespoons tamarind juice and dried chillies. Stir. Bring to a boil.
5) Add shrimp, dried garlic and dried onion; stir until shrimp are cooked through, about 4 minutes. Transfer to serving plate. Garnish with onion slivers and additional chillies. Yield: 4 servings.

Wednesday, October 15, 2008

Kladdkaka

Kladdkaka

Is kladdkaka the glory or the curse of Swedish kitchens? The cratered confection falls somewhere between cake and candy on the Swedish culinary ladder. It is a thin, sticky - very, very sweet - chocolate cake with a texture all it's own. My not-terribly-domestic Dad, unable to convincingly argue a case that would cause my Mother to rethink her refusal to make anything so sweet, learned to make it for himself. My husband, too, loves this confection - me, a lover of the barely sweet, maybe not so much. There are no fence-sitters when it comes to kladdkaka - you either love it or you hate it; I'll let you be the judge.

Kladdkaka - Swedish Sticky Chocolate Cake

Ingredients:
1/2 cup pastry or all-purpose flour
1/4 to 1/3 cup unsweetened cocoa (I use 1/3 cup)
1/8 teaspoon salt
2 large eggs, room temperature
1 to 1-1/3 cups granulated sugar (I use 1 cup)
1 tablespoon vanilla extract
1/2 cup melted butter
Confectioners' sugar for dusting

Directions:
1) Adjust a rack to lower third of oven. Preheat oven to 300 degres F. Lightly grease an 8-inch springform pan or pie plate.
2) Combine flour, cocoa and salt; sift and set aside.
3) Combine eggs and sugar in the bowl of an electric mixer. Beat for 5 minutes on medium speed, or until pale yellow and mixture forms a ribbon. Stir in vanilla. Add flour mixture and stir just until combined. Add butter and mix well. Pour into prepared pan.
4) Bake for 35 minutes, or until the center is just set. Allow to cool in pan for about an hour. The cake will crater as it sits. Remove ring if using a springform pan. Serve warm or cold. Yield: 8 servings.

Tuesday, October 14, 2008

Asian-Style London Broil

Asian-Style London Broil

No story today. Just reporting the results of an experiment to produce a wow recipe on the cheap. Using flat iron steaks, tenderized with a jaccard, and a simplified variation of a Korean Bulgogi sauce, I think I've done it. My tasters gave this a 'New York Deli Owner' review (that's the equivalent of two thumbs up around here), so I feel secure in passing it on to you. The Japanese-style potatoes are from Just Hungry and they are a perfect accompaniment to the London Broil. The steaks can, of course, be grilled stovetop or broiled.

Asian-Style London Broil

Ingredients:
1 large (1-1/2 to 2 pound) flat iron or flank steak
1 teaspoon salt
1/4 teaspoon cracked black pepper
1/4 cup light or golden brown sugar
1/2 cup soy sauce
1 teaspoon Sriracha or other Asian-style hot sauce
1 tablespoon dark sesame oil
Cilantro

Directions:
1) Pierce both sides of meat at 1/4-inch intervals with a jaccard or meat fork. Season with salt and pepper. Set aside.
2) Combine sugar, soy sauce, Sriracha and sesame oil in a saucepan. Bring to a simmer, stirring to dissolve sugar. Cook until mixture becomes syrupy and is reduced by half.
3) Preheat gas grill according to manufacturer's instruction for cooking by direct heat. Brush top of steak with glaze. Grill steak for 5 minutes. Turn; brush top of steak with glaze and grill for another 5 to 7 minutes. Remove to a platter; brush again with glaze. Tent with foil and allow to sit for 10 minutes. Slice steak, thinly, against grain; sprinkle with cilantro. Yield: 5 to 6 servings.

Monday, October 13, 2008

Of Victory Gardens and Slumgullion


We have garden plots in town that are leased to green thumbs who have no property on which to garden. They were busy folks today, hustling like ants on a hill, anticipating a freeze that will surely take their gardens down. Watching their efforts triggered memories of the community gardens I knew as a child. Victory gardens - war gardens - were planted wherever there was vacant land, even on rooftops, to help reduce pressure on a heavily rationed food supply. The gardens actually produced 40 % of the vegetables and legumes consumed during WWII and one of the first signs I was able to read as a child was the slogan "Grow More in 44." Digging was done with a pitch fork and water was hauled by the bucket; it was hard, hard work and most of it was done by women. If you had a car chances were you had no gasoline, so my Mom would load her gear into a red wagon and drag it, and us, to the drained swamp where our garden was grown. She carried my brother on her hip and her right side was always damp. Soakers - heavy crocheted diaper covers - didn't quite do the trick and rubber and synthetic substitutes were strictly rationed - there were no rubber pants. We would spend an hour or two in the garden and start home when Mama, whose hip was by this time wet and dirty, would smile and say, "Sufficient to the day." Indeed it was. We were never hungry - we never felt unsafe. She was our taproot.

Meals during the war years were plain affairs. You made do with what you had and Slumgullion - a ground or cubed meat casserole extended with anything that was available - made a weekly appearance on most dinner tables. The name pretty much says it all. The funny part of all this is that Slumgullion is the precursor to the ground meat casseroles that are popular today. I can't look at Hamburger Helper without smiling. Today's recipe came from the back of an Uncle Ben's rice box back in the sixties. They called it California Rice Skillet and, as you've probably guessed, it's Slumgullion putting on airs. I can't tell you how many teens or church groups this recipe has fed and while I know this is going to take a leap of faith - this recipe is worth trying. I'm going to call it Slumgullion for nostalgia's sake; you might prefer California Rice Skillet. Whatever you call it, it's a 45 minute wonder that's nice to have in the recipe file. This is also a great filling for stuffed peppers - a truc (trick) passed on to me by my first born.

Slumgullion - California Rice Skillet

Ingredients:
1 tablespoon olive oil
1 large onion, chopped
1 large clove garlic, minced
1 green pepper, chopped
1 pound ground beef or turkey
1 cup rice
3 beef or chicken bouillon cubes, crushed
1 teaspoon ground dry mustard
1/4 teaspoon cracked black pepper
1 (14.5-oz.) can stewed tomatoes, drained
2 cups water
1 cup shredded Monterrey Jack cheese
2 tablespoons chopped parsley

Directions:
1) Heat oil in a large skillet. Add onion, garlic and green pepper; saute until wilted. Add meat meat and brown. Stir in rice, bouillon cubes, dry mustard and black pepper; toss to coat rice. Stir in stewed tomatoes. Add water. Bring to a simmer: cover pan and cook for 25 minutes, or until rice is tender and water absorbed.
2) Sprinkle cheese over top. Cover; let stand until cheese melts, about 2 to 3 minutes. Sprinkle with parsley. Yield: 4 to 5 servings.

Sunday, October 12, 2008

Awards and Badges


Thank you Lorie

Thank you Pam


Thank you Veronica and Julie


Thank you Allie


Thank you Lisa, Cathy and Martha

Bread Baking Buddies

Saturday, October 11, 2008

Saturday Musings 10-11-08

It's been a busy and exciting week. I was the recipient of two awards that I'd like to play forward to some really talented women.

I had the good fortune to receive the Brillante Weblog award from Lisa at Jersey Girl Cooks. I, in turn, am passing that award to Julie at Peanut Butter and Julie.
Photobucket

I, also, received the Yummy Blog Award from Lorie at Rice, Beans and Other Fine Things and want to pass that on to Candy at The Courageous Cook.
Photobucket

These gals all have wonderful blogs and I hope you'll visit them often. Each is unique and has something singular to offer. Take a peak!

I came across an article in Metro magazine that identifies Food Trends that will be of interest to fellow recipe developers and lovers of good food.

Food for thought..."Happy and successful cooking doesn't rely only on know-how; it comes from the heart, makes great demands on the palate and needs enthusiasm and a deep love of food to bring it to life." Georges Blanc