Thursday, December 31, 2009

Guinness Bloody Mary - Foodie Friday


From the kitchen of One Perfect Bite...Happy New Year! My greeting comes with special wishes for your health and happiness in 2010. I thought it might be fun to start the new year with a new drink, so I've bumped my scheduled post to share this one with you before the holiday officially ends. None of you will need a drink to cure "the hair of the dog", but in case you know someone who does, or are entertaining this weekend, you might find this twist on a Bloody Mary interesting. Years ago, it was believed that the best antidote for rabies was a drink brewed with the hair of the the dog that caused the rabies. Certain drinks, like the Bloody Mary, are believed by some to cure the symptoms of a hangover. While there is no medical proof to support that claim, the hypothesis is tested on a regular basis by revelers. The drink was first served in Chicago at the Bucket of Blood Club. Fernand Petiot, while working at Harry's New York Bar in Paris, France, was asked to create a drink like that served at the Bucket of Blood by a waitress called Bloody Mary. Hence, the name. Interestingly, the Guinness Bloody Mary also has its roots in Chicago. I had the drink at a brunch in Austin and was able to find a prototype for the recipe on the Tabasco Foodservice website. If you are looking for a new brunch drink, this one might be perfect for you. It really is delicious, but be forewarned - it does pack a punch. Here's the recipe.

Guinness Bloody Mary...from the kitchen of One Perfect Bite

Ingredients:
4 cups tomato juice
Juice of 2 limes
4 shots good vodka
2 teaspoons prepared horseradish
2 teaspoons Worcestershire sauce
1 teaspoon celery salt
Tabasco sauce to taste
Salt and fresh ground pepper to taste
Coarse salt for coating rims of mugs
1 (12-oz.) bottle Draught Guinness
Optional: Limes or olives for garnish

Directions:
1) Combine tomato juice, lime juice, vodka, horseradish, Worcestershire sauce, celery salt, Tabasco sauce, and salt and pepper in a large iced filled pitcher.
2) Dampen the rims of 4 mugs with water and dip them in a bowl of coarse salt. Fill each mug with an equal portion of tomato juice mixture. Float 3 ounces of Guinness on top of each mug. Serve immediately. Garnish with lime slices or olives if desired. Yield: 4 drinks.


This recipe is being linked to:
Designs By Gollum - Foodie Friday

Wednesday, December 30, 2009

Mexican Beer-Cheese Spread


From the Kitchen of One Perfect Bite...This is one of my go-to cheese spreads. Success with this recipe depends on the quality of cheese that you use. Here in the Pacific Northwest, I use Tillamook Special Reserve Extra Sharp Cheddar and their Pepper Jack cheese to make my spread. Having lived in other areas, I can tell you that premium Wisconsin and Vermont cheeses can also be used and will produce an equally great cheese spread. It takes 5 minutes to prepare and it's close to effortless if you use a blender or food processor to make it. I like to make this several days before serving it in order to allow all the flavors to blend. Truth be told, it can be served in eight hours if you are in a bind. The spread will keep in the refrigerator for 10 days or so. Because jack cheeses vary in heat, I've included an optional addition of hot peppers or pepper flakes in the recipe. If you like heat and feel the base mixture is too tame, go for it. Otherwise take a pass. I think you'll like this spread for its great flavor and ease of preparation. Here's the recipe.

Mexican Beer-Cheese Spread
...from the kitchen of One Perfect Bite

Ingredients:

1 small grated onion and juice
1 teaspoon minced garlic
1/2 cup + 1/4 cup flat Mexican beer (i.e. Corona), divided use
1 tablespoon tomato based steak sauce (i.e. Heinz 57)
1 tablespoon mayonnaise
1/2 pound freshly shredded extra sharp Cheddar cheese
1/2 pound freshly shredded pepper jack cheese
Optional: 1 small, finely minced jalapeno pepper or 1/2 teaspoon red pepper flakes

Directions:
1) Combine minced onion and onion juice, garlic, 1/2 cup beer, steak sauce and mayonnaise in the bowl of a food processor. Process until blended.
2) Add cheeses and process until perfectly smooth. Add additional beer by the tablespoon until mixture has a spreadable consistency. Fold in optional jalapeno pepper or pepper flakes if using. Transfer to a refrigerator container and chill for several days before serving. Serve at room temperature with crackers or crisp chips. Yield: about 2-1/4 cups.

Tuesday, December 29, 2009

Spiced and Pickled Shrimp


The weather outside is frightful. Come inside and join us by the fire for one of our favorite finger foods - spiced and pickled shrimp
.


From the kitchen of One Perfect Bite...I love to serve these shrimp to friends at informal gatherings. This dish is one I wish I could claim as my own. I can't. I found the recipe, developed by Peggy Towbridge, at About.com Home Cooking and it's been a favorite of mine ever since. Don't be put off by the ingredient list. Chances are you have everything needed to make these shrimp in your refrigerator or pantry. I've made two slight changes to the original recipe. I think balsamic vinegar muddies the glorious color of this dish, so I've opted to use white wine or white balsamic vinegar instead. I've also added small amounts of red and yellow bell pepper to provide more eye candy in the final presentation. While I've served these shrimp as a first course for an informal dinner, I am more likely to set out bowls of them to entertain a large number of people for cocktails or an open house. When I serve these as finger food, I remove all trace of shell from the shrimp. I know that runs contrary to conventional wisdom, but I hate to see folks trying to balance drinks and plates of discarded shells or toothpicks. Shrimp, once a luxury item, is relatively inexpensive these days. So, you'll be happy to know the recipe can be doubled or tripled for those occasions when you're feeling particularly generous or are feeding the immediate world. I let the shrimp marinate for 24 hours before serving them. Discard uneaten, unrefrigerated shrimp at the end of the evening. The brine used to pickle the shrimp is not strong enough to kill organisms that might developed after the shrimp has been sitting unrefrigerated for several hours. Here's the recipe for a terrific party appetizer.

Spiced and Pickled Shrimp...from the kitchen of One Perfect Bite

Ingredients:
1/2 teaspoon garlic powder
1/2 teaspoon onion powder
1/2 teaspoon lemon pepper
1 teaspoon sweet Hungarian paprika
1/4 teaspoon celery seed
Juice of 1 lemon, rinds reserved
2 pounds large or jumbo raw shrimp, peeled and deveined
1/4 cup olive oil
1/4 cup cider vinegar
1/4 cup white balsamic or white wine vinegar
2 tablespoons fresh dill weed, finely chopped OR 2 teaspoons dried
2 cloves garlic, pressed
2 teaspoons Dijon mustard
1 tablespoon honey
1 teaspoon kosher salt
1/4 teaspoon red pepper flakes or hot sauce to taste
1 small sweet onion, finely sliced
1 small red bell pepper, cored and thinly sliced
1 small yellow pepper, cored and thinly sliced
1 small green bell pepper, cored and thinly sliced

Directions:

1) Combine garlic powder, onion powder, lemon pepper, paprika, and celery seed until mixed.
2) Sprinkle lemon juice over the shrimp, top with the spice mixture, and toss to coat.
3) Place sliced reserved lemon rinds in about 1 inch of water. Cover with a steamer basket. Place spiced shrimp in the basket, cover pot, and gently steam until shrimp is just barely done and opaque, about 2 minutes. Do not overcook or the shrimp will become rubbery. Remove from heat, uncover, and place shrimp in a large bowl of ice to stop cooking.
4) For the marinade, place olive oil, cider vinegar, balsamic vinegar, dill weed, garlic, Dijon mustard, honey, salt, and pepper flakes or hot sauce in a large heavy bag with a zip top. Squish to thoroughly combine.
5) Add drained shrimp, sweet onion, and bell pepper to the marinade in bag. Seal with air in bag and toss to coat. Open bag, squeeze out air, and re-seal. Refrigerate for at least 4 hours or overnight. Serve cold. Yield: 12 to 16 appetizer
servings.

This is being linked to:
Outdoor Wednesday - A Southern Daydreamer

Monday, December 28, 2009

Chunky Chopped Clam and Bacon Dip


From the kitchen of One Perfect Bite...The countdown to the new year has begun, and, as the nesting months of its first quarter approach, I'm starting to give some consideration to fireplace and football food. This week I wanted to explore some of my favorite snacks and appetizers, especially the ones that make hosting a breeze. They're simple to make and easy on the pocketbook. Their greatest virtue is that they'll also allow you to enjoy a game or conversation with friends and fellow fans. I also wanted to come up with newer versions of old recipes that everyone likes. Who doesn't like clam dip or can resist one that's laced with bacon? I know I can't, so I thought I'd give this a try and, hopefully, come up with something that could be shared with you. I'm glad I did. While I prefer the flavor of fresh chopped clams, canned clams work well here if they are drained. I reserve the clam juice and use it at the very end of the recipe to achieve the consistency I want for my dip. Make sure your bacon is really crisp, well-drained and not too finely crumbled before adding it to the mix. The red bell pepper adds wonderful color to the dip. If you don't care for horseradish use hot sauce instead. I like to prepare this a full day before serving it. This dip ages really well if refrigerated. Here's the recipe.


Chunky Chopped Clam and Bacon Dip...from the kitchen of One Perfect Bite

Ingredients:

10 slices thick-cut smoked bacon, cooked and crumbled
2 cans (6 oz. size) drained chopped clams, liquid reserved
1/2 cup + 1 teaspoon sour cream
8 ounces softened cream cheese
2 scallions, finely chopped
1/2 teaspoon Worcestershire sauce
1 teaspoon lemon juice
1 teaspoon mayonnaise
1 teaspoon prepared horseradish or horseradish sauce
1/2 cup finely chopped red bell pepper

Directions:

Blend all ingredients in medium mixing bowl and refrigerate for at least 2 hours before serving. If dip is too thick, thin with spoonfuls of reserved clam juice until desired consistency is reached. Remove from refrigerator 1/2 hour before serving. Serve with chips, crackers or bread. Discard leftovers that have been sitting at room temperature. Yield: 12 servings.

Sunday, December 27, 2009

Blackberry Cream Cheese Coffee Cake - Blue Monday


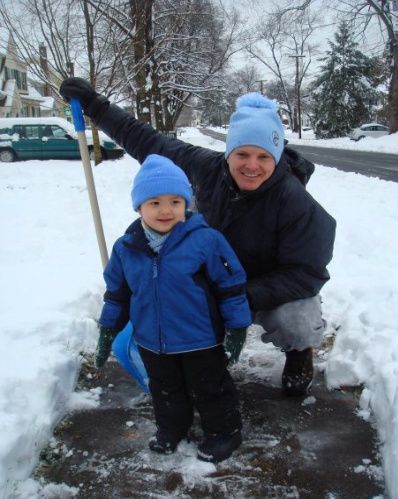
We've finally reached Connecticut and are again with the men in blue. I'm sure you've heard it was a less than perfect year for Christmas travelers. I can attest to an unintended night in Phoenix and an unplanned, though lovely, extension of our Austin visit. Folks more intelligent than I, know better than to book flights that go anywhere near O'Hare airport at this time of year. We've had a run of good luck these past few years and it was bound to end sooner or later. It did. Some blame Hermes, others Christopher. I prefer to take a deep breath, swear a little and then surrender to the limitations of the day. Fortunately, it has all ended well. It's been a wonderful holiday so far and I have another week to go. Oops! More snow is forecast for tomorrow.


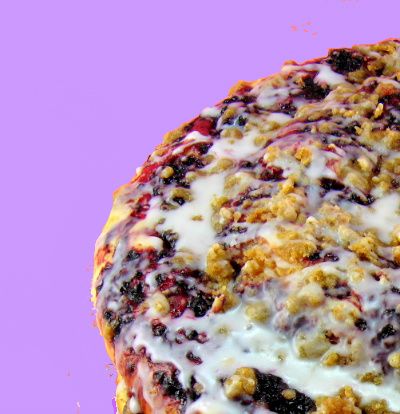
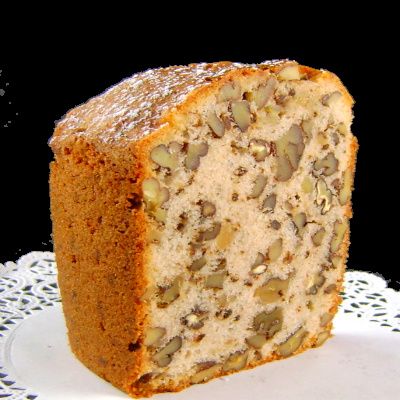
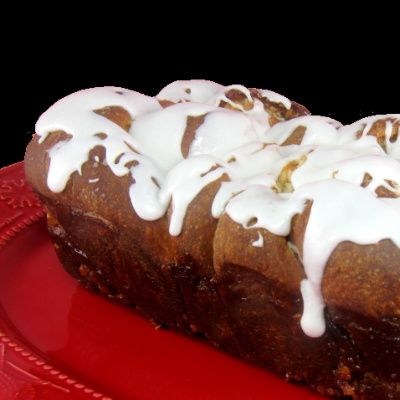
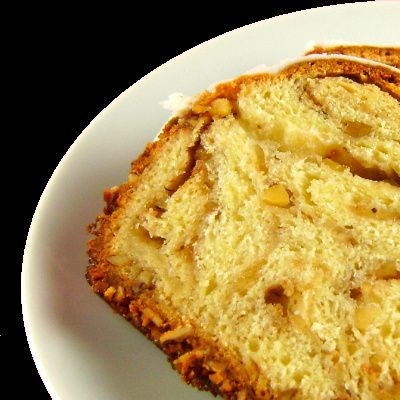
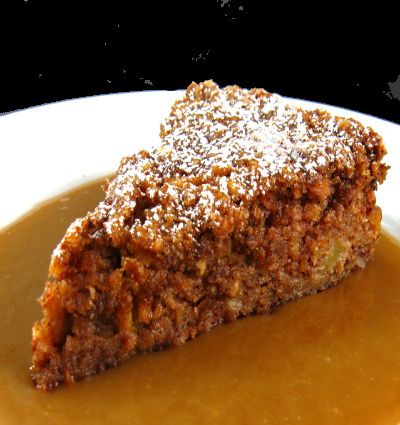
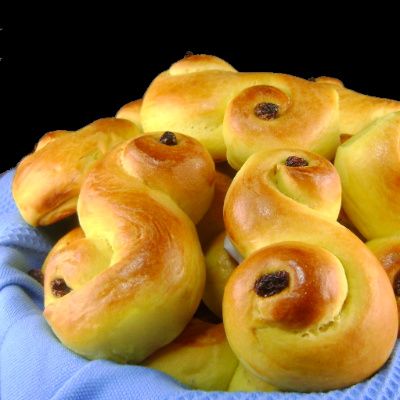
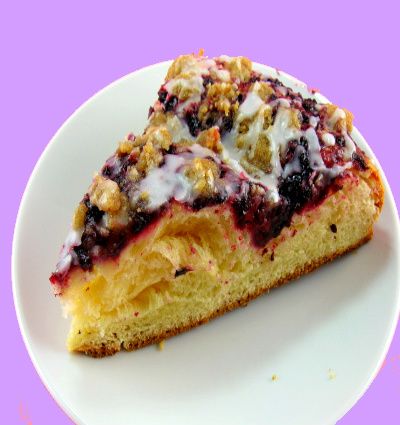
From the kitchen of One Perfect Bite...I saw the prototype for this coffee cake on Annie's Eats while searching for new sweet breads for the holiday. I wanted to give a Pacific Northwest twist to her wonderful Raspberry Cream Cheese Coffee Cake, so I began to dissemble it. I chose to use a moist potato dough for the cake base, swapped blackberries for raspberries and, of course, felt compelled to use hazelnuts in the streusel topping. I also doubled the ingredients so I could have a spare cake in the freezer. This is not a difficult recipe if you break it into its component parts. It will take time, but you'll also have a luscious coffee cake to serve your family and friends. A refrigerator dough is used to form the base of the coffee cake, so you'll want to start this the day before you plan to serve it. Here's the recipe.

Blackberry Cream Cheese Coffee Cake
...from the kitchen of One Perfect Bite

Ingredients:
Dough
1-1/4 cups warm water
2 (4-1/2 teaspoons) packages active dry yeast
1/2 cup granulated sugar
1 tablespoon kosher salt
1/2 cup instant, reconstituted warm mashed potatoes, prepared without butter and salt
2 large eggs + 2 egg yolks, room temperature
1/2 cup butter, softened
6-1/2 cups all-purpose flour
Berry Topping
4 cups fresh or frozen blackberries
1/4 cup granulated sugar
2 tablespoon lemon juice
1/8 teaspoon salt
1/8 teaspoon ground cinnamon
1 tablespoon cornstarch dissolved in 2 tablespoon orange juice
Cream Cheese Filling
1 (8-ounce) package cream cheese, softened
1/4 cup granulated sugar
3 tablespoons all-purpose flour
1/8 teaspoon salt
2 teaspoons finely grated lemon zest
1 egg, lightly beaten
1/2 teaspoon almond extract
Streusel Topping:
1/3 cup brown sugar
1 tablespoon granulated sugar
1/2 cup all-purpose flour
1/2 cup toasted chopped hazelnuts
1/2 teaspoon ground cinnamon
1/8 teaspoon salt
5 tablespoons cold unsalted butter, cut into 4 pieces
Egg Wash
1 large egg
1 tsp. heavy cream or whole milk
Glaze
2/3 cup confectioners' sugar
4 teaspoons milk
1/4 teaspoon almond extract

Directions:
1) To make the dough: Pour warm water into a medium size bowl. Sprinkle yeast over water; add sugar and salt; stir to combine. Let sit until mixture begins to bubble, about 5 minutes.
Add eggs, soft butter, warm mashed potatoes and 3 cups flour. Beat with a portable mixer until just smooth. Using a wooden spoon, beat in 2 additional cups of flour until just mixed into dough. Add remaining 1-1/2 cups flour, using hands to mix dough until it's smooth and leaves sides of bowl. Brush top with oil or melted butter. Cover with plastic wrap and let rise in refrigerator until doubled in bulk, about 2 hours. Punch down. Cover and return to refrigerator for one to three days, punching down once each day. Remove dough from refrigerator 2 hours before proceeding to shape.
2) To make berry filling: Combine berries, sugar, lemon juice, salt, cinnamon, cornstarch and orange juice in a medium saucepan. Bring to a boil over medium heat, stirring occasionally. Continue boiling, stirring constantly, until mixture is thick and shiny, 1½ to 2 minutes. Scrape into a small bowl, cover and chill thoroughly before using.
3) To make cream cheese filling: Beat cream cheese, sugar, flour and salt in bowl of a mixer at high speed until smooth, 2-4 minutes. Add lemon zest, egg and almond extract. Reduce speed to medium and continue beating, scraping down sides of the bowl at least once, until incorporated, about 1 minute. Scrape mixture into a small bowl and chill thoroughly before using.
4) To make streusel topping: Mix brown and granulated sugars, flour, hazelnuts, cinnamon and salt in a small bowl. Add butter pieces and toss to coat. Rub butter chunks and dry mixture together between your fingertips until mixture is crumbly. Chill thoroughly before using.
5) When ready to shape coffee cakes: Remove dough from refrigerator 2 hours before shaping. Then turn it out onto a lightly floured surface. Divide dough into 2 pieces. Shape each piece into a log about 8 inches long and about 2 inches in diameter. Roll each log evenly into a 40-inch rope about 1 inch in diameter. Flatten each rope into a strip that is 1-1/2 inches wide. Use both hands to twist each strip of dough into a coil. Loosely coil each rope in a spiral pattern, leaving a ¼-inch space between coils. Tuck ends under and pinch to seal. Place each coil on a separate baking sheet lined with parchment paper. Cover shaped cakes with plastic wrap and let rise at room temperature until nearly doubled in volume, about 45-60 minutes.
6) Preheat oven to 350 degrees F. Brush each cake with egg wash. Spoon half of cheese filling over the center of the top of each cake, leaving a border clear around edge. Layer half of blackberry filling over cheese filling on each cake. Sprinkle streusel topping over each cake. Bake until deep golden brown and an instant-read thermometer inserted in center of the cake reads 190 degrees F, about 25-30 minutes. Transfer to a wire rack and cool for at least 20 minutes.
7) To make glaze: Whisk together confectioners' sugar, milk and almond extract in a bowl. Drizzle over top of finished cakes and let set before serving. Yield: 2 cakes; 16-2o servings.

This post is being linked to:
Smiling Sally - Blue Monday

This recipe is linked to:
Wild Yeast - Yeast Spotting

Saturday, December 26, 2009

Sugar Snap Peas with Sesame


From the kitchen of One Perfect Bite...These snap peas have become a feature of our dinner table. I also keep a supply of them in the refrigerator for between meal snacks. They're simple to prepare and once you try them I suspect you'll discover they're like peanuts or martinis in that "one's not enough, but two is too many". When I first made these, I'd stir-fry them. That's still a viable option, but these days I use the microwave to get the peas to that perfect degree of crisp-tender, while using far less oil. Unless you are working with small peas straight from the garden, it's important to trim the peas. To prepare snap peas for eating, grasp the stem end and pull it down with one of the plump sides facing you; if the peas are very fresh, this will remove the strings on both the inner and outer curves in one movement. Sometimes it is necessary to remove the strings separately: pull the blossom end toward the inner curve, and pull the stem end toward the outer. A bit of an inconvenience but well worth the effort. Toasted (dark) sesame oil and light or dark sesame seeds are the only other ingredients you actually need. A last minute sprinkle with coarse sea salt is nice but not necessary. While this is more procedure than recipe, proper quantities make this tastier and easier to do, so I'm presenting this in recipe format. Here it is.

Sugar Snap Peas with Sesame...from the kitchen of One Perfect Bite

Ingredients:
1 pound sugar snap peas, trimmed
2 to 3 teaspoons dark sesame oil
1 tablespoon light or dark sesame seeds
Optional: coarse sea salt

Directions:
1) Place peas in a large microwave pan. Toss with sesame oil. Run water over pan cover. Shake off excess. Cook, covered, on HIGH power for 3 to 5 minutes, or until peas are just crisp-tender.
2) Transfer to serving platter. Sprinkle with sesame seeds and optional sea salt. Serve hot or cold. Yield: 4 servings.

Friday, December 25, 2009

Stuffed Flank Steak Spirals - Pink Saturday


Grandma's coming.


From the kitchen of One Perfect Bite...I made and froze these steak spirals several days ago in order to make tonight's meal really simple. While I stuffed these with spinach and goat cheese, anything that appeals to you could be used. I've had great success using sun-dried tomatoes with arugula and feta cheese as an alternate filling. Winter weather in Oregon allows those of us who wish to do so, to grill outdoors. It's also possible to prepare these steaks in a griddle pan on top of the stove. When grilled, I suggest they be cooked for six minutes on each side. Flank steak can become tough if cooked too long. However you cook these, be sure to let them rest for at least 10 minutes before serving. The spirals are wonderful to have on hand for busy days. I think you'll like their simplicity. Here's the recipe.

Stuffed Flank Steak Spirals...from the kitchen of One Perfect Bite

Ingredients:
1 1-1/2 to 2 lb. butterflied flank steak
Kosher salt and pepper to taste
1 tablespoon olive oil
2 cloves garlic, minced finely
6 ounces fresh baby spinach or chard
3 ounces crumbled goat cheese
Optionsl Garnish: chopped parsley or dill

Directions:
1) Preheat oven to 375 degrees F. Season flank steak with salt and pepper. Set aside.
2) Heat olive oil in a saute pan over medium-high heat. Add minced garlic. Cook 1 minute, being careful not to burn. Add spinach and cook just until wilted, a minute or two. Remove from heat and let cool.
3) Lay flank steak out on a cutting board with long end parallel to you. Spread spinach in a thin strip horizontally down middle of the steak. Top with the crumbled goat cheese. Tuck short ends in on sides, then roll long side away from you. Place kitchen twine around steak at 1/2-inch intervals. Wrap in plastic warp and chill for several hours or overnight.
4) Adjust a rack to upper third of oven. Preheat oven to 375 degrees F.
5) Cut steak crosswise into 6 pieces. Heat a saute pan with an oven-proof handle over medium-high heat. When pan is hot, spray steak with olive oil cooking spray and place in hot pan. Sear both sides of flank steak until just browned, about 2 minutes per side.
6) Transfer pan to upper third of oven and bake until internal temperature reaches 130 degrees, about 15 minutes. Let rest for 10 minutes before serving. Garnish with chopped parsley or dill if desired. Yield: 6 servings.

This post is being linked to:
Pink Saturday, sponsored by Beverly at How Sweet the Sound

Thursday, December 24, 2009

Cranberry Glogg - Merry Christmas


On this day of wonder and delight, I'd like to propose a toast to you and other absent friends.


May there always be friends at your fire, family at your table, blessings in your home, and joy in your heart.


From our home to yours, come warm wishes for a Happy Christmas. Blessings to you all...Mary

Cranberry Glogg...from the kitchen of One Perfect Bite courtesy of Beatrice Ojakangas

Ingredients:
1 (28-ounce) bottle white table wine, or 4 cups white grape juice
4 cups cranberry juice
8 whole cloves
1 (1-inch) piece fresh ginger, peeled
2 (3-inch) cinnamon sticks
1/4 to 1/2 cup sugar

Directions:

1) Combine wine, cranberry juice, cloves, ginger and cinnamon in a large bowl. Refrigerate for 24 hours before serving.
2) Pour into a large stockpot and heat until almost simmering. Glogg should be 150 to 170 degrees F for serving. Ladle into small, warmed cups and serve. Yield: 10 servings.

This recipe is being linked to:
Designs By Gollum - Foodie Friday

Wednesday, December 23, 2009

Caramel Corn


From the kitchen of One Perfect Bite ...When our children were small, Christmas Eve required advance preparation and activities to keep them occupied and their excitement under control. The moms of the neighborhood organized caroling adventures, and, whenever possible sled rides down a local hill. The logical conclusion to these activities was an indoor project that would warm small hands and keep them busy at least till the sun set. After 5 o'clock all parents were on their own. Our indoor project and secret weapon was popcorn balls - the kind that could be assembled without sugar syrup and possible burns. However, in the background, sensitive noses could pick up traces of the "real" thing, honest-to-goodness caramel corn that had been made made while the children were out. Over the years, I've come across and made lots of recipes for caramel corn. I keep searching for the perfect one. I came awfully close the year I used the recipe developed by David Leibovitch's that can be found here. Last year I found a new version created by Donna Deanne in The Los Angeles Times. I thought it was wonderful and good enough to try again this year. This is definitely an upscale caramel corn and those who have tried it love it. It's easy enough to do and, in the grand scheme of things, it's well worth the small effort it takes to make. It is quite simply delicious. Here's the recipe. I hope you'll try it.

Caramel Corn...from the kitchen of one Perfect Bite, courtesy of Donna Deane and The Los Angeles Times

Ingredients:
12 cups popped corn
1 cup toasted salted peanuts
1 cup toasted salted almonds
2 cups toasted salted pecans
1 cup (2 sticks) butter, cut into quarters, plus butter for greasing 2 baking sheets
2 cups packed brown sugar
1/2 cup light corn syrup
1 teaspoon salt
1 teaspoon baking soda

Directions:
1) Heat oven to 200 degrees. In a large heat-proof bowl, combine popcorn, peanuts, almonds and pecans. Place bowl in to warm while making caramel. Lightly butter 2 baking sheets.
2) In a large heavy-bottomed saucepan, combine butter, brown sugar, corn syrup and salt. Heat pan over high heat, stirring to combine contents, until mixture comes to a boil. Reduce heat to a strong simmer and continue cooking, stirring frequently, until a candy thermometer inserted reads 255 degrees. Stir in baking soda and remove from heat.
3) Pour caramel quickly over the popcorn and toss to coat evenly. Divide caramel corn between two prepared baking sheets and place them in oven. Bake, stirring occasionally, until caramel dries and hardens, about 1 hour. Remove the trays from the oven and allow caramel corn to cool on the pans. Break cooled caramel corn into small clusters and store in airtight containers. Caramel corn will keep for 2 days, stored at room temperature. Yield 12 cups

Tuesday, December 22, 2009

Savory Mushroom Puff - Outdoor Wednesday


From the kitchen of One Perfect Bite...The cakes and cookies have all been baked and safely stored. Now, like it or not, it's time to get back to kitchen basics and think about making a "real" meal or two. This mushroom puff is a cross between a crustless quiche and a souffle and it is one of my favorite casseroles for a holiday breakfast or brunch. It's really simple to do and the few ingredients that are used to assemble it provide great texture and a unique flavor. The dish can be oven ready in 15 minutes and on the table within an hour. It holds well and can be served hot from the oven or warm. It can also be reheated. It would be wonderful to serve for breakfast on Christmas or New Year's morning. The casserole rises slightly in the oven, a bit like a souffle, and, while it deflates quickly, it has great color and visual appeal. The recipe can be doubled without a problem. Here's how it's done.

Savory Mushroom Puff
...from the kitchen of One Perfect Bite

Ingredients:
4 thick slices white bread, crusts removed
1/2 pound breakfast sausage, cooked and crumbled
1/4 cup finely chopped onion
3 cups sliced mushrooms
6 large eggs, beaten
1 cup baking mix (i.e. Bisquick)
2 cups milk
1 tablespoon Dijon mustard
1 tablespoon mayonnaise
2 tablespoons chopped fresh parsley + parsley for garnish
1-1/2 cups shredded cheddar cheese

Directions:

1) Preheat oven to 350 degrees F. Grease a 9-inch square glass pan and set aside.
2) Line bottom of pan with bread slices.
3) Combine sausage, onions and mushrooms and sprinkle them over bread slices.
4) Combine eggs, baking mix, milk, mustard, mayonnaise, parsley, sage and cheese in a bowl. Pour into pan.
5) Place a baking sheet under pan. Transfer to oven. Bake until puffed and golden brown, about 45 to 50 minutes. Cut into squares and garnish with chopped parsley, if desired. Yield: 9 servings.

This is being linked to:
Outdoor Wednesday - A Southern Daydreamer

Monday, December 21, 2009

Southern Nut Cake


From the kitchen of One Perfect Bite...Fruit cake is a misunderstood confection. While we love it, most of our guests move it around their plates or hide it under napkins when they don't think we are looking. If your first bite of fruit cake was a disaster, chances are I'll never be able to convince you of its merits. That's a shame because a well aged fruit cake is a wondrous mix of jeweled and drunken fruit suspended in a spare but flavorful batter. In order to please our guests I periodically seek out recipes for Christmas cakes and puddings that might have more universal appeal. This year I decided to try Maida Heatter's Southern Nut Cake. I'm happy to report it is a lovely cake and it has been well received by those who've tried it. I thought the cake was dry when I first sampled it, so I wrapped it in brandy soaked cheese cloth and let it sit for several days before serving. That did the trick. If you are looking for a fruitless fruit cake, you'll love this nut extravaganza. While it is expensive to make, it's easy to do and would make a marvelous addition to your Christmas table. Here's the recipe.

Southern Nut Cake...from the kitchen of One Perfect Bite, courtesy of Maida Heatter

Ingredients:
1 pound toasted walnuts, broken in large pieces
1 pound toasted pecans, broken in large pieces
3-1/2 cups sifted all-purpose flour
2 teaspoons double acting baking powder
1/2 teaspoon mace
1/4 teaspoon salt
3/4 cup milk
1/2 cup brandy or bourbon, divided use
1 cup butter, room temperature
2 cups granulated sugar
6 large eggs

Directions:

1) Move an oven rack to lower third of oven. Preheat oven to 325 degrees F. Butter a 10 x 4-inch tube pan. Line bottom with parchment paper. Butter paper and dust pan with fine dried bread crumbs. Set aside.
2) Place walnuts and pecans into a very large mixing bowl or roasting pan.
3) Combine flour, baking powder, mace and salt in another bowl. Whisk to combine.
4) Combine milk and 1/4 cup brandy or bourbon in another bowl. Set aside.
5) Cream butter in large bowl of an electric mixer. Add sugar and beat at moderate speed for two or three minutes. Add eggs, one at a time, beating each until incorporated. Increase speed and beat until light and fluffy.
6) On low speed alternately add flour mixture in three additions and milk mixture in two, beating only until smooth after each addition. Pour batter over nuts and mix with your hands or a wooden spoon until nuts are coated with batter. Turn batter into prepared pan, smoothing top to even.
7) Bake for 1-3/4 hours or until cake tester inserted in center of cake comes out clean. Transfer cake to a cooling rack. While cake is still hot brush top with reserved 1/4 cup brandy or bourbon. Let cake cool in pan for 20 minutes. Cover cake with a cooling rack and invert to remove paper. Invert again and cool in upright position. Let cake age for 24 hours before serving. Yield: 16 servings.

Sunday, December 20, 2009

Walnut Coffee Cake - Blue Monday


Trafalger Square


As you read this, we'll be on our way to Texas for the first leg of our Christmas adventures. We'll be in Austin through the 26th and then head to Connecticut to meet our newest heir and greet the New Year. While my correspondence may suffer, there will be a new recipe and a, hopefully, pithy observation each day I'm gone, so please don't be strangers. I'll do my best to respond to your comments, but should reality trump intent, know I'll be back and in fine fettle for the New Year.

The walnut coffee cake featured today is the very nicest surprise of my Christmas baking adventures. I stumbled on the recipe and clipped it to use as a filler, never expecting it to become a holiday superstar. It is a wonderful yeast bread that is decidedly simple to make. It requires patience rather than kneading. The dough is mixed and then put to bed for the night in the refrigerator. It is filled, rolled and baked the following day. While there are several steps required to make this, none of them are difficult and no special equipment is required. The loaves can be frozen, but if you choose to take that route don't frost them until they've been thawed and are ready to serve. The loaves are very sticky, so don't let them sit for more than 15 minutes in their pans. When you turn them out, cover your cooling rack with plastic wrap or parchment paper to keep them from sticking to the ribs of the rack. Once cool, they'll be fine and the paper can be removed from the bottom of the loaves. This cake comes very close to being my all-time favorite coffee cake. It would be in first place if it weren't for the fact I know that there is another one out there that is just waiting to be discovered. On a scale of one to five, this cake is easily a five. Please try it.

Over-Night Walnut Coffee Cake...from the kitchen of One Perfect Bite, courtesy of Epicurean.com

Ingredients:

Dough
4 cups flour
1/4 cup sugar
1 teaspoon salt
1 cup butter, softened
4-1/2 teaspoons (2 pkg.) active dry yeast
1 tablespoon sugar
1/4 cup warm water
2 eggs
1 cup cold milk
1 teaspoon vanilla
2 tablespoons melted butter
Filling:
3/4 cup butter
1-1/2 cups powdered sugar
1 teaspoon vanilla
1-1/2 cups finely chopped walnuts
Frosting:
1 cup powdered sugar
1 tablespoon butter
1 tablespoon light corn syrup
1 tablespoon hot water

Directions:

1) In large mixing bowl, combine flour, 1/4 cup sugar and salt. Cut in butter until it resembles corn meal.
2) In small bowl, combine yeast with 1 tablespoon sugar and warm water; stir to dissolve.
3) In another bowl, combine eggs, milk and vanilla; stir until well combined. Stir in yeast mixture, then add to flour mixture with a wooden spoon mixing until well combined and a rough dough forms. Cover bowl with plastic wrap; refrigerate overnight.
4) When ready to proceed, cream butter. Gradually beat in gradually beat in powdered sugar and vanilla. Spread 2 tablespoons of mixture in bottom and up sides of two 9 x 5 loaf pans. Reserve remainder for filling. Sprinkle 1/4 cup chopped nuts in bottom of each pan.
6) Preheat oven to 350 degrees F.
7) Divide dough in half. On lightly floured board, roll each half to a 10 x 18 inch rectangle. Spread each half with remaining filling, then sprinkle each with 1/2 cup chopped nuts. Cut each half cross wise into 3 equal strips, 6 x 10 inches long. Starting at long edge of each strip, roll up jelly-roll style to form 10-inch long rolls; twist slightly. Braid 3 rolls together; place in pans, tucking ends under.
8) Bake for 50 - 55 minutes. Remove from pans; frost when cool.
9) To make frosting, place powdered sugar, butter, corn syrup and water in a small bowl and combine until smooth. Add additional water as need to make a heavy but pourable icing. Yield: 2 loaves/cakes.

This post is being linked to:
Smiling Sally - Blue Monday

Wild Yeast - Yeast Spotting

Saturday, December 19, 2009

Linzer Cookies


From the kitchen of One Perfect Bite...I love Linzertorte when it's made by someone other than myself. It's a lot of work to assemble and I have trouble with the lattice that typically covers it. I make up for it's absence on our dessert table by making Linzer cookies for the holiday. The cookies are very easy to do and the ingredients used to make them are the same as those used in the torte. While the cookies are far simpler to assemble than the torte, they need to be chilled before being rolled. That means you'll need to build wait time into your plans should you decide to make these luscious morsels. These are basically a butter rich sandwich cookie. It can be a trick to get the top and bottom layers to line up with so soft a dough. I recently read the problem can be overcome by rolling the cookies on parchment paper and transferring the paper to a cookie sheet, rather than attempting to move the cookies. Makes sense. I still haven't tried it, but I've put it on my must try list for the coming year. Linzer cookies are traditionally filled with black currant jam. That can be hard to come by, so feel free to use whatever jam you have available. Raspberry and apricot are always safe alternatives. If the dough becomes too soft as you are working with it, return it to the refrigerator to chill again. All scraps can be saved and reused if they are chilled before an attempt is made to roll them. If you keep the dough cold and use a cookie cutter no more than 2 inches in diameter, you'll have no problem making this classic cookie. Here's the recipe.

Linzer Cookies...from the kitchen of One Perfect Bite

Ingredients:
2 cups all-purpose flour
1 cup ( 2 sticks) sliced butter at room temperature
1/2 cup + 3 tablespoons granulated sugar
1 large egg, separated
2/3 cup finely chopped almonds, divided use
1/3 to 1/2 cup good jam or jelly

Directions:
1) Combine flour, butter, 1/2 cup sugar, 1 egg yolk and 1/3 cup almonds in bowl of a food processor. Blend until a smooth dough is formed. Wrap in plastic wrap and chill for at least 30 minutes. I chill my dough for 3 to 4 hours before rolling.
2) Preheat oven to 350 degrees F. Line several cookie sheets with parchment paper. Set aside.
3) Roll dough on a well-floured board until it is 1/8-inch thick. Use a cookie cutter or thimble to cut centers from half of cookies. Brush cookies with centers removed with egg white. Sprinkle with reserved 1/3 cup almonds and 3 tablespoons sugar. Plain rounds should be left without topping. Transfer cookies to prepared cookie sheets.
4) Bake for 10 to 12 minutes, until edges just begin to brown and center of cookie is set. Transfer to wire racks to cool.
5) Top each plain cookie with 1/2 teaspoon jam. Cover with a cut out cookie making sure to keep almond-sugar side up. Yield: about 50 sandwich cookies.

Friday, December 18, 2009

Moravian Spice Cookies


From the kitchen of One Perfect Bite...
Our Christmas celebration begins the day after Thanksgiving with the making of at least one dessert or treat to be served during the Christmas holidays. That first dessert is usually a cake that requires aging, but we've also been known to make cookies that fall into a category we call "keepers". A "keeper" in our parlance is a treat that will not stale before the official holiday begins. Moravian Spice Cookies fall into that category. When I was a child we called these glass cookies, not because of their appearance, but because they were so thin they'd shatter if you dropped them on the floor. They were brought to the United States by members of the Moravian church who settled in colonial American communities established by church elders in Pennsylvania and North Carolina. The highly spiced cookies are flavored with molasses and are arguably the world's thinnest cookie. When properly rolled, a one inch stack will contain 16 cookies. I still haven't mastered that challenge, though I continue to try. Over the years, I've made some changes to the original recipe to accommodate the tastes of family and friends. Not everyone appreciates the bold taste of full-flavored molasses and dark brown sugar, so, while the dark versions are more authentic, I prefer to use light molasses and brown sugar. The cookies are simple to make and they are wonderful keepers. Be forewarned that the dough must be refrigerated before it can be rolled, so you'll have to plan your time accordingly. Here's the recipe.

Moravian Spice Cookies...from the kitchen of One Perfect Bite

Ingredients:
1-1/4 cups sifted all-purpose flour
1/4 teaspoon salt
1/4 teaspoon nutmeg
1/4 teaspoon allspice
1/4 teaspoon ground cloves
3/4 teaspoon cinnamon
1/2 teaspoon ground ginger
Pinch of cayenne pepper
3 tablespoon butter
2 tablespoons light or dark brown sugar, packed
1/3 cup molasses, light or dark

Directions:

1) Whisk flour, salt, nutmeg, allspice, cloves, cinnamon, ginger, and cayenne pepper together in a small bowl. Set aside.
2) Using an electric mixer, cream butter in a small bowl. Add sugar and molasses and mix until combined.
3) Slowly add flour mixture and beat just until smooth.
4) Wrap dough in plastic wrap and refrigerate for at least 5 hours. Dough will keep several days if refrigerated.
5) Move a rack to upper third of oven. Preheat oven to 350 degrees F. Line a cookie sheet with foil. Set aside.
6) Divide dough into 4 parts. Work with 1/4 of dough at a time, keeping the rest refrigerated. Roll dough on a well-floured surface until it is paper thin - 1/16th of an inch thick. Work quickly because dough will become sticky and unworkable if out too long. Cut with a 2-3/4-inch round cookie cutter. Transfer cookies to prepared cookie sheet.
7) Bake until cookies darken slightly, about 8 minutes. Transfer to a wire rack to cool. Repeat with remaining portions of dough. Scraps can be reserved and rerolled following refrigeration. Store cooled cookies in an airtight container. Yield: 48 cookies.

This post is being linked to:
Pink Saturday, sponsored by Beverly at How Sweet the Sound

Thursday, December 17, 2009

Florentine Lace Cookies


The appearance of these cookies on my holiday tray began as a fondness for the person who introduced me to them. I'd never had them in Chicago, and when we moved east I was still of an age where I thought I knew everything. Yvonne, whom we met through an old-fashioned letter of introduction, was determined to show me how mistaken that notion was. She was French and charming and had an accent that would make the angels sing. She was also a natural born teacher. Her original mission was to teach me needle work, but when that didn't work as she planned, she took me into her kitchen. That visit led to a Christmas that would include our first Paris Brest, a Bouche de Noel and these lovely lacy Florentines. Contrary to popular belief, these cookies are not Italian. They've been traced to the kitchens of Louis XIV where they were made for visiting Medici princes who took them back with them when they returned to Florence. Of all the cookies I've prepared for the holidays, these are my favorites. I love the way they look and smell and taste. While we eat ours out of hand, it is not uncommon to see them drizzled with chocolate. I love chocolate but I don't think it adds anything to these cookies. If you try the recipe, or are a fan of Florentines, I'd love to know how you feel about using chocolate to finish them. If you've never made them, there is one truc you should be aware of. Even though you bake the cookies one tray at a time, the dough must be dropped on cookie sheets while it is still warm. Once it cools it will crumble and become unworkable. So, while you'll bake 6 cookies per sheet, you'll form all sheets as soon as the dough is cool enough to handle. I think you're going to love them. I have a cookie monster, now in his 7th decade, who lives in my house and shares my table. I have to hide these from him because, left to his own devices, he will eat them all in a day or two. These are really good, so instead of talking, let's preheat the oven and get to it.

Florentines...from the kitchen of One Perfect Bite

Ingredients:
1/2 cup ground almonds (about 2-oz.)
5 tablespoons unsalted butter
1/4 cup firmly-packed light brown sugar
2 tablespoons granulated sugar
2 tablespoons light corn syrup
1/3 cup all-purpose flour
Pinch salt
1 teaspoon pure vanilla extract

Directions:

1) Preheat oven to 350 degrees F. Position two oven racks in the middle and upper third of oven. Line two cookie sheets with parchment paper.
2) In a food processor, grind almonds finely; measure out 1/2 cup and set aside.
It is also possible to buy ground almonds for use in this recipe.
3) In a medium saucepan over low heat, heat the butter, brown sugar, granulated sugar, and corn syrup until the butter melts and the sugar dissolves, stirring often. Increase the heat to medium high and, stirring constantly, bring mixture JUST to a boil. Immediately remove pan from the heat and stir in flour and salt until incorporated. Stir in ground almonds and vanilla extract.
4) Drop batter using a teaspoon, 3-inches apart, on prepared cookie sheets (about 1/2 dozen cookies per cookie sheet). Prepare all your pans of cookies at this time even though you are only going to bake 1 or 2 sheets at a time.
5) Bake cookies until evenly light brown, approximately 8 to 10 minutes until cookies spread, become thin, and take on a deep golden color. If you are using 2 cookie sheets switch top to bottom and back to front at 5 minute mark to promote even baking. Cookies will begin to spread 6 minutes into baking time.
6) Line wire cooling racks with plastic wrap. When cookies are done baking, remove cookies from oven and, as soon as they're firm enough to lift off baking sheet (which will take just a few minutes), use a wide spatula to transfer them to prepared cooling racks to cool completely. Allowing cookies to cool slightly on cookie sheets will also cause them to flatten out more. NOTE: If cookies become too cold and hard to remove from baking sheet without shattering them, replace pan in the oven to soften the cookies again. Bake remaining cookies; batter will have firmed up a bit, but that is fine. Store flat cookies between sheets of parchment paper in a tin or plastic container with a tight-fitting lid. Yield: 25 to 30 cookies.

This recipe is being linked to:
Designs By Gollum - Foodie Friday

Our Special Christmas Blessing


Connor - born this morning weighing in at 9 pounds 1 ounce


Joshua - his big brother enjoying a few last moments as an only child

Wednesday, December 16, 2009

Pan de Polvo


From the kitchen of One Perfect Bite...Pan de polvo, also known as polvorones, or Mexican wedding cookies, are sinfully delicious. This version is unusual. Last spring, having, of course, finished reading The Economist and Atlantic Monthly, I was paging through InStyle magazine and came across Eva Longoria's recipe for the cookies. It was quite unlike any I'd seen before and I made a mental note to give them a try. I, of course, forgot all about it until Anna Ginsberg of Pillsbury Bake-Off fame featured them in her wonderful blog Cookie Madness. I decided I had to give them a try. I did. I can report they are lovely cookies, and while they won't replace my personal favorite, the desperate housewife's recipe is well worth a try - especially for those of you who enjoy old favorites in new guises. These shortbread cookies originally came from Spain and this version infuses the cookies with the flavors of cinnamon and anise. The cookies are traditionally served at Christmas and weddings, but because they are easy to do, they are favorites of young bakers. Both my girls loved to make them and would practice on their friends and boyfriends. I loved to have them make them for Christmas because these elegant cookies, also known as Russian Tea Cakes, were crowd pleasers. If you have some time and are looking for something new to fill your cookie tray, consider trying this version of Mexican wedding cookies.

Pan de Polvo...from the kitchen of One Perfect Bite

Ingredients:
2 whole sticks Mexican cinnamon
1 teaspoon anise seed
1-1/2 cups water
.
1/3 cup unsalted butter
1/3 cup butter-flavored shortening
1/2 cup granulated sugar
1 teaspoon almond extract
2-1/4 cups all-purpose flour
2 teaspoons baking powder
1/4 teaspoon salt
.
2 tablespoons ground cinnamon
1/4 cup granulated sugar

Directions:
1) Preheat oven to 375 degrees. Place cinnamon sticks, anise seed and water in a small saucepan and bring to a boil. Reduce heat and allow to simmer gently for 5-7 minutes. Remove from heat, strain, and set liquid aside to cool.
2) In a separate bowl (or in the bowl of a stand mixer,) cream butter, shortening, and sugar until light and fluffy. Once creamed thoroughly, add almond extract. Meanwhile combine flour, baking powder, and salt. Add ¼ cup cinnamon water to creamed mixture, adding slowly until all liquid is absorbed. Add flour mixture and blend until dough is uniform. Chill dough for 15 minutes or until it can be handled easily. Roll dough into 1 inch balls and place on an ungreased cookie sheet. Bake for 15-20 minutes, or until the edges of the cookie begin to brown slightly.
3) While cookies are baking, mix cinnamon and sugar and set aside. When done, remove cookies from the oven and, while cookies are still warm, gently roll in cinnamon sugar mixture. Allow to cool before serving. Yield: 3 dozen cookies.

Tuesday, December 15, 2009

Rosettes - Outdoor Wednesday


Rosettes - today's recipe - and a tree decorated for the holiday in a Swedish amusement park.


From the kitchen of One Perfect bite...Rosettes are deep fried, ornate pastries that are formed with a special iron and served during the Christmas holidays throughout Scandinavia and Eastern Europe. They are also a standard feature of the table at Chez Mary. For me, and for many who were children during WWII, they are also "a remembrance of things past". Once the use of the rosette iron is mastered, you'll find them simple to make, wonderful to eat and kind to the family budget. I've just finished making 48 rosettes for less than three dollars. I mention cost not because I think it's of special concern to you, but their simplicity and affordability are what made these cookies known to me. I've spoken in the past, perhaps too much, of war kitchens. Unfortunately, in this season of miracles, I've been discovered by a few people who would like to rewrite the history of kitchens in the United States. We have to live with stupidity, but ignorance drives me crazy because it is avoidable. Like it or not, there has been a huge change our country's eating habits over the past 50 years. Today's cookies are a case in point. When the government has rationed your use of butter, sugar and eggs, you can throw your hands in the air, shake your head and walk away, or choose to emulate those wonderful women of my childhood and make do with what is on hand. The Italian kitchen of Mrs. S, the German kitchen of Hannie and the Swedish kitchen of Mrs. P all made rosettes for Christmas. Their rosettes were different from each other, but they all managed to make a wonderful pastry for pennies. Each made a cookie that reflected their cultural traditions. One used beer, one used anise and one used citrus zest. Using the simplest of batters, they made the culinary traditions of their families shine. I hope you'll give these a try. I've chosen the most basic batter to get you started and I have a few tips to share with you regarding the iron used to form the rosettes. The iron should sit in hot oil for 10 minutes before it is dipped into batter. The batter into which the hot iron is dipped should come no further than 3/4 of the way up the mold. Any higher and you'll not be able to release the cookie at the proper time. I've found that I get the crispest rosettes if I let the batter sit overnight before being used. I also like to sugar the rosettes while they are still warm. While many people use cinnamon sugar, I prefer to use confectioners' sugar because most of my holiday cookies are highly spiced and the rosettes are a nice change. Vanilla and lemon sugar would also be lovely here. That's up to you. Here's the base recipe for one of the nicest Christmas cookies you'll ever have. Many will tell you these keep for a week. Don't believe them. These are best eaten the day they are made. The cookies can be stored in an airtight container for several days, but you'll notice the deterioration of the pastries with each passing day. Try to keep the oil in which the rosettes are fried at a constant temperature. If it is hot enough when the dough goes into the oil you'll find the cookies do not absorb the oil. I know you'll love this one.

Rosettes...from the kitchen of One Perfect Bite

Ingredients:
1 cup all-purpose flour, sifted before measuring
1/2 cup evaporated milk
1/2 cup water or flat beer
1 teaspoon sugar
1/4 teaspoon salt
1 large egg, beaten
Cinnamon sugar or confectioners' sugar for dusting

Directions:
1) Combine milk, water (or beer), sugar, salt and egg in a medium bowl. Whisk to combine. Slowly stir in flour; beat with an electric beater at medium speed until smooth.
2) Heat 2-inches of vegetable oil to 365 degrees F. Heat iron in hot oil for 5 to 10 minutes. Shake off excess. Dip iron into batter until it covers 3/4 of mold's height. Go no higher or batter will not release from mold. As soon as Rosette begins to brown, lift mold and let Rosette drop gently into oil. Turn it over and let reverse side cook for a few extra second.
3) Carefully remove Rosette and drain on paper toweling. Sprinkle with cinnamon sugar or confectioners' sugar. Repeat until batter is used. Yield: 48 Rosettes.

Cook's Note: Rosettes can be frozen. Re-crisp in 300 degree F. oven.

This is being linked to:
Outdoor Wednesday - A Southern Daydreamer

Monday, December 14, 2009

Warm Apple Pudding with Hot Caramel Sauce


From the kitchen of One Perfect Bite...In the midst of the plenty that bombards us at this time of year, there are days that I want to step back and enjoy far simpler fare. Don't get me wrong. I love the treats and empty calories associated with the holidays, but on those nights when there are just two of us at the table or in front of the fire, my tastes run to more basic food. I've shared my love of all things lemon with you. Lemon's only real contender are desserts made with apples. I have two apple puddings that I make over and over again. One comes from a Mennonite community and the other, tonight's offering, comes from an issue of The New York Time Magazine section published more years ago than I care to admit. My vanity aside, credit must be given where it is due. So, I really have to thank Marcia Adams for this lovely recipe. I hope you are still with us, Marcia! It's a great recipe. You have everything you need to pull this off in your pantry and the hot caramel sauce that's served with the pudding will make you socks go up and down. If you hate apples, file the recipe for caramel sauce. I guarantee you won't be sorry. Here are the recipes for the pudding and its wonderful sauce.

Warm Apple Cake with Hot Caramel Sauce
...from the kitchen of One Perfect Bite

Ingredients:
1/2 cup pecans
5 medium apples to yield 2 1/2 cups chopped (I use Golden Delicious)
1/2 cup butter at room temperature
1 cup granulated sugar
1 large egg
1 teaspoon baking soda
1/2 teaspoon salt
1 teaspoon ground cinnamon
1 scant teaspoon ground nutmeg
1 cup all-purpose flour
Caramel Sauce:
1/2 cup butter
1 cup light brown sugar
1/2 teaspoon salt
1 teaspoon vanilla extract
1/2 cup evaporated milk

Directions:

1) To make cake, preheat oven to 350 degrees. Place pecans in bowl of a food processor and process until fine. Set aside. Peel, core and quarter apples and place them in bowl of food processor and pulse until they are in medium-coarse shards, or about size of almonds. Set aside.
2) Place butter in a large mixer bowl, add sugar and beat until fluffy. Add egg and beat until blended. Add soda, salt, cinnamon, nutmeg and mix quickly. Add flour and beat until just blend. Stir in apples and nuts.
3) Pour mixture into a greased 9-inch-round cake pan and bake for 30 minutes or until top springs back when touched with a finger. Cool slightly. Center may sink somewhat.
4) For caramel sauce, melt butter, brown sugar and salt in a small saucepan over medium heat. Bring to a boil, stirring with a whisk. Remove from heat and whisk in vanilla and milk.
5) Cut cake into eight wedges. Ladle a large spoonful of sauce on the bottom of eight dessert plates. Place a wedge of cake on top of sauce. Yield: 8 servings.

This post is being linked to:

Tasty Tuesday

Sunday, December 13, 2009

Transylvanian Goulash - Slow Cooking at Its Best


From the kitchen of One Perfect Bite...Transylvania is a province in central Romania that's surrounded by the Transylvanian Alps and the Carpathian Mountains. If we are to believe the likes of Bram Stoker and Anne Rice, this plateau is also the ancestral home of vampires. While imagination should be allowed to soar, I wish the two of them, in the midst of all that Gothic angst, could have given a nod to Romanian cooking. I've held on to this recipe for quite a while now. It first appeared in "The Cooking of Vienna's Empire" by Joseph Wechsberg and it was featured in The New York Times in 2006. I didn't give the recipe a try until last week. My bad! This is absolutely delicious and I hope those of you who trust my opinion and recipes will give this a try. A bit of back ground will help here. We've had unseasonably cold weather in Oregon this past week. I had a taste for choucroute garni but my pantry and freezer did not have all I needed to make it. I decided that this would be a perfect time to give this recipe a test run. I'm so glad I did! This is perfect winter fare and the recipe adapts beautifully to crock-pot or low-slow oven cooking. I'm giving directions for both. Here's the recipe.

Transylvanian Goulash...from the kitchen of One Perfect Bite

Ingredients:
1 pound (drained weight) sauerkraut
2 tablespoons butter
1 cup onion, finely chopped
1 large garlic clove, miced
Salt
2 tablespoons sweet Hungarian paprika
3 cups chicken broth
4 pounds boneless pork shoulder, cut in 2-inch cubes
1-1/2 teaspoons caraway seeds
1/4 cup tomato puree or plain tomato sauce
1/2 cup sour cream
1/2 cup heavy cream
2 tablespoons flour

Directions:
1) Wash sauerkraut under cold running water then soak in cold water for 20 minutes to reduce sourness. Strain well, pressing out excess water.
2) Melt butter in a 5-quart casserole; add onions. Cook over medium heat, stirring occasionally until lightly colored, 6 to 8 minutes. Add garlic, season with salt and cook a minute or two longer. Stir in paprika, pour in 1/2 cup of broth and bring to boil. Add pork cubes. Spread sauerkraut over pork sprinkle with caraway seeds. Combine tomato puree and reserved broth in a small bowl. Mix well and pour over sauerkraut. Bring to a boil.
3) If using a crock-pot, transfer contents of casserole to crock-pot insert. Cover, and cook on high, for 3 to 3-1/2 hours, or until pork is fork tender but still retains its shape.
4) If using a conventional oven, preheat to 250 degrees F. Cover casserole and transfer to oven. Cook, covered, for 3 to 3-1/2 hours, or until pork cubes are tender but still retain their shape.
5) When pork is tender, transfer meat and sauerkraut to a serving platter with high sides. Tent with foil to keep warm.
6) Transfer sauce to a 2-quart pan. Set over medium heat. Combine flour, heavy cream and sour cream in a small bowl. Whisk until smooth. Stir mixture into sauce and simmer for 10 minutes longer. Do not boil. Season to taste with salt and pepper. Pour over meat and serve. Pass additional sour cream as a side. Yield: 6 servings.

This post is being linked to:

Crock-Pot Wednesday at Dining with Debbie

Saturday, December 12, 2009

St. Lucia Buns - Blue Monday


From the kitchen of One Perfect Bite...
Christmas celebrations in Sweden begin with the feast of St. Lucia on the 13th of December. Lucia is the patron saint of light and she is honored on this day. In homes that still observe the feast, the eldest daughter awakens early, dons a white garment sashed in red and places a crown of laurel that holds 4 candles upon her head. Legend tells us that Lucia, whose name means light, placed candles in a wreath she placed on her head in order to free her arms to carry bread she was smuggling to Christians hiding in the catacombs. These days the daughter leads a musical procession with her younger siblings in tow and serves the family special buns called lussekatt for their breakfast. The saffron flavored buns are usually shaped like the figure eight and are topped with raisins at either end of the spiral. The children may, if they wish, wear their costumes to school on this day. Winter months are dark in Sweden and the candles in Lucia's crown symbolize the light of faith and the promise of the sun's return.


Last year my nod to Lucia was a special coffee cake and a recounting of Christmas misadventures with Claire, who dreamed of being chosen to led the St. Lucia Day procession. That story is here should you like to read it. Today's treat is the saffron buns that are traditionally served on this holiday. They are very easy to do, so I'll get right to the recipe.

St. Lucia Buns...from the kitchen of One Perfect Bite

Ingredients:
8 tablespoons (1 stick) unsalted butter
1-1/3 cups milk
1 teaspoon saffron threads, chopped fine and soaked in a few drops of water
1 tablespoon active dry yeast
2/3 cup sugar
1/2 teaspoon salt
2 eggs, divided use
4 cups unbleached flour + flour for kneading
Raisins for garnish

Directions:
1) Melt butter in a small saucepan set over medium heat. Add milk and saffron and heat until just until warm. Pour into bowl of an electric stand mixer. Sprinkle yeast over milk and let it sit for 5 minutes. Add sugar, salt, 1 egg and 2 cups flour. Beat with paddle attachment until smooth and well combine, about 2 minutes on medium speed. Add final 2 cups of flour. Using dough hook, beat until mixture is smooth and begins to climb beater. Transfer dough to a lightly floured surface and knead until perfectly smooth. This dough has a wonderful velvety texture to it. Place in a greased bowl, turn once to coat all surfaces, and let rise, covered, in a warm place until doubled in bulk, about 1 hour.
2) Line a baking sheet with parchment paper. Preheat oven to 400 degrees F. Punch dough down, roll into a cylinder 36 inches long. Cut 18 2-inch pieces from cylinder. Roll each piece into a 10-inch rope. Form each piece into an S, spiraling ends to form a figure eight. Transfer pieces to to prepared baking sheet. Let rise, covered, until doubled in size, about 45 minutes. Brush buns with reserved egg. Tuck raisins into spirals at each end of figure eight. Bake for 15 minutes, or until golden brown. Yield: 18 buns.

This post is being linked to:
Smiling Sally - Blue Monday

This recipe is linked to:
Wild Yeast - Yeast Spotting


Photo of Lucia procession courtesy of Flickr Creative Commons license.

Friday, December 11, 2009

Pink Peppermint Patties - Pink Saturday


From the kitchen of One Perfect Bite...We've been asked to include a favorite ornament in our post today. Mine needs a little explanation. When my parents died, I became the keeper of the things no one else wanted. Tucked among them was the Christmas angel that topped our tree throughout my childhood. Though her age was apparent I couldn't bare to get rid of her, so I used her on our tree for another 30 years. I had intended at some point to replace her, but the angels that came my way were glitzy and not at all like the ones I associated with the manger in Bethlehem. When we sold the big house and moved West she was one of the few ornaments we brought with us. As fate would have it, the van in which our things were moved had a leak and my Christmas angel never saw another holiday. She was damaged beyond repair. I wasn't aware of that until we went to put up our tree on Christmas Eve. My angel had disintegrated. We dashed to a craft store for a replacement, only to find there wasn't a lot left. I saw a large white dove and grabbed it, thinking I'd replace it the following Christmas. Bob dubbed the dove the "pigeon of peace" and she gained such renown within the family that that we never let her go. My eyes at Christmas are always clouded by sentiment, so I hope you'll forgive me if I call her beautiful - almost as lovely as the angel of my childhood.

Today's recipe is a holiday version of peppermint patties. They are very easy to do and a little different from most of the homemade candies associated with Christmas. If you keep the candy base cold you'll have no problems making these. I think you'll enjoy them. Here's the recipe.

Pink Peppermint Patties...from the kitchen of One Perfect Bite

Ingredients:
2 cups confectioners' sugar
1-1/2 tablespoons unsalted butter, softened
1/4 teaspoon peppermint oil (do not use peppermint extract)
1/4 teaspoon pure vanilla extract
2 tablespoons evaporated milk + more as required
1 or 2 drops red food coloring
Chocolate Coating:
9 ounces semi-sweet or bittersweet chocolate, coarsely chopped
1 tablespoon shortening

Directions:
1) To make peppermint patties: Line a cookie sheet with aluminum foil, smoothing out any wrinkles from foil. Lightly dust foil with confectioners' sugar. Combine sugar, butter, peppermint oil, vanilla extract, evaporated milk and 1 or 2 drops of food coloring in a bowl. Beat with an electric mixer until creamy, about 3 minutes. Add additional evaporated milk by drops if needed to achieve a creamy texture. Transfer to a small bowl, cover with plastic wrap and refrigerate until firm enough to be rolled into balls, about 1 hour. Roll dough into 24 1-inch balls and place on prepared pan. Flatten each ball until patties are about 1-1/2 inches in diameter and 1/3 inch thick. Cover and place in the refrigerator until patties are firm, about 1 hour.
2) To make chocolate coating: Melt chocolate and shortening in a heatproof bowl placed over simmering water. Remove patties from refrigerator and dip, one at a time, into melted chocolate coating both sides of patties with chocolate.olate
Coating: Melt the chocolate and shortening in a heatproof bowl placed over a saucepan of simmering water. Remove patties from refrigerator and dip, one patty at a time, into melted chocolate, making sure both sides of each patty are completely coated with chocolate. Return to cookie sheet. Once all patties have been dipped in chocolate, return to refrigerator and chill until firm, about 1 hour. Store, refrigerated, in an airtight container for up to one month. Yield: 24 small patties.

Recipe adapted from Joy of Baking.com


This post is being linked to:
Pink Saturday, sponsored by Beverly at How Sweet the Sound

Thursday, December 10, 2009

Kris Kringle Ginger Cakes and Baby Jesus Birthday Cake - Foodie Friday


Kris Kringle Ginger Cakes with Green Cardamom Icing


Baby Jesus Birthday Cake and the Christmas Pageant Link

All families develop Christmas traditions that are passed from one generation to the next. I suspect that any of us expecting a visit from Santa, set out a "little something" to help ease the burden of that heavy sack and sustain him through the journey of the night. Our Santa, spoiled rotten, looked forward to hot buttered rum and a Scandinavian or German treasure. I happen to adore ginger bread, so Santa, too, learned to love it. These ginger cakes are lovely. My only caution is not to get carried away with the lemon zest. Too much will bury the wonderful flavors of ginger and cardamom that set these cupcakes apart from others like them. They are really easy to do, as you'll see when peruse the recipe. If there are small children in the house use multi-colored sprinkles to decorate the cake. Adults, who don't seem to know how to have fun, prefer crystallized ginger. Pity, that!

I've also decide to resurrect the story of the Christmas pageant and our family's Baby Jesus Cake. Of all we wrote and published last year, this proved to be our most popular entry. I hope those of you who were with us last year will revisit it and those of you who joined us after the holidays will follow the link above to the recipe and the stories that accompany it.

Kris Kringle Ginger Cakes with Green Cardamom Icing...from the kitchen of One Perfect Bite

Ingredients:
8 tablespoons (1 stick) unsalted butter, at room temperature
1/2 cup firmly packed brown sugar
1/2 cup molasses
1 egg
1/2 teaspoon vanilla
1/2 cup boiling water
1 teaspoon baking soda
1-1/2 cups all-purpose flour
2 teaspoons ground cinnamon
1 teaspoon ground ginger
1 teaspoon ground cloves
1 teaspoon fresh lemon zest
1/4 teaspoon salt
Cardamom Cream Cheese Frosting:
8 ounces cream cheese, at room temperature
1-1/2 cups confectioners’ sugar
1/2 teaspoon vanilla
1 tablespoon fresh lemon juice
1 teaspoon fresh lemon zest
1 teaspoon ground green cardamom

Directions:
1) Preheat oven to 350 degrees F. Grease 12 standard-size muffin cups or line them with paper cups.
2) Cream butter and brown sugar in a large mixing bowl until light and fluffy. Beat in molasses, egg, and vanilla.
3) In a small bowl, stir together boiling water and baking soda until dissolved. Stir baking soda water into molasses mixture.
4) Sift flour, cinnamon, ginger, cloves, lemon zest, and salt into a small bowl.
5) Whisk flour mixture into the molasses mixture until batter is combined.
6) Spoon batter into prepared muffin cups. Bake cupcakes until a toothpick inserted in center of one or two of them comes out clean, about 20 minutes.
7) While cupcakes are baking, make frosting. Cream together cream cheese and sugar in a medium mixing bowl until light and fluffy. Beat in vanilla. Add lemon juice, lemon zest, and cardamom and beat until fluffy and smooth. Chill frosting until ready to use.
8) Remove cupcakes from oven and allow to cool for 5 minutes before removing from pan. Place cupcakes on a rack to cool for 30 minutes. Spread cream cheese frosting generously over cooled cupcakes. Yield: 12 servings.

This recipe is being linked to:
Designs By Gollum - Foodie Friday

Recipe adapted from The Spice Kitchen by Sara Engram and Katie Luber

Wednesday, December 9, 2009

Sautéed Christmas Peppers


From the kitchen of One Perfect Bite...Several summers ago I stumbled on the solution to lack of color on my Christmas table. Double cut lamb chops were sizzling on the grill when I realized I had a rainbow assortment of bell peppers almost past their prime. It was a now or never moment. Working on the assumption that they'd be delicious with anything coming off the grill, I grabbed an onion, some fresh herbs, my best olive oil and the dregs of some chilled red wine and commenced a kitchen experiment. It was successful enough that the effort was repeated, and, while the mixture overwhelmed poultry, it proved to be a great side with beef as well as lamb. When Christmas rolled around, I remembered the gorgeous jewel tones and decided to make this part of our holiday dinner. I've done so ever since. I've fashioned a recipe, actually a technique, for you, but I hope you loose your imagination and create a version of your own. I have been known to take shortcuts, so while I'll be scorned by real foodies, I'll tell those of you who are short of time or space that the peppers can also be cooked in a microwave oven. You get to pick as long as I can exercise plausible deniability. Here's the recipe. The cheat sheet is in red.

Sautéed Christmas Peppers...from the kitchen of One Perfect Bite

Ingredients:
2 red bell peppers
2 orange bell peppers
2 yellow bell peppers
2 green bell peppers
3 tablespoons olive oil
3 cloves coarsely minced garlic
1 medium yellow onion, peeled and sliced
1 tablespoon fresh or 1 teaspoon dried oregano
1 tablespoon fresh or 1 teaspoon dried rosemary
3 tablespoons dry red wine
Salt and freshly cracked pepper to taste
1/4 cup chopped fresh Italian parsley
Sea salt for garnish

Directions:

1) Stem, core and remove ribs from bell peppers. Cut lengthwise into 1/2-inch strips; set aside.
2) If sautéeing: Heat oil in a large frying pan or wok. Add onions and cook until s soft, about 5 minutes. Add garlic and stir until garlic is fragrant. Add bell peppers, oregano and rosemary; saute 5 minutes. Add wine and cook, covered until peppers are tender, about 5 minutes longer. Season to taste with salt and pepper. Stir in parsley. Transfer to a serving bowl. Sprinkle lightly with sea salt and serve immediately. Yield: 8 servings.
3) If microwaving: Place peppers, onions and garlic in a large microwave container. Toss with olive oil. Microwave, covered, on HIGH power for 5 minutes. Uncover and stir. Add wine and cook, covered, for another 5 minutes or until peppers are crisp tender. Remove from oven. Season to taste with salt and pepper. Stir in parsley. Transfer to a serving bowl. Sprinkle lightly with sea salt and serve immediately. Yield: 8 servings.