Showing posts with label cheese. Show all posts

Friday, December 10, 2010

Holiday Breakfast Round-Up + Pink Saturday


We have lots going on today. It's Pink Saturday and we've been asked to share our favorite holiday movie with you. That's way too easy, so I'm going to cheat a bit and simply give you a visual clue. There will be no homework for anyone who can correctly name my favorite movie. Are you ready?


....and finally I want to share some ideas for holiday breakfasts with you. The recipes that appear below are easy to make but they produce dishes that are festive enough to make holiday meals special. I must admit I'm a bit spoiled when it comes to holiday breakfasts. The Silver Fox makes breakfast on Thanksgiving and Christmas morning, so the recipes are, of necessity, very straightforward and easy to complete. As an aside, they are also very easy to clean up after. Add one or several of them to the menu for your holiday breakfast or brunch and I know you'll be happy with the results. Here are some of my favorites.


Asparagus and Mushroom Strata


Eggs Florentine


Oven Baked Scrambled Eggs


Frittata with Spring Herbs and Leeks


Pumpkin Pancakes with Orange Caramel Syrup


Baked French Toast with Cardamom and Apricot Preserves


Breakfast Polenta with Chorizo and Queso Fresco


Smothered Eggs in Spoonbread


Swiss Onion Tart


Brussels and Liege Waffles


This post is being linked to:
Pink Saturday, sponsored by Beverly at How Sweet the Sound.

Sunday, November 21, 2010

Herb Cheese Dip - Blue Monday


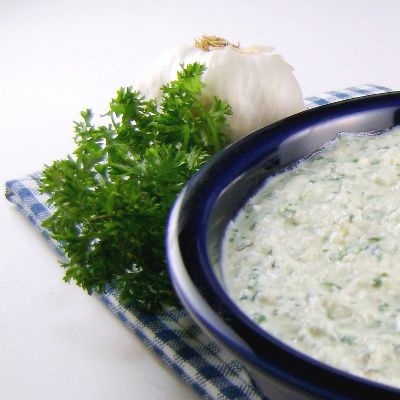
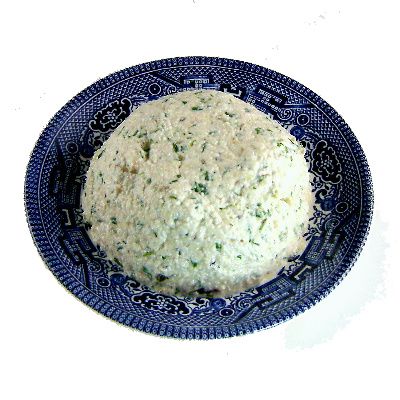
From the kitchen of One Perfect Bite...It's drip and dip season here in Oregon. Rain and football seem to go hand in hand and those games are a great excuse to make a dip whose roots can be found in Lyons, France. There the dip is made with fromage blanc. Rest easy in the knowledge that cottage cheese will work nearly as well and that the herbs needed to make it can all be found in your neighborhood grocery store. It was originally intended to be used as a dip for raw vegetables, but I've found it to be a wonderful sandwich spread as well. As you scan the recipe ingredients you'll find it to be a healthy and figure friendly addition to your snack repertoire. The recipe, developed by Patricia Wells, is easy to make, but the cheese needs to drain for a day or two before it is served, so wait time will have to be factored into your game plan. This also gives the flavors of the herbs an opportunity to permeate the cheese. If you have a particularly macho crew for game day, you might want to omit the vegetables and serve the dip as a spread on rounds of rye bread that are topped with salami or other deli meats. It would also be wonderful as a spread on thick slices of crusty peasant bread. The dip can be made several days in advance of serving and you probably won't have leftovers to worry about. Here's the recipe.

Herb Cheese Dip
...from the kitchen of One Perfect Bite courtesy of Patricia Wells

Ingredients:

2 cups full-fat or low-fat cottage cheese
2 shallots, peeled and minced
1 plump, fresh garlic clove, peeled and minced
3 tablespoons fresh chives, snipped with a scissors
3 tablespoons fresh tarragon leaves, snipped with a scissors
3 tablespoons fresh parsley leaves, snipped with a scissors
1/2 teaspoon fresh thyme leaves, carefully stemmed
Fine sea salt and freshly ground black pepper to taste
1 tablespoon dry white wine
1 teaspoon best-quality sherry wine vinegar
1 tablespoon extra-virgin olive oil
Mixed fresh herbs, for garnish (optional)

Directions:
1) Place cottage cheese in bowl of a food processor and pulse once, just long enough to break up cheese curds. Add shallots, garlic, chives, tarragon, parsley, and thyme, and process very briefly, pulsing only to blend. Season to taste with salt and pepper. Pulse once again to distribute the seasonings.
2) Transfer mixture to a cheesecloth-lined large sieve set over a bowl. Cover and refrigerate for at least 24 hours and up to 48 hours.
3) Remove cheese from refrigerator. Discard any liquid that has drained from the sieve. Transfer cheese to bowl of a food processor. Add wine, vinegar, and oil, and pulse to blend. Taste for seasoning. Transfer to a small bowl. Serve at room temperature. Yield: 2 cups.

You might also enjoy these recipes:
Blue Cheese and Bacon Dip - Easy Appetizers
Smoked Salmon Cheese Spread - Drick's Rambling Cafe
Hummus - Anja's Food 4 Thought
Taramosalata - Kalofagas
Warm Black Bean Dip - One Perfect Bite
Blue Cheese Dip - One Perfect Bite

This post is being linked to:
Smiling Sally - Blue Monday

Sunday, November 7, 2010

Tuscan Cheese Cake - Torta di Ricotta


From the kitchen of One Perfect Bite...We've had lots of pasta this fall, so with my kitchen in Italian mode, it was only a matter of time before I remembered this cake and pulled the recipe from my files. This dessert is not to everyone's liking, and while I hate to admit it, I have dissenters in my own family. They grouse the entire time they're eating the cake, but because no one here is force fed, that always makes me smile. The cake does have an unusual texture. It's a cross between a sponge cake and a cheesecake but it lacks the creamy sweetness of its American counterpart. If I had to compare it to something we all have eaten, a custardy bread pudding comes to mind. It's also been compared to a heavy souffle, the type you wouldn't want to drop on your foot. If you can, make this with fresh ricotta cheese, it really is worthwhile in this particular recipe. The cake has a faint undertone of lemon that makes it perfect to serve with macerated berries. I think the addition of almond flavor would also be wonderful. I refrigerate the cake for a full day before I plan to slice and serve it. I don't think it holds up well so my rule for it is a day to sit, a day to eat. I rarely have enough leftovers for that to be a problem. The recipe originally came from the Silver Spoon cookbook. Here's how they make this.

Torta di Ricotta - Tuscan Cheese Cake...from the kitchen of One Perfect Bite, courtesy of the Silver Spoon cookbook

Ingredients:
Butter for the pan
2-1/4 cups all purpose flour; extra for dusting the pan
4 eggs
1/2 cup light brown sugar; extra for sprinkling
1-3/4 cups ricotta cheese
Grated zest of 1/2 lemon
5 tablespoons olive oil
3/4 cup milk
1 tablespoon baking powder

Directions:
Preheat oven to 350 degrees Fahrenheit. Grease a deep tart or springform pan with butter and dust with flour. Whisk eggs and brown sugar together until light and foamy. Stir in ricotta cheese, lemon zest, olive oil and milk. Sift flour and baking powder over egg mixture, mix well and pour into cake pan. Sprinkle generously with additional brown sugar. Bake for 40 minutes. Remove from oven, cool and turn out. Serves 6.

You might also enjoy these recipes:
Yogurt Cheesecake - One Perfect Bite
Margarita Cheesecake - One Perfect Bite
Lavender Cheesecake Bars - One Perfect Bite
Caramel Apple Cheesecake - The Foodie/Nutritionist
Blueberry Japanese Cheesecake - Flour on Her Nose
Almond Cheesecake - Anncoo Journal
Fig and Almond Cheesecake - Brown Eyed Baker

Saturday, November 6, 2010

Crustless Onion Quiche


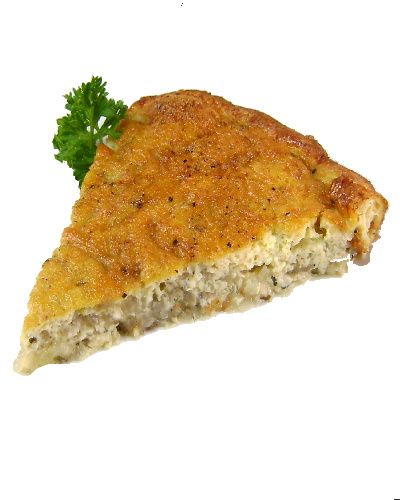
From the kitchen of One Perfect Bite...This lovely crustless quiche is wonderful to have on nights when real appetite fails you. It's also great to have on Sunday morning or for a holiday brunch when your appetite runs wild. It is inexpensive to make and can be prepared by novice cooks without special equipment. The Silver Fox makes this for me when I'm not feeling well. Believe me, if he can do it, you can do it. The onions are bothersome, but doable, and they are a perfect way to teach the culinary technique of sweating. A video showing how to sweat onions can be found here. Please notice the pan used here is a 10-1/2 inch round baking dish. If you use a pan of smaller size you'll have to adjust cooking time. While this can be assembled hours ahead of serving, I bake it at the last minute and serve it warm. I've found the onions get watery in the quiche sits around for too long a time. I usually serve this with a salad and really good peasant bread. If I've convinced you to try this, my work here is done. I'll leave supper in your capable hands. Here's the recipe.

Crustless Onion Quiche...from the kitchen of One Perfect Bite, courtesy of Patricia Wells

Ingredients:

Unsalted butter for greasing baking dish
1 pound onions, peeled
3 tablespoons unsalted butter
1 tablespoon fresh thyme leaves, carefully stemmed
Kosher salt and freshly ground black pepper to taste
Freshly grated nutmeg to taste
4 large eggs
1/4 cup whole milk
3 tablespoons heavy cream

Directions:
1) Preheat the oven to 425 degrees F. Generously butter bottom and sides of baking dish. Set aside.
2) Slice the onions in half lengthwise. Place, cut side down, on a cutting board and slice crosswise into very thin slices.
3) In a large unheated skillet, combine onions, butter, thyme, salt, pepper, and nutmeg. Sweat over moderate heat, covered, until onions are soft, about 8 minutes. They should not caramelize or turn brown. Taste for seasoning. Set aside.
4) Crack eggs into a medium-size bowl and whisk just to blend. Whisk in milk and cream.
5) Transfer onions to prepared baking dish, smoothing them out with back of a spoon. Pour egg mixture over the onions. Season with additional pepper and nutmeg.
6) Place in center of oven and bake until top is a deep golden brown and custard is firm, about 30 minutes. To test for doneness, insert tip of a knife in the center of quiche. It is done when the knife comes out clean. Do not underbake or the quiche will be mushy, not firm. Let sit for about 5 minutes to firm up. Serve warm, cut into thin wedges. Yield: 8 servings.

You might also enjoy these recipes:
Swiss Chard Quiche - Foodie/Nutritionist
Golden Onion Mushroom Quiche - The Edible Garden
Corn Quiche with Tortilla Crust
Spinach, Zucchini and Mushroom Quiche - Sing for Your Supper
Potato Frittata - The Comfort of Cooking
Southwestern Sausage Quiche - Plain Chicken
Swiss Onion Tart - One Perfect Bite
Savory Asparagus and Goat Cheese Tart- One Perfect Bite

Tuesday, October 26, 2010

Warm Black Bean Dip


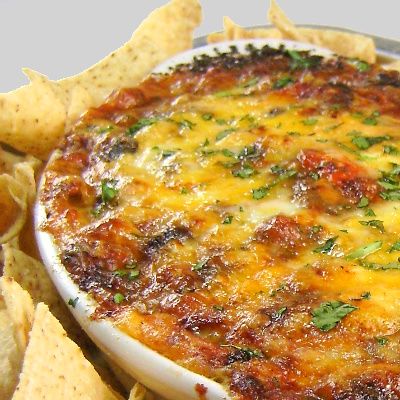
From the kitchen of One Perfect Bite...I love to make this dip for Friday movie nights or watching weekend games. It's one of those dishes that everyone seems to love and you'll never have to worry about leftovers when you serve it. It is really easy to make and involves little more than opening cans and thawing vegetables. It can be made in advance and then baked just before you want to serve it. Serve it with warm tortilla chips and your guests will follow you anywhere. To warm chips, spread them in a single layer on a cookie sheet or baking pan and bake in a 350 degree F. oven for about 5 minutes. Dump them into a bowl and serve, repeating as often as is necessary. The recipe was developed by Tony Rosenfeld for Fine Cooking magazine. I have made only minor changes to his creation. Specifically, I use less vinegar than he calls for. Here's the recipe.

Warm Black Bean Dip...from the kitchen of One Perfect Bite courtesy of Tony Rosenfeld

Ingredients:
2 tablespoons extra-virgin olive oil + more for baking dish
2 medium tomatoes, cored and cut into medium dice
2 teaspoons kosher salt, divided use
1 large yellow onion, finely diced
3 large cloves garlic, minced
1 tablespoon chili powder
2 (15.5-oz.) cans black beans, rinsed and drained well
2 canned chipotles en adobo, minced (about 1 tablespoon), plus 3 tablespoons adobo sauce from can
1 to 3 tablespoons cider vinegar
1-1/2 cups fresh or frozen corn kernels (if frozen, thaw first)
1-1/2 cups (6 oz.) grated sharp cheddar cheese
1-1/2 cups (6 oz.) grated Monterey Jack cheese
3/4 cup chopped fresh cilantro
Freshly ground black pepper
Tortilla chips for serving

Directions:
1) Heat oven to 425 degrees F. Grease a 1-1/2 qt. baking dish with oil and line a baking sheet with foil. Set the tomatoes in a colander over the sink and sprinkle with 1 teaspoon salt.
2) Heat oil in a large (12-inch) skillet over medium-high heat until shimmering hot. Reduce heat to medium, add onion, sprinkle with reserved 1 teaspoon salt, and cook, stirring, until softened and translucent, about 4 to 6 minutes. Add garlic and chili powder and cook, stirring, for 1 minute. Add half of black beans, chipotles and adobo sauce, and 3/4 cup water and bring to a boil. Cook until liquid reduces by about half, 2 to 3 minutes.
3) Transfer bean mixture to a food processor, add vinegar (I used only 1 tablespoon), and process until smooth. Let cool for a couple of minutes and then transfer to a large bowl. Add rest of beans, tomatoes, corn, half of each of cheeses, and 1/2 cup of cilantro. Mix well and season to taste with salt and pepper.
4) Transfer to baking dish and sprinkle with remaining cheese. Bake on a foil-lined baking sheet (to catch drips) until cheese melts and browns around edges, about 15 minutes (longer if refrigerated). Sprinkle with remaining cilantro and serve with warm tortilla chips for dipping.
Yield: 10 to 12 servings.

You might also enjoy these recipes:
Spicy White Bean Dip - Never Enough Thyme
Hot Clam Dip - One Perfect Bite
Bleu Cheese and Bacon Dip - Easy Appetizers
Mississippi Sin Dip - Deep South Dish
Edamame Dip - The Baking Barrister
Pan Fried Onion Dip - Brown Eyed Baker
Roasted Eggplant Dip - Melbo's Toast
Cucumber Yogurt Dip - Eclectic Recipes
Homemade Onion and Herb Dip - What's Cookin, Chicago

Wednesday, September 22, 2010

Tomato Clafoutis


From the kitchen of One Perfect Bite...You know there's too much on your plate when green tomatoes, meant for relish, turn bright red on the pantry shelf while waiting to be used. While there'll be no chow-chow this year, there is an upside to all of this. Those no longer green tomatoes will give me an opportunity to share an old recipe with you. It was developed by Patricia Wells and while it's called a clafoutis, I honestly think it's texture is more like that of a frittata. I'll leave final judgment to those of you who experiment with the recipe. Whatever you chose to call it, rest assured that it's a nice entree for lunch or a light supper. The dish is far more attractive when it's made with uniformly sized Roma tomatoes. Unfortunately, I had to use those pesky no longer green tomatoes to make mine. This is more time consuming than most custard dishes. The tomatoes must be skinned before they are cored and seeded. They are then cut, salted and left to drain on paper toweling for at least 30 minutes to rid them of moisture. Too much juice can spoil the custard, so don't rush this step. I actually let mine drain for about 1 hour before proceeding with the recipe. Once the tomatoes are done, the remainder of the recipe is child's play. I hope you'll give it a try. Here's how it's made.

Tomato Clafoutis...from the kitchen of One Perfect Bite courtesy of Patricia Wells

Ingredients:
2 pounds Roma tomatoes, peeled, cored, quartered, seeded and juiced
Salt
2 whole eggs + 2 additional egg yolks
1/3 cup heavy cream
1/2 cup grated Parmesan cheese
2 teaspoons fresh thyme

Directions:
1) Preheat oven to 375 degrees F. Grease 10-inch round baking dish. Set aside.
2) Salt tomatoes and drain on several thicknesses of paper toweling for 30 to 60 minutes.
3) Place eggs, cream, half of Parmesan cheese and half of thyme in in a small bowl. Whisk to
combine. Adjust salt and pepper to taste.
4) Layer tomatoes on bottom of baking dish. Pour batter over tomatoes. Sprinkle with remainder of cheese and thyme.
5) Bake until batter is set, about 30 minutes. Serve warm or at room temperature. Yield: 6 to 8 servings.

You might also enjoy these recipes:
Tomato, Zucchini and Goat Cheese Clafoutis - What's for Lunch Honey
Eggplant Clafoutis - Eating Club Vancouver
Rose Murray's Roasted Tomato Clafoutis - More Than Burnt Toast
Bistro Artichoke Clafoutis - Sippity Sup
Romanesco Claufoutis with Soy Ricotta - Vegalicious
David Boulud's Asparagus Clafoutis - La Belle Cuisine

Wednesday, August 18, 2010

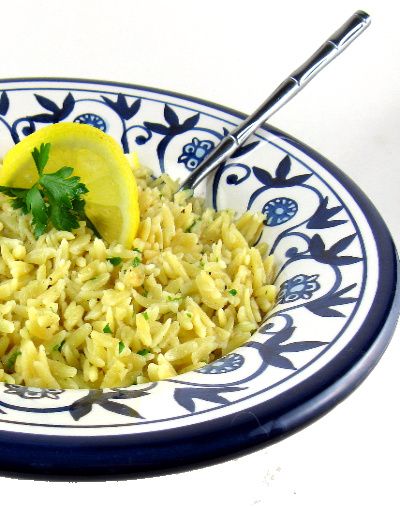
Orzo and Rice Pilaf with Pignoli and Parmesan Cheese


From the kitchen of One Perfect Bite...This is an old family favorite that we love to serve with grilled or roast meat. It is our version of a commercial rice product that was quite popular years ago. Appetites are hardy in our family and it reached a point where the prepared mix cost nearly as much as the meat it was supposed to accompany. That didn't compute, so we came up with our own rice mix. Pilaf is one of those dishes that spans cultures and geographical regions. A more thorough examination of its rootless nature can be found here. This recipe is quite simple and if your family enjoys rice-based dishes I think they'll like this one. The cheese topping is optional but it is a very nice addition that you probably will want to try. The recipe can easily be doubled. Here's how it's made.

Orzo and Rice Pilaf with Pignoli and Parmesan Cheese...from the kitchen of One Perfect Bite

Ingredients:

2 tablespoons extra virgin olive oil
1/4 cup finely chopped yellow onion
1 teaspoon minced garlic
3/4 cup raw basmati rice
1/2 cup orzo
2 cups chicken broth
1 teaspoon kosher salt
1/4 cup toasted pignoli (pine-nuts)
Optional: 1/4 cup freshly grated Parmesan cheese

Directions:

1) Heat oil in a large skillet or saucepan over medium-low heat. Add onion and saute until golden, about 5 minutes. Add garlic and cook until fragrant, about 1 minute.
2) Add rice and orzo and cook for 2 minutes. Add chicken broth and salt. Heat to boiling. Cover pan, reduce heat to medium-low and cook for 15 minutes longer, or until broth is absorbed. Remove pan from heat. Let sit, covered, for 10 minutes before serving.
3) Add toasted pignoli and cheese (if using) to pilaf. Serve immediately. Yield: 4 servings.

You might also enjoy these recipes:
Rice and Red Lentil Pilaf: Kichiri - One Perfect Bite
Southwestern Cilantro Rice Salad - One Perfect Bite
Shrimp Risotto - Coco Cooks
Spanish Rice - Taste Tempters
Mexican Rice - Chef in You
Paella Rice Salad - Eclectic Recipes
Radish Rice -Aayi's Recipes
Zesty Rice and Barley - Living the Gourmet

Friday, August 13, 2010

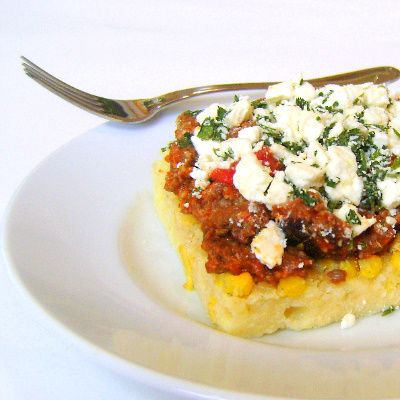
Breakfast Polenta with Chorizo and Queso Fresco


From the kitchen of One Perfect Bite...It was another busy day. The boys climbed Spencer Butte this morning and spent the afternoon picking berries for a pie and a flognard. Between adventures we stopped back home for this delicious pizza-like polenta that has a Southwestern flair. I made the polenta earlier in the day and spread it in a pan, so we could cut, rather than spoon it onto plates. The rest of the assembly is quite easy and the finished dish was scarfed down by our hungry boys. The recipe for this first appeared in Bon Appetit magazine and I like it well enough to keep it in my recipe rotation, usually serving it for brunch or a light supper. A few ingredient substitutions can be made. Coarse yellow cornmeal can be used in place of polenta and any spicy sausage can be used if you are unable to find chorizo. It's best, however, to use cherry tomatoes for the sauce. Other varieties can add too much liquid to the topping and take longer to cook as well. I know that those of you who try this will like it. Here's the recipe.

Breakfast Polenta with Chorizo and Queso Fresco...from the kitchen of One Perfect Bite, courtesy of Bon Appetit Magazine

Ingredients:
1-1/3 cups crumbled queso fresco or feta cheese (about 6 ounces)
1/2 cup chopped fresh cilantro
3-1/4 cups water
1 cup polenta (coarse yellow cornmeal) or regular cornmeal
1 1-pound bag frozen yellow corn kernels, thawed
1 pound fresh link chorizo sausage, casings removed
1 pound cherry tomatoes (about 3 1/2 cups)

Directions:
1) Preheat oven to 425°F. Toss cheese and cilantro in small bowl. Mix 3-1/4 cups water, polenta, and corn kernels in 13x9x2-inch glass baking dish. Sprinkle generously with salt and pepper and stir to blend well. Bake until water is absorbed and polenta is tender, stirring once, about 25 minutes.
2) Meanwhile, break chorizo into small pieces and saute in a large skillet over medium-high heat until browned, about 6 minutes. Add cherry tomatoes to skillet. Cover, reduce heat to medium, and simmer until tomatoes soften, about 6 minutes. Uncover; crush some tomatoes with fork. Simmer until tomatoes release juices and sauce thickens slightly, about 10 minutes. Spoon or cut polenta into squares and put on individual serving plates. Top each with a portion of chorizo mixture, then cheese mixture. Yield: 4 servings

You might also enjoy these recipes:
Mamaliga Baked with Cheese - One Perfect Bite
Oven Baked Polenta - One Perfect Bite
Spoon Bread with Leeks and Gruyere Cheese
P Is for Polenta - The Duo Dishes
Crispy Polenta with Fresh Corn and Aged Cheddar Cheese - Whisk: A Food Blog
Polenta with Mushroom Duxelles - Vino Luci
Creamy Polenta with Sausage - The Diner's Journal
Polenta Lasagna with Mushrooms Bechamel - Retro Food
Bacon Sage Polenta - The Blue Kitchen

Wednesday, August 4, 2010

Broccoli and Cauliflower Gratin


From the kitchen of One Perfect Bite...This is a quick and delicious dish that I stumbled on while looking for new ways to cook broccoli and cauliflower. The recipe was developed by Laura Chenel for Food and Wine magazine. There tends to be a sameness to recipes that are written for the more strongly flavored vegetables. This one is a delightful departure from the norm. While I love the recipe as it is written, I would suggest you omit the broccoli and double the the amount of cauliflower the recipe calls for. I think the mix of ingredients is better suited to cauliflower and it makes for a much prettier dish than when the two are combined. I promise I'll give broccoli equal time at a later date. I love it, just not in this particular dish. This gratin is strongly flavored and is probably best served with plain grilled chicken or meat, though I must say I liked this enough to have the leftovers for my breakfast the last time I made it. "Gratin" is one of those culinary oddities that identifies a pan in which to cook, as well as a method of cooking. The pan is a shallow vessel that is used to hold a mixture that is topped with breadcrumbs and cheese and quickly broiled or flashed to produce a crunchy crust. They are usually easy to prepare, high in calories and absolutely delicious. This one is no exception, though it healthier than most. This is a really nice, serviceable recipe that you'll use over and over again once you've tried it. I hope that will be soon. Here's the recipe.

Broccoli and Cauliflower Gratin...from the kitchen of One Perfect Bite, courtesy of Laura Chenel

Ingredients:
4 cups broccoli florets (from 2 small heads)
4 cups cauliflower florets (from 1 small head)
1/4 cup extra-virgin olive oil
2 large garlic cloves, minced
1/8 teaspoon crushed red pepper
1/2 pound sharp Cheddar cheese, coarsely shredded (2 cups)
1/4 cup pitted oil-cured green or black olives, coarsely chopped
1 cup coarse plain dry bread crumbs
Salt and freshly ground pepper

Directions:
1) Preheat oven to 400 degrees F. Butter a 2-inch-deep 2-quart baking dish. Bring a large saucepan of salted water to a boil, add broccoli and cauliflower and cook until crisp-tender, about 3 minutes. Drain thoroughly.
2) In a large skillet, heat 2 tablespoons of oil over moderate heat. Add garlic and crushed red pepper and cook just until fragrant. Remove pan from burner. Add broccoli and cauliflower and toss. Toss olives and half of cheese with vegetables. Transfer to a baking dish and sprinkle with remaining cheese.
3) In a small bowl, toss crumbs with remaining 2 tablespoons of olive oil; season with salt and pepper. Sprinkle crumbs over cheese. Bake in upper third of oven for about 12 minutes, or until cheese is bubbling and crumbs are golden. Serve hot. Yield: 4 to 6 servings.

You might also enjoy these recipes:
Spring Vegetable Ragout - One Perfect Bite
Summer Vegetable Gratin - Delicious Dishings
Winter Root Vegetable Gratin - Playing House
Vegetable Au Gratin - eCurry
Root Vegetable Gratin - The Bitten Word
Summer Vegetable Gratin - Erin Cooks

Monday, July 19, 2010

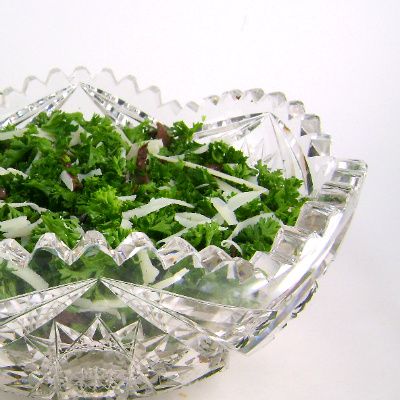
Flaked Parsley Salad with Black Olives and Cheese


From the kitchen of One Perfect Bite...Those of you who have traveled the backroads and byways of the Mediterranean are probably familiar with this salad. I learned of it ten years ago while paging through an article written by Paula Wolfert, a respected food writer and teacher with expertise in the food of the region. The recipe was unusual enough to catch my eye and simple enough to hold my attention. While I love to serve the salad with grilled meat or fish, I also like to incorporate it as an ingredient in other recipes that will be featured later in the week. Its main ingredient is fresh curly parsley. Lots of it. The parsley leaves are removed from the stems and torn into tiny bits. It's really important that no short cuts be taken with this step. Large clumps and stems will spoil this salad and make it quite ordinary. Once you have about four cups of shredded parsley flakes they are combined will olives and shallots and tossed with the simplest of oil and vinegar dressings. The resulting salad is delicious when it's made with really fresh parsley. It's not worth your while to make it with parsley of an uncertain age. Older parsley is tough and the salad will taste like rabbit fodder. It's also important not to dress the salad until just before serving. The salad becomes compacted if it sits too long after the oil and vinegar have been added. I first made this out of curiosity, but what began as an experiment has become a regular feature of my summer table despite its pains and pitfalls. I know that many of you share my passion for the unusual, so I decided to post this recipe despite its simplicity. I really think you'll like it. Here's the recipe.

Flaked Parsley Salad with Black Olives and Cheese...from the kitchen of One Perfect Bite, inspired by Paula Wolfert

Ingredients:
1/4 pound very fresh curly parsley, washed and thoroughly dried
1/2 cup (about 24) Kalamata olives, rinsed, drained pitted and slivered
1/4 cup minced shallots or red onion
1/2 teaspoon Worcestershire sauce
3 tablespoons extra virgin olive oil
1 tablespoon cider vinegar
Salt and freshly ground pepper to taste
1/4 cup coarsely grated Pecorino-Romano cheese

Directions:

1) Remove parsley from stems. Discard stems and tear each leaf into tiny bits. You should have four cups of loosely packed parsley flakes.
2) Combine parsley, olives, shallots, Worcestershire, oil, vinegar in a medium bowl. Add salt and pepper to taste. Toss gently to combine. Transfer to a serving bowl and sprinkle with cheese. Yield: 6 servings.

You might also enjoy these recipes:
Corn and Radish Salad - One Perfect Bite
Mediterranean Radish Salad - One Perfect Bite
Asparagus and White Bean Salad - One Perfect Bite
Moroccan Carrot Salad - The Perfect Pantry
Feta and Watermelon Salad - Girlichef
Heirloom Tomato Salad - Chef Tom's Blog
Spicy Lentil, Radish and Parsley Salad - Cook Sister
Greek-Style Zucchini Salad - Closet Cooking

Friday, July 16, 2010

Shrimp and Cheesy Grits - Pink Saturday


From the kitchen of One Perfect Bite...One of the benefits of having family spread across the country is the opportunity to sample regional foods and meet with like-minded folks who also enjoy the kitchen. Today's recipe is the kidnapped offspring of one that was developed by chef Jon Bonnell for a side dish that was to be served in his Texas restaurant. Under normal circumstances, I would have nothing to do with a dish like this. Years ago, while traveling in the South, I developed an active dislike of grits which appeared, unrequested and unseasoned, on my breakfast plate - over and over again. I equated them with paste. Truth be told, I thought paste had more flavor. At any rate, this past year I was given a copy of Bonnell's book, on the condition I make a version of his shrimp and grits. I should be ashamed I know, but I wanted the book, so my version of shrimp and grits was born. For the uninitiated, grits are coarsely ground dried corn that's served boiled, or boiled and then fried. While they're related to corn meal, they are more coarsely ground. They can be found on the cereal aisles in all large food markets. I've used quick cooking grits in my recipe and my directions are based on those that come on the box of grits I buy. If you make this dish, check the instructions on your box to make sure there are not vastly different from the ones I give here. You may also want to increase the heat by adding more hot pepper sauce. Be careful if you do that. The dish can quickly turn to fire if too much is used. This is a wonderfully easy recipe. It is, unfortunately, high in calories because of the amount of cream used to assemble the dish. While you can cut back to half-and-half, the dish really is not the same. Despite my initial reservations, I've really come to love this dish and serve it as an entree for family and close friends. I think you might like it too. Here's the recipe.

Shrimp with Cheesy Grits...from the kitchen of One Perfect Bite inspired by Jon Bonnell

Ingredients:
Grits
1/2 cup chopped yellow onion
1 teaspoon minced garlic
1 teaspoon butter
1 teaspoon hot pepper sauce (i.e. Tabasco)
1 cup heavy cream
1 cup chicken stock
1 tablespoon Creole seasoning
1/2 cup quick grits
1/2 cup grated Monterey or Pepper Jack cheese
Shrimp
12 ounces Andouille sausage, cut in 1/2-inch dice
1 teaspoon butter
1 pound large (16 - 20) count shrimp, peeled and deveined
1/2 cup heavy cream
1 teaspoon hot pepper sauce (i.e.Tabasco)
Salt and pepper to taste

Directions:
1) To make the grits: Melt butter in a medium nonstick skillet set over medium heat. Add onions and saute until soft, about 3 to 5 minutes. Add garlic and saute until fragrant, about 30 seconds longer. Add hot sauce, heavy cream and chicken stock and bring just to a simmer. Whisk in Creole seasoning and grits. Cook, stirring constantly until mixture begins to thicken, about 5 minutes. Remove from heat. Fold in cheese and let sit, covered, for 5 minutes.
2) To make shrimp: Melt butter in a large nonstick skillet set over medium heat. Add sausage and saute in butter until lightly browned. Add shrimp and cook for two minutes. Pour in cream and add hot sauce. Reduce heat and cook until cream thickens slightly and shrimp is cooked through, about 3 minutes. Season to taste with salt and pepper.
3) To serve: Spread grits on a small platter. Pour shrimp and sauce over grits. Yield: 4 servings.

You might also enjoy these recipes:
Blue Corn Muffins - One Perfect Bite
Spoon Bread with Leeks and Gruyere Cheese - One Perfect Bite
Oven Baked Polenta - One Perfect Bite
Garlic Shrimp and Cheddar Grits - A Dose of Frosting
Shrimp and Andouille Sausage - Framed: My Life One Picture at a Time
Grits and Grillades - Deep South Dish

This post is being linked to:
Pink Saturday, sponsored by Beverly at How Sweet the Sound.

Monday, June 7, 2010

Asparagus and Mushroom Strata


From the kitchen of One Perfect Bite...While it is starting to get spindly, asparagus is still available in our local farmers' markets. I've been wanting to make this strata for ages, but for one reason or another kept putting it off. I finally decided it was foolish not to try it while asparagus is so cheap and plentiful. I always welcome recipes that make company breakfast or brunch easier to do and I like stratas because they can be assembled the night before they're needed. This one, adapted from Better Homes and Gardens magazine, is really easy to assemble and it is a pleasant way to start the day. If you are looking for a recipe that will simplify the serving of breakfast or brunch, you might want to give this one a try. It will never replace Eggs Benedict, but it's easy to do and festive. Here's the recipe.

Asparagus and Mushroom Strata...from the kitchen of One Perfect Bite, adapted from a recipe in Better Homes and Gardens magazine

Ingredients:
1 pound thin asparagus spears
1 tablespoon olive oil
1 pound sliced fresh mushrooms
3 cloves garlic, minced
1/4 teaspoon salt
1/4 teaspoon freshly ground pepper
2 cups shredded Swiss cheese (8 ounces)
2 tablespoons snipped fresh dillweed or 1 teaspoon dried dillweed
12 slices French or Italian bread, cut into 4x1x1-inch sticks
6 eggs
2-1/4 cups half-and-half or whole milk
1/4 cup grated Romano or Parmesan cheese

Directions:
1) Clean asparagus; snap off woody bases. Cut thick spears in half lengthwise. Cut spears into 3-inch pieces. In a large saucepan bring a small amount of water to boiling. Add asparagus. Cook, uncovered, 1 minute. Drain; rinse with cold water. Drain on paper towels.
2) Lightly grease a 2-quart rectangular baking dish; set aside. In a large skillet heat oil. Add mushrooms, garlic, salt, and pepper. Cook, uncovered, over medium-high heat for 4 to 5 minutes or until nearly all liquid has evaporated. Set aside.
3) In a bowl toss together the Swiss cheese and dillweed.
4) Cover bottom of baking dish with half of the bread sticks. Top with half of the mushrooms, half of the cheese mixture, and half of the asparagus. Repeat with remaining mushrooms, cheese mixture, and asparagus. Top with remaining bread pieces.
5) In a bowl beat together eggs and half-and-half. Pour mixture over layers in dish. Press lightly with back of a spoon to thoroughly moisten bread. Sprinkle grated cheese over top. Cover and chill 2 hours. Bake, uncovered, in a 325 degree F oven about 45 minutes or until a knife inserted near center comes out clean. Remove from oven; let stand 10 minutes before cutting. Makes 6 to 8 servings.

To Make Ahead: Layer the strata and pour the egg mixture over layers. Cover and chill up to 24 hours. Bake, uncovered, as directed above.

You might also enjoy these recipes:
Asparagus and White Bean Salad - One Perfect Bite
Penne with Asparagus and Lemon Sauce - One Perfect Bite
Asparagus Soup - One Perfect Bite

Saturday, April 17, 2010

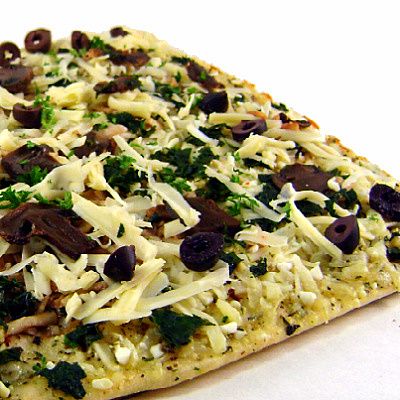
Greek-Style Flatbread Pizza


From the kitchen of One Perfect Bite...It was a wonderfully busy day today. We headed into the Lorane Valley to look at property and on our way back stopped for a quick visit with friends who have just opened their nursery and farm stand for the season. We did a quick walk through of our Saturday Market and had a very late lunch at a favorite local Thai restaurants. By the time we reached home the sun had set and we knew that dinner would be light and late. I decided to make Greek pizzas that use lavash as a base for Mediterranean-style ingredients. They are much lighter than their doughy cousins and I actually prefer the thin crisp crust to that of a standard pizza. These are easy to do. If you don't care for the Greek version, use standard pizza ingredients or better still use the flatbread for a wonderful pissaldiere. I think many of you will like this light pizza. Here's the recipe.

Greek-Style Flatbread Pizza
...from the kitchen of One Perfect Bite

Ingredients:
1 soft lavash bread
3 tablespoons olive oil
1/2 cup minced pitted Kalamata olives
1 cup grated Monterey Jack cheese
1-3/4 cups crumbled feta cheese
1-1/2 cups baby spinach, wilted
1-1/2 cups thinly sliced cremini mushrooms

Directions:

1) Preheat broiler. Place lavash on large baking sheet; brush with 1 1/2 tablespoons oil and broil until it begins to crisp, about 1 minute.
2) Reduce oven temperature to 450 degrees F. Turn lavash over on baking sheet, broiled side down. Brush with remaining 1-1/2 tablespoons oil. Sprinkle with Monterey Jack and feta cheese. Top with wilted spinach, olives and mushrooms. Sprinkle with salt and pepper. Using a wide spatula, slide lavash dierectly onto an oven rack. Bake until pizza is heated through and cheeses melt, about 5 to 7 minutes. Cut into squares. Yield 2 to 3 servings.

You might also like these recipes:
Mexicali Pizza - One Perfect Bite
Focaccia Bread - One Perfect Bite
Whole Wheat Olive Bread - One Perfect Bite

Tuesday, April 6, 2010

Cheesy Orzo Pilaf


From the kitchen of One Perfect Bite...I bought lamb chops for our holiday dinner, but because I was unsure of the number I'd be feeding, I ended up with more chops than guests at the table. I decided to grill the remainder of the chops tonight. Those we had for the holiday were delicious and I wanted to serve these with something that would compliment, rather than overpower, their marvelous flavor. I decided to make an endive and watercress salad and a very cheesy orzo pilaf. I can attribute the salad to Thomas Keller, but identifying the parentage of the orzo is next to impossible. Rachael Ray did a version of this recipe at least five years ago and since that time it has appeared in various guises on numerous cooking sites. I lack the wisdom of Solomon and have no easy test to establish paternity, so I'm just going to move along and pretend the orzo is a new version of rice pilaf. It is very easy to do and can be on the table in 15 minutes. Chances are you have all the ingredients you need to make this in your pantry, and, if not, they can all be found in any large grocery store. It is a perfect dish to serve with grilled meat or poultry and I know you'll enjoy it. Here's the recipe.

Cheesy Orzo Pilaf...from the kitchen of One Perfect Bite

Ingredients:
3 cups low-sodium chicken broth
3/4 pound orzo
5 minced garlic cloves
1 cup grated Parmesan-Reggiano cheese
2 tablespoons finely minced parsley
salt to taste
freshly ground pepper to taste

Directions:

1) Bring broth to a boil in a large heavy saucepan. Add orzo and garlic and reduce heat to medium high. Simmer, uncovered, for about 7-8 minutes, stirring occasionally, until the pasta is tender, and broth is nearly absorbed.
2) Turn heat off, but leave the pan on stove. Add cheese and parsley and mix well. Season to taste with salt and pepper. Serve warm. Yield: 6 servings.

You might also enjoy these recipes:
Yangzhou Fried Rice - One Perfect Bite
Warm Asian-Style Rice Salad - One Perfect Bite
Sticky Rice - One Perfect Bite

Monday, March 29, 2010

Lemon Cheese Buns


From the kitchen of One Perfect Bite...Some things never change. One of my grandson's called tonight, ".....love you, Oma." I know he does, but an unsolicited call of this sort, at his age, is unusual and I sensed something was up. We chatted for a bit and then the shoe dropped. "Mom and I have to make a Sachertorte for school tomorrow. Do you have a recipe?" Seems he was giving an oral report on Austria and wanted to share a sample of Viennese food with his classmates. Whatever happened to cupcakes? I quickly pointed out that a Sachertorte was not simple to make and tossed out a couple alternatives that were a bit more realistic. He listened politely but he still wanted to make the torte, so I sent him to a trusted site where he could find a recipe. A few minutes later his mother called. "He asked the wrong question, Mom." My girl is no fool. She doesn't do Sachertorte on Monday night. So, we went to conference call and came up with a Viennese-style fudge that, while delicious, was much easier to do. I thought I could share the recipe with you but I was missing the hazelnuts which are the core of the recipe. What I do have is the recipe for a kolache-like cheese bun that my classmates and I might have taken to school for an Easter party or had for Easter breakfast. The buns are quite nice and would be a lovely addition to your breakfast or brunch table. The soft dough is silky and a joy to work with. You can, of course, substitute plum or jelly fillings for the cheese that is called for here. These do not freeze well, but they will keep for 24 hours if well wrapped and refrigerated. Here's the recipe for an old-fashioned Easter treat.

Lemon Cheese Buns
...from the kitchen of One Perfect Bite

Ingredients:

2 packages (1/4 ounce each) active dry yeast
3/4 cup warm milk (110° to 115°)
1/2 cup sugar
1/2 cup butter, softened
1 teaspoon salt
3/4 teaspoon grated lemon peel
3 eggs
4-1/2 to 5 cups all-purpose flour
Filling *
1 package (8 ounces) cream cheese, softened
1/4 cup sugar
1 egg
1/2 teaspoon grated lemon peel

Directions:

1) In a large bowl, dissolve yeast in warm milk. Add sugar, butter, salt, lemon peel, eggs and 2 cups of flour; beat until smooth. Add enough remaining flour to form a soft dough. Turn onto a floured surface; knead until smooth and elastic, about 6-8 minutes.
2) Place in a greased bowl, turning once to grease top. Cover and let rise in a warm place until doubled, about 1 hour.
3) Punch dough down. Divide in half; shape each half into 12 balls. Place 3-inches apart on parchment paper lined baking sheets. Flatten each ball to a 3-inch circle. Cover and let rise in a warm place until doubled, about 30 minutes.
4) Meanwhile, preheat oven to 375 degrees F.
5) In a small bowl, beat all filling ingredients until smooth. Make a depression in center of each roll; add filling. Bake for 8-10 minutes or until golden brown. Remove from pan to cool on a wire rack. Yield: 2 dozen.

You might also enjoy these recipes:

Hot Cross Buns - One Perfect Bite
Shrove Tuesday Buns - One Perfect Bite
Cinnamon Rolls - One Perfect Bite


This post is being linked to:

Wild Yeast - Yeast Spotting

Wednesday, February 17, 2010

Truffled Mac n' Cheese


From the kitchen of One Perfect Bite...Tucked along the Rio Grand in the quiet hill country of Texas is Hudson's on the Bend, a restaurant that has fed presidents, Hollywood royalty and a real king or two. The restaurant is known for its preparation of wild game and fish and the big flavors produced by Chef Jeff Blank and his kitchen staff. I received one of Jeff's cookbooks last Christmas. While perusing the book I came across a recipe for truffled Mac n' Cheese and knew I had to try it. I want to share it with you today. Those of you who visit me on a regular basis know that the first time I use a recipe developed by a culinary star, I follow the recipe exactly as it was written. The habit is annoying to some, but I think it's the only fair way to judge the success of the dish and the chef. After that all bets are off. I've been known to completely rewrite some of the creations that find their way to my kitchen. I have not done that with today's recipe, but I have some suggestions for those of you who want to try it. This is a delicious dish, but it's extraordinarily rich. In addition to copious amounts of butter and cheese, the recipe calls for a quart of heavy cream. The second time I made the dish I replaced heavy cream with light cream and added the juice of half a lemon to the liquid as well. I made tonight's version with whole milk. The truffle oil is a must, as is the use of a soft herbed cheese. Even with the revisions, the dish is extraordinarily rich. It is also delicious. If you love mac n' cheese you owe to yourself to give this a try. Here's the recipe as it was originally written.

Truffled Mac n' Cheese ...from the kitchen of One Perfect Bite, courtesy of Hudson's on the Bend

Ingredients:
1 pound dried pasta (i.e. elbow macaroni, penne, cavatappi)
1/4 cup truffle oil
1 quart heavy cream
4 tablespoon butter
6 tablespoons all-purpose flour
Dash cayenne pepper
Salt and pepper to taste
1 cup grated Parmesan cheese
1 cup Boursin cheese
Optional : 1 truffle
Crumb topping
1 cup bread crumbs
1 tablespoon truffle oil
3 tablespoons melted butter
2 tablespoons mixed fresh parsley and chives

Directions:
1) Cook pasta in a large pot of boiling, salted water, until just tender.
2) Cool pasta with cold water, then drain in a colander.
3) Toss pasta with 1/4 cup truffle oil.
4) Melt 4 tablespoons butter in a heavy bottomed pan.
5) Stir in flour to make a blonde roux. Don't brown.
6) Add heavy cream and simmer mixture until it thickens.
7) Season with cayenne, salt and pepper.
8) Remove from heat and add pasta and cheeses.
9) Stir to combine.
10) Taste mixture and adjust salt and pepper if needed.
11) Pour into a buttered 9 x 9-inch ovenproof casserole dish.
12) In a bowl, combine bread crumbs, melted butter, 1 tablespoon of truffle oil, and herbs.
13) Pour bread crumbs over the pasta cheese mixture.
14) Bake until golden brown at 400 to 425 degrees for approximately 25 minutes.
15) Garnish with optional truffle slices. Yield: 10-12 servings.

You might also enjoy these recipes:

Straw and Hay
Pumpkin and Goat Cheese Lasagna
Mushroom Lasagna Florentine

Thursday, January 28, 2010

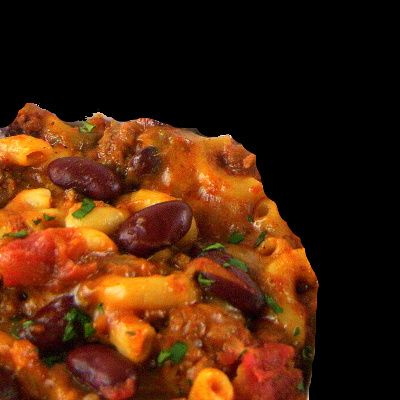
Game Day Chili-Mac Skillet


From the kitchen of One Perfect Bite...One of my favorite blogs is For the Love of Cooking. It's one of those sites that never fails to please. The photos are great, the recipes delicious and the writer an absolute charmer. Recently Pam featured a recipe for Italian Goulash that took me back to a casserole that made regular appearances on our table when the children were at home. I also serve it - then and now - for game day get-togethers with good friends. It's not meant to impress and it's best to think of it as grub at its finest. This is what happens when you combine chili with mac n' cheese. The dish takes ten minutes to prepare, twenty-five minutes to cook and uses just one pan. You can alter heat and spices to taste. You can also control the amount and type of cheese you use. Here's the base recipe. I hope you'll make this one your own.

Game Day Chili-Mac Skillet...from the kitchen of One Perfect Bite

Ingredients:

1 tablespoon vegetable oil
1 pound ground beef
1 cup chopped onion
1/2 teaspoon garlic salt
1 (14.5-oz.) can Mexican-style stewed tomatoes, undrained
1 (15.25-oz.) can red kidney beans, rinsed and drained
1 (8-oz.) can tomato sauce
1/2 cup elbow macaroni, uncooked
1/4 cup water
1 (4-oz.) can diced green chili peppers, drained
2 teaspoons ground cumin
1 teaspoon chili powder
1 cup (4-oz.) shredded Monterey Jack or cheddar cheese
Optional garnish: chopped cilantro or parsley

Directions:
1) Heat oil in a large skillet set over medium-high heat. Add ground meat, onions and garlic salt; cook until meat is brown and onions are tender. Pour off accumulated drippings.
2) Add beans, stewed tomatoes, tomato sauce, macaroni, water, green chili peppers, cumin, chili powder to meat mixture. Bring contents of skillet to a boil. Reduce heat, cover pan and simmer, stirring frequently, until macaroni is tender, about 20 minutes. Sprinkle top with cheese. Cover pan and heat until cheese melts, about 2 minutes. Garnish with chopped cilantro, if using. Yield: 6 servings.

Monday, January 25, 2010

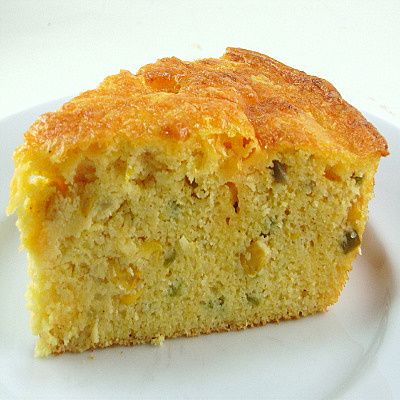
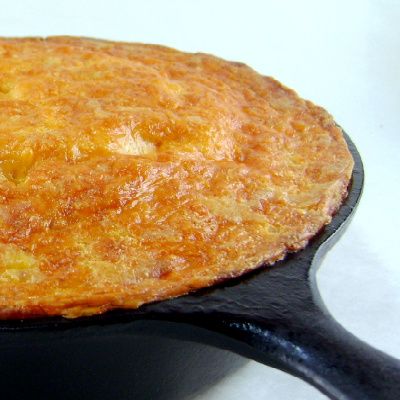
Mexican Skillet Cornbread


From the kitchen of One Perfect Bite...Over the years, I've tried at least a dozen recipes for Mexican cornbread. Some were great, others were just passable. Before going any further, I must disclose that Bob and I have an allegiance to a very simple Yankee cornbread. It's equally important that you know we are quite open-minded and willing to give almost anything a try. I found this version of Mexican cornbread while looking through a three decade old version of "The New York Times Bread and Soup Book Cookbook". It sounded good enough to try, and, if you like a spicy and moist cornbread, I think you'll find this recipe to be best of show. I liked it a lot. It's very much like the Romanian Mamaliga that I posted here last year. My preference is still for Yankee cornbread but this is very good and perfect to serve with chile or a Mexican bean soup. Here's the recipe.

Mexican Skillet Cornbread...from the kitchen of One Perfect Bite, inspired by Yvonne Young Tarr

Ingredients:
2-1/4 cups yellow cornmeal
2 teaspoons salt
4 teaspoons baking powder
1/4 teaspoon chile powder
3 eggs
3/4 cups vegetable oil
2 cups sour cream
1 to 2 jalapeno peppers, chopped
1/2 green pepper, chopped
2 cups canned creamed corn
2-1/2 cups sharp cheddar cheese, grated

Directions:
1) Preheat oven to 350 degrees F. Generously grease a 10-inch cast iron skillet. Set aside.
2) Place cornmeal, salt, baking powder and chile powder in a large bowl. Whisk to combine.
3) Beat eggs in a separate large bowl. Add oil and sour cream and beat until combined.
4) Add cornmeal mixture to eggs and stir until combined. Add peppers and creamed corn. Mix well.
5) Pour half of cornbread batter into the prepared skillet. Sprinkle with half the grated cheese. Cover layer with remaining batter and top with remainder of grated cheese.
6) Bake for 45 minutes. Serve warm. Yield: 12 to 16 servings.

Friday, January 22, 2010

Chocolate Peppermint Pie - National Pie Day - Pink Saturday


From the kitchen of One Perfect Bite...I've been looking for a new dessert to serve on Valentine's Day. While searching for recipes for National Pie Day, which coincidentally is today, I found this lovely Chocolate Peppermint Pie on the Wisconsin Milk Marketing Board web site. It would be perfect for Valentine's Day and I knew I had to try it. Any recipe that combines white and dark chocolate with peppermint and cream cheese gets my attention immediately. I must tell you I wasn't disappointed, but there are things I'd change the next time I make the pie. Forget the crust. It doesn't add much to the pie. Use a prepared chocolate crumb shell instead. It will add another layer of flavor and save a lot of time as well. I'd also make the pie 24 hours before I plan to serve it. If you look at my photo, you'll see that the layers "bled" together when the pie was sliced. I think that can be avoided with longer chilling. You might also want to add a touch of red food coloring as the crushed peppermint adds only a hint of color to the white chocolate layer. It's sinfully rich and very sweet, but it's a dessert meant for a special day, so, I gave myself absolution and will atone with an extra hour on the treadmill. I do hope you'll try it. The verdict of my tasters was "most excellent". Here's the recipe.

Chocolate Peppermint Pie...from the kitchen of One Perfect Bite courtesy of the Wisconsin Cheese Board

Ingredients:
Crust:
2 cups all-purpose flour
2 tablespoons powdered sugar
1 teaspoon salt
3/4 cup (1 1/2 sticks) cold butter, cut into 1/2-inch cubes
1 teaspoon vinegar
5 to 6 tablespoons ice water
Chocolate Peppermint Pie:
1/2 cup (1 stick) butter, softened
1 cup (8 ounces) cream cheese, softened
3/4 cup sugar
1/2 cup pasteurized egg product*
1/2 cup whipping cream
1 cup white chocolate chips, melted and cooled
1/2 cup (20) peppermint candies, crushed
1/2 cup semi-sweet chocolate chips, melted and cooled
1 9-inch baked pie crust (press-in or fancy), cooled
Optional garnish: sweetened whipped cream, crushed peppermint

Directions:
Pie Crust:
1) In a bowl, stir together flour, sugar and salt. Using a pastry blender, cut butter cubes into flour mixture until pieces are pea-size. Sprinkle vinegar over flour mixture, tossing with a fork. Sprinkle 5 to 6 tablespoons cold water, 1 tablespoon at a time, over flour mixture, tossing with a fork each time until dough is moistened and crumbly. Gather dough into a ball, flatten into a disk, wrap in plastic wrap and refrigerate at least 4 hours.
2) Preheat oven to 400ºF.
3) Roll dough into a 12-inch circle. Gently fold the crust into quarters, center over 9-inch pie plate and unfold. Ease crust into the plate. Trim pastry, leaving a 1-inch overhang beyond plate edge. Fold crust edge under and crimp or flute the edge using a fork or your fingers.
4) Prick pastry with a fork. Line bottom and up sides of crust with foil and add dried beans or pie weights. Bake for 15 minutes, remove foil. Bake an additional 10 to 15 minutes, until crust is golden. Remove to a wire rack; cool completely.
Filling:
5) In a bowl, beat butter, cream cheese and sugar together. Combine egg product and whipping cream in a separate bowl; gradually add to butter mixture while beating, scraping bowl often. Beat until light and fluffy, about 5 minutes. Reserve half of mixture in a small bowl. Add cooled white chocolate to remaining half of mixture; beat well. Stir in crushed candy. Spread in baked pie crust; chill 10 minutes.
6) Return reserved butter mixture to bowl, add cooled semi-sweet chocolate; beat well. Spread over white chocolate layer. Refrigerate at least 2 hours. Garnish and serve. Yield 8 servings.

*Note: Pasteurized egg products are available in the supermarket. The reason the recipe calls for this product is that the filling is not cooked, and there is a salmonella risk associated with eating raw eggs.

This post is being linked to:
Pink Saturday, sponsored by Beverly at How Sweet the Sound

Wednesday, January 13, 2010

Warm Beef and Cheese Dip with Pecans


From the kitchen of One Perfect Bite...I love to see old things made new again. Over the holidays we were served a long retired beef and cheese dip that I'm very fond of. While I love its taste, I even more enamored of the ease with which it can be prepared. I especially like this recipe because the ingredients can be reduced by half to produce a quantity that's perfect for smaller gatherings. I shouldn't admit this, but I 'm a fan of dips. I 'm fond of those made with ingredients that make those more sophisticated than me shudder. I dip freely into mixtures made with dehydrated mixes, so it should come as no surprise that I occasionally serve one made with dried beef. There are many versions of this on the net. This version is my refinement of the recipe to suit the tastes of my family. I always serve this warm from the oven with thinly sliced French bread or an assortment of good crackers. It's perfect football fodder.

Warm Beef and Cheese Dip with Pecans
...from the kitchen of One Perfect Bite

Ingredients:
2 (8-oz.) packages of cream cheese, room temperature
3/4 cup sour cream
1/4 cup mayonnaise
1/4 cup grated onion and juice
1 large clove garlic, minced
2 (2-1/2-oz.) jars dried beef, finely minced
1 cup chopped toasted pecans

Directions:
1) Combine cream cheese, sour cream, mayonnaise, onion and juice and garlic in a small bowl. Mix until smooth and light. Fold in minced beef. Transfer to a bake and serve dish. Top with toasted pecans.
2) Preheat oven to 300 degree F. Bake, uncovered for 30 minutes. Serve with good bread and crackers. Yield: 2-1/2 cups.