Showing posts with label confection. Show all posts

Monday, December 20, 2010

Chocolate Hazelnut Truffles


From the kitchen of One Perfect Bite...This confection is private stock, served only to BFF's or shared with my daughters as we sip pear brandy and talk late into the night. While not quite as good as the Ferrero Rocher chocolates after which they're patterned, I must say, with all due modesty and a drum roll or two, that these are PDG. They are also embarrassingly easy to assemble and for that reason I make them throughout the year. The truffles take about 30 minutes to prepare, but the chocolate mixture used to form them must be chilled before they can be shaped, so, despite ease of preparation, you'll have to build wait time into your game plan. I found the recipe on the Taste of Home website several years ago and I've made no changes to it, save for altering the time the chocolate must be refrigerated. I've found that the overnight chill suggested in the recipe produces an unworkable mass that must sit for an hour before the truffles can be shaped. A three hour chill is all that's really need. I am currently using milk chocolate candy bars to make these, but come the first of the year I want to make these using Nutella. I like the thought of triple hazelnut truffles. I hope you'll give these a try. They really are delicious. Here's the recipe.

Chocolate Hazelnut Truffles...from the kitchen of One Perfect Bite, courtesy of Debra Pedrazzi and Taste of Home magazine

Ingredients:
3/4 cup confectioners' sugar
2 tablespoons baking cocoa
4 milk chocolate candy bars (1.55-oz. each)
6 tablespoons butter
1/4 cup heavy whipping cream
24 whole hazelnuts
1 cup very finely chopped hazelnuts, toasted

Directions:

1) In a large bowl, sift together confectioners' sugar and cocoa; set aside. In a saucepan, melt candy bars and butter. Add the cream and reserved cocoa mixture. Cook and stir over medium-low heat until mixture is thickened and smooth. Pour into an 8-in. square dish. Cover and refrigerate for about 3 hours or overnight.
2) Using a melon baller or spoon, shape candy into 1-in. balls; press a hazelnut into each. Reshape balls and roll in ground hazelnuts. Store in an airtight container in refrigerator. Yield: 2 dozen.

You might also enjoy these recipes:
Easy and Festive Peppermint Bark Candy - Sugar and Spice
Candy Cane Fudge - What's Cookin Chicago?
Dark Chocolate-Covered Peanut Butter Cups - Verses from My Kitchen
Honey Cream Caramels - Eat Good 4 Life
Peanut Butter Fudge - Brown Eyed Baker
Chocolate Covered Toffee - Petit Foodie
Rocky Road Fudge Candy - Baking and Boys
Easy Chocolate Turtles - Culinary Cory
Friday, October 22, 2010

Cinnamon Candy Apples - Pink Saturday


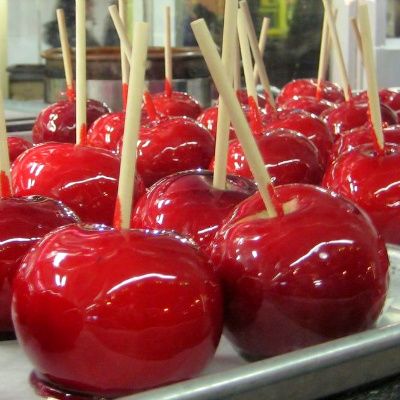
From the kitchen of One Perfect Bite...It's hard to imagine a fall harvest without candied apples. While caramel apples have become more popular, the cinnamon variety predates them by 50 years. Candied apples were created at the turn of the 20th century by William Kolb, a New Jersey candy maker. He made them to use as part of his Christmas display and they rapidly became popular with his customers. His approach was simple. He dipped apples into a candy made from sugar, corn syrup, red dye and cinnamon oil. As the candy hardened it formed a glistening shell around the apple and the candied apple as we know it was born. The apples are still prepared in this way. If you are comfortable working with a candy thermometer you'll find these easy to make. There are, however, a few pitfalls that you want to avoid. For openers, make sure your apples are wax free. Since this is not a recipe that can be tasted as it cooks, be generous with the amount of flavoring you use up front. You should be able to find bottled cinnamon flavoring in the spice aisle of major grocery chains. It can also be ordered online. Make sure you use a pot that is deep enough to allow dipping the apples and that sticks inserted into the apples are strong enough to hold them. If the syrup becomes too thick don't be afraid to reheat it and when you're finished dipping, make sure you put the apples down on a buttered baking sheet or parchment paper. Wax paper will melt. Finally, these are best eaten within 24 hours of making. Their appearance begins to deteriorate after that. This recipe will make enough syrup to coat 12 small apples. It may be doubled. Here's the recipe.

Cinnamon Candy Apples...from the kitchen of One Perfect Bite inspired by Paula Deen

Ingredients:
1 cup water
1/2 cup corn syrup
2 cups sugar
1 teaspoon cinnamon flavoring
1 teaspoon red coloring
1 dozen wooden craft sticks
1 dozen small firm apples

Directions:
Boil water, syrup, and sugar together until a brown caramel color is reached (at about 250 degrees F on a candy thermometer). Remove from heat and add cinnamon and red coloring. Cool slightly. Meanwhile force a stick into the core of each apple. Dip apples 1 at a time into heavy red syrup, drain well, and place on a buttered baking sheet or parchment paper to cool. Yield: 12 small candied apples.

You might also enjoy these recipes:
Caramel Corn - Chasing Delicious
Making Candy in the Spirit of Halloween - The Food Addicts
Mummy Munch - Picky Palate
Caramel Apples - Annie Eats
Candy Compost Bars - Sugar Plum
Cakespy: Homemade Candy Corn - Serious Eats

This post is being linked to:
Pink Saturday, sponsored by Beverly at How Sweet the Sound.

Sunday, October 10, 2010

Candied Walnuts


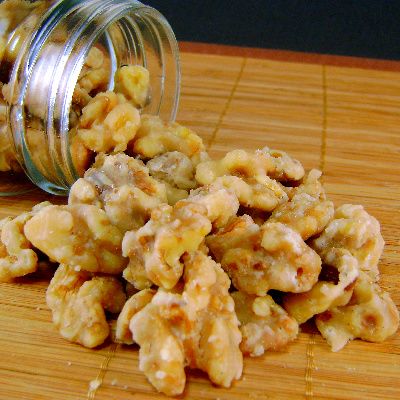
From the kitchen of One Perfect Bite...I make it a point to keep a supply of candied walnuts and pecans in the pantry. I use them often enough to warrant making them in quantity and that, coincidentally, allows me to avoid the expense of the commercial variety that I favor. We don't eat these out of hand, but I do use them in salads and to top certain of the desserts we enjoy. Years ago, Bob and I fell in love with a French salad of watercress and endive that is lightly dressed with vinaigrette and tossed with candied walnuts. We have the salad at least once a week and I've convinced myself that it is not an extravagance as long as I make the nuts myself. My stash allows me to overlook the outrageous cost of Belgian endive and watercress. Foolish I know, but we all have grand deceptions we visit upon ourselves. This happens to be one of mine. I have several recipes for candied nuts and the one I'm sharing tonight is the one my family most enjoys. Regular readers know that I have a great deal of faith in the test kitchens of some commercial ventures. I've had exceptionally good luck with the recipes that come from the Diamond Walnut test kitchen. Let me immediately interject that mine is an unsolicited and unpaid observation. I am in no way affiliated with these people and am merely sharing personal observations and experience. If you have a need for candied nut meats and are comfortable using a candy thermometer, I think you'll love this recipe. The nuts can be stored in an airtight container for several weeks. Here's how they are made.


Candied Walnuts...from the kitchen of One Perfect Bite, courtesy of Diamond Walnut test kitchen

Ingredients:

1-1/2 cups granulated sugar
1/4 teaspoon salt
1/4 cup honey
1/2 cup water
1/2 teaspoon vanilla
3 cups walnut halves or large pieces

Directions:
Boil sugar, salt, honey and water together, stirring often to 242 degrees F on a candy thermometer (firm, soft ball stage). Remove from heat and add vanilla and walnuts. Stir until creamy. Turn out on waxed paper; separate walnuts, using two forks.

You might also enjoy these recipes:
Candied Walnuts - 400 Calories or Less
Roasted Walnuts with Rosemary - The Dog's Breakfast
Orange Glazed Walnuts - Meals 4 Moms
Candied Walnuts - Delicieux
Walnut Brittle with Orange Zest and Sea Salt - Eat Real
Maple-Rosemary Glazed Walnuts - Pinch My Salt
Maple Syrup Candied Walnuts - The Family Kitchen