Sunday, February 28, 2010

Poppyseed Cake - Blue Monday


Poppyseed Cake with Sour Cream Glaze


Photo courtesy of Little Orange Kitchen

From the kitchen of One Perfect Bite...This lovely European-style cake was brought to the prairies of the United States by immigrants and refugees from Central Europe. I discovered the recipe in an old Farm Journal Cookbook and was surprised to find it there, only because it's not as sweet as the cakes they usually feature. That's not to say it's not delicious. I love poppyseeds and any dessert or bread made with them. I will, however, never understand how the import and sale of Sichuan peppercorns could be banned for years in our country while the sale of poppyseeds was allowed to continue. Interesting, no? The only part of the opium poppy that can be imported here is its seed. It's completely legal to import, sell and buy them, but once you plant them you become a drug lord. That doesn't compute, at least in this old brain. Now, I have no intention of planting the few seeds I have left after making this cake, but I don't understand the way we pick and choose what's important to us. I digress. One of the instructions in the recipe calls for soaking the poppy seeds. This is not done to remove narcotic properties. Many folks have problems digesting the seeds and it's been found that soaking softens the hull and negates the problem. I'm also faithfully following the Farm Journal recipe for the cake glaze. Just between you and me, you can substitute your best cream cheese frosting for the glaze. It's lovely but the frosting is easier to make and its creaminess will take the cake to another level. The cake and glaze are simple to make, and if you are looking for something a bit different to serve your family and friends, this recipe has your name on it. Here's how it's done.

Poppyseed Cake...from the kitchen of One Perfect Bite, courtesy of Farm Journal

Ingredients:
1/4 cup poppy seeds
1 cup milk
2/3 cup unsalted butter or vegetable shortening
1-1/2 cups granulated sugar
1 tablespoon baking powder
3 cups sifted cake flour
1 teaspoon salt
4 large egg whites, stiffly beaten

Directions:
1) Add poppy seeds to milk and let stand for 1 hour.
2) Preheat oven to 375 degrees F. Grease and flour a 9 x 13-inch pan. Set aside.
3) Cream butter and sugar until light and fluffy.
4) Whisk flour, baking powder and salt together in another bowl.
5) Add flour and milk alternately to creamed mixture, beginning and ending with flour.
6) Fold in egg whites, half at a time. Pour into prepared pan. Bake for 30 minutes or until a toothpick inserted in several areas comes out clean. Let sit in pan for 10 to 15 minutes before removing to a rack to complete cooling.

Sour Cream Frosting


Ingredients:

1 cup + 3 tablespoons sour cream, divided use
1-1/2 cups sugar
1/4 cup water
1 teaspoon vanilla
1/2 cup coarsely chopped nuts

Directions:
1) Blend 1 cup sour cream and sugar in a 3-quart pan. When smooth, add water. Cook, stirring constantly, over medium heat until soft ball stage (235 degrees F.) is reached. Remove from heat. Cool slightly.
2) Add vanilla and reserved 3 tablespoons sour cream. Beat with a hand mixer until creamy. Spread quickly on top of cake. Top with nuts if desired. Yield: 12 servings.

You might also enjoy these recipes:

Lemon Poppyseed Bread - One Perfect Bite
Kaiser Rolls - One Perfect Bite
Buttermilk Cluster with Blue Poppyseeds - One Perfect Bite

This post is being linked to:
Smiling Sally - Blue Monday

Yangzhou Fried Rice


From the kitchen of One Perfect Bite...Ten years ago we spent a brief period of time in a loft apartment. It was quite small, but with only three of us and a great deal of planning, it became a manageable, if not luxurious, space. Bob and I had sold our family home and were biding time, waiting for secondary pensions to vest before moving on to Oregon. Our youngest daughter, home following a year in Asia, made her first forays into cooking in that tiny kitchen. Fried rice was her specialty. She and I had discovered Ming Tsai, who was a Food Network star at the time and his style of cooking was perfect for that tiny space. We became wok and cleaver women and began to study, really study, Asian cooking and techniques. Years later in Yangzhou, a city near Shanghai, China I came across a fried rice that would replace the one that we crafted in that loft. No one knows for sure how fried rice became associated with the city Marco Polo once called home. The rice, in different guises, is served throughout China, and Western eyes are drawn to the color of its myriad ingredients. The version I serve is meatless and made with two cups of diced vegetables. If you prefer meat in your rice, substitute one cup of vegetables with a protein you really like. In China, we were served a version that was, most often, made with dried, reconstituted shrimp and fatback or pork belly. It's interesting to note that fried rice was served in the emperor's court, though it was wrapped in egg crepes or lotus leaves. For most of us, however, it will remain a great way to use leftover rice and bits and bobs of previous meals. There are hundreds of ways to make this rice. Here's the one I use for a great meatless meal.

Yangzhou Fried Rice - Yangzhou Chao Fan
...from the kitchen of One Perfect Bite

Ingredients:
4 tablespoons vegetable oil, divided use
2 large eggs, beaten
1/2 cup finely minced yellow onion
1 teaspoon minced garlic
1/2 cup frozen petite peas, thawed and drained
1/2 cup frozen petite corn, thawed and drained
1/2 cup frozen diced carrots, thawed and drained
1/2 cup frozen edamame, thawed and drained
1 tablespoon dark sesame oil
2 tablespoons soy sauce
1 teaspoon salt
1/2 teaspoon sugar
4 cups cooked rice

Directions:
1) Heat a wok over medium high heat. Add 2 tablespoons of oil. When hot, pour in eggs and cook without stirring until lightly set, about 30 seconds. Break up eggs and transfer to a plate.
2) Add remaining 2 tablespoons of oil to wok set over high heat. Add onion and stir fry until softened, about 3 minutes. Stir in garlic and cook until fragrant. Add vegetables and stir fry until crisp tender, about 3 minutes.
3) Add sesame oil, soy sauce, salt and sugar to vegetables. Stir in rice and toss to combine. Add eggs and cook until rice is heated through. Serve hot. Yield: 4 servings.

You might also enjoy these recipes:

Warm Asian-Style Rice Salad - One Perfect Bite
Wild Rice, Celery and Walnut Salad - One Perfect Bite
Sticky Rice and Alms Giving in Luang Prabang - One Perfect Bite

Friday, February 26, 2010

Popovers and Strawberry Butter - Pink Saturday


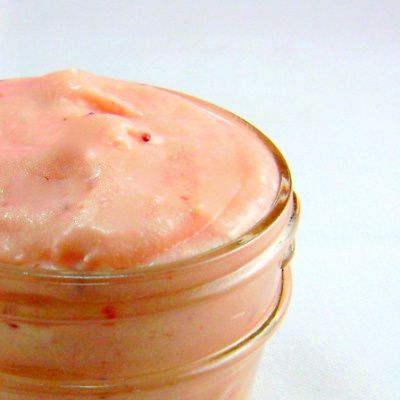
From the kitchen of One Perfect Bite... Easter and Passover will soon be here and I wanted to make sure I posted holiday recipes in time for your consideration. At Bob's suggestion, I'm going to begin with breakfast or brunch dishes that are unusual or will make entertaining a house full of people easier. I have two recipes to share with you today. One of them is a decade old recipe for popovers that was developed by Pam Anderson. Her recipe is unusual because it uses instant blending flour and that eliminates the wait time that is necessary to relax the gluten in all-purpose flour. That means that you can mix and bake popovers and have them on the breakfast table within an hour. You're probably familiar with the instant blending flours and use them for browning or thickening soups or stews. This type of flour goes through a special milling process that gives it a granular form that is much like sugar. It's perfect for sauces and gravies because it dissolves easily in liquids. Some restaurants use it to help brown meat. It can also be used for batters, quick breads, muffins and cakes. If you haven't had popovers for a holiday breakfast or brunch I hope you'll give them a try. They are really easy to make and when served warm with a fruit butter they are a real treat. The second recipe is for a strawberry butter that is a perfect accompaniment to the popovers. It, too, is easy to make. Here are the recipes.

Popovers...from the kitchen of One Perfect Bite courtesy of Pam Anderson

Ingredients:
1-1/2 cups instant blend flour (i.e. Wondra)
1 teaspoon slt
1-1/2 cups skim milk
4 large eggs
2 tablespoons melted butter

Directions:
1) Adjust an oven rack to lower middle position. Preheat oven to 425 degrees F. Spray a 12-cup muffin pan or cups of 2 popover pans with vegetable cooking spray. Set aside.
2) Mix flour and salt in a medium bowl. Mix eggs, milk and butter in a 1-quart measuring cup. Beat egg mixture into flour mixture until batter is smooth. Return batter to measuring cup. Return batter to 1-quart measure and pour into prepared cups, filling each three-fourths full.
3) Bake, without opening oven door, until popovers are crisp and golden, about 35 minutes. Twist gently to loosen from pan, then cool. Yield: 8 to 12 servings.

Strawberry Butter
...from the kitchen of One Perfect Bite

Ingredients:
1/2 cup butter, room temperature
1/4 cup cream cheese, room temperature
1/4 cup confectioners' sugar
2 to 4 tablespoons strawberry puree or preserves

Directions:
Beat butter and cheese in a small bowl until smooth and creamy. Add sugar and strawberry puree and beat to combine. Transfer to a 1-cup ramekin. Cover with clear plastic wrap and refrigerate until 30 minutes before serving. Yield: 1 cup.

You might also enjoy these recipes:
Gluten-Free Pancakes - One Perfect Bite
Maple Butter - One Perfect Bite
Brussels and Liege Waffles - One Perfect Bite

This post is being linked to:
Pink Saturday, sponsored by Beverly at How Sweet the Sound.

Thursday, February 25, 2010

French Breakfast Puffs


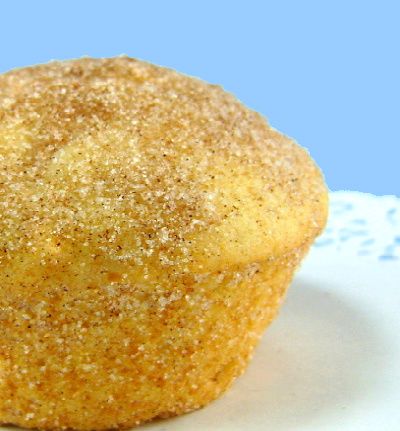
From the kitchen of One Perfect Bite...We have a code known only to the folks who call this house home. When Bob comes into the kitchen for his first cup of coffee and the kitchen is in glorious disarray, he knows exactly what's going on. "You gotta a thing this morning?" I nod affirmatively. "Whatcha making?" I smile broadly and parry, "Stuff." I had a lot of "stuff" to make for my "thing" this morning and, with a still limited range of motion, it also had to be easy to do. I remembered these delightful muffins and decided to resurrect the recipe which is almost as old as I am. French Breakfast Puffs were developed in the test kitchens of Betty Crocker many, many years ago.They are still popular today. They lack the cache of croissants or the wide appeal of bagels, but they have withstood the test of time. These morsels taste a bit like cake donuts, though they are less dense. I can't say they are lighter because each muffin is dunked in melted butter before it's coated with cinnamon sugar. While the muffins are quite pleasant on their own, the bath in butter and sugar is what made their reputation. Think snickerdoodles and you'll understand why folks love them. Years ago, all surfaces of the muffins were coated. I no longer do that, but it is important to let the muffin tops sit in butter for a minute or two before they are rolled in sugar. These do not keep well and they are best served warm. Here's the recipe for a very easy old-fashioned treat that just won't go away.

French Breakfast Puffs ...from the kitchen of One Perfect Bite, courtesy of Betty Crocker

Ingredients:
1/3 cup shortening or butter
1/2 cup sugar
1 egg
1-1/2 cups all-purpose flour
1-1/2 teaspoons baking powder
1/2 teaspoon salt
1/4 teaspoon ground nutmeg
1/2 cup milk
1/2 cup sugar
1 teaspoon ground cinnamon
1/2 cup butter, melted

Directions:
1) Heat oven to 350 degrees F. Grease 12 medium muffin cups.
2) Mix shortening, 1/2 cup sugar and the egg thoroughly in medium bowl. Stir in flour, baking powder, salt and nutmeg alternately with milk. Divide batter evenly among 9 muffin cups.
3) Bake 20 to 25 minutes or until light golden brown. Mix 1/2 cup sugar and the cinnamon. Immediately roll hot muffins in melted butter, then in sugar-cinnamon mixture. Serve hot. Yield: 9 muffins.

You might also enjoy these recipes:
Raspberry Streusel Muffins - One Perfect Bite
Blueberry and Lemon Cake-Style Muffins - One Perfect Bite
Blue Corn Muffins - One Perfect Bite

This recipe is being linked to:
Designs By Gollum - Foodie Friday

Wednesday, February 24, 2010

Crisp Cranberry and Carrot Oatmeal Cookies


From the kitchen of One Perfect Bite...Arguably, there are few snacks more appealing than an old-fashioned oatmeal cookie. While I suspect your favorite recipe for them was selected years ago, I have one more version I'd like you to try. These crisp cookies use less shortening than most and they're so packed with good things that a snake oil salesman might actually be able to convince you that they're good for you. I wouldn't go that far, but if your sweet tooth demands a snack, you could do worse. How's that for a rave review? Seriously, the cookies are packed with oatmeal, carrots, cranberries and nuts and there is hint of orange buried in the dough that gives them a unique flavor. It's hard to make a homely cookie anything more than it is, so rather than try let's get right to the recipe for this not bad for you cookie. Here it is.

Crisp Cranberry and Carrot Oatmeal Cookies...from the kitchen of One Perfect Bite

Ingredients:

1/2 cup butter
1 cup brown sugar
1/2 cup granulated sugar
2 large eggs, beaten
1 teaspoon fresh orange zest
1 tablespoon orange liqueur or concentrated orange juice
1 teaspoon vanilla extract
2 cups all-purpose flour
2 teaspoons baking powder
1/2 teaspoon baking soda
1/2 teaspoon salt
2 cups rolled oats
1 cup dried cranberries
1 cup grated carrots
1 cup chopped toasted walnuts

Directions:
1) Preheat oven to 350 degrees F. Line 2 cookie sheets with parchment paper. Set aside.
2) Cream brown and white sugar with butter. Add orange zest, vanilla and orange liqueur to beaten eggs. Mix well and stir into creamed mixture.
3) In a separate large bowl, whisk flour, baking powder, baking soda and salt to mix. Add oats, raisins, carrots and nuts. Add to butter and sugar mixture. Work with a wooden spoon to mix. The dough will be very stiff.
4) Using a tablespoon measure, drop dough onto prepared cookie sheets, spacing about 2-inches apart. Flatten top of cookies with a fork or damp fingers. Bake for 25 to 30 minutes. Remove from oven. Let sit in pans for 5 minutes. Transfer to a rack to finish cooling. Yield: 36 cookies.

You might also enjoy these recipes:
Lemon Tea Cookies - One Perfect Bite
Chinese-Style Almond Cookies - One Perfect Bite
Bittersweet Chocolate Snowballs - One Perfect Bite

Tuesday, February 23, 2010

Wild Rice, Celery and Walnut Salad - Outdoor Wednesday


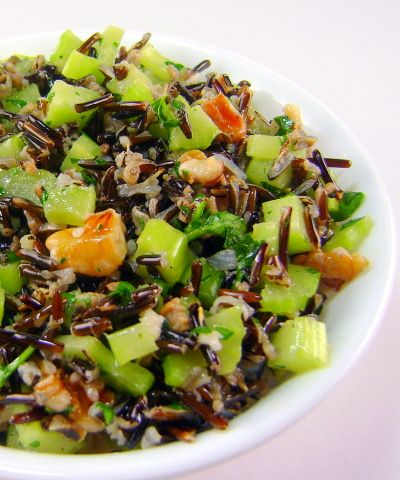
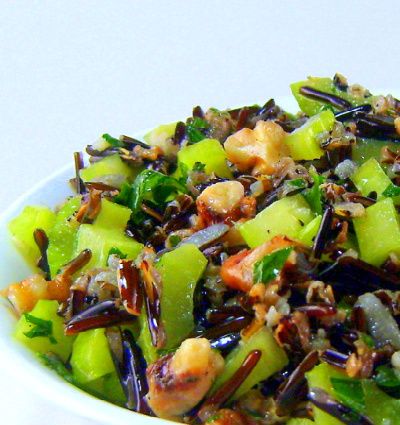
From the kitchen of One Perfect Bite...Last summer I had the opportunity to tour a local farm where wild rice is grown. While the Willamette Valley is beautiful, heavy clay soil restricts what can be grown here. Fortunately, the damp clay of the valley floor is perfect for growing grasses and wild rice is, as you know, a water-grass. Years ago a grain specialist at Oregon State University, tossed a handful of wild rice seeds into a pond behind his home to see if they would grow in this climate. A year later he had wild rice in his yard and published an article about it. As a result of the article, some far-thinking farmers planted a water-grass crop and the state's wild rice industry was born. At the moment our wild rice is still under water. In late April or early May, sprouts emerge from the water and rest on its surface. It looks a bit like seaweed at this point. Come June, the rice goes through a growth spurt and begins to stand erect. It will grow until it's about 6 feet tall and set flowers sometime in July. When the flowers set seed, the fields in which the rice grows are drained and the crop is mechanically harvested. Combined rice is allowed to ferment before it's de-hulled, dried, sorted and packaged for sale to locavores. Now the only problem is what to do with it. Unfortunately, there are not a lot of recipes for wild rice available to us. I found the recipe for this salad in the New York Times. I've modified it over and over again and have finally come up with something I really like. This recipe can also be used for brown rice, should you prefer it. The salad should be served at room temperature. Here's the recipe.

Wild Rice, Celery and Walnut Salad...from the kitchen of One Perfect Bite, inspired by Martha Rose Shulman and the New York Times

Ingredients:
4 cups low-sodium chicken broth
1 cup wild rice, rinsed
1 teaspoon salt
1 cup broken and toasted walnut pieces or 1 cup candied walnuts
1-1/4 cups thinly sliced celery
1/2 cup chopped Italian parsley
Salad Dressing
1/4 cup fresh lemon juice
1 teaspoon minced garlic
1 teaspoon salt
1/2 teaspoon pepper
1 teaspoon granulated sugar
1/4 cup walnut oil
2 tablespoons extra virgin olive oil
2 tablespoons low-fat yogurt

Directions:
1) Bring chicken broth to a boil in a large saucepan. Add salt and wild rice. Simmer, covered, for 40 minutes, or until rice is tender and splayed. Drain. Toss with walnuts, celery and parsley.
2) To make salad dressing, place lemon juice, garlic,salt, pepper, sugar, walnut oil, olive oil and yogurt in a jar with a lid. Shake until combined. Pour over wild rice mixture and toss to mix. Adjust seasonings to taste. Yield: 6 servings.

You might also enjoy these recipes:
Bulgur Salad with Pomegranate Dressing
Warm Asian Rice Salad
Asian Bean Sprout Salad

This is being linked to:
Outdoor Wednesday - A Southern Daydreamer

Monday, February 22, 2010

Thai-Style Catfish - Plah Toht Kamin


From the kitchen of One Perfect Bite...I'm told that plah toht kamin is a native Thai dish. I can't speak to the veracity of that because each time I've had the dish it was made by a French chef who was plying his trade in Southeast Asia. Thailand, Cambodia, Laos and, to a lesser degree, Vietnam seem to be magnets for French chefs. I suspect there are more of them in Southeast Asia than there are in France. The fusion of wonderful native cuisine with French technique and talent makes for some fascinating meals, and what native and French chefs are able to do with fish is really amazing. While most of the food we had in Asia was wonderful, our best meals in China were vegetarian and our best meals in Southeast Asia were fish or shellfish. I stopped by the fish market today to see what was available and found some gorgeous looking catfish fillets at bargain prices. I was determined to sidestep my usual blackened preparation and come up with something that, for us, would be new. I remembered the turmeric fried catfish we had in Thailand and Laos and set out to reproduce it. We had a lovely meal this evening. Fish prepared in this manner is really easy to make and can be on the table in about 30 minutes. The only remotely exotic ingredients are turmeric and fish sauce and they can be found in most large supermarkets. Bob really enjoyed this, so it will make an encore performance at the table in the next few weeks. I served the fillets with a Thai cucumber relish and sticky rice. I hope you'll try this. It is remarkably good. Here's the recipe.

Thai-Style Catfish - Plah Toht Kamin...from the kitchen of One Perfect Bite

Ingredients:
2 tablespoons chopped garlic
1 tablespoon chopped shallot or scallion
2 teaspoons ground turmeric
1 teaspoon sugar
1 teaspoon freshly ground black pepper
1/2 teaspoon salt
2 tablespoons fish sauce
3 tablespoons vegetable oil, divided use
1-1/4 pounds catfish fillets
Flour for dredging fish
Optional: Thai chili-lime sauce dipping sauce

Directions:
1) Place garlic, shallots, turmeric, sugar, pepper, salt, fish sauce and 1 tablespoon vegetable oil in the bowl of a small food processor. Process to a fairly smooth paste, using a small amount of water if necessary to bring ingredients together. Combine fish fillets and turmeric paste in medium bowl or baking dish, turning fillets to coat evenly with marinade. Let sit for 15 to 20 minutes at room temperature. The fillets can be marinated for up to 24 hours if covered and refrigerated.
2) Place about 1 cup of flour in a pie plate or cake pan. Dredge fillets in flour, shaking off excess. Heat reserved 2 tablespoons oil in a large frying pan set over medium-high heat. When a drop of water sizzles in pan, add fillets and cook, turning once, for 5 to 7 minutes depending on thickness of fillets. Be careful when turning. Transfer to a serving plate and serve with a Thai dipping sauce if desired. Yield: 4 servings.

Chili-Lime Sauce:

Ingredients:
1/4 cup fish sauce
3 tablespoons lime juice
2 tablespoons sugar
1 teaspoon finely chopped garlic
1 teaspoon finely chopped fresh hot green chilies
1 teaspoon finely chopped cilantro

Directions:
Combine fish sauce, lime juice, sugar and garlic in a small bowl, stirring until sugar dissolves. Sprinkle with chilies and cilantro. Set aside. Best served at room temperature.

You might also enjoy these recipes:

Thai Fish Cakes with Cucumber Relish from One Perfect Bite
Thai Cucumber Relish from One Perfect Bite
Thai Fresh Pea Soup with Green Curry from One Perfect Bite

Sunday, February 21, 2010

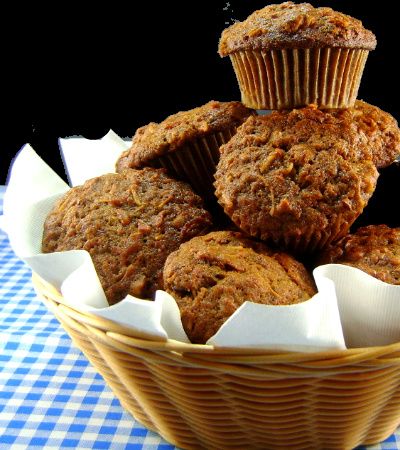
Morning Glory Muffins - Blue Monday


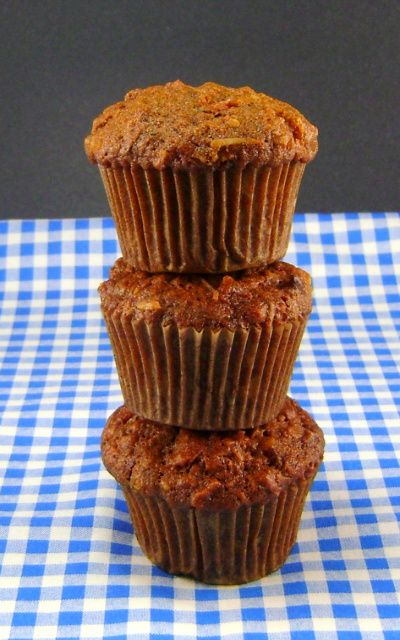
From the kitchen of One Perfect Bite...The original recipe for these muffins was published by Gourmet Magazine in 1991. Ten years later Pam McKinstry's recipe was chosen one of the magazine's 25 favorite recipes from the past 50 years. Since then, many have tried to improve the recipe. While they may have made the muffins a bit healthier by reducing fat and using whole grain flours, the "improved" versions of the muffins do not, in my opinion, match the flavor of the original. A lot goes into these muffins, but they are very easy to prepare and they stay fresh for several days after they've been made. The most irreverent of my children has a special name for any food that can be made or ordered "with everything". As a result, you will occasionally hear references to garbage pizzas, burgers and muffins in my house. I hate it, but what can you do? These muffins escape that designation, but just barely. Adding one more thing to the ingredient list would take it over the top and it, too, would find itself on the "garbage" list. Before that happens let me give you the original recipe. As a point of reference, these muffins are more like an apple cake or pudding then a standard breakfast muffin. They are delicious. Here's how they're made.

Morning Glory Muffins...from the kitchen of One Perfect Bite courtesy of Gourmet Magazine and Pam McKinstry

Ingredients:
1-1/4 cups sugar
2-1/4 cups unbleached all-purpose flour
1 tablespoon ground cinnamon
2 teaspoons baking soda
1/2 teaspoon salt
1/2 cup shredded, sweetened coconut
3/4 cup raisins, light or dark
1 large apple, peeled, cored and grated
1 cup (8 ounces) crushed pineapple, drained
2 cups grated carrots
1/2 cup coarsely chopped pecans or walnuts
3 large eggs
1 cup vegetable oil
1 teaspoon pure vanilla extract

Directions:
1) Position a rack in lower third of the oven and preheat to 350 degrees F. Line standard muffin pans with paper liners. Set aside.
2) Whisk together sugar, flour, cinnamon, baking soda, and salt into a large bowl. Add coconut, raisins, apple, pineapple, carrots, and nuts, and stir to combine.
3) In a separate bowl, whisk eggs with the oil and vanilla. Add to dry ingredients and mix well.
4) Spoon batter into muffin tins, filling to top of each cup. Bake for 35 minutes or until a toothpick inserted into middle comes out clean. Cool muffins in pan for 10 minutes, then turn onto a rack to finish cooling. Yield: 16 muffins.

You might also like these recipes:
Raspberry Streusel Muffins - One Perfect Bite
Lemon and Blueberry Cake Muffins - One Perfect Bite
Blue Corn Muffins - One Perfect Bite

This post is being linked to:
Smiling Sally - Blue Monday

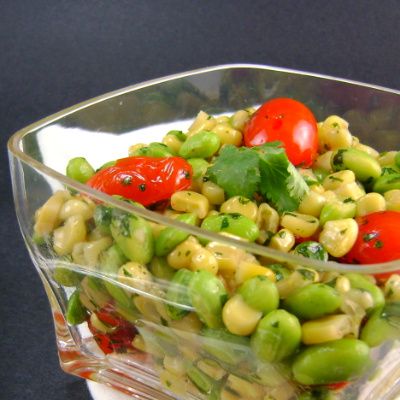
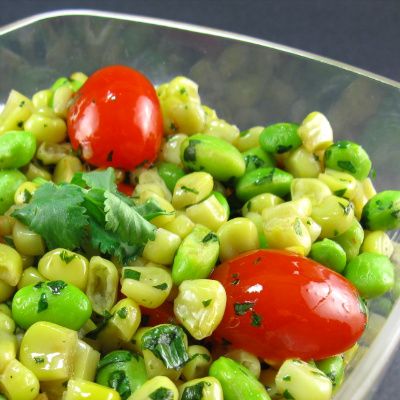
Corn Salad with Edamame and Tomatoes


From the kitchen of One Perfect Bite...Despite predictions of glorious weather, we've had days this week with fog so thick you needed a machete to cut through it. Weathermen have the only job in the world where you can be consistently wrong and still be promoted. However, if you say things often enough and wait long enough, sooner or later you'll be right. Yesterday was that day. The weatherman finally nailed it. The sun rose glowing and stayed that way for the entire day. Under all that fog, the plum and pear trees and early daffodils had been waiting for the sun to signal their debut. They made their appearance yesterday, so, I can finally say with certainty that spring has come to my corner of the world. When the pear trees come fully into bloom, the valleys here will look like they've been sprayed with popcorn. That's eye candy for winter weary souls. Bob and I decided it was no day to remain indoors, so we took off early and came home late. We had breakfast and lunch on the road in quantities larger than our want, so we weren't ravenous when dinner time rolled around. I made a quick soup, some rice and this lovely simple salad that I want to share with you today. It contains protein rich edamame, green soybeans, and the beans add a lovely crunch to this quick salad. I do hope you'll give this a try. It's a perfect accompaniment to grilled anything. The salad has magnificent color and is meant to be eaten hot or warm. You'll find its color becomes less vibrant as it sits, so make this just before you plan to serve it. Here's the recipe.

Corn Salad with Edamame and Tomatoes...from the kitchen of One Perfect Bite based on a recipe developed by Nancie McDermott

Ingredients:
2 tablespoons vegetable oil
2 teaspoons chopped garlic
2 thin slices fresh ginger
1 teaspoon salt
3 cups frozen sweet corn
1 cup frozen edamame beans
3 tablespoons water
1/2 cup halved cherry or grape tomatoes
1/2 teaspoon sugar
1 teaspoon dark sesame oil
2 tablespoons chopped fresh cilantro

Directions:
1) Heat a wok or a deep skillet over high heat. Add vegetable oil and swirl to coat all surfaces of pan.
2) Add garlic, ginger and salt. Stir just until garlic releases its fragrance, about 30 seconds. Add corn and toss to coat with oil. Stir in edamame beans.
3) Add water and cook, tossing or stirring often, until the corn and edamame are hot and tender, about 5 minutes.
4) Add tomatoes and sugar. Toss or stir gently until they are warm and heated through. Add sesame oil and cilantro and mix well. Transfer to a plate. Serve hot or warm. Yield: 4 servings.

You might also enjoy these recipes:
Bulgur and Walnut Salad with Pomengranate Dressing - One Perfect Bite
Warm Asian-Style Rice Salad - One
Perfect Bite

Khmer Green Papaya Salad - One Perfect Bite

Friday, February 19, 2010

Shrimp Omelet from the Pearl River Delta - Pink Saturday


From the kitchen of One Perfect Bite...Over the years, I've tried at least a thousand recipes and, of that number, only a hundred or so have survived and regularly appear on my table. This homely and unlikely candidate is one of them. The dish comes from Southern China and has several virtues to commend it. It has wonderful flavor and a play of textures that will appeal to almost any palate. It is also easy to prepare. It uses no exotic ingredients and its beautiful play of pink on yellow can be table ready in about 30 minutes. The two primary ingredients are eggs and shrimp. The Chinese rub the shrimp with a paste of cornstarch and salt to whiten them. If you are in a hurry this step can be omitted. The eggs are flavored with a very small amount of sesame oil. The trick to this dish is in the way it is cooked. In China the omelet is cooked in lard. We'll forego that and use canola or peanut oil to cook ours, but you'll need a cup or so of oil. Don't stint on that measure. The shrimp are quickly fried in the oil and then drained. Because they have no coating to absorb the oil, you'll find that almost all the oil remains in the pan after cooking. The shrimp will subltely flavor the oil and add a unique taste to the finished eggs. Omelets made in this fashion are easy to assemble because they are not rolled and require no special techniques to get them from the pan to the table. The eggs are gently cooked in a bit of the flavored oil and as they begin to set the shrimp are added to the pan. The only caution is to make sure you can serve these while they are still hot. This is a lovely, light dish that is perfect for those who avoid meat during the Lenten season. Here's the recipe for this treasure.

Shrimp Omelet from the Pearl River Delta
...from the kitchen of One Perfect Bite

Ingredients:
1/2 pound medium shrimp, peeled and deveined
1/2 teaspoon salt
1 tablespoon cornstarch
2 scallions (white part only), finely chopped
6 large eggs
3/4 teaspoon salt
Pinch of pepper
1/3 teaspoon toasted sesame oil
1 cup canola or peanut oil for frying

Directions:
1) Place shrimp in a dish with salt and cornstarch. Add a litlle cold water and gently rub shrimp to whiten them. Rinse thoroughly, drain and pat dry.
2) Beat eggs with salt, pepper and sesame oil.
3) Heat oil in a wok or heavy skillet and fry shrimp just until they turn bright pink, about 2 minutes. Remove and drain.
4) Pour off all but two tablespoons of oil. Add scallions and fry just until softened. Add the egg mixture. Cook gently, stirring slowly, until eggs begin to set. Add shrimp and continue to cook over gentle heat until the eggs are just firm. Transfer to a serving plate and serve immediately. Yield: 2 to 3 servings.

You might also enjoy these recipes:
Oven-Baked Scrambled Eggs - One Perfect Bite
Individual Baked Omelets - One Perfect Bite
Tortilla Espanola - One Perfect Bite

This post is being linked to:
Pink Saturday, sponsored by Beverly at How Sweet the Sound

Thursday, February 18, 2010

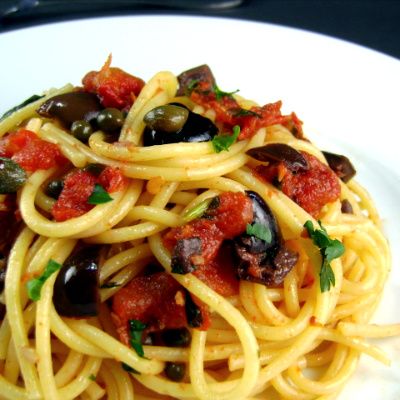
Pasta Puttanesca


From the kitchen of One Perfect Bite...Ladies of the evening are credited with creating this pasta dish. While that makes the origins of the dish more interesting, there's not a lot to support the claim. Pasta Puttanesca did not become popular until the 1960's. A more likely truth can probably be found in the purses of frugal Italian housewives. The sauce is made with a handful of ingredients, many of them leftovers, and by using a bit of this and a bit of that, a filling and delicious pasta could be made for pennies. I'm not completely immune to kitchen fable and romance. My favorite story regarding the origins of the dish comes from the book "Top 100 Pasta Sauces" by Diane Seed who reported, "My introduction to this famous pasta dish occurred when I overheard two elderly priest discussing the pros and cons of spaghetti alla puttanesca ("whore's spaghetti") as they deliberated over the menu in a Neapolitan restaurant. Made of ingredients found in most Italian larders, this is also known as spaghetti all buona donna - the good woman's spaghetti - which can be misleading if one is not familiar with the ironic insult "figlio d'una buona donna" - son of a good woman." Now how does that explain how this particular sauce got its name? In the 1950's Italian brothels were state owned. Italian prostitutes were, for all intent and purposes, civil servants, but they were only allowed to shop once a week and could not shop with "good" Italian housewives. Their meals were made from odds and ends and tinned goods in the kitchens of the brothels. This sauce became one of their specialties. They did not create it, but they sure made it popular. When I was working and my ravenous teens could not wait for a "real" meal, this became one of my go-to suppers. I could have it on the table in 20 minutes and quell the revolution before it gained a foothold in my kitchen. I made this at least once a month back then and it is still a favorite of mine on days when the clock runs out before my schedule does. It's perfect for a Lenten Friday supper. Here's the recipe.

Pasta Puttanesca...from the kitchen of One Perfect Bite

Ingredients:
1 tablespoon freshly minced garlic
1 pound spaghetti
2 tablespoons salt
3 tablespoons olive oil, divided use
1/2 to 1 teaspoon hot red pepper flakes
4 teaspoons minced anchovies (about eight fillets) or 1 heaping tablespoon anchovy paste
1 can (28-oz) diced tomatoes, drained, reserve ½ cup juice
3 tablespoons capers, rinsed and drained
1/2 cup black olives (kalamata) pitted and chopped coarse
1/4 cup minced fresh parsley leaves and or basil

Directions:
1) Bring 4 quarts of water to a rolling boil in a large pot. Meanwhile, mix garlic with 1 tablespoon water in a small bowl; set aside. When water is boiling, add salt and the pasta; stir to separate the noodles. Cook the pasta until al dente. Drain then return pasta to pot. Add 1/4 cup reserved tomato juice and toss to coat.
2) While pasta cooks, heat 2 tablespoons oil in a large skillet set over medium heat. Add garlic mixture, pepper flakes and anchovies to pan. Cook, stirring, frequently, until garlic is fragrant but not brown. Stir in tomatoes and simmer for 8 minutes.
3) Stir capers, olives, and parsley into the sauce. Pour sauce over pasta and toss to combine, adding more tomato juice to moisten if necessary. Adjust seasonings with salt and pepper to taste. If desired, sprinkle an additional tablespoon of olive oil over pasta before serving. Serve immediately. Yield: 4 to 5 servings.

You might also enjoy these recipes:

Capellini Capricciosi
Fusilli with Fennel, Sausage and Red Wine
Ravioli with Salmon and Vodka Cream Sauce

This recipe is being linked to:
Designs By Gollum - Foodie Friday

Wednesday, February 17, 2010

Truffled Mac n' Cheese


From the kitchen of One Perfect Bite...Tucked along the Rio Grand in the quiet hill country of Texas is Hudson's on the Bend, a restaurant that has fed presidents, Hollywood royalty and a real king or two. The restaurant is known for its preparation of wild game and fish and the big flavors produced by Chef Jeff Blank and his kitchen staff. I received one of Jeff's cookbooks last Christmas. While perusing the book I came across a recipe for truffled Mac n' Cheese and knew I had to try it. I want to share it with you today. Those of you who visit me on a regular basis know that the first time I use a recipe developed by a culinary star, I follow the recipe exactly as it was written. The habit is annoying to some, but I think it's the only fair way to judge the success of the dish and the chef. After that all bets are off. I've been known to completely rewrite some of the creations that find their way to my kitchen. I have not done that with today's recipe, but I have some suggestions for those of you who want to try it. This is a delicious dish, but it's extraordinarily rich. In addition to copious amounts of butter and cheese, the recipe calls for a quart of heavy cream. The second time I made the dish I replaced heavy cream with light cream and added the juice of half a lemon to the liquid as well. I made tonight's version with whole milk. The truffle oil is a must, as is the use of a soft herbed cheese. Even with the revisions, the dish is extraordinarily rich. It is also delicious. If you love mac n' cheese you owe to yourself to give this a try. Here's the recipe as it was originally written.

Truffled Mac n' Cheese ...from the kitchen of One Perfect Bite, courtesy of Hudson's on the Bend

Ingredients:
1 pound dried pasta (i.e. elbow macaroni, penne, cavatappi)
1/4 cup truffle oil
1 quart heavy cream
4 tablespoon butter
6 tablespoons all-purpose flour
Dash cayenne pepper
Salt and pepper to taste
1 cup grated Parmesan cheese
1 cup Boursin cheese
Optional : 1 truffle
Crumb topping
1 cup bread crumbs
1 tablespoon truffle oil
3 tablespoons melted butter
2 tablespoons mixed fresh parsley and chives

Directions:
1) Cook pasta in a large pot of boiling, salted water, until just tender.
2) Cool pasta with cold water, then drain in a colander.
3) Toss pasta with 1/4 cup truffle oil.
4) Melt 4 tablespoons butter in a heavy bottomed pan.
5) Stir in flour to make a blonde roux. Don't brown.
6) Add heavy cream and simmer mixture until it thickens.
7) Season with cayenne, salt and pepper.
8) Remove from heat and add pasta and cheeses.
9) Stir to combine.
10) Taste mixture and adjust salt and pepper if needed.
11) Pour into a buttered 9 x 9-inch ovenproof casserole dish.
12) In a bowl, combine bread crumbs, melted butter, 1 tablespoon of truffle oil, and herbs.
13) Pour bread crumbs over the pasta cheese mixture.
14) Bake until golden brown at 400 to 425 degrees for approximately 25 minutes.
15) Garnish with optional truffle slices. Yield: 10-12 servings.

You might also enjoy these recipes:

Straw and Hay
Pumpkin and Goat Cheese Lasagna
Mushroom Lasagna Florentine

Tuesday, February 16, 2010

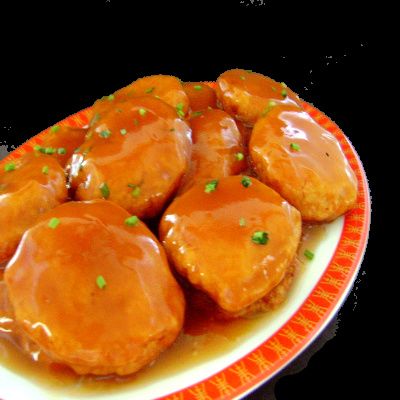
Shrimp Cakes with Sweet and Sour Tomato Sauce


Vendor Selling Tomatoes in China

From the kitchen of One Perfect Bite...Now that Carnival and Mardi Gras have ended, meals in some households will be changing. Fridays between now and Easter Sunday will become meatless. For most who observe, this presents no problem. There are a wealth of recipes, really good recipes, that address the dietary constraints of this period. We've come a long way from grandma's mystery casseroles and overcooked fish. Each year I make it a point to search out, or create, new meatless meals to keep everyone at my table on board without complaint. Today's recipe is not only meatless, it's also easy to make if you have a food processor. All the ingredients you need to prepare this can be found in any well-stocked supermarket. The one item that might sound strange to your ears is ginger juice. It's a bother to find a place that sells it, but it can easily be made at home if you have fresh ginger available to you. To make the juice simply grate ginger and squeeze the juice from it. A garlic press makes easy work of the task. This dish can be on the table within 45 minutes. Bob and I first had these shrimp patties in Beijing. We encountered them over and over again as we crossed the country, though they did get hotter as we moved towards the interior. This dish will serve four people if served with rice and a vegetable or two. Here's the recipe for this surprising good sweet and tangy shrimp dish.

Shrimp Cakes with Sweet and Sour Tomato Sauce...from the kitchen of One Perfect Bite

Ingredients:
Shrimp Cakes
1 pound fresh shrimp, peeled and deveined
2 egg whites
1 tablespoon cornstarch
1 teaspoon ginger juice
1 teaspoon finely grated ginger
Oil for deep frying
Sweet and Sour Sauce
1/2 cup chicken broth
1/4 cup ketchup
1/4 cup rice wine vinegar
2 tablespoons unsweetened rice wine or dry sherry
1/2 cup granulated sugar
3/4 teaspoon salt
1 tablespoon cornstarch

Directions:
1) Place shrimp in bowl of a food processor. Process until a pulp or paste forms. Scrape into a medium bowl.
2) Place egg whites in another. Beat just until frothy. Add cornstarch, ginger and ginger juice and mix to combine.
3) Add egg mixture to shrimp and stir, going in one direction only, until everything is thoroughly mixed.
4) Combine chicken broth, ketchup, vinegar, sherry, sugar salt and cornstarch in a small pan. Bring to a boil, stirring constantly, until it begins to thicken. Simmer for 1 minute more. Remove fro heat. but keep warm.
5) Heat oil to 375 degrees F in a wok of deep frying pan. With wet hands, fashion large spoonfuls of shrimp mixture into silver-dollar sized cakes.
6) Working in batches, deep-fry shrimp cakes over moderate heat until golden brown. Drain on paper towels.
7) Arrange shrimp cakes on a serving plate. Pour warm sauce over all. Yield: 12-14 shrimp cakes.

You might also enjoy these recipes:
Singapore Noodles
Farfalle with Fresh Tomato and Basil Sauce
Vegan Red Lentil and Sweet Pepper Flan

This is being linked to:
Outdoor Wednesday - A Southern Daydreamer

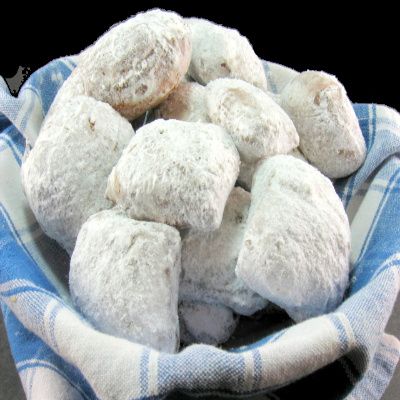
French Quarter Beignets


Photo courtesy of Ron Dauphin

From the kitchen of One Perfect Bite...A still warm beignet cloaked in confectioners' sugar must be included on the long list of pleasures that is New Orleans. To have beignets, in various shapes, with mugs of steaming coffee at the Cafe du Monde, or elsewhere in the French Quarter of the city, is a near perfect way to start a day or end a night of revelry. While I can't take you there, I can show you how to enjoy this treat in your own kitchen with a quiet cup of coffee and a table and floor relatively free of sticky powdered sugar. While I've tried, I can't find a way to keep the powdered sugar off your face. Everyone will know exactly what you've been doing. For the uninitiated, a beignet is a warm, crisp piece of fried dough that is topped with a heavy layer of confectioners' sugar. Food historians believe French colonists brought beignets to New Orleans in the 18th century. Some believe the Ursaline nuns brought the recipe with them from France, others believe the Acadians, who were expelled from Nova Scotia, introduced them to the people of New Orleans. No one is sure how the donuts got their name. The Celts had a word "bigne" that meant to raise. The French called donuts "beignet". We know for sure that beignets are made with yeast and while they are allowed to slowly rise, how they got their name is not at all important to those who love them. This recipe makes about 48 donuts. The good news is that the dough keeps well for about five days when it's refrigerated. That's important on several levels. Though beignets should be thought of as a dessert and can be eaten anytime, once fried and cool they quickly lose their appeal. Day old, they become bird-fodder or the base for bread pudding. You can cut this recipe in half to produce a less gargantuan quantity. These should always be served warm. If I haven't frighted you away and you actually make these, I know you'll love them. They are addictive. Here's the recipe for your downfall.

French Quarter Beignets...from the kitchen of One Perfect Bite, inspired by Paula Deen and others

Ingredients:

1-1/2 cups lukewarm water
1/2 cup granulated sugar
2-1/4 teaspoons active dry yeast
2 eggs, room temperature slightly beaten
1-1/4 teaspoons salt
1 cup evaporated milk
7 cups all-purpose or bread flour
1/4 cup shortening, melted and cooled to room temperature
Nonstick spray
Oil, for deep-frying
3 cups confectioners' sugar

Directions:
1) Mix water, sugar, and yeast in a large bowl and let sit for 10 minutes.
2) In another bowl, beat eggs, salt and evaporated milk together. Whisk egg mixture into yeast mixture.
3) Mix 3 cups of flour into yeast mixture. Add shortening and continue to stir while adding remaining flour. Remove dough from the bowl, place onto a lightly floured surface and knead until smooth. Spray a large bowl with nonstick spray. Put dough into bowl and cover with plastic wrap or a towel. Let rise in a warm place for at least 2 hours.
4) Preheat oil in a deep-fryer to 350 degrees F.
5) Place confectioners' sugar in a paper or plastic bag. Set aside.
6) Roll dough out to about 1/4-inch thickness and cut into 2-inch squares. Deep-fry, flipping constantly, until golden color. Drain on paper towels for a few seconds then place in bag with confectioners' sugar and toss to thickly coat. Serve warm. Continue until all beignets have been fried and coated. Yield: 48 donuts.

You might also enjoy these recipes:

Open Mouths Laughing
Donuts for National Donut Day
Apple Fritters

This post is being linked to:

Wild Yeast - Yeast Spotting

Sunday, February 14, 2010

Shrove Tuesday Buns - Blue Monday


From the kitchen of One Perfect Bite...These these lovely cream filled buns were once associated with the Lenten season in Scandinavia. They were prepared on Shrove Tuesday to use up stores of butter, cream and sugar that could not be eaten during the days of fast and abstinence that led up to Easter Sunday. While religious affiliations in the region have changed, they are still called Fat Tuesday or Shrove Tuesday Buns. The buns are now enjoyed at any time, but they were once made only on the day before Ash Wednesday. That day was called Shrove Tuesday because those whose confessions were heard on this day were called shrove, or shriven of sin. The buns are a real delicacy and I think everyone will enjoy them. A simple sweet dough is shaped into rolls and baked. Once they're done they can be filled in many ways. Some simply hinge the roll, insert a piece of almond paste into it and top it with whipped cream. Others remove the top of the roll, scoop out the innards and mix the bread crumbs with ground nuts to form a poor man's almond paste. Either way, the buns are delicious and they are not hard to do. While everything can be prepared ahead of time, it's best not to fill these until you're ready to serve them. They can get soggy. Here's the recipe.

Shrove Tuesday Buns...from the kitchen of One Perfect Bite inspired by Kathy Cutler

Ingredients:

Buns
3 to 3-1/2 cups all-purpose flour
1/4 cup granulated sugar
1/2 teaspoon salt
1 tablespoon Active dry yeast
1 teaspoon ground cardamom
3/4 cup milk
6 tablespoons butter
1 egg
Filling
3/4 cup finely chopped nuts
3/4 cup confectioners" sugar + additional sugar for dusting
1 cup light cream or half-and-half
1/2 teaspoon vanilla extract
1 cup heavy cream, whipped

Directions:
1) Combine 2 cups flour, sugar, salt, yeast and cardamom in a mixing bowl. Whisk well.
2) Place milk and butter in a small saucepan and heat until butter is melted. Let cool to 120 degrees.
3) Add milk to flour mixture. Mix well. Add egg and about 1 cup of remaining flour to make a soft dough.
4) Knead on a lightly floured surface until smooth and elastic, about 10 minutes. Place in a lightly greased bowl, cover with plastic wrap and let rise in a warm place until doubled in volume, about 1 hour.
5) Punch dough down. Shape dough into a 12-inch rope. Cut rope into 12 1-inch pieces.
Form pieces into round buns. Cover a baking sheet with parchment paper. Place buns on baking sheet. Lightly cover and let rise until double, about 30 minutes.
6) Meanwhile, preheat oven to 400 degrees F.
7) Bake buns for until golden brown, about 10 to 15 minutes. Cool on a wire rack.
8) Slice top off each bun. Reserve tops. Scoop out center of rolls, leaving a shell about 1/4-inch thick, with a fork or grapefruit spoon.
9) Place crumbs, nuts and confectioners' sugar in bowl of a food processor. Pulse until the mixture resembles corn meal. Transfer to a medium bowl. Add light cream and vanilla. Mix well.
10) Spoon filling into buns. Top each with a heaping spoonful of whipped cream. Put tops back on and sprinkle with confectioners' sugar. Yield: 12 Buns.

You might also enjoy:

Crepes with Hot Buttered Rum Sauce
Gluten Free Pancakes
Hot Cross Buns


This post is being linked to:

Smiling Sally - Blue Monday
Wild Yeast - Yeast Spotting

Saturday, February 13, 2010

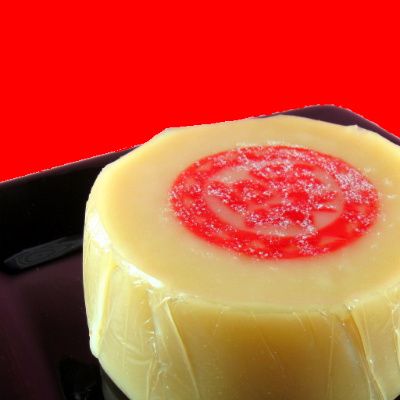
Sticky Rice Cake - Nian Gao for Chinese New Year


From the kitchen of One Perfect Bite...
There are many customs and traditions associated with Chinese New Year. One of the most pervasive has led to an exercise that takes place days before the celebration actually begins. It is believed the Kitchen God returns to heaven a week before the New Year to report on a family's behavior during the year that is ending. An unfavorable report means that the family will have bad luck in the year to come. In order to prevent that from happening the tradition of making sticky cake took hold. The belief that the Kitchen God could not issue a bad report if his mouth was full became pervasive. While a bit softer, the cake has the same chewy properties as taffy. It is, in a word, sticky. It's usually made with glutinous rice flour, a candy called peen tong and dried fruit. The traditional cake is always steamed and, if it's made with peen tong, it is always a rich caramel in color. However, as you move across China, you'll find there are regional differences in how the cake is made. If granulated sugar is used in place of peen tong, the cake will have a creamy hue. The cake is not easy to make, but it can be bought for next to pennies. Ergo, most sticky rice cakes, including mine, are purchased rather than made. A link to more information about the Kitchen God and a classical recipe for the steamed cake be found here. I'm including a much easier version of the recipe for you to try, should you wish to do so. I want to wish all of you who are celebrating, an auspicious New Year that will be rich in family, friends and food.

Baked Sticky Cake (Nian Gao)...from the kitchen of One Perfect Bite, courtesy of Frances Kai-Hwa Wang

Ingredients:
16 oz. Mochiko sweet rice flour
One stick of butter or 3/4 cup of vegetable oil
3 eggs
2-1/2 cups milk
1 to 1-3/4 cup sugar--depending on if you like it sweeter
1 tablespoon baking soda
One can of red azuki beans

Directions:
Mix everything but the beans with an electric mixer at medium speed for 2 minutes. Beat for 2 more minutes at high speed. Sprinkle Mochiko flour over a 9"x 13" baking dish that has been oiled or sprayed with Pam. Spread half of the batter on the bottom of the baking pan. Spread the red azuki beans (you can mix some batter into the beans if they are too thick to spread). Spread the other half of the batter over the red azuki beans. Bake in oven at 350 degrees for 40 to 50 minutes. Test for doneness by inserting a chopstick (this is Chinese New Year, Cake after all) if it comes out clean, it is done. This is best served warm.

You might also enjoy:

Long Life Noodles for Chinese New Year

Open Mouths Laughing for Chinese New Year
Pearl Balls - Louis Chinese Porcupines

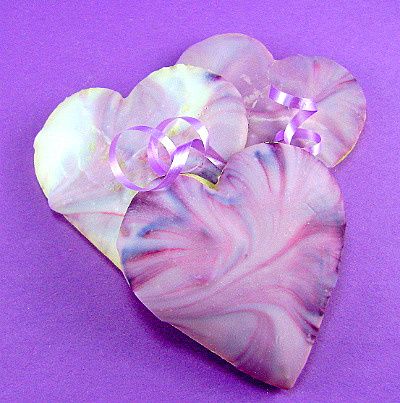
Marbled Sweetheart Sugar Cookies - Pink Saturday - Saturday Blog Showcase


From the kitchen of One Perfect Bite...I spent some time at the Cookie Madness blogsite looking for a recipe for rolled sugar cookies. I know there are loads of recipes for them floating in cyberspace, but I was short of time and needed a recipe I could count on. Anna has never disappointed me. If you haven't visited her site, I hope you'll drop-by when you have some time. It's a baker's paradise. You can find Anna's recipe for No-Fail Cut Out Sugar Cookies here. I didn't use Anna's icing for the cookies, because I wanted to flood, rather than spread, them with icing. I decided to use the frosting I used to top shortbread hearts several weeks ago. The frosting recipe can be found here. In order to create the marbled appearance, I made three batches of icing and swirled the colors to achieve the effect I was looking for. I had seen this combination in a local bakery and like it enough to use here. I find my icing much easier to work with than fondant and - from a great distance - they look the same. Here's the recipe for Marbled Sweetheart Sugar Cookies.

Marbled Sweetheart Sugar Cookies...from the kitchen of One Perfect Bite courtesy of Anna Ginsberg at Cookie Madness

Ingredients:
3 cups all purpose flour
1 teaspoon baking powder
2 sticks butter, unsalted, cool room temperature
1 cup granulated sugar
1/2 teaspoon salt
1 teaspoon vanilla extract
Optional: 1/8 teaspoon lemon extract (or almond) (dash)
1 large egg

Directions:
1) Place flour and baking podwer in a medium bowl. Whisk to combine. Set aside.
2) Beat butter and sugar with an electric mixer until light and fluffy. Beat in salt and extract/extracts. Scrape sides of bowl and beat in egg, beating only until egg is blended in.
3) Add flour mixture gradually (1 cup at a time) and stir until incorporated.
4) Form dough into a disc and wrap in plastic wrap. Refrigerate for at least 1 hour.
5) Preheat oven to 375 degrees F. Roll dough onto a lightly floured surface to approximately 5/8″ thick. Cut cookies into shapes and place cut cookie shape on a parchment lined cookie.
6) Bake the cookies for approximately 10 minutes or until edges begin to turn golden brown in color. Remove cookies from oven and allow to cool on a wire rack for 5 minutes. Frost when completely cool. Yield: 18-24 heart shaped sugar cookies.

You might also enjoy:

Chocolate Peppermint Pie
Cranberry Souffle
Raspberry Streusel Muffins

This post is being linked to:

Pink Saturday, sponsored by Beverly at How Sweet the Sound

being hosted this week by Lori at All That Splatters

Thursday, February 11, 2010

Forget Me Not Fudge - Foodie Friday


From the kitchen of One Perfect Bite...This is a really simple recipe and because candy is such an integral part of our Valentine's Day celebrations, I thought this would be the perfect time for this delicious spiked fudge to make its debut. The recipe uses just six ingredients and consistently produces a rich, smooth fudge that's never grainy. The recipe was developed by Maker's Mark Kentucky Bourbon Whiskey. If you prefer, you can substitute one teaspoon of vanilla extract for the small amount of bourbon used in the recipe. If you're looking for a chocolate confection to make for someone special, look no further. Once you've assembled the ingredients, you'll need about 10 minutes to make the fudge. It's necessary to keep it in a cool spot for 6 to 8 hours to set before cutting. This recipe makes a lot of fudge, so round up friends to share it with or cut the recipe in half. Here's how the fudge is made.

Forget Me Not Fudge...from the kitchen of One Perfect Bite adapted from a recipe by Maker's Mark

Ingredients:
4-1/2 cups granulated sugar
1 (13-oz.) can evaporated milk
9-oz. bittersweet chocolate morsels
9-oz. semi-sweet chocolate morsels
1/2 pound butter, cut in 1/2-inch pieces
1 tablespoon Kentucky bourbon
2 cups coarsely chopped pecans

Directions:
1) Combine sugar and evaporated milk in a large (4-quart) saucepan. Bring to a boil over moderate heat. Boil for exactly 6 minutes, stirring constantly. Remove from heat.
2) Add chocolate morsels, butter, bourbon and pecans. Mix well with a wooden spoon.
3) Pour into a well-greased 9 x 13-inch pan. Smooth top. Allow to set in a cool place for 6 to 8 hours. Cut into 1 x 1-inch squares.

You might also enjoy:

Candied Orange and Lemon Peel
Pink Peppermint Patties
White Chocolate Truffles

This recipe is being linked to:
Designs By Gollum - Foodie Friday

Wednesday, February 10, 2010

Smothered Eggs in Spoonbread


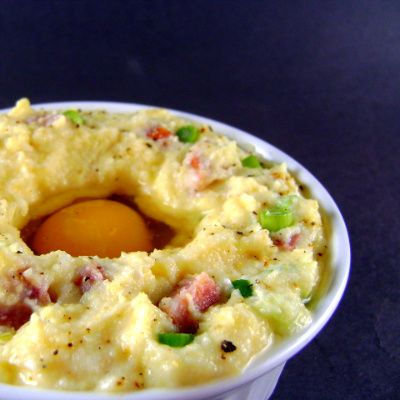
From the kitchen of One Perfect Bite...Curiosity and experimentation led me to the version of the recipe you see today. I'm the child of died in the wool Yankees, so it should come as no surprise to hear that I was nearly 40 before spoonbread crossed my lips. Sad to say, it was not love at first bite. Spoonbread, for those unfamiliar with it, is a bit like a pudding or souffle made with cornmeal. While I liked the texture, I thought it was very bland and didn't bother with it for another 20 years. I revisited it because I was looking for new ways to serve baked eggs and thought spoonbread might work if the ingredients could be revved up. That can sometime be dangerous, especially if you're working on recipes for breakfast or brunch. I think I finally have the right balance for this one. It's perfect for a holiday brunch or breakfast in bed. I've added andouille sausage and red pepper flakes so this is definitely spoonbread with an attitude. If you'd like to try something different for a change, I recommend this. I've scaled the recipe for two but it can be doubled if need be. One caution, don't overcook these. You want the egg set but not hard cooked and the center of the spoonbread should be pudding moist. Here's the recipe.

Smothered Eggs in Spoonbread...from the kitchen of One Perfect Bite inspired by Jesse Ziff Cool

Ingredients:
1 cup water
1/2 teaspoon salt
1 teaspoon brown sugar
1/2 cup coarse cornmeal
4 eggs, divided use
1/4 cup butter, divided use
1/2 cup milk
4 ounces Andouille, cut in 1/2-inch dice
2 green onions, thinly sliced
1 teaspoon baking powder
1 teaspoon dried thyme leaves
1/4 teaspoon red pepper flakes

Directions:
1) Preheat oven to 375 degrees F. Grease two (2-cup) ramekins with 1 tablespoon butter. Set aside.
2) Combine water, salt, sugar and cornmeal in a medium saucepan. Gradually bring to a simmer and cook, uncovered, until cornmeal thickens. Add 3 tablespoons butter and stir until melted. Remove from heat and let cool for 5 minutes.
3) Separate two eggs. Add yolks to milk. Stir into cornmeal mixture. Fold in sausage and onions and let cool for 15 minutes. Add baking powder, thyme and pepper flakes. Mix well.
4) Meanwhile beat egg whites until soft peaks form. Fold whites, one third at a time into cornmeal mixture.
5) Spoon half of batter into ramekins. Crack an egg in center of each one. Spread remaining batter over eggs but do not cover them completely. Bake for 20 to 25 minutes, or until egg white is firm and yolk cooked. Serve hot. Yield: 2 servings.

A Tea Party for My Mother


A Tea Party for My Mother

I've come across some beautiful blogs these past few weeks. My favorites are not limited to those written by folks who garden or love to cook and eat. One in particular haunts me. It is a beautifully written journal of a last goodbye. I hope all of you will take some time to explore what's been written there. There are some days much like yours and mine. There are days when what is said will make you weep, but there are also moments of shared grace that will bring a smile or nod of recognition to your face. This is a love story of the highest order. It is also a story about learning how to say goodbye. If ever you had doubts about the power of words or the tenacity of the cords that bind mothers to their daughters, this intimate journal of two women, one strong, the other in decline, will lift your spirits and let theirs soar. I know you're busy, but I hope you'll steal a few moments to read A Tea Party for My Mother.

Tuesday, February 9, 2010

Crumpets


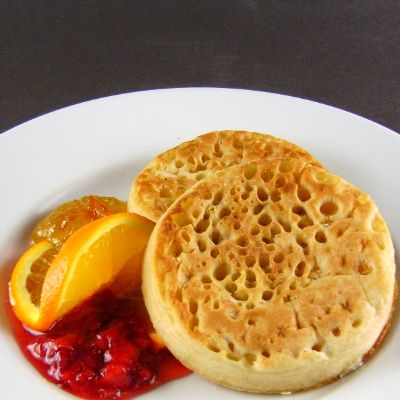
From the kitchen of One Perfect Bite...Do you know the difference between a crumpet and an English muffin? You probably do, but because we're friends I hope you'll humor me. Did you know that English muffins are an American invention? They were created by the "nooks and crannies" guy, Samuel Bath Thomas, towards the end of the 19th century. His goal was to create a crumpet that could be split and then toasted on both sides. Unfortunately, history does not tell us why this feat was of such great importance to him. While many use the terms interchangeably, there is a real difference between a crumpet and an English muffin. Muffins are made from a drier batter than crumpets and are served split rather than whole. The crumpet is cooked, stovetop, in a shallow ring mold that allows its bottom to become a lovely brown while the top develops a gazillion tiny holes that are perfect vessels for holding copious quantities of butter and warm jam. In England they are usually served for tea, while here they are served for breakfast. Let me insert, at this point, a disclaimer. While I love crumpets, I make them only once or twice a year. Life in any kitchen is a matter of choices, and while I bake all our bread, I'm quite content to purchase commercially prepared crumpets as long as I know I can make them if I have to. The "can if I have to" mind set was fueled by an economics professor who insisted my generation would starve to death surrounded by animals we had never learned to hang and dress. I was very impressionable, so, in addition to making crumpets and cheese, I stand at the ready if you ever need a chicken's neck wrung. My crumpet recipe comes from James Beard. I have an equally delightful recipe for English muffins that was developed by Julia Child. We'll do English muffins in a few weeks. Today we are all about crumpets. Tea anyone?

Crumpets...from the kitchen of One Perfect Bite inspired by James Beard

Ingredients:
1/2 cup milk
1/2 cup boiling water
2-1/4 teaspoons active dry yeast
1 teaspoon granulated sugar
1-1/2 teaspoons salt
1-3/4 cups all-purpose flour
1/4 teaspoon baking soda, dissolved in 1 tablespoon hot water
8 to 10 buttered flan rings or tuna cans with tops and bottoms removed

Directions:
1) Combine milk and boiling water in a large bowl. Cool until lukewarm. Add yeast and sugar. Let sit for 5 minutes, or until bubbly. Mix salt with flour. Add to yeast mixture and beat with a spoon for several minutes. Let batter rise until doubled in bulk and slightly bubbly. Beat dissolved soda into batter. Let rise again until doubled in bulk.
2) Heat a griddle or large frying pan over medium-hot heat. Position buttered rings in pan. Spoon batter into rings to a depth of about 1/2-inch. Cook until dry and bubbly on top. Remove rings, turn crumpets and brown lightly on the other side. Transfer to a rack to cool. Toast and butter to serve. Yield: 8 to 10 servings.

You might also enjoy:

Brussels and Liege Waffles
Gluten-Free Pancakes
Baked Swedish Pancake

This recipe is linked to:
Wild Yeast - Yeast Spotting

Monday, February 8, 2010

Stilton and Apple Soup


From the kitchen of One Perfect Bite...Back in the day, my dear friend Lil warred against no longer pristine snows and the bitter cold of late Chicago winters, with reveries that took her from her beloved moors and headlands to a college in London where tutors tried to tame and teach a wilding from the Hebrides. For the record, I can tell you that they educated, but never tamed her. When arctic blasts tore down the midway, she'd double wrap her long school scarf and, once home, fashion, from a childhood memory, the strangest rarebit I'd ever seen. She'd pull near frozen cider from the porch and spoon it with great deliberation into a wedge of blue-streaked Stilton cheese until the crumbly blue achieved a texture not unlike that of a softened, whipped cream cheese. Still not done, she'd core an apple and then peel it in a single corkscrew strip before cutting it into a uniform dice that was then folded into the cheese. The mixture was thickly spread on slices of really good bread and then set under the broiler to toast before serving. It was not, is not and never will be a favorite of mine. The "blues", on their own, are all too strong for my palate, but using the same ingredients she was able to make a soup that I quite enjoy. Recipes for Stilton and Apple Soup abound, but Lil's recipe is unique in its simplicity and the apples do tame the cheese. Any good blue cheese can be used to prepare the soup. I make this every now and then and I thought some of you might, for curiosity's sake, like to give it a try. Here's the recipe we use.

Stilton and Apple Soup
...from the kitchen of One Perfect Bite

Ingredient:
3 tablespoons butter
2 tablespoons all-purpose flour
3 cups chicken broth
4 large red delicious apples' peeled, cored and coarsely chopped
2 cups whole milk
8 ounces Stilton cheese + cheese for garnish
1 teaspoon apple cider vinegar
Optional garnish: chopped chives

Directions:
1) Melt butter over medium heat in a 4 to 5 quart pot. Sprinkle with flour and stir over low heat until light golden brown, about 2 minutes. Add chicken broth and stir until smooth. Add apples and cook, covered, over medium heat until apples are tender, about 20 minutes. Cool, then puree in small batches, until soup base is smooth.
2) Return mixture to pot. Add milk and bring to a simmer over medium heat. Add Stilton cheese and cider vinegar. Stir until cheese melts and soup is smooth. Ladle into soup bowls. Garnish with a bit of crumbled cheese and chopped chives if using. Yield: 6 to 8 servings.

You might also enjoy:

Sauerkraut Soup
Vegan Cream of Broccoli Soup
Thai Fresh Pea Soup with Green Curry

Focaccia Bread - Blue Monday


Focaccia for the body and grape hyacinths for the soul.


From the kitchen of One Perfect Bite...The fog's still thick and I'm craving soup. Not the thick and heavy variety. I want a soup with vibrant color to chase the chill and gray of winter's end away. Remember the tomato soup of childhood? That's what I want. Ours was always served with grilled cheese sandwiches and a tall glass of milk. My soup no longer comes from a can and I haven't had grilled cheese in years. Somewhere along the line, cheese covered breads replaced the sandwiches of my childhood lunches. One of my favorites is focaccia. It's really easy to make and is the perfect accompaniment to a lovely tomato or minestrone soup. I'm fairly specific in the ingredients I choose for mine. If my choices don't spark your fancy, substitute any toppings you'd like for yours. Here's the recipe I use.

Focaccia...from the kitchen of One Perfect Bite

Ingredients:
2-1/4 teaspoons active dry yeast
3/4 cup warm water
2 cups all-purpose flour
1/2 teaspoon salt
1/4 cup olive oil, divided use
1 teaspoon Italian seasoning
1 cup sliced oil-packed roasted peppers or 8 oil-packed sun-dried tomatoes, drained
1/2 cup (2 ounces) shredded provolone cheese
1/4 cup (1 ounce) freshly grated Parmesan cheese

Directions:
1) Dissolve yeast in warm water; let stand 5 minutes. Combine flour and salt in work bowl of food processor. Stir in yeast mixture and 3 tablespoons oil. Process until ingredients form a ball. Process 1 minute more. Turn out onto lightly floured surface. Knead about 2 minutes or until smooth and elastic. Place dough in oiled bowl; turn once to oil dough surface. Cover with clean kitchen towel. Let rise in warm place about 30 minutes or until doubled in bulk.
2) Punch dough down. Let rest 5 minutes. Press dough into oiled 10-inch cake pan, deep-dish pizza pan or springform pan. Brush with remaining 1 tablespoon oil. Sprinkle with Italian seasoning. Press peppers or sun-dried tomatoes over dough dough,staying about 1 inch from edge. Sprinkle with cheeses. Cover and let rise in warm place 15 minutes.
3. While dough completes final rise, preheat oven to425 degrees F. Bake 20 to 25 minutes or until golden brown. Cool completely in pan on wire rack.

Cook's Note: If mixing dough by hand, combine flour and salt in large bowl. Stir in yeast mixture and 3 tablespoons oil until ball forms. Turn out onto lightly floured surface and knead about 10 minutes or until smooth and elastic. Proceed as directed.

You might also enjoy:

Whole Wheat Olive Focaccia Bread

Apple-Onion Bread with Cheddar Cheese
Muenster Cheese Bread

This post is being linked to:
Smiling Sally - Blue Monday

This recipe is linked to:
Wild Yeast - Yeast Spotting

Sunday, February 7, 2010

Vegan Red Lentil Soup


From the kitchen of One Perfect Bite...I try to keep a supply of red lentils in the pantry. They're perfect for making a really quick soup that's hearty and filling but not heavy. Red lentils cook in about 30 minutes and there is a sweetness about them that can't be found in the green or black varieties. The real trick to this particular soup is the quality and flavor of the vegetable stock use to make it. A good commercial variety is fine, but taste carefully for salt. Lentils can be very bland and the minimal spicing used in this recipe demands a well-salted broth. This soup is very nearly a puree. If you prefer more texture, measure an additional cup of lentils and cook them separately in rapidly boiling water until they are just tender. To insure they don't over cook plunge them into cold water. Add them to the soup and heat through just before serving. While the lentils are a saffron red in their raw state they turn a most unattractive shade of mustard as they cook down. I use sweet paprika to make my soup more visually appealing. Not necessary, but nice. I suspect pimenton could also be used but that would produce a deeper and more smokey flavor. This soup is best eaten the day it is made. Like pea soup, it will thicken and will need to be thinned with additional stock or water if it sits. This recipe can be halved for small families or doubled if you are feeding a crowd. Here's the recipe.
Vegan Red Lentil Soup...from the kitchen of One Perfect Bite

Ingredients:
2 tablespoons vegetable oil
1 cup finely chopped onion
1 teaspoon ground cumin
1 teaspoon ground coriander
1/4 teaspoon allspice
1 tablespoon sweet paprika
3 cloves crushed garlic
1 pound red lentils
8 cups vegetable stock
1 teaspoon cider vinegar
Optional garnish: 1/2 cup vegan yogurt

Directions:
1) Heat oil in a heavy bottomed soup pot. When it shimmers, add onions and cook over medium heat until softened, about 5 minutes. Stir in cumin, coriander, allspice, paprika and garlic and cook for 1 minute more.
2) Add lentil to pot and stir well to coat with spices. Add vegetable stock and bring to a boil. Reduce heat and simmer, partially covered, for 30 minutes. Stir in vinegar. Adjust seasoning to taste with salt and pepper. Ladle into soup bowl. Garnish with yogurt if using. Yield: 6-8 servings.

You might also enjoy:

Vegan and Red Lentil Flan
Vegan Cream of Broccoli Soup
Celery Soup

Friday, February 5, 2010

Coconut Cloud Pudding - Pink Saturday


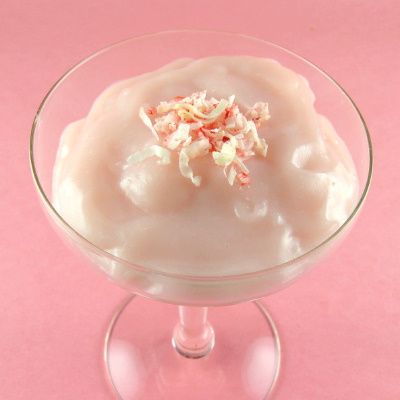
From the kitchen of One Perfect Bite...There are folks who won't admit to birthdays, but like, nonetheless, to be remembered on their special day. I have such a friend. She has eclectic tastes and loves coconut, so I decided to make an uncommon and homely pudding to mark the importance of the day to those of us who love her. This is not the coconut pudding that is so popular across Asia. It's made from cornstarch rather than gelatin and beaten egg white. It does, however, use coconut milk for most of its flavor. I supplement that with a variable amount of coconut extract and use flaked coconut for garnish. This is really easy to do and the six ingredients required to make it can be found in any major grocery store. It can be assembled in about 15 minutes, though it requires 4 to 6 hours to set. Here's the recipe.

Coconut Cloud Pudding...from the kitchen of One Perfect Bite

Ingredients:
6 tablespoons cornstarch
1/4 teaspoon salt
1-1/2 cups whole milk, divided use
1-1/2 cups coconut milk
1 cup granulated sugar
1/2 to 1 teaspoon coconut extract
Optional garnish: shredded coconut

Directions:
1) Whisk cornstarch and salt together in a medium bowl. Slowly add 1/2 cup milk and stir until smooth.
2) Add reserved 1 cup milk, coconut milk and sugar to a 2-quart saucepan. Bring to a simmer over medium heat, stirring until sugar is dissolved. Slowly stir in cornstarch mixture and stir constantly until mixture is very thick, about 5 to 6 minutes. Remove pan from heat. Add coconut extract to taste and stir for another minute. Let cool for 10 to 15 minutes longer.
3) Spoon custard into 6 3/4-cup containers. Refrigerate until chilled and set, about 4 to 6 hours. Garnish, if desired, with shredded coconut. Yield: 6 servings.

Cook's Note: If you enjoy a really light pudding, let the pudding cook to room temperature and fold in 2 cups of whipped cream or non-dairy topping. Then refrigerate to chill.

You might also enjoy these recipes:
Old-Fashioned Lemon Pudding
Double Chocolate Pudding
Pumpkin Panna Cotta

This post is being linked to:
Pink Saturday, sponsored by Beverly at How Sweet the Sound