Saturday, October 31, 2009

French Onion Soup - October Recipes to Rival Challenge


I need a secretary! I almost missed the deadline for the October Recipes to Rival Challenge. Fortunately, Sara, who selected this months recipe and blogs at imafoodblog, had selected a Thomas Keller recipe for French Onion Soup that, while time consuming, used readily available ingredients, that made participation possible despite a late start.

Our standard for French Onion Soup was set 50 years ago at a restaurant in the Cattlemen's Hotel in Kamloops, British Columbia. The town was a terminus for cattle drives and functioned as a stockyards for holding cattle before slaughter. We came into Kamloops after weeks of hiking in the high country and didn't expect much save a bed and warm bath. You didn't have to venture far from the center of town to encounter unpaved streets and sidewalks. We were really surprised at the quality and quantity of food that was served to us. The food was wonderful and the onion soup that was available with all meals was incredible. The stock used to make the soup was packed with beefy goodness. Without a doubt it was the best onion soup I have ever had. To this day, Bob sings "O, Canada" whenever we have onion soup. He is not shy, so this has been known to happen in restaurants as well as at our table. I'm sure that Thomas Keller would be surprised to learn he was bested by a line cook in a cowtown. Kamloops, by the way, is no longer a provincial hamlet and I can guarantee you the streets are now paved. The town wants to host the Olympic games and they have a really good chance of that happening. Kamloops we love you.

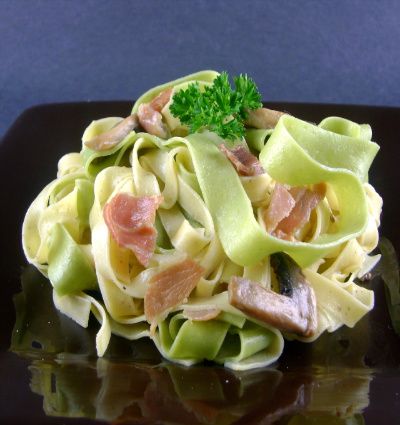
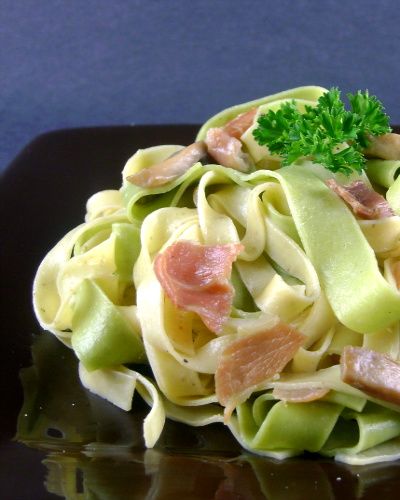
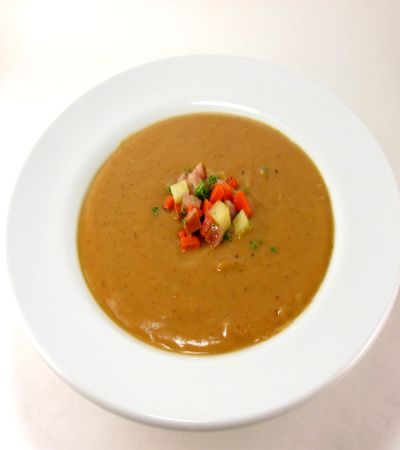
The Keller recipe for onion soup is terrific. It's just not up to the Kamloops standard. I followed this recipe as it was written. I made the stock for the soup and was able to purchase the cheeses he recommended. If you haven't yet found a recipe for onion soup that you call your own, this could be a contender. I'm including the Keller recipe for you to scan. While it's long, it is not hard and if you make stock the day before you plan to serve the soup, it will be nearly effortless. You could also use canned broth but be sure to select a low-sodium variety. Keller actually recommends that you use only water if you don't make your own stock.

Onion Soup - Soupe A L'Oignon


Ingredients for Soup:

Sachet:
2 bay leaves
12 black peppercorns
6 large sprigs of thyme

Soup:
8 pounds (about 8 large) yellow onions
8 tablespoons (4 ounces) unsalted butter
Kosher salt
1 1/2 teaspoons all purpose flour
3 1/2 quarts Beef Stock (recipe below)
Freshly ground black pepper
Sherry wine vinegar

Croutons:
1 baguette (about 2 1/2 inches in diameter)
Extra Virgin Olive Oil
Kosher salt

6 to 12 slices (1/8 inch thick) aged Comte or Emmentaler cheese (at least 4 inches square)
1 1/2 cups grated aged Comte or Emmentaler cheeses, or a combination of the two.

The more basic the soup, the more critical the details: Slice the onions uniformly and brown them very slowly and evenly; slice the bread a half inch thick and dry it completely in the oven; and serve the soup in appropriately sized bowls so that the melted cheese extends over the rim. When you hit it right, there's nothing more satisfying to cook or to eat than this soup.

It's worth reiterating the importance of cooking the onions slowly so that the natural sugars caramelize rather than brown through high heating sautéing. The onions cook for about five hours and need to be stirred often, but they can be made up to two days ahead. The soup is best if refrigerated for a day or two so that the flavors of the onion and beef broth can deepen.

Comte is traditionally the cheese of choice, but Emmentaler works as well. Gruyère is a bit strong. Use an aged cheese; a younger cheese would just melt and wouldn't form a crust.

FOR THE SACHET: Cut a piece of cheesecloth about 7 inches square. Place the bay leaves, peppercorns, and thyme in the center, bring up the edges, and tie with kitchen twine to form a sachet.

FOR THE SOUP: Cut off the tops and bottoms of the onions, then cut the onions lengthwise in half. Remove the peels and tough outer layers. Cut a V wedge in each one to remove the core and pull out any solid, flat pieces of onion running up from the core.

Lay an onion half cut side down on a cutting board with the root end toward you. Note that there are lines on the outside of the onion. Cutting on the lines (with the grain) rather than against them will help the onions soften. Holding the knife on an angle, almost parallel to the board, cut the onion lengthwise into 1/4 inch thick slices. Once you've cut past the center of the onion, the knife angle will become awkward: Flip the onion onto its side, toward the knife, and finish slicing it, again along the grain. Separate the slices of onion, trimming away any root sections that are still attached and holding the slices together. Repeat with the remaining onions. (You should have about 7 quarts of onions)

Melt the butter in a large heavy stockpot over medium heat. Add the onions and 1 tablespoon salt, reduce the heat to low. Cook, stirring every 15 minutes and regulating the heat to keep the mixture bubbling gently, for about 1 hour, or until the onions have wilted and released a lot of liquid. At this point, you can turn up the heat slightly to reduce the liquid, but it is important to continue to cook the onions slowly to develop maximum flavor and keep them from scorching. Continue to stir the onions every 15 minutes, being sure to scrape the bottom and get in the corners of the pot, for about 4 hours more, or until the onions are caramelized throughout and a rich deep brown. (my note - like a super deep brown, like way browner than you think they need to be. Think poop. Yes I said it.) Keep a closer eye on the onions toward the end of the cooking when the liquid has evaporated. Remove from the heat. (You will need 1 1/2 cups of onions for the soup; reserve any extra for another use. The onions can be made up to 2 days ahead and refrigerated.)

Transfer the caramelized onions to a 5 quart pot (if they've been refrigerated, reheat until hot.) Sift in the flour and cook over medium-high heat, stirring, for 2 to 3 minutes. Add the beef stock and sachet, bring to a simmer, and simmer for about 1 hour, or until the liquid is reduced to 2 1/2 quarts. Season to taste with salt, pepper, and a few drops of vinegar. Remove from the heat.

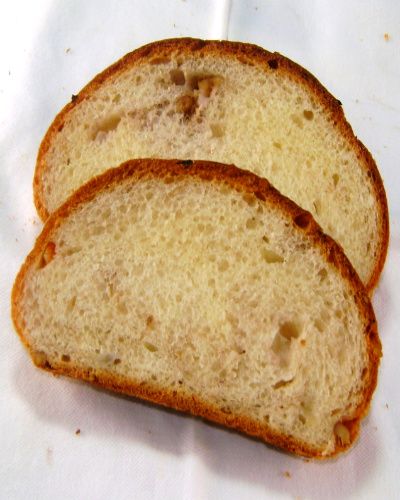
FOR THE CROUTONS: Preheat the broiler. Cut twelve 3/8 inch thick slices from the baguette (reserve the remainder for another use) and place on a baking sheet. Brush the bread lightly on both sides with olive oil and sprinkle lightly with salt. Place under the broiler and toast the first side until golden brown, then turn and brown the second side. Set aside and leave the broiler on.

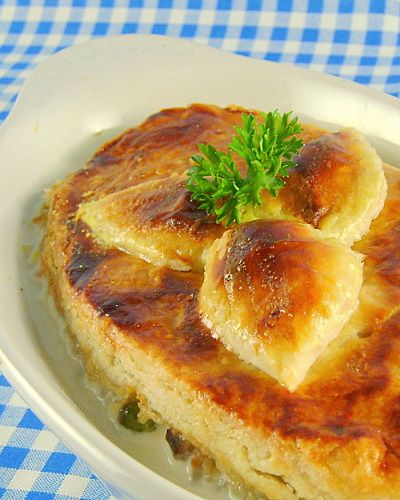
TO COMPLETE: Return the soup to a simmer. Place six flameproof soup tureens, with about 1 1/2 cups capacity on a baking sheet to catch any spills (the soup will bubble up and over the tureens). Add the hot soup to the tureens, filling them within 1/2 inch of the tops. Top each serving with 2 croutons: Lay them on the surface - do not push them into the soup. Lay the slices of cheese over the croutons so that the cheese overlaps the edges of the tureens by about 1/2 inch, Scatter the grated cheese over the sliced cheese, filling in any areas where the sliced cheese is thiner, or it may melt into the soup rather than forming a crust.

Place the tureens under the broiler for a few minutes, until the cheese bubbles, browns, and forms a thick crust. Eat carefully, the soup and tureens will be very hot.

Okay now if you are feeling like a real challenge, you can make Keller's homemade beef stock as well. I have never made homemade beef stock before, and I think I may try this when I make the soup again, depending on how much time I have. If anyone has their own recipe for beef stock, use that by all means, and please share!


Ingredients for Beef Stock:

makes 3 1/2 quarts

We use this stock for onion soup and to add in combination with veal stock to beef stews. The bones are roasted first to give the stock a roasted flavor, then simmered with caramelized vegetables for a rich brown stock.

About 2 tablespoons canola oil
5 pounds meaty beef necks or leg bones, cut into 2-3 inch sections
2 small Spanish onions (about 8 ounces total), peeled
1/2 teaspoon Kosher salt
3 ounces (1 large) carrot, peeled and cut into 4 pieces
3 ounces (1 large) leek, roots trimmed, split lengthwise, rinsed well, and cut into 2 inch pieces, or leek tops
1 large sprig of thyme
1 large sprig of Italian parsley
3 bay leaves
1/4 teaspoons black peppercorns
1 head garlic, cut horizontally in half (reserve half for another use)

Preheat the oven to 475F. Place a large roasting pan in the oven to preheat for about 10 minutes.

Add 1 tablespoon of the oil tot he hot roasting pan and distribute the beef bones in a single layer. Roast the bones for about 45 minutes, or until richly browned, turning each piece only after it is well browned on the bottom side.

Meanwhile, cut 1 onion crosswise in half. Heat a small heavy skillet over medium-high heat for 2-3 minutes. Place 1 onion half cut side down to one side of the skillet so that it is not over direct heat and let it brown and char black, about 30 minutes. This will add color to the stock, set aside.

Remove the roasting pan of bones from the oven and reduce the oven temperature to 400F. Transfer bones to a large colander set over a baking sheet to drain.

Drain the fat from the roasting pan and discard. Add about 1 cup water to the pan, place over medium heat, and use a metal spatula to scrape the bottom of the pan and release the pan juices. Let them simmer until reduced by half. Add the resulting fond to a large deep stockpot.

Transfer the bones to the stockpot and add about 5 quarts cold water - just enough to cover the bones. Any fat present in the juices will rose to the top when the cold water is added; use a skimmer to remove and discard the fat. Add the charred onion half and the salt. Place over medium heat and bring to a simmer, skimming as impurities rise to the top of the stockpot. Reduce the heat and simmer gently, skimming often, for 5 hours. If the level of liquid falls below the bones, add additional water.

Meanwhile, cut the remaining whole onion into quarters and cut the remaining onion half in half again. Place the onions, carrots, and leeks in a roasting pan that will hold them in a single layer, toss with the remaining 1 tablespoon canola oil, and place in the oven to roast for 20 minutes.

Remove from the oven and stir, then roast for an additional 20 minutes or until the vegetables are richly caramelized. Set aside.

After the stock has simmered for 5 hours, add the caramelized vegetables, herbs, peppercorns, and garlic and simmer for 1 hour longer. Turn off the heat and allow the stock to rest for 10 minutes.

Prepare an ice bath. Place a strainer over a large bowl. Removing the bones or pouring out the liquid through the bones would cloud the stock. Instead, carefully ladle the stock out of the pot and pass it through the strainer, tilting the pot as necessary to get all the stock. Strain a second time through a chinois or fine mesh strainer lines with a dampened cheese cloth.

Measure the stock. If you have more than 3 1/2 quarts, pour it into a saucepan and reduce to 3 1/2 quarts. Strain the stock into a container and cool in the ice bath, stirring occasionally. (Store the stock in the refrigerator for up to 3 days, or freeze in several containers for longer storage.)

NOTE: If the stock will be refrigerated for longer than 3 days, bring it back to a boil after 3 days, cool it, and return it to the refrigerator.

Friday, October 30, 2009

Cranberry Soufflé - Pink Saturday


From the kitchen of One Perfect Bite...A soufflé is a magnificent egg creation that should be served hot from the oven. It can be sweet or savory and, when the planets are in perfect alignment, it will tower above the mold in which it bakes. Soufflés collapse as they cool, so efforts to photograph them can be heroic. My only usable pictures were taken while they were still in the oven. The soufflé was created in the 19th century by chef Antonin Carême, who was arguably the first celebrity chef. While his culinary achievements are legendary, he is also remembered as being a prolific food writer and as the man who created the chef's hat, the toque. I'll wager he'd hate to know that the toque is included in his biography.

Soufflés rise because stiffly beaten egg whites trap air and allow them to expand with the heat of the oven. There are two components to a soufflé; a base which can be a sauce, pastry cream or puree and stiffly beaten egg whites that are used to lighten the base. There are several tricks to making a successful soufflé. A pinch of table salt added to the whites and using a collar to guide the soufflé as it rises are among them. More important still is a can-do attitude. The only hard and fast rule I have to share with you is don't open the door while the soufflé is baking. It will deflate like a balloon.

This cranberry soufflé is the creation of Michel Richard, the executive chef at Citronelle. It actually is very easy to do. It uses a puree of cranberries and sugar as a base and it requires no collar as it bakes. If you want your family or guests to see the soufflé at the height of its glory move it quickly from the oven to the table. This soufflé deflates quickly because there is no flour in it. I used a blender to puree the cranberries, adding small amounts of water only as need to continue processing. The puree should have the consistency of a bechamel sauce or pudding, so use water sparingly. I have everything ready to go before I begin to beat the egg whites. I do add a pinch of table salt to the whites and I make it a point to throw a pinch over my shoulder for luck. This is a wonderfully seasonal recipe. I hope you'll give it a try and enjoy this lovely cranberry creation.


Cranberry Soufflé...from the kitchen of One Perfect Bite

Ingredients:
1/2 cup fresh cranberry purée mixed with 1/2 cup of granulated sugar
1/2 cup of sugar, plus another 1/2 cup for coating soufflé dishes
2 tablespoons butter, softened
4 egg whites
.
5 (6-oz.) soufflé dishes

Directions:
1) Preheat oven to 325 degrees F.
2) Puree cranberries and mix with 1/2 cup sugar in a medium sized bowl. Set aside.
3) Using a pastry brush, generously coat soufflé dishes with butter, then coat them with 1/2 cup sugar. Turn them upside down to remove excess sugar. Set them on a baking sheet.
4) Quickly beat egg whites with a pinch of table salt, adding a 1/2 cup of reserved sugar a teaspoon at a time, until soft peaks are formed.
5) Fold whites into cranberry purée. Spoon batter into soufflé dishes. Bake for 25 minutes. Serve immediately with whipped cream, or vanilla ice cream. Yield: 5 servings.

Recipe courtesy Of Michel Richard.

This post is being linked to:

Pink Saturday, sponsored by Beverly at How Sweet the Sound.

Cocoa for a Crowd


From the kitchen of One Perfect Bite...
Our home is located on an incline that many call a cliff. While it misses that designation by a few degrees, it's not easy to get here and tomorrow will be of special concern because the weather is forecast to be wet and chilly. Past holidays have taught us that weather never dampens an Oregonian's joie de vivre and, while Noah may have to build another arc, there will be tiny ghosts and goblins at our door tomorrow night. They'll come with their out-of-breath parents and we'll offer them a brief respite from the storm. In addition to their Halloween grab bags, the little guys will get hot cocoa and any parent who might want something stronger will be offered an unspiked hot buttered rum to which they can add the poison of their choosing. It gives us a wonderful chance to touch base with neighbors, old and new, and the drinks are next to no work to assemble. I shared the recipe for hot buttered rum mix with you last Christmas and I'm including a link to it and the story of my darlin' Lily here. I do hope you have time to read it. Here's the recipe for cocoa for a crowd. It, too, is very easy to do and the kids will love it. Just don't forget the marshmallows and any other sprinkles you like to use. Naked cocoa just won't do.

Cocoa for a Crowd...from the kitchen of One Perfect Bite

Ingredients:
1-1/2 cups sugar
1-1/4 cups cocoa (not hot chocolate mix)
1/2 teaspoon salt
3/4 cup hot water
1 gallon milk
1 tablespoon vanilla extract

Directions:

Combine sugar, cocoa and salt in 6-quart saucepan; gradually add water. Cook over medium heat, stirring constantly, until mixture boils. Boil and stir 2 minutes. Add milk. Heat to serving temperature, stirring frequently. Do not boil. Remove from heat; stir in vanilla. Serve hot. About twenty-two 6-oz. servings.

Recipe courtesy of Hershey Kitchens.

Thursday, October 29, 2009

Patatas Bravas - Foodie Friday


From the kitchen of One Perfect Bite...
There are many versions of this classic Spanish tapa. This one comes from Valencia and it's made with olive oil and a special paste of chilies, garlic, cumin, smoked paprika and vinegar. Patatas Bravas are as popular in Spain as potato skins are here. The name means "fierce potatoes." Bravas suggests the dish is very hot and that it's macho to eat it. This is one of the tapa that I regularly prepare for our supper and because I can control the quantity being made I don't have to deal with leftovers. I also happen to love these potatoes and will make them for myself when I'm alone for dinner. When served hot and crisp from the skillet with a perfectly fried egg, there is almost nothing I'd rather have to eat. It's important to remember you can control the amount of heat in this dish. The chilies that are used in Spain are not available in my area so I worked around the problem by using cayenne pepper or red chili flakes. If you like fiery food, use one-eighth to one-half teaspoon cayenne pepper in the paste you use to coat the potatoes. The Spaniards use Choricero, Nora, and Guindilla chilies. If you can find them, by all means use them. Just remember that size is inversely proportional to the heat a chili generates. Some small chilies will send you straight to perdition. The recipe begins with potatoes that are almost tender. You can steam, microwave or boil the potatoes to get them to that point. I prefer to microwave mine on HIGH power for 10 minutes. You may peel them if you wish. I don't bother, because I think the potatoes hold up better with the skin on. They are then fried in a small amount of oil until crisp and golden. Just before serving they are tossed with the seasoning paste. While these are sometimes served at room temperature, I advise you to eat them while they're hot. Sitting around doesn't improve the taste of anything that been fried. Donuts are the only exception. I like to serve these with an aioli. These are a real taste treat. I hope you'll try them.

Patatas Bravas...from the kitchen of One Perfect Bite

Ingredients:
1-1/2 pounds small new potatoes (I use Yukon Gold)
1/4 cup olive oil
2 cloves minced garlic
3 dried chilies, seeded and chopped or 1/8 to 1/2 teaspoon cayenne pepper
1/2 teaspoon ground cumin
2 teaspoons sweet smoked paprika
2 tablespoons red wine vinegar
1 red bell pepper, seeded and thinly sliced
Coarse sea salt

Directions:
1) Scrub potatoes. Steam, boil or microwave until just tender. Cool slightly. Peel if desired. Cut small potatoes in half.
2) Heat oil in a large frying pan over medium-high heat, turning frequently until golden and crisp.
3) Meanwhile mash garlic, cayenne, cumin, paprika using back of a spoon or a mortar and pestle. Stir in vinegar. Add to potatoes with sliced bell pepper and cook, stirring, for 2 minutes longer. Sprinkle with sea salt. Serve hot with aioli. Yield: 4 servings.

This recipe is being linked to:

Designs By Gollum - Foodie Friday

Wednesday, October 28, 2009

Bread of the Dead - Pan de Muerto


From the kitchen of One Perfect Bite...The Day of the Dead, or Dia de Los Muertos, represents the melding of an old Aztec tradition with the religion of the Conquistadors. The celebration is actually a two day feast that coincides with the Catholic observance of All Saint's and All Soul's days. The first day of the celebration occurs on the 1st of November. It's called the Day of the Little Angels and it is set aside to remember children who have died. The second day is set aside to honor adults who have passed to the next life. It is important to understand that these are days of celebration rather than days of mourning. In homes that observe Dia de los Muertos, altars are built containing symbols of the four elements: fire, water, wind and earth. They are beautifully decorated and, because many believe that the deceased visit their homes during this celebration, food is placed on the altar to entice them to stay for the festivities. Feasting is an important part of both days of celebration. Good food, and clean homes are thought to entice the dead. Toy skeletons and skulls are welcome features and "dead" bread may even have a small skeleton, promising good luck, baked inside it. The second day of the celebration is usually spent outdoors with picnics in graveyards. It is a joyous time and seen as an opportunity for families to come together to honor the memories of those who have passed to the next life. It is hoped that the laughter and mention of the deceased will bring their spirits back to earth to visit with the assembled family members. To many, the Day of the Dead is a strange observance, but Mexican tradition views death as an important part of life, a natural consequence of living and one not to be feared. It's their belief that these celebrations connect families to each other and their deceased relatives, a proof, if you will, that the ties of love cannot be broken - even by the grave.

The Aztecs believed that death was a portal to another existence. Oral tradition tells us that the request of the dead before burial is, "Give me bread and sugar to help me on my journey." The bread of the dead, pan de muerto, is made only for the Dia de los Muertos celebration. It is a sweet, egg-rich bread and it can be found throughout Mexico, though its form differs vastly from one region to the next. The bread is supposed to resemble a skull and it is adorned with bones and sometimes tear drops.

I've chosen a very simple recipe for the bread and have opted for bare bones - forgive the pun - adornment. While this recipe appears in many places, I believe that its original source is "Look What We Brought You from Mexico." I actually had trouble with the first loaf I tried to make. I found 3 cups of flour produced a loaf that was heavy enough to be a door stop. The loaf you see in the photo was made with 2-1/2 cups flour. I've changed the flour measurement to reflect a range, but I strongly advise you mix with the lesser amount and use the last 1/2 cup for kneading. Here's the recipe, just in time for Dia de Los Muertos.

Pan de Muerto (Bread of the Dead)...from the kitchen of One Perfect Bite

Ingredients:
1/4 cup milk
1/4 cup (half a stick) butter, cut into 8 pieces
1/4 cup sugar
1/2 teaspoon salt
2-1/4 teaspoons active dry yeast
1/4 cup very warm water
2 eggs, divided use
2-1/2 to 3 cups all-purpose flour, unsifted
1/2 teaspoon anise seed
1/4 teaspoon ground cinnamon
2 teaspoons sugar

Directions:
1) Bring milk to boil in a small saucepan; remove from heat. Stir in butter, 1/4 cup sugar and salt.
2) In large bowl, mix yeast with warm water until dissolved and let stand 5 minutes. Add the milk mixture.
3) Separate yolk and white of one egg, reserving white for glaze. Add yolk and 1 whole egg to yeast mixture. Stir in flour, blend until a dough ball is formed.
4) Flour a pastry board or work surface. Knead dough until smooth. Return to large bowl and cover with plastic wrap. Let rise in warm place for 90 minutes.
5) Grease a baking sheet. Punch dough down. Knead again on floured surface. Divide it into fourths and set one piece aside. Roll remaining 3 pieces into "ropes."
On greased baking sheet, pinch 3 rope ends together and braid. Finish by pinching ends together on opposite side to form a circle. Use remaining dough to form bones. Place them on the baking sheet.
6) Preheat oven to 350 degrees F. Cover bread with plastic wrap and let rise for 30 minutes. Meanwhile, in a bowl, mix anise seed, cinnamon and 2 teaspoons sugar together. In another bowl, beat egg white lightly.
7) Brush top of bread and bones with egg white, sprinkling only the loaf with sugar mixture. Bake at 350 degrees for 35 minutes. Cool. Yield: 1 loaf.

This post is being linked to:

Wild Yeast - Yeast Spotting

Tuesday, October 27, 2009

Wasabi-Glazed Salmon - Salmon Ladders - Outdoor Wednesday


A salmon ladder on the McKenzie River in Oregon. The ladder is a step-like structure designed to allow fish to migrate upstream over or through a barrier to spawn.


It's a Sisyphean effort. While these ladders help the salmon make their long way home, the journey is arduous. It's fascinating, almost mesmerizing, to watch them clear these and other hurdles encountered on the way to their spawning grounds. It's a lesson in determination and the biological imperative which ensures a constant flow of salmon to our markets. I feel almost - almost - guilty about using so simple a recipe for salmon, but, truth be told, it is one of my best finds. It's low in fat and very easy to make. The secret ingredient here is the wasabi paste that gives some oomph to a fairly standard teriyake glaze. I clipped the Weight Watcher's recipe from the Washington Post several years ago and it immediately made it to my permanent recipe rotation. I would advise anyone who is unfamiliar with wasabi paste to add it to the teriyake sauce in 1/2 teaspoon increments. You can always add more, but once it's in the mix there's no turning back. I enjoy mild to medium heat and do not find 2 teaspoons of the paste to be excessive. If you are in a real hurry, use commercially prepared teriyake sauce and add wasabi paste to it. If you can't find the paste, use a teaspoon of wasabi powder mixed with 1-1/2 teaspoons water as a substitute. Here's one of the easiest recipes your ever likely to find. Once you have tried it, you'll know why the salmon is called "king."

Wasabi-Glazed Salmon...from the kitchen of One Perfect Bite courtesy of Weight Watcher's and the Washington Post

Ingredients:
3 tablespoons mirin
1 tablespoon rice vinegar
1 tablespoon reduced-sodium soy sauce
1 tablespoon honey
1 teaspoon finely chopped, peeled ginger root
2 teaspoons wasabi paste
Nonstick vegetable spray oil
4 salmon fillets (4 to 6 ounces each)

Directions:
1) In a small saucepan over medium-high heat, stir together mirin, vinegar, soy sauce, honey, ginger and wasabi to taste. (Add the wasabi incrementally, tasting as you go.) Bring to a boil. Reduce the heat to medium and cook, stirring occasionally, until glaze thickens slightly, about 5 minutes. Remove from the heat.
2) Meanwhile, spray a large nonstick skillet with oil and place over medium-high heat. Add salmon and cook, turning once, until fish is browned on the outside and opaque in center, about 4 minutes per side, depending on thickness of the fillet. Spoon sauce over the salmon. Serve hot. Yield: 4 servings.

From "Weight Watchers Take-Out Tonight: 150+ Restaurant Favorites to Make at Home, All 8 Points or Less" (Fireside, 2003). Each serving is 4 points.

This recipe is being linked to:

Outdoor Wednesday, an event sponsored by Susan at A Southern Daydreamer.

Monday, October 26, 2009

Maple Chocolate Walnut Bars


From the kitchen of One Perfect Bite...We spent most of Sunday at a Mushroom Festival held at the arboretum in our area. This is a yearly event and I really look forward to it. Many of the Master Gardeners volunteer for the event. I'm not among them because I want the day to peruse and learn and touch base with folks I haven't seen since the last show. If you're into mushrooms there are some prestigious elbows to be rubbed here and that's hard to do when you are manning an exhibit. My guilty conscience is assuaged by donating baked goods for the cold wet volunteers who do what I should be doing. This Sunday I made several pans of these wonderful bar cookies. They are embarrassingly easy to make and I have yet to meet anyone who doesn't like them. I'd love to tell you it's a gourmet creation. It's not. The recipe comes the Eagle Brand test kitchen. I don't know if my experience is unique, but I have extremely good luck with recipes from these kitchens and I never hesitate to try the ones they feature. Today's recipe requires no special equipment and it's very easy to do. The bars are wonderfully flavorful and they are crowd pleasers. Nuff' said. Here's the recipe.

Maple Chocolate Walnut Bars
...from the kitchen of One Perfect Bite courtesy of Eagle Brand Test Kitchen

Ingredients:
1-1/2 cups Pillsbury BEST® All Purpose Flour
2/3 cup sugar
1/2 teaspoon salt
3/4 cup cold butter
2 large eggs
1 (14 oz.) can Eagle Brand® Sweetened Condensed Milk
1-1/2 teaspoons maple flavoring
2 cups chopped walnuts
1 cup (6 oz. pkg.) semi-sweet chocolate chips

Directions:
1) Heat oven to 350 F. Combine flour, sugar and salt in large bowl. Cut in butter with pastry blender or 2 knives until mixture resembles coarse crumbs. Stir in 1 egg. Press evenly into an ungreased 13 x 9-inch baking pan.
2) Bake 25 minutes. Beat sweetened condensed milk, remaining 1 egg and maple flavoring in medium bowl. Stir in walnuts. Sprinkle chocolate chips evenly over partially baked crust. Top with walnut mixture, spreading evenly to edges.
3) Bake an additional 20 to 25 minutes or until golden. Cool. Cut into bars. Yield: 36 bars.

Sunday, October 25, 2009

The Lighthouse Keeper's Rhubarb Bread - Blue Monday


Lime Kiln Lighthouse - San Juan Island, Washington


Nieuwpoort Lighthouse - Belgium


Kilauea Lighthouse - Kauai, Hawaii


The Lighthouse Keeper's Rhubarb Bread


From the kitchen of One Perfect Bite...I have an unapologetic love for covered bridges and lighthouses. The bridges are predictable. The lighthouses, at least the ones I've seen, are unique. Both speak to times now past and both have become redundant. Communities struggle to keep them as monuments to a proud past, but I suspect their days are numbered. Today's recipe comes from a lighthouse keeper. A lighthouse keeper was the person responsible for tending and caring for a lighthouse, its lamps and lenses. The advent of electricity sounded their death kneel and global positioning systems delivered the coup de gras. In an effort to raise funds, while recording snippets of history, lighthouse societies in various parts of the country have collected recipes that capture the meals eaten by the keepers from the 1700's through to today. This recipe comes from the children's book "The Little Traverse Light" by Elizabeth Whitney Williams. The bread is easy and delicious - really delicious. If you don't like rhubarb substitute raspberries. You won't be sorry you tried this one.

The Lighthouse Keeper's Rhubarb Bread...from the kitchen of One Perfect Bite adapted from The Little Traverse Light

Ingredients:
1-1/2 cups brown sugar, packed
2/3 cup vegetable oil
1 large egg, beaten
1 cup buttermilk
1 teaspoon salt
1 teaspoon baking soda
1 teaspoon vanilla
2-1/2 cups all-purpose flour
2 cups finely diced rhubarb
Topping:
1/3 cup chopped walnuts
1 teaspoon cinnamon
1/3 cup brown sugar

Directions:
1) Preheat oven to 350 F. Grease and flour 2 8x4-inch loaf pans.
2) Combine brown sugar and oil in a bowl. Stir until smooth. Add egg, buttermilk, salt, baking soda, vanilla and flour. Blend until moist.
3) Fold in diced rhubarb. Turn batter into prepared loaf pans.
4) For topping, combine walnuts, cinnamon and brown sugar. Sprinkle over batter.
5) Bake 50 to 55 minutes, or until cake tester comes out clean. Turn out onto racks and cool before slicing. Yield: 2 loaves.

This post is being linked to:

Smiling Sally - Blue Monday

Saturday, October 24, 2009

Albondigas - Spanish Meatballs in Tomato Sauce


From the kitchen of One Perfect Bite...
I love Spanish food and don't think it gets nearly the attention it deserves. I became interested in it while searching for recipes scaled to feed two people. My research led me into the world of tapa and a new way of eating. A tapas is not a specific type of food, and it is not, as I once believed, a starter course. Tapas is a style of eating that revolves around small dishes of something edible. Anything can be a tapa as long as the portion is small and it is served with a drink. The word "tapa" means lid or cover. Originally a slice of cheese or ham was served with a drink to cover it and keep away the flies. The more fanciful believe the custom can be traced to a kindly king, who couldn't drink on an empty stomach. It's said he issued a royal decree that demanded all his subjects have food with their drinks. While there was a time in Spain when tapa were free, that is no longer true. At any rate, I started to use tapa recipes for some of our meals and was really pleased at how well they worked. These tasty meatballs, served in a lovely tomato sauce, are from a recipe I've adapted for use at our dinner table. It's a really simple recipe. Chances are you have all the ingredients you need to prepare it in your pantry and refrigerator. The original recipe called for meaty tomatoes. I use that method when heirloom tomatoes are readily available. The rest of the time I rely on a large can of plum tomatoes. A 28-ounce can of plum tomatoes is equivalent to 4 large tomatoes and its a great substitute. Use whole plum tomatoes. For reasons I don't understand, diced tomatoes retain their shape and don't cook down. This recipe is best with a pulpy tomato fondue. You can use any type of ground meat, but I think ground turkey produces dense meatballs that aren't as pleasant as those made from beef and pork. This recipe is scaled to feed 2 people. It can be doubled. Here's the recipe.

Albondigas Con Salsa De Tomate...from the kitchen of One Perfect Bite courtesy of Peptita Aris

Ingredients:
1/2 pound ground beef
4 green onions, thinly sliced
2 cloves garlic, finely chopped
2 tablespoons grated Parmesan cheese
1 large egg yolk
2 teaspoons fresh thyme leaves or 1/2 teaspoon dried thyme leaves
1/2 teaspoon salt + salt to taste
1/2 teaspoon freshly cracked black pepper + pepper to taste
1 tablespoon olive oil
4 large tomatoes, chopped or 1 (28-oz.) can plum tomatoes, drained
2 tablespoons red or white wine
2 teaspoons fresh chopped rosemary or 1/2 teaspoon dried rosemary
Pinch of sugar
Thyme or parsley for garnish

Directions:

1) Place ground beef, green onions, garlic, Parmesan cheese, egg yolk, thyme, salt and pepper in a large bowl. Mix gently to combine. Shape into 12 equal sized meatballs.
2) Heat olive oil in a large skillet. Saute meatballs, turning several times, until brown, about 5 minutes.
3) Add tomatoes, wine, sugar and rosemary. Season to taste with salt and pepper. Cook, covered, over low heat for 15 minutes until tomatoes are pulpy and meatballs cooked through. Sprinkle with thyme or parsley. Serve hot. Yellow rice is a lovely accompaniment. Yield: 2 servings.

Friday, October 23, 2009

Raspberry Cream Cheese Coffee Cake - Pink Saturday


From the kitchen of One Perfect Bite...I've wanted to try this recipe for years. I've seen it in many places but the version I used today came from Allrecipes. The cake intrigued me because it uses jam rather than berries. I tend to horde my stash of berries and use them only for special desserts. The cake is easy to make and can be on the table in a little over an hour. It consists of a layer of pastry that's covered with a cheese filling and spread with raspberry jam before being sprinkled with a struessel topping. It's a nice cake and I will keep the recipe. I have other coffee cakes that I prefer, but I like to have something new in reserve for the folks who eat regularly at my table. I substituted mascarpone for the cream cheese and used my own freezer jam rather than a commercial product. I'll use cream cheese the next time I make this and I plan to increase the amount of jam from 1/2 to 3/4 of a cup. I think I'll also try blackberry or peach jam in place of the raspberry. This is not a particularly sweet cake, nor will it win any beauty contests. It's makes a nice light dessert and would work well as part of a brunch buffet. If I had to sum up the cake in a single word the word I'd select would be "nice." Not great, just nice. Here's the recipe for a nice cake.

Raspberry Cream Cheese Coffee Cake
...from the kitchen of One Perfect Bite courtesy of Allrecipes

Ingredients:

2-1/4 cups all-purpose flour
3/4 cup sugar
3/4 cup cold butter
1/2 teaspoon baking powder
1/2 teaspoon baking soda
1/2 teaspoon salt
3/4 cup sour cream
1 egg, beaten
1-1/2 teaspoons almond extract
FILLING:
1 (8-oz.) package cream cheese, softened
1/2 cup sugar
1 egg
1/2 cup raspberry jam
1/2 cup slivered almonds
Confectioners' sugar (optional)

Directions:
1) In a large mixing bowl, combine flour and sugar. Cut in butter until mixture is crumbly. Remove 1 cup and set aside. To remaining crumbs, add baking powder, baking soda and salt. Add sour cream, egg and almond extract; mix well. Spread in the bottom and 2 in. up the sides of a greased 9-in. springform pan.
2) To make filling, beat cream cheese, sugar and egg in a small bowl until blended. Pour over batter; spoon raspberry jam on top. Sprinkle with almonds and reserved crumbs.
3) Bake at 350 degrees F for 55-60 minutes. Let stand for 15 minutes. Carefully run a knife around edge of pan to loosen; remove sides from pan. Dust top with confectioners' sugar if desired. Yield: 8 servings.

This post is being linked to Pink Saturday, sponsored by Beverly at How Sweet the Sound.

Thursday, October 22, 2009

Celery Soup - Foodie Friday


From the kitchen of One Perfect Bite...
I began the effort to "green" my kitchen several years ago. One of the areas I knew needed to be addressed was the amount of waste I generated as I prepared and cooked our meals. I began with an honest evaluation of food that was purchased and never used, or food that went bad before it could be used. I also took a look at leftovers that spoiled before they made it back to our table. The first thing I addressed was "right sizing" the number and size of portions I prepared for our meals. Recipes were sized to feed two or create planned leftovers. The harder part was identifying the true waste lurking in the refrigerator. For whatever reason, my vegetable crispers always held some food that seemed destined for the garbage can. I was especially bad with things like green onions, peppers and celery. It took some doing, and a lot of planning, but I eventually got to the point where what was purchased was eaten. Celery was my biggest problem. I would use a stalk or two but had no plan to use what remained. At one time I had the same problem with carrots. I solved that by searching out recipes that would finish the bunch before week's end. While it was harder with celery, I used the same approach and eventually found ways to use it. This light and simple soup is one of the recipes I use to make sure that my celery doesn't go to waste. I like, whenever possible, to add chopped fresh fennel to the soup pot along with the celery. The flavors are compatible because they come from the same plant family. While it's listed as an optional ingredient, celery salt adds enormously to the flavor the soup. As you scan the ingredient list you'll see that this is a perfect vegan meal. The soup can be table ready in an hour. It is too light to serve as a dinner entree, but it's perfect for lunch or a first course and it's great for company. You'll find that the celery is too stringy for an immersion blender to do its job. It really is best to use a blender or food processor and then strain the puree through a fine mesh sieve. The flavor of the soup improves as it sits, so I try to make this a day before I plan to serve it. Here's the recipe.

Celery Soup...from the kitchen of One Perfect Bite courtesy of the Los Angeles Times

Ingredients:
3 tablespoons vegetable oil or butter
1-1/2 cups diced onion
1 teaspoon minced garlic
1 large baking potato, cut in 1/2-inch dice to yield 2 cups
10 stalks of celery, trimmed and cut into 1/2-inch dice to yield 6 cups
1 small bulb fennel, trimmed, core and chopped (optional)
5 cups reduced-sodium vegetable or chicken broth
1 teaspoon apple cider vinegar vinegar
1 teaspoon celery salt (optional) or table salt to taste
1 large pinch pepper
2 tablespoons heavy cream (optional)
Celery leaves for garnish

Directions:
1) Place oil or butter in a soup pot. Add onion and cook over medium heat until translucent, about 8 minutes. Add garlic and stir until fragrant, about 1 minute.
2) Add potatoes, celery and fennel (if using). Add broth and bring to a boil. Reduce heat and simmer until vegetables are tender, about 20 minutes.
3) Puree soup in batches using a blender or food processor. Pass puree through a strainer, pressing solids with the back of a spoon.
4) Return to a clean pot. Add pepper and celery or table salt. Stir in cream if using. Bring soup to a simmer and keep warm over low heat until ready to serve. Yield: 4 to 6 servings.

This recipe is being linked to:
Designs By Gollum - Foodie Friday

Wednesday, October 21, 2009

Old-Fashioned Lemon Pudding


I have more good news to share with you. The folks at Tillamook Cheese are featuring our Creamy Broccoli and Cheddar Soup on their site - they're calling it calling it Soup of the Gods. We also received a nod for our Pumpkin Butter in the on-line Health and Fitness section of Glamour magazine.


From the kitchen of One Perfect Bite...Today's recipe is for an old-fashioned pudding that lemon-lovers will really enjoy. I want to emphasize that this is a pudding, not a curd. A curd contains no cornstarch and the only liquid used to make it is the juice of lemons. Lemon fillings and puddings, however, are made with water or milk and use cornstarch as a thickener. Like most old recipes, this one is simple and quite straight forward. It is tart. If you have small children you might want to use less zest than the recipe calls for. While I hate to suggest that, I think it's better than adding additional sugar. Make sure you remove only the yellow colored portion of rind. The white pith will make the pudding bitter. I've found that two large lemons will give the juice and zest I need to make this. This is a wonderful, inexpensive family dessert.

Old-Fashioned Lemon Pudding...from the kitchen of One Perfect Bite

Ingredients:
3/4 cup granulated sugar
1/4 cup cornstarch
2-1/2 cups milk
3 large egg yolks, lightly beaten
2 tablespoons finely grated lemon zest
Pinch of salt
1/2 cup fresh lemon juice
2 tablespoons butter, softened

Directions:
1) Place sugar and cornstarch in a 2-quart saucepan. Whisk to combine. Gradually add milk, whisking until smooth. Add egg yolks, lemon zest and salt. Cook, stirring, over medium-high heat until sauce thickens and coats a spoon.
2) Remove pan from heat. Stir in lemon juice and butter. Pour through a fine mesh strainer into a large bowl or individual serving dishes. Let cool to room temperature. Cover with plastic wrap. Transfer to refrigerator for 2 hours, or until set. Serve chilled. Yield: 4 -6 servings.

Tuesday, October 20, 2009

Straw and Hay - Pasta for Outdoor Wednesday


Straw is a hollow grain stalk.


Hay is a grain or legume.


Straw and Hay is a wonderful pasta dish.


From the kitchen of One Perfect Bite...
This recipe for Straw and Hay, called Paglia e Fieno Papalina, is based on a pasta entree we had at Romeo Salta's restaurant in New York City. The restaurant is now gone, but wonderful memories of good times and great food are still with us, and the few recipes we have from those days are treasured. I'd love to tell you that this dish is easy to make. It actually is, if you have a source for fresh plain and green fettucine, or are willing to settle for the packaged dried equivalent. If you make your own pasta, you'll hate me. I want to point out that the two pastas are cooked in separate pots. This is done to prevent the green pasta from bleeding into the white and it also allows the pasta to cook more quickly. I've cut way back on the butter and substituted half-and-half for the heavy cream that was used when this dish was made tableside at the restaurant. I've also removed peas from the ingredient list. If you want more green than parsley can provide, feel free to add 1/2 to 1 cup petite peas to the mix. Though I do extensive mise en place ahead of time, I make this dish for and in front of guests. Simple things wow people. Although this was originally meant to be a first course, I serve it as an entree with a salad and a really great bread. I make it a point to finish this meal with a dessert that sure to be a stunner. Last night it was a warm lemon souffle, served straight from the oven while it's top hat was still standing tall. It was a lovely compliment to the richness of the pasta. Here's my rendering of Romeo's Straw and Hay. I do hope you'll try it. I know you'll love it.

Straw and Hay - Paglia e Fieno Papalina
...from the kitchen of One Perfect Bite

Ingredients:
1/2 pound spinach fettucine
1/2 pound fettucine
1 pound mushrooms, sliced
4 tablespoons butter, divided use
1 clove garlic
Salt and pepper to taste
1/2 pound prosciutto, diced
1 cup light cream or half-and-half
1/2 cup freshly grated Parmesan cheese

Directions:

1) Melt 2 tablespoons butter in a large skillet. Add mushrooms and saute for 10 minutes. Add garlic and cook until fragrant. Remove from heat. Season with salt and pepper. Keep warm.
2) Melt reserved 2 tablespoons butter in a second skillet. Add prosciutto and brown; keep warm.
3) Heat cream in a microwave on HIGH power until warm, about 1 minute.
4) Cook each pasta in a separate pot of boiling salted water, following label directions. Drain well and toss with a small amount of olive oil to prevent sticking.
5) Toss noodles with mushrooms, prosciutto, cream and Parmesan cheese until well coated. Season to taste with salt and pepper. I use about 1/2 teaspoon black pepper. Transfer to a warm serving platter and serve. Yield: 4 - 6 servings.

This recipe is being linked to:

Outdoor Wednesday, an event sponsored by Susan at A Southern Daydreamer.

Presto Pasta Nights, being hosted this week by Heather at Girlichef

Monday, October 19, 2009

Scandinavian Yellow Pea Soup - Crock-Pot


From the kitchen of One Perfect Bite...This is one of my favorite soups. It was made in the German and Swedish kitchens of my childhood with very different ingredients and results. I usually sided with Hannie when it came to soup, but the truth was, not only did Mrs. P make a better pea soup, she made it every Thursday.

This is a photo, courtesy of David Ryan, of the now grown Anthony, recreating the famous run that convinced us all that Wednesday was spaghetti day in Boston's North End. Anthony's story and a wonderful walk down memory lane can be found here. While Anthony ran home for spaghetti, the Scandinavians in Chicago were busy making potato sausage to accompany the yellow pea soup they served every Thursday night. Mrs. P was a story teller and loved to recount the tale of good King Erik XIV who was poisoned with a bowl of arsenic laced pea soup. Believe me when I say I watched every step she took as she made her soup. What I most liked about it was the smoky undertone it developed. Anyone who has ever made pea soup knows it cooks very quickly. Not so, that made by Mrs. P. She began her soup on Wednesday night with a large slab of uncut bacon that was put in a pot and covered with water to simmer overnight. The following morning she would remove the bacon, skim the broth and add the yellow split peas and vegetables needed to finish the soup. While the soup simmered she would dice the bacon and lightly fry it until it browned and crisped a bit. She refused to use any other meat to flavor the broth. She pureed the soup but added cubed carrots, potatoes, bacon and ham or sausage to it just before it was served. It was wonderful. I have, over the years, altered her recipe a bit. The biggest change is that I now make it in a crock-pot. Here's how it's done.

Scandinavian Yellow Pea Soup...from the kitchen of One Perfect Bite

Ingredients:

1 pound unsliced slab bacon
2 quarts water
2 cups yellow split peas, picked over and rinsed
1 cup chopped onion
1-3/4 cups diced carrots, divided use
1 teaspoon dried thyme
1 bay leaf
Salt and pepper to taste
1 cup diced boiling potatoes
1 cup diced cooked ham

Directions:
1) The night before serving, place bacon into crock-pot. Cover with 2 quarts water. Cover and cook on LOW for 12 hours. Remove bacon. Skim broth.
2) Place split peas in a colander and rinse under cold running water. Pick over and discard any discolored peas. Add peas to crock-pot with onions, 1 cup carrots, thyme and bay leaf. Cover and continue to cook on LOW for 8 to 10 hours.
3) Just before soup is done, place reserved 3/4 cup carrots and potatoes in a microwave dish, cover, and cook on HIGH power for 2 minutes, or until vegetables are tender. If you are going to use bacon, cut it into uniform dice and brown it in a frying pan set over medium heat. Set aside.
4) Puree soup, using a blender, food processor or immersion blender. Add carrots, potatoes, ham and bacon, if using to soup. Season to taste with salt and pepper. Heat through. Yield: 6 servings.

This post is being linked to:

Crock-Pot Wednesday an event sponsored by Deb at Dining with Debbie.


Kahakai Kitchen
for Souper Sunday

Sunday, October 18, 2009

Thai Fish Cakes with Cucumber Relish - Blue Monday


Photobucket Creative Commons License

A Oregon fisherman's paradise serves as a perfect introduction to Thai Fish Cakes and Blue Monday.


From the kitchen of One Perfect Bite...We have an abundance of salmon at this time of year and, out of necessity, I've learned to deal with the surplus that tries to claim exclusive use of my freezer space. Today's recipe is an adaption of one for fish cakes that Bob and I had, and loved, when we were in Thailand. The fish cakes are easy to make and they're inexpensive if you use canned salmon or tuna fish to assemble them. The recipe calls for fish sauce and red curry paste. They are available in any well stocked grocery store, but if you're living at the North Pole or in the middle of the Gobi Desert, they can be ordered via the internet. Both will last for several months in the refrigerator. You can make your own red curry paste if you wish. I've included a recipe for the adventurous, but, I hasten to add, commercially prepared red curry paste works like a charm. Red curry is hot to many tongues, so I've used a range of measurement for it in the recipe. Go easy, if you are just beginning to eat hot and spicy food. The cucumber relish is served with many Thai dishes to offset and balance the heat of chilies. Again, the relish is simple and takes minutes to prepare. The recipe I'm including here is very basic. I posted a more involved version earlier in the year and if you'd like to try it follow this link to Ah Jhat. I use mashed potatoes to bind the fish cakes but bread crumbs can also be used. I cook the cakes in a small amount of oil. In Thailand these are deep fried and smaller sized cakes are also used as appetizers. Here are the recipes for the fish cakes, the simplified cucumber relish and red curry paste. I hope you'll try them. You won't be sorry.

Thai Fish Cakes with Cucumber Relish
...from the kitchen of One Perfect Bite

Ingredients:
1-1/2 cups cooked flaked salmon or 1 (14.75-oz.) can pink salmon
1/2 cup plain mashed potatoes or bread crumbs
1/4 cup very finely chopped onion
1/4 cup coarsely chopped fresh cilantro or mint
1 large egg
1 to 3 teaspoons red curry paste
1 tablespoon fish sauce
1/2 teaspoon salt
1/2 teaspoon freshly ground black pepper
3 tablespoons vegetable oil

Directions:

1) If using canned salmon, drain it well. Place in a large bowl and work with fingers to remove skin and bones. Add mashed potatoes, onion and cilantro. In a separate small bowl, combine egg, red curry paste, fish sauce, salt and pepper and mix with a fork until smooth. Add to salmon mixture; mix gently with a spoon or your hands to combine. Using a 1/4 cup measure, shape mixture into 3-inch patties; place on a baking sheet and chill in freezer for about 30 minutes.
2) When ready to proceed, heat oil in a large skillet set over medium-high heat. Carefully add 4 patties and cook, turning once, until golden brown, about 3 minutes per side. Transfer to a serving platter and continue procedure with remaining patties. Serve hot for best flavor. Yield: 4 to 6 servings.

Cucumber Relish

Ingredients:
1/2 cup granulated sugar
1/2 cup white or rice wine vinegar
1 large English cucumber, diced
1/2 cup very finely chopped peanuts

Directions:
1) Combine sugar and vinegar in a small sauce pan. Bring to a boil over medium heat, stirring occasionally. Remove from heat and allow to cool.
2) Pour into a two cup bowl. Add cucumbers. Toss to combine. Top with peanuts. Yield: 1 cup

Red Curry Paste

Ingredients:
3 large dried red New Mexico or Anaheim chili peppers
10 small dried red chilies (i.e. chiles de arbol or japones)
1/2 cup coarsely chopped shallots
1/4 cup coarsely chopped garlic
1 tablespoon coarsely chopped fresh ginger
1 tablespoon ground coriander
1 teaspoon ground cumin
1/2 teaspoon freshly ground pepper
1/2 teaspoon salt

Directions:
1) Stem and seed all chilies. Chop into large pieces; place in a small bowl. Add warm water and let them soak awhile proceeding with recipe.
2) Using bowl of a small food processor or a blender, combine shallots, garlic, ginger, coriander, cumin, pepper and salt. Add softened chilies and 1/4 cup of soaking liquid; process until a smooth puree forms. Transfer paste to a lidded jar and refrigerate for up to 3 weeks. Paste can be frozen for 3 months. Yield: 3/4 cup.

Recipes adapted Temple of Thai and Nanci McDermott


This post is being linked to:

Smiling Sally - Blue Monday

Saturday, October 17, 2009

Old Fashioned Double Chocolate Pudding


I had the good fortune to be raised in the company of wonderful cooks. My mother, bright and beautiful, was a woman of many talents, but cooking wasn't one of them. She had ten recipes in her rotation and never met a dessert, save for her lemon pie, that didn't come from a box. Fortunately, Jello puddings became available in 1936 so we did have dessert at our table, but imagination, taste and skill were learned in other kitchens. As a matter of fact, if it weren't for the visits of my paternal grandmother, Maude, I'd probably still think pudding came from a box. Maude had raised a large, boisterous family, and while she lived with her only daughter she spent most of the year visiting the homes of her "boys." She called it taking turns. When she stayed with us, dessert was her responsibility and this pudding is based on one she taught my sister and I how to make. It really is quite lovely and vastly improved by the wonderful chocolates that are available to us now. I make the pudding with whole milk and really good chocolate. While not as smooth as a mousse, or as intensely chocolate as a pot de creme, this is, nonetheless, delicious. It's easy to do and a perfect family dessert. Here is Grandma Maude's recipe for old-fashioned double chocolate pudding.


Old Fashioned Double Chocolate Pudding
...from the kitchen of One Perfect Bite

Ingredients:
2 (1-oz.) squares, unsweetened baking chocolate
1 cup granulated sugar
1/8 teaspoon salt
2 cups milk, divided
3 tablespoons cornstarch
3 tablespoon Dutch process cocoa powder
2 tablespoons unsalted cold butter, cut in small pieces
1/2 teaspoon vanilla extract

Directions:
1) Grate chocolate squares into top of double boiler that's been placed over simmering water. Add sugar, salt and 1-2/3 cups milk. Heat, stirring constantly, until chocolate melts and mixture is well-blended.
2) Sift cornstarch and cocoa powder together onto a sheet of waxed paper. Add to reserved 1/3 cup milk; stir until well combined.
3) Add cocoa mixture to chocolate in double boiler. Continue to cook, stirring gently, until pudding thickens and almost mounds, about 8 minutes. Cover pan; cook without stirring for 10 minutes. Remove top of double boiler from water. Gently stir in butter. Cool for about 10 minutes before adding vanilla; stir well. Pour into dessert dishes. Cover tops with plastic wrap and allow to cool completely before refrigerating. Chill for several hours before serving. Yield: 4 to 6 servings.

Friday, October 16, 2009

Mile High Apple Pie with Cranberries - Pink Saturday


This is a wonderfully rosy pink pie that's perfect for the fall season. It can be made at other times of year without the cranberries. The apples in the pie will retain their shape as they bake, but they will be reduced in volume and there will be a void between the apples and the crust. If you prefer softer apples or don't care for the hollow, I urge you to partially cook them before they're placed in the pastry shell. I use Golden Delicious or Granny Smith apples to make the pie because they retain their shape and are not overly sweet. When I make the pie without cranberries I cut way back on the amount of sugar used in the filling, so the measurement for sugar that is shown in the recipe is variable. We serve this warm with really good vanilla ice cream. Here's the recipe.


Mile High Apple Pie with Cranberries
...from the kitchen of One Perfect Bite

Ingredients:
8 cups apples, pared, quartered, cored and thinly sliced
1 to 2 cups cranberries (optional)
1/3 to 3/4 cup firmly packed light brown sugar
1/3 to 3/4 cup granulated sugar
3 tablespoons cornstarch
1 teaspoon ground cinnamon
1/4 teaspoon ground mace
1/4 teaspoon ground nutmeg
2 tablespoons butter
Pastry for a 2 crust pie
Glaze:
1 egg yolk + 1 teaspoon milk

Directions:
1) Preheat oven to 425 degrees F.
2) Place apples and cranberries(if using) in a large bowl. Mix sugars, cornstarch, cinnamon, mace, nutmeg and salt in a small bowl to combine. Sprinkle mixture over apples and let sit until juices begin to form, about 15 minutes.
3) While apples rest, roll half of pastry to fit a 9-inch pie plate with 1/2-inch overhang. Roll remaining dough to form top crust for pie, folding into quarters.
4) Pile apple mixture into pastry. Dot with butter. Moisten edge of pastry with water. Place folded pastry on apples with point in the center. Unfold. Press edges together to seal. Flute. Make several holes or slits in crust to allow steam to escape.
5) Mix yolk with milk and brush top of pastry with mixture. Bake pie for 1 hour, or until crust is deep golden brown and juices are bubbling through slits. If crust browns too rapidly, cover with foil. Yield: 6 to 8 servings.

This post is being linked to Pink Saturday, sponsored by Beverly at How Sweet the Sound.

Yeasted Walnut Bread from Southern Burgundy - World Bread Day


Today is World Bread Day and I almost - almost - forgot. I'm sneaking under the wire with a yeasted walnut bread from Southern Burgundy that was developed by Jane Grigson, an English food writer. She was a good friend of James Beard and had the unique honor of having her work translated into French. That was an uncommon occurrence 40 years ago. I've had her recipe for decades and never made it for want of walnut oil. Fortunately, I've remedied that and was able to make the bread for this event. The bread is simple to do, and while it's a bit costly to make, it is delicious. The only change I would make is to increase the measure of walnuts used in the bread. I can't wait to see how it tastes tomorrow after it's had time to ripen. This recipe makes 4 small loaves of a bread that is flavored with onions, chopped walnuts and walnut oil. The aroma of this bread when it is baking will bring you to your knees and the trick will be allowing it to cool before you slice into it. The bread has a lovely crust and a very mild onion flavor. Here, just in time for World Bread Day, is Jane Grigson's Yeasted Walnut Bread from Southern Burgundy. Enjoy!

Yeasted Walnut Bread from Southern Burgundy...from the kitchen of One Perfect Bite, courtesy of Jane Grigson from James Beard's Beard on Bread

Ingredients:
5 cups all purpose flour (preferably unbleached)
1 tablespoon salt
2 tablespoons sugar
2 packages active dry yeast or 4-1/2 teaspoons active dry yeast
2 cups warm milk
1/2 cups walnut oil or olive oil or 8 tablespoons (1 stick) butter, melted but cool
1/2 to 1 cup walnuts, roughly chopped
3/4 cup onion, finely chopped

Directions:
1) Sift flour, salt, and sugar into a warm bowl. Dissolve yeast in 1/2 cup of warm milk, and pour it into middle of the flour, together with walnut oil (or butter) and remainder of milk. Knead well until dough is firm and blended into a smooth, springy ball, about 10 minutes.
2) Leave in a warm place to rise for 2 hours. Punch down dough, mix in walnuts and onions, shape into four rounds, and leave on a greased baking tray to rise for 45 minutes. Bake at 400 degrees F for 45 minutes or until loaves sound hollow when tapped underneath. Yield: 4 small loaves.

This post is being linked to:

World Bread Day

Wild Yeast - Yeast Spotting

Thursday, October 15, 2009

Chicken Pot Pie - Foodie Friday


I had a wonderful surprise yesterday. I learned that my Apple Custard Pie with Streusel Topping was being featured on Saveur's Best of the Web page and, that as a result, One Perfect Bite would be included in their "Sites We Love" list. My thanks to all of you for your support. Your daily visits and kind words helped make this happen. A group hug is in order.

The Coach House Restaurant in New York City closed in the late 90's, but during it's hay day some wonderful food could be had there. I was fortunate enough to get their recipe for Chicken Pot Pie before they closed their doors. It was a lunchtime favorite of mine and when I make pot pie at home, this is the recipe I use. It has, however, been simplified and deconstructed over the years. While purists will argue, I think the changes have made a wonderfully homey dish even better. The original recipe called for stewing a chicken to produce meat and stock for the pie. I've replaced the sometimes less than tender bird with poached chicken thighs or a deli-style chicken. I also use canned chicken broth and frozen vegetables to make quick work of required mise en place. The most noticeable change is the technique I use for the pastry that tops the pie. While I make my own pie crust, I hasten to add that ready-made crust or puff pastry can, of course, be used. I use the bottom of the dish or dishes in which I plan to bake the pie as a form to cut pastry that will fit over the filling without crimping the edges. I carefully move it to a baking sheet that's been covered with parchment or waxed paper and bake it until it's a deep golden brown and then set it aside. I make the sauce stove top, then add the chicken and vegetables and cook until everything is piping hot. It's then spooned into individual casseroles that are carefully topped with an already baked and crisp pastry crust. It goes back in the oven to assure everything is warm before it's served. Here are the recipe specifics.

Chicken Pot Pie
...from the kitchen of One Perfect Bite

Ingredients:
12 tablespoons butter
2/3 cup all-purpose flour
4 cups chicken broth
1 tablespoon fresh tarragon or parsley
Salt and pepper to taste
Pinch of nutmeg
Juice of 1/2 lemon
12 large white mushrooms, quartered
1 cup frozen diced peas and carrots, thawed and drained
1/2 cup frozen pearl onions, thawed
4 cups cooked chicken, shredded in spoon size chunks
Pastry for a two crust pie
1 egg yolk
1 tablespoon cream or milk

Directions:
1) Preheat oven to 400 degrees F. Line a baking sheet with parchment or waxed paper. Set aside.
2) Melt butter in a large, heavy bottomed sauce pan. Stir in flour; cook, stirring, over medium heat for 3 minutes, until bubbly but not brown. Gradually add chicken broth and cook stirring constantly until sauce thickens and bubbles. Add mushrooms, pearl onions and peas and carrots; simmer, stirring occasionally, for 10 minutes. Add chicken. Set aside.
3) Roll out pastry on a lightly floured surface to about 1/4-inch thickness. Use bottom of individual casseroles to cut pastry topping. Carefully move to prepared baking sheet. Mix egg yolk with cream or milk. Brush pastry with glaze. Bake for 20 to 25 minutes, or until a deep golden brown. Set aside. Reduce oven to 350 degrees F.
4) Spoon chicken mixture into 6 individual greased baking dishes. Carefully cover with pastry toppers. Bake for 20 minutes to warm or until sauce is bubbly. Serve hot. Yield: 6 servings.

This recipe is being linked to:
Designs By Gollum - Foodie Friday

Wednesday, October 14, 2009

Pumpkin Cake


From the kitchen of One Perfect Bite...This is an old cake from one of Maida Heatter's first cookbooks. It's a lightly spiced pumpkin cake that's chock full of nuts and macerated raisins. The raisins are soaked in dark rum for an hour or so before being added to the cake batter. Raisins plumped in this fashion aren't necessary, but they add a lovely adult touch to an otherwise simple cake. Apple juice could also be used. I like this cake because it's easy to assemble, needs no special equipment to make and uses no exotic ingredients, save for the rum which is optional. When my children were small, I loved to make this cake for them, sans rum of course. It's only mildly sweet and the raisins and nuts add some nutritional value to otherwise empty calories. I did, however, have one child who would confound me. To this day, a raisin has never passed her lips. By the time she finished pulling raisins from this cake or a slice of raisin bread they'd look like Flemish lace. It was the habit years ago to serve this cake with a ginger flavored whipped cream. It's still a lovely garnish, but I prefer to keep things really simple and use a dusting of confectioners' sugar to finish the cake. Here's the recipe.

Pumpkin Cake...from the kitchen of One Perfect Bite courtesy of Maida Heatter

Ingredients:
3 cups sifted all--purpose flour
2 teaspoons baking soda
2 teaspoons baking powder
1 tablespoon cinnamon
1/2 teaspoon powdered ginger
1/4 teaspoon powdered cloves
1/4 teaspoon nutmeg
1/4 teaspoon allspice
1 teaspoon salt
1 cup raisins, macerated in rum or apple juice for an hour, then drained and patted dry
3 1/2 ounces (1 cup) walnuts, broken into medium-size pieces
2 cups plain pumpkin puree
2 cups sugar
1-1/4 cups safflower oil, corn oil, or other salad oil (not olive oil)
4 large eggs
Optional: Confectioners sugar

Directions:
1) Adjust rack one-third up from bottom of oven and preheat to 350 degrees. Butter a 10 x 4-1/2 inch tube pan. Line bottom with paper cut to fit and butter paper.
2) Sift together flour, baking soda, baking powder, cinnamon, ginger, cloves, nutmeg, allspice, and salt. Add a tablespoon of sifted dry ingredients to raisins in a small bowl. With your fingers, toss raisins to separate them and coat each one with the dry ingredients. Stir in nuts and set aside.
3) In large bowl of electric mixer, place pumpkin, sugar, and oil. Beat at medium speed until smooth. Add eggs individually, beating after each until incorporated.
4) On low speed add sifted dry ingredients, beating only until smooth. Remove from mixer. Stir in raisins and nuts. Turn into prepared pan. Rotate pan briskly to level top.
5) Bake 1 hour and 5 minutes or until a cake tester comes out dry. Cool on a rack for about 10 minutes. The baked cake will only fill about three-quarters of pan.
6) Cover cake with a rack and invert. Remove pan and paper. Cover with another rack and invert again. Cool right side up on the rack.
8) When cool, top may be dusted with confectioners sugar sifted through a fine mesh strainer.
Serve as is or with a generous spoonful of whipped cream. Yield: 10 to 12 servings.

Tuesday, October 13, 2009

Oatmeal Cake - Outdoor Wednesday


Today's recipe is for an oatmeal cake. I thought it would be interesting to see a field where oats are grown in the early summer.


Then again just before the crop is harvested.


Rolled oats anyone?


I'm responsible for providing cake and pastry for a large group of women who enjoy a morning "coffee" several times a year. While I love these gals, I don't want to spend hours in the kitchen or break the bank feeding them. Pride prevents me from sacrificing taste and flavor or short changing them, but I've learned not to stress about occasions such as this and try to make quick work of what has to be done. I started with several pans of cinnamon rolls, chosen because they are inexpensive and can be finished on sight. Their aroma fills the room and is guaranteed to stimulate the poorest of appetites while enhancing your reputation as a cook. I rounded out my contribution and added variety to the table with two additional cakes, one sweet and the other more European in taste. For this occasion I made oatmeal and pumpkin cakes. Today we're going to tackle the very sweet oatmeal cake. How sweet? It falls into the icky, sticky, ooey, gooey realm of cooking. To be honest, I don't care for it at all and the thought of eating it puts me into sugar shock, though I do have to laugh at myself. I'm not great at determining food trends or what will capture the fancy of others. I bet that cupcakes would have three months of fame four years ago and they're still going strong. Predictions like that keep me humble and in my place. Oatmeal cake is like that. The first time I made it I was sure no one would eat it. They loved it then and they love it now. Today's recipe is not original and my aversion to super sweet has kept me from playing with it. The recipe is really simple. The only change I've made is to replace the broiled topping with an icing that's used on German chocolate cake. If you like your cake really sweet and moist, you'll love this confection. If your tastes run to the just barely sweet, come back tomorrow for my special pumpkin cake. Here's the recipe for oatmeal cake.

Oatmeal Cake
...from the kitchen of One Perfect Bite, courtesy of Nancie McDermott

Ingredients:
Cake
1 cup old-fashioned oatmeal
1/2 cup butter
1-1/2 cups boiling water
1-1/2 cups flour
1 teaspoon baking soda
1 teaspoon salt
1 teaspoon ground nutmeg
1 cup sugar
1 cup light brown sugar
2 eggs, beaten well
1 teaspoon vanilla extract
Frosting
1/2 cup butter
1/4 cup evaporated milk
1 cup sugar
1 teaspoon pure vanilla extract
1 cup chopped pecans, toasted
1 cup sweetened shredded coconut

Directions:
1) Combine oatmeal, butter and boiling water in a medium bowl; stir. Set aside for 30 minutes. Preheat oven to 350 degrees F. Grease and flour two 9-inch rounds or one 9 x 13-inch pan. If making a layer cake, I suggest you line cake pans with parchment or wax paper and grease and flour it as well.
2) Combine flour, baking soda, salt and nutmeg in another medium bowl; whisk to combine.
3) Combine granulated sugar, brown sugar, eggs and vanilla in the bowl of an electric stand mixer. Beat for 2 minutes at medium speed, scraping sides of bowl as necessary.
4) Stir flour mixture into the egg mixture in 2 batches, beating just until flour disappears. Mix in oatmeal mixture, stirring and folding to combine everything into a nubby but well-mixed batter.
5) Scrape batter into prepared pan/pans. Bake 25 to 30 minutes for round pans and 35 to 40 minutes for a rectangular pan. Cake should be golden brown and pulling away from edges of pan and spring back when lightly touched.
6) Cool cake on a wire rack for 10 minutes. If using round layers turn them out and finish cooling on racks. A rectangular cake can cool it its pan.
7) To make frosting: Combine butter, evaporated milk and sugar in a saucepan set over medium heat. Bring to a gentle boil, stirring occasionally. Remove from heat; stir in vanilla, pecans and coconut. Beat with a whisk, spoon or electric hand mixer until the frosting is thick and cooled. If making a layer cake, spread between two rounds and on top layer. If making a rectangular cake spread it over the top. Yield: 8 to 16 servings.

Recipe courtesy of Nancie McDermott.

Outdoor Wednesday, an event sponsored by Susan at A Southern Daydreamer.

Monday, October 12, 2009

Cranberry Dressing


From the kitchen of One Perfect Bite...
Several years ago I had the good fortune to find this recipe for cranberry dressing. It was created by Chef Denis Bettinger who used it as a garnish for a luscious scallop entree. I love to use it as a dip for chicken fingers or coconut shrimp and as a sauce for turkey. I also use it as a salad dressing for baby greens. It has a vibrant color that adds immediate appeal to anything it's served with. I'm always amazed when a simple recipe that uses a handful of ingredients adds intense flavor to a dish. This wonderful sauce does that. The ingredients can be found in any grocery store and frozen cranberries can be used. You will, however, need a blender or food processor to puree the cranberries. The sauce is fairly thick, but it can be thinned with water if you'd like. If you decide to dilute the sauce, add water in a measured fashion to prevent it from becoming too thin. Here's the recipe.

Cranberry Dressing...from the kitchen of One Perfect Bite

Ingredients:

1 cup fresh or frozen cranberries
2 teaspoon sugar
1/3 cup red wine vinegar
1-1/2 cup olive oil
fresh herbs (such as basil, thyme, parsley, tarragon) to taste
salt and pepper to taste

Directions:

Cook cranberries in a small amount of water until tender. Add sugar, herbs, oil and vinegar. Pureé in a blender or food processor, adding water as necessary to get the desired consistency. Use as a garnish, sauce or dip. Yield: 2 cups.

Sunday, October 11, 2009

Pumpkin Butter


From the kitchen of One Perfect Bite...We've had large, carving pumpkins in local farmer's markets for weeks now, but this weekend I saw the first of the sugar pumpkins I like to use for baking. Pumpkins are everywhere, and that started me thinking about how they got their name. I guessed it came from England but I was wrong. It originated with the Greeks whose word "pepon" which means large melon. The French played with the word, changed it to "pompon", and passed it on to the English who immediately changed it to "pumpion." As a matter of fact, you'll find references to "pumpion" in Shakespeare's Merry Wives of Windsor. By the time of our forefather's first Thanksgiving, the large orange squash was called a pumpkin. While pumpkin pie originated in the American colonies, the first pumpkin pie was not a pie as we know it today. The colonists sliced off the pumpkin top, removed the seeds, and filled the insides with milk, spices and honey and baked it in hot ashes. Chances are it was very stringy and bland, but the pumpkin was a major source of food for the colonists. Edward Johnson, who wrote the History of New England (1654), thought it important enough to share this admonition, "And let no man make a jest at Pumpkins, for with this fruit the Lord was pleased to feed his people to their good content, till Corne and Cattell were increased." Needless to say, the stern old Pilgrim didn't mention the jack-o-lanterns which people had been making for centuries.

The practice of carving pumpkins originated with an Irish myth about a man called Stingy Jack who invited the Devil to have a drink with him. Jack didn't want to pay for the drinks, so he convinced the Devil to turn himself into a coin that could be used to buy their drinks. The Devil agreed but Jack had a change of heart and decided to keep the coin in his pocket along with a silver cross that prevented the Devil from assuming his original form. Jack eventually freed the Devil, under the condition that he would cause Jack no harm for a year and that, should Jack die, he would not claim his soul. The next year, Jack again tricked the Devil into climbing into a tree to pick a piece of fruit. While he was up in the tree, Jack carved a sign of the cross into the tree's bark so that the Devil could not come down until he promised Jack he would not bother him for ten more years. Soon after, Jack died. As the legend goes, God would not allow such an unsavory figure into heaven. The Devil, upset by the tricks Jack had played on him and keeping his word not to claim his soul, would not allow Jack into hell. He sent Jack off into the dark night with only a burning coal to light his way. Jack put the coal into a carved out turnip and has been roaming the Earth with it ever since. The Irish began to refer to this ghostly figure as "Jack of the Lantern," and then, simply "Jack O'Lantern."

Now back to cooking. When selecting a pumpkin for cooking, your best choice is a "pie pumpkin" or "sweet pumpkin." These are smaller than carving pumpkins and the flesh is sweeter and less watery. It should have a stem that 1 to 2 inches long. Anything less than that will cause the pumpkin to decay quickly. Shape is not important but avoid those that have blemishes and soft spots. You'll need one pound of raw, untrimmed pumpkin for each cup of finished pumpkin puree. To make the puree, remove the stem, cut the pumpkin in half, remove the seeds and fibrous mass and cut the pumpkin into large chunks. I steam mine for about 12 minutes, or until it's fork tender. It could also be boiled, baked or microwaved if you prefer. When it's tender and cool enough to handle, remove the peel with a knife and your fingers. Puree the pumpkin using a food processor, blender or food mill. If you don't want to bother with this, buy a can of solid pack pumpkin and use that instead.

I made pumpkin butter this weekend. My favorite recipe is an old one developed by Martha Stewart and I suspect you've seen it before. I made one small change to her recipe. It calls for 1/2 teaspoon ground cloves. I thought the cloves made last year's batch too bitter, so I cut the measure to 1/4 teaspoon cloves and added 1/4 teaspoon mace to keep the recipe in balance. It's a lovely recipe and, yes, you can used canned pumpkin.

Pumpkin Butter
...from the kitchen of One Perfect Bite

Ingredients:

1 (28-oz.) can pumpkin puree
3/4 cup apple juice
2 teaspoons ginger
1/4 teaspoon cloves
1/4 teaspoon mace
2 teaspoons cinnamon
1 teaspoon nutmeg
1-1/2 cups granulated sugar

Directions:
1) Combine all ingredients in a large saucepan. Bring to a boil, then reduce to a simmer and cook, stirring often, for 30 minutes, or until mixture thickens. I cook mine until a spoon pulled through middle of mixture leaves a trail that does not close in upon itself. If you plan to use immediately, let cool to room temperature. Pack into storage containers and refrigerate for up to a month. Pumpkin butter can also be frozen for up to 6 months. Yield: 3 cups.