Monday, May 31, 2010

Caramelized Onion, Blue Cheese and Walnut Pizza


From the kitchen of One Perfect Bite...I used to serve small squares of this pizza as a cocktail appetizer. People loved the combination of caramelized onions with blue cheese and toasted or candied walnuts. We had it so often that I grew tired of it and that usually marks the death knell for my recipes. Once retired, they're rarely used again. This one has been pardoned and given a second life because of Meatless Mondays. As you can see, I've resurrected the recipe and we had the pizza for supper tonight. The recipe makes a nice pie and if you're looking to serve something a bit outside the box, you might enjoy this one. The pizza can be made with a standard dough or served on a flatbread or tortilla. While this is simple to make, it is not speedy and you'll need time to caramelize the onions. The mantra here remains the same. The onions must be watched as they cook. Once they start to caramelize they move from brown to black in the wink of an eye. If they char or burn you'll have to start again. This is a highly flavored pie and to enjoy it, you have to love all three of its major ingredients. If the trio appeals to you, you'll love this pizza. Here's the recipe.

Caramelized Onion, Blue Cheese and Walnut Pizza - Meatless Monday...from the kitchen of One Perfect Bite

Ingredients:

3 tablespoons olive oil, divided use
2 tablespoons butter
2 pounds yellow onions, very thinly sliced
2 teaspoons kosher salt
1 teaspoon sugar
fresh ground black pepper to taste
1 pound pizza dough
1 cup toasted walnuts, chopped
4 ounces blue cheese, crumbled

Directions:

1) Heat 2 tablespoons oil and butter in a large heavy skillet set over medium heat. Add onions and salt, stirring frequently until onions begin to brown, about 20 minutes. Add sugar and cook, stirring frequently until onions are well-browned, about 15 minutes longer. Do not allow onions to burn. Season with pepper to taste.
2) Preheat oven to 425 degrees F. Spray bottom of a round or rectangular pizza pan with nonstick cooking spray. Press dough into pan, building up sides slightly. Brush crust with reserved 1 tablespoon oil. Bake for 10 minutes. Remove from oven. Spread onions on crust. Top with walnuts and blue cheese. Return to oven and bake until cheese starts to soften and brown, about 10 minutes. Serve hot. Yield: 4 -6 servings.

You might also like these recipes:
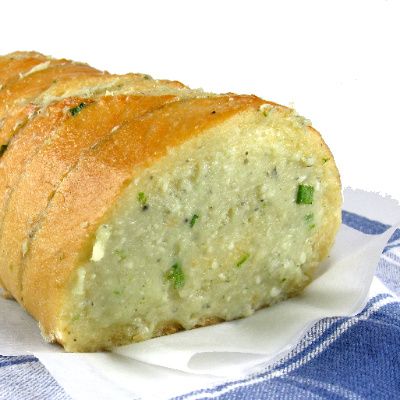
Greek-Style Flatbread Pizza - One Perfect Bite
Onion Parmesan Focaccia with Tomatoes - One Perfect Bite
Whole Wheat Olive Flatbread Focaccia - One Perfect Bite

Sunday, May 30, 2010

Blue Cheese Bread


From the kitchen of One Perfect Bite...It was a busy day. Commercial growers in our area open their fields and display gardens to the public at this time of year. We spent the day touring acres and acres of peonies, iris and hostas and, when the crowds became too much, enjoyed the respite of the grower's gardens. A few peeks at the fields and gardens follow today's recipe. A brief sunshower, called a "monkey's wedding," dampened our clothing but not our spirits and the reward for our good nature was the promised rainbow. Dinner, which came from the freezer, was a late affair of tomato soup and blue cheese bread. The combination goes extremely well together and I thought those of you who love blue cheese might want to try the bread. It is much like a garlic bread or ripped baguette and is really easy to make. Here's the recipe.

Blue Cheese Bread...from the kitchen of One Perfect Bite

Ingredients:
1/2 cup butter, softened
4 ounces crumbled blue cheese
2 tablespoons grated Parmesan cheese
1 tablespoon minced chives
1 teaspoon garlic powder
1 loaf (1 pound) unsliced French bread

Directions:
1) Preheat oven to 350 degrees F.
2) Combine butter, blue cheese, Parmesan cheese chives and garlic powder in a small bowl. Mix well. Cut bread into 1-inch slices but leave slices attached at bottom of loaf. Spread cheese mixture between slices.
3) Wrap loaf in a large piece of heavy-duty foil. Fold foil around bread and seal tightly. Bake for 20 minutes or until heated through. Serve warm. Yield: 10 servings.

You might also enjoy these recipes:
My Dad's Garlic Bread - 101 Cookbooks
Roasted Garlic Bread - Vanilla Icing
Cheesy Ramp Garlic Bread - Closet Cooking


Adelman's Peony Gardens Salem, Oregon


Schreiner's Iris Gardens Salem, Oregon


Schreiner Family Garden


Schreiner Family Gardens


Seabright Hosta Display Garden Salem, Oregon

Saturday, May 29, 2010

Blue Cheese and Onion Burger Topping


When I fire up the grill for burgers, it's rarely to make gourmet patties. Hamburgers are an occasional treat for Bob and me, and we so enjoy them that I'm loathe to season the meat with anything other than salt and pepper. I do, however, do a lot of work with the condiments and relishes I serve with the burgers. Among my favorites are a Balsamic Onion Marmalade which I shared with your last year. Today's blue cheese and onion topping is another. The award winning recipe was developed by Norma Reynolds for Country Woman Magazine. She uses the flavored onions as a side dish to accompany meat for special dinners. I prefer to use them as a topping for an all-American burger. You'll find these onions extremely easy to make. I've cut back a bit on the amount of butter used in her recipe and, by trial and error, have concluded that 1/4-inch onion slices work best in this dish. I like the onions to retain a faint crunch and have found that onions cut too much thinner than that tend to form an unappetizing slurry. Blue cheese can be downright unpleasant when used to excess. Here it's paired with lovely caramelized onions and creates a real taste treat. I hope you'll try this so you can judge for yourself. Here is the recipe.

Blue Cheese and Onion Burger Topping...from the kitchen of One Perfect Bite courtesy of Country Woman Magazine

Ingredients:

1-1/2 cups (6 ounces) crumbled blue cheese
2 tablespoons Worcestershire sauce
1/2 teaspoon dill weed
1/4 teaspoon pepper
2 large onions, thinly sliced
4 tablespoons butter, melted

Directions:

1) Preheat oven to 425 degrees F.
2) Combine blue cheese, Worcestershire sauce, dill and pepper in bowl of a food processor; cover and process until blended.
3) Place onions in an ungreased 13-in. x 9-in. baking dish. Drizzle with butter; top with tablespoonfuls of blue cheese mixture.
4) Bake, uncovered, for 20-25 minutes or until golden brown. Serve immediately. Yield: 2 cups.

You might also like these recipes:
Blue Cheese Twice Stuffed Potatoes - One Perfect Bite
Blue Cheese Steak Sandwich - One Perfect Bite
Blue Cheese Gougeres - One Perfect Bite

This post is being linked to:
Smiling Sally - Blue Monday

Sour Cherry Gelato - Pink Saturday


From the kitchen of One Perfect Bite...It's next to impossible to have a celebration without cake and ice cream. The blog, How Sweet the Sound, the sponsor of Pink Saturday, is celebrating its second anniversary today and I thought I'd bring ice cream to the party. Actually, I decided to make a sour cherry gelato for the occasion. Gelato is Italy's lower fat version of ice cream. Because it is lower in butterfat, it does not freeze as firmly as ice cream and melts more quickly on the tongue. It also has a creamier taste because no air is added to it as it's made. I love to add a sour cherry puree to gelato to offset the sweetness of its creamy base. It is really simple to do and can even be made without an ice cream machine if you have time and patience. If you don't have a machine and would like to make ice cream or gelato, I suggest you read David Lebovitz's instructions on How to Make Ice Cream Without a Machine. If you'd like to make my version of sour cherry gelato, here's the recipe.

Sour Cherry Gelato...from the kitchen of One Perfect Bite

Ingredients:

1 pound pitted fresh or frozen sour cherries
2 cups whole milk
1 cup heavy whipping cream
3/4 cup granulated sugar
4 egg yolks
1 tablespoon kirsch liqueur

Directions:

1) Place uncooked cherries in a heavy pan over medium heat. Cook, stirring, until reduced to about 1-1/2 cups. Puree cherries in a blender or food processor.
2) Heat milk and cream in a heavy saucepan until small bubbles form around edge of pan.
3) In bowl of an electric mixer, beat egg yolks. Slowly add sugar and continue beating until light and thick and mixture forms a ribbon when dropped from a spoon. Add milk mixture to eggs slowly, then add cherry mixture. Place over low heat and stir constantly until mixture thickens and coats a spoon. Watch carefully. If mixture overheats it will curdle.
4) Strain through a sieve into a bowl and cool in ice water bath about 15 minutes. Pour into a covered container and refrigerate two to three or until chilled. Add kirsch. Pour into an ice cream machine and follow manufacturer's directions. Yield: 1 quart.

You might also like these recipes:
Peppermint Ice Cream - One Perfect Bite
Rhubarb and Raspberry Gelato - One Perfect Bite
Cranberry Chambord Sorbet - One Perfect Bite

Friday, May 28, 2010

Sauteed Sweet and Spicy Szechuan Asparagus


From the kitchen of One Perfect Bite...The alliteration should have been my first clue. It was just too cute for words. I sat, nonetheless, and carefully read every word of the recipe before committing to make it. My last thought before moving on to the kitchen? The sauce would be too strong for the asparagus. As it turned out I was right. Every once and a while, I fall prey to a professional recipe that I sense is wrong but for some reason refuse to put down. It's misguided hero worship on my part. I still can't believe that pros put recipes out there that haven't been kitchen or field tested. This recipe failed my field test, but I decided to post it anyway. While it may be wrong for asparagus it would work nicely with fresh green beans or garlic whistles. Information about garlic whistles can be found here. The recipe makes enough sauce that the beans or whistles could be served with rice noodles and make a lovely light supper or lunch. Do be aware that once this sauce hits a green vegetable it will lose its lovely color. Here's the recipe for those of you who have not been put off.

Sauteed Sweet and Spicy Szechuan Asparagus
...from the kitchen of One Perfect Bite

Ingredients:
2 pounds asparagus, ends discarded
1/4 cup soy sauce, low sodium
2 tablespoons rice wine vinegar, unseasoned
1/4 cup sugar
1/4 to 1 teaspoon red chili flakes
1/2 teaspoon fresh ground white pepper
1/2 cup water
2 tablespoons vegetable oil
2 tablespoons garlic, minced
1 tablespoon fresh ginger, minced
1 tablespoon sesame seeds, toasted

Directions:
1) Diagonally cut asparagus into 3 inch pieces.
2) In a small bowl, whisk together soy sauce, rice vinegar, sugar, chili flakes and pepper. Set aside.
3) Heat a large sauté pan over high heat. Add 1/2 cup water and asparagus. Cover and cook until asparagus is still crisp to the bite, about 2 to 3 minutes. Uncover and pour off any remaining water.
4) Add oil, garlic and ginger to pan with asparagus. Sauté until lightly browned.
5) Add soy sauce mixture. Bring to a boil. Cook until sauce coats asparagus.
6) Sprinkle in toasted sesame seeds. Transfer to a serving platter. Serve immediately. Yield: 4 - 8 servings.

You might also enjoy these recipes:
Penne with Asparagus and Lemon Sauce - One Perfect Bite
Asparagus and White Bean Salad - One Perfect Bite
Asparagus and Lemon Grass Risotto - One Perfect Bite

Thursday, May 27, 2010

Funeral Pie


From the kitchen of One Perfect Bite...One of the desserts that we considered for Bob's birthday was an Amish funeral pie. Bob was intrigued by its name and its resemblance to a mincemeat tart I serve for the holidays. Many of our friends are older than Bob and me, and I was not sure they'd appreciate being served something called a funeral pie at a birthday celebration. Bob, nonetheless, wanted to give it a try. After some negotiation, my inner diplomat successfully reasoned with his inner child and we deferred serving the pie until later in the week. The pie is traditionally served at funerals of Old Order Mennonites and Amish. It was served at so many funeral suppers that it was given the name "funeral pie." It became a favorite of Mennonite cooks because the ingredients were always available and the pie kept well. That meant it could be made a day or two before the funeral supper and freed hands for other tasks. The pie is not unpleasant, and if you love raisins or mincemeat I suspect you'll love it. One caution. It is very sweet. Susan, who writes The Well-Seasoned Chef, let us know that the pie is deliberately made cloyingly, almost painfully, sweet to allow mourners to forget, if only for a moment, the pain of their grief. If I make this again, I'll reduce the sugar by half. I would also make a lattice crust to improve its appearance. As you can see from the photo above, Bob enjoyed his pie as written. We have a Mennonite community in our area and I used a recipe given to me by one of their best bakers to make the pie. Here's the Smith family recipe.

Funeral Pie
...from the kitchen of One Perfect Bite, inspired by the cooks of the Smith family

Ingredients:
2 cups raisins
1 cup water
Finely grated zest of 1 large orange
1 cup orange juice
3/4 cup + 1 tablespoon granulated sugar, divided use
2 tablespoons cornstarch
3/4 teaspoon ground allspice
1/4 teaspoon freshly grated nutmeg
1 tablespoon lemon juice
1/2 cup chopped walnuts
1 egg, beaten
Pastry for 2 crust pie

Directions:
1) Preheat oven to 425 degrees F.
2) Combine raisins, water, orange zest and juice in a saucepan. Bring to a boil, reduce heat and simmer for 5 minutes.
3) Meanwhile, combine 3/4 cup sugar, cornstarch, allspice and nutmeg in a small bowl.
Stir slowly into raisin mixture. Cook, stirring constantly, until thickened, about 2 minutes. Remove pan from heat. Stir in lemon juice and walnuts.
4) Roll out half the pie dough on a lightly floured surface. Fit into an 8 or 9-inch pie pan. Pour filling into pie shell.
5) Roll out remaining pastry and place over pie. Seal and flute edges. Cut several slashes into top of pie to release steam. Brush with beaten egg and sprinkle with reserved tablespoon of sugar. Bake until golden, about 20 to 25 minutes. Serve warm. Yield: 8 servings.

You might also enjoy these recipes or information:
Sister Sarah's Apple Pudding - One Perfect Bite
Apple Butterscotch Grunt - Simply Annes
Shoo-Fly Pie - Not So Humble Pie
Old Order Mennonite Blog - Old Fashioned Net
Sweet Sorrow - Rosino Pie - The Well-Seasoned Chef

This recipe is being linked to:
Designs By Gollum - Foodie Friday

Wednesday, May 26, 2010

Asparagus and White Bean Salad


From the kitchen of One Perfect Bite...Since I've committed to Meatless Mondays, I've been searching for recipes that are substantial enough to serve for dinner and tasty enough to keep a confirmed meat eater happy. That search, and local asparagus selling for less than $2.00 a pound, led me to this light and delicious entree. The recipe first appeared in Gourmet Magazine in April of 2006. The original recipe used this salad as a brushcetta topping. I've carried it a bit farther and use the salad as a filler for flour tortillas, rice wrappers or lettuce wraps. I've changed the presentation because the bruschetta proved to be very messy. There is no binder in the filling and a lot of it ended up on the table or floor. Those of you who try this recipe will be very pleased with its taste and texture. It is next to no work to assemble, but it is important to follow a couple of the directions to a tee. The asparagus must be sliced no thicker than 1/8 of an inch. While it briefly sits in a warm marinade, it is not cooked and anything thicker than that would be tough to chew. It's also important to serve the salad soon after it has been prepared. It loses color as it sits and unless your favorite color is olive drab, it behooves you to get this to the table in a timely fashion. Please note that the cheese is shaved from a brick and that the recipe measurement is for shaved, not grated, cheese. I really like this entree. It is light, bright, different and altogether perfect for a weekend lunch or a light supper. Here's the recipe.

Asparagus and White Bean Salad
...from the kitchen of One Perfect Bite, courtesy of Gourmet Magazine

Ingredients:

1 pound medium asparagus, trimmed
1/4 cup extra-virgin olive oil
1/2 teaspoon finely grated fresh lemon zest
2 tablespoons fresh lemon juice
1/2 teaspoon salt
1/4 teaspoon black pepper
2 (15- to 19-oz) cans white beans, rinsed and drained well
1 (1/2-lb) piece Parmigiano-Reggiano
1/4 cup chopped fresh flat-leaf parsley
Flour tortillas, rice wrappers, or toasted sliced country-style bread

Directions:

1) Cut asparagus on a diagonal into 1/8-inch-thick slices.
2) Bring oil, lemon zest, juice, salt, and pepper to a simmer in a 4-quart heavy saucepan, then stir in beans and asparagus. Remove from heat and let stand, uncovered, 10 minutes. Meanwhile, remove enough cheese from piece with a vegetable peeler to measure about 1/2 cup shavings. Add shavings to beans along with parsley, then toss. Adjust salt to taste.
3) Spoon salad into wrappers or spread on warm toast. Serve immediately. Yield: 4 servings.

You might also enjoy these recipes:
Savory Asparagus and Goat Cheese Tart - One Perfect Bite
Asparagus and Lemon Grass Risotto - One Perfect Bite
Spring Vegetable Ragout - One Perfect Bite

Tuesday, May 25, 2010

The Last Best Egg Cream in New Jersey


From the kitchen of One Perfect Bite...He was an old man. He survived two wars, one left him with a gimpy leg, the other with a numeric tattoo. He rarely spoke of either. He came, without family, to the United States in the late 40's. He opened a small shop, called Jack's, where he sold convenience items and made breakfast and lunch for the neighborhood. The store was positioned on a street that served as an artificial barrier between neighbors in Montclair. While it was one of the first integrated communities in the country, there were areas of the town that seemed to be separated by color. In truth, the barriers were economic, rather than racial. Flanked by palaces on his right and bungalows and apartments on his left, Jack served coffee to all and was incredibly good with the neighborhood children. No one in his purview went to school hungry and it was not unusual to see a child spinning on a stool next to a Senator or ball player who was trying to read the morning paper. The shop was also a mecca for editors and writers who commuted to their jobs at The New York Times. There were so many of them that locals, had if fact, named a stretch of the town the Times Ghetto. Jack rarely smiled but there came a Monday when he beamed for most of the day. The Sunday New York Times Magazine had, in an article, named his egg cream the best in New Jersey. I learned today that Jack had passed. I will, of course, say my prayers for the dead, but he was not a religious man and would smile at my foolishness. I wanted to mark his passing in a way that would please him. I remembered the article and his smile that day. Now, my egg cream will never be a match for his, but wherever he is, he'll know I'm thinking of him. L'chaim, Jack. Shalom.

The Last Best Egg Cream in New Jersey...from the kitchen of One Perfect Bite

Ingredients:

Fox U-Bet or Hershey's chocolate syrup
Whole milk
Seltzer or club soda

Directions:
1) Pour 1 inch of U-Bet syrup into a soda or cola glass.
2) Gently pour 1-1/2 inches of milk on top of syrup.
3) Fill glass with seltzer or club soda and leave some room at top so it doesn't overflow.
4) Stir vigorously to get most of the chocolate from the bottom and sides of glass. Egg cream should have 1 to 2 inches of foam at top. Serve immediately.

You might also enjoy this:
New York Egg Cream - How to Make an Egg Cream - What's Cooking America
Egg Cream - Wikipedia
Can the Egg Cream Make a Comeback - New York Times
Foodie Pregnancy: The Mighty Egg Cream - Saint Tiger Lily
Egg Creams and Candy Stores - Hub Pages
The Egg Cream Lives - Jeremiah's Vanishing New York

Monday, May 24, 2010

Blanquette de Veau


Bob and I have two favorite dishes that have their roots in French peasant kitchens. Mine is Cotes de Pork L'Auvergnate, a wonderful dish of pork and cabbage that's braised in cream. Bob's is Blanquette de Veau, a white veal stew that's made with mushrooms and pearl onions that comes from Normandy. Veal, other than cutlets, is difficult to come by here. Every now and then, veal stew meat appears in one of our supermarkets and when it is available I buy all of it I can. We really love this dish and for years I served it for dinner on Christmas Eve. All cooks have dishes they make from memory. These two recipes have been burned into mine and I put them together as easily as some folks throw together a meatloaf. Practice makes perfect. It helps that they are very easy to do. Last week I was able to buy veal stew meat and made Bob his favorite stew. Here's the recipe.

Blanquette de Veau - Veal Stew with Mushrooms and Onions...from the kitchen of One Perfect Bite

Ingredients:

3 pounds veal stew meat, cut in 2-inch cubes
2 quarts water
3 cups chicken broth
1 large carrot, peeled, in 3-inch chunks
1 large onion stuck with 1 whole clove
1 stalk celery, in 2-inch pieces
1 bouquet garni (1/2 bay leaf, 1/2 teaspoon dried thyme, 5 parsley sprigs) tied in a coffee filter
Salt
18 medium-size white mushrooms, trimmed
1/2 of 10-ounce bag frozen pearl onions
4 tablespoon butter
5 tablespoon all-purpose flour
Salt, pepper and lemon juice to taste
3 egg yolks
Chopped parsley for garnish

Directions:
1) Place veal in a 4-quart casserole. Add water and bring to a boil. Simmer until heavy scum no longer rises, about 10 minutes. Drain and rinse veal. Wash pan and return meat to it. Add chicken broth, carrot, celery, onion and bouquet garni to veal. Salt lightly to taste. Simmer slowly, partially covered, until meat is tender, about 1 hours. Remove pan from heat. Let pot sit, uncovered, for about 30 minutes to allow veal to absorb flavor of cooking liquid. With a slotted spoon, remove veal from cooking liquid. Set aside. Remove vegetables and bouquet garni; discard. Strain cooking liquid into a large saucepan. Wash kettle and return veal to it along with cooking liquid. Add mushrooms and onions and cook for 30 minutes longer.
2) Remove meat and vegetables to a large bowl with a slotted spoon. Tent with foil to keep warm. Reserve 3 cups of cooking liquid; keep hot.
3) Melt butter in a 3 quart saucepan. Add flour and cook until flour and butter froth together for 2 minutes. Do not allow to brown. Slowly whisk in hot broth. Simmer for 10 minutes, skimming off any foam that appears on surface of sauce. Adjust seasoning and add lemon juice to taste (I generally use a tablespoon of lemon juice). Return veal, mushrooms and onions to sauce and toss gently to coat. Simmer for about 3 minutes. Blend egg yolks and cream in a small bowl. Add a ladle full of sauce to cream mixture to warm egg yolks. Remove veal from heat. Stir in cream mixture and return to a gentle heat. Stir gently until mixture thickens slightly, about 10 minutes. Do not let sauce come to a boil. Transfer to a warm serving bowl. Garnish with parsley and serve with rice or parsley buttered noodles. Yield: 6 servings.

You might also enjoy these recipes:
Boeuf Bourguignon - One Perfect Bite
Braised Short Ribs Côtes du Rhône - One Perfect Bite
Crock-Pot Mediterranean Pot au Feu - One Perfect Bite

Creamy Onion and Blue Cheese Soup - Meatless Monday


From the kitchen of One Perfect Bite...The weather turned cool and wet on Saturday. Really wet. It was not a day for salads, so I pulled an untried soup recipe from my files and had a go at it. This turned out to be a nice soup, perfect for a rainy Saturday or Meatless Monday, but I must warn you, it is not for the feint of heart. To say it is strongly flavored is an understatement, but if you love French onion soup, beer and blue cheese I suspect the first spoonful will make you a rabid fan. The recipe is much like any other you may have for French onion soup, save for the addition of lots and lots of blue cheese. The cheese gives the soup its creamy texture. I suggest you add it in increment and taste as you go along. Start with four ounces and work you way up the suggested range of measure. Eight ounces would have been ideal for me, but Bob preferred it with a full twelve ounces. The soup also uses beer instead of wine to boost flavor. A bit of caution should be exercised here. To avoid bitterness, use something that is mellow. I have, for years now, used a specific non-alcoholic beer for cooking that gives flavor without bitterness. I'm not a teetotaler. The Belgian beer that I prefer is not available in this area, but I've found that O'Doul's Amber Ale has a hops finish and is a reasonable substitute. I also puree roughly half of the soup to give it substance. While this will never replace my favorite French onion soup, I can recommend this soup to any who love strong flavors are looking to try something a bit out of the ordinary. Here's the recipe.

Creamy Onion and Blue Cheese Soup
...from the kitchen of One Perfect Bite adapted fro The Spoon

Ingredients:

6 (8-oz.) yellow onions, thinly sliced
3 tablespoon butter or olive oil
1 tablespoon olive oil
1 teaspoon salt
1 teaspoon brown sugar
2 tablespoons all-purpose flour
1 teaspoon dried thyme
1 bay leaf 1/2 teaspoon sage
6 cups vegetable stock or water
1 (12-oz.) bottle O'Doul's Amber Ale
4 to 12 ounces blue cheese, crumbled

Directions:
1) Heat olive oil and butter in a large pot or Dutch oven until butter melt and mixture sizzles. Add onions and stir to coat. Cover pan and cook at a medium-low temperature for 15 to 20 minutes, stirring occasionally, until onions are tender and translucent. Uncover, raise heat to medium-high, and stir in salt and sugar. Cook, stirring only to prevent burning, until onions are a deep golden brown, about 30 to 45 minutes.
2) Lower heat to medium, stir in flour to form a paste with onions. Cook, stirring constantly, until flour is lightly brown, about 2 minutes. Add 1 cup of vegetable stock or water, stirring to blend stock with onion mixture. Add thyme, bay leaf and sage along with remain stock and beer to pot. Bring mixture to a simmer and cook slowly for 30 to 40 minutes. Place 1/3 to 1/2 of soup in a blender jar, Puree, being careful not to burn yourself. Return to pot. Add cheese in 4 ounce increments to taste. Add salt and pepper as required. Continue cooking over low heat for 30 minutes longer. Do not allow soup to boil once cheese has been added. Serve piping hot. Yield: 6 servings.

You might also enjoy these meatless entries:
Vegan Red Lentil and Pepper Flan - One Perfect Bite
Vegan Red Lentil Soup - One Perfect Bite
Pasta Primavera - One Perfect Bite

This recipe is being linked to Meatless Monday at My Sweet and Savory

Sunday, May 23, 2010

Ghee and Me - A Love Affair Not Meant to Be


Strained, freshly made ghee


Solidified ghee

From the kitchen of One Perfect Bite...When the book of life is writ and I approach the pearly gates, a footnote will be appended to my dossier. The notation will inform the gate keeper that I made ghee - once. I should be ashamed of myself I know. A goodly portion of the world makes ghee and they do it without complaint. Not only do I complain, I complain when it is not necessary. It's not so much that ghee is hard to make, it's that it's a bother to make. It takes time and patience and a serenity that seems, still, to elude me. Ghee is a fat that is much like clarified butter. There is one major difference, however. Ghee is made by simmering melted butter and allowing the milk solids at the bottom of the pan to brown before straining. The foam at the top of the butter is whey, while the brown bits on the bottom of the pan are curds. The clear oil that remains after straining the curds and whey is pure butterfat or ghee, and it has a high smoke point that makes it great for frying. Clarified butter is made in much the same way, save for the fact that the curds at the bottom of the pan are not allowed to brown. The browning gives ghee a subtle nutty flavor that can't be found in clarified butter. As to my unnecessary complaints, I live in a university community that has an Indian grocery store. I can buy ghee and do most of the time. I do, however, have an independent streak that forces me to try things that really aren't necessary. I talked myself into making ghee and now that I've done it I'll move on to other things, secure in the knowledge that I can make it should I have to. For those kindred spirits whose "been there, done that" list does not yet contain ghee, here's the recipe.

Ghee
...from the kitchen of One Perfect Bite

Ingredients:

1 cup ( 2 sticks) unsalted butter

Directions:

Place butter in a small heavy saucepan and set over very low heat. A heavy saucepan is necessary to prevent burning. Allow butter to melt without stirring. About 10 minutes into process, it will start to spit and a white foam will form on surface. Do not stir or shake pan. Continue cooking, over very low heat, for 30 to 40 minutes longer. Remove pan from heat and skim off crusty top layer. This layer looks like a soft topping of bread crumbs. Slowly pour liquid through a fine mesh strainer that is lined with a coffee filter, making sure to leave any foam or brown bits behind. The butterfat, ghee, will be clear and lemon or light gold in color. Pour into a lidded container and seal. Ghee will thicken as it cools. While ghee can be kept at room temperature, it is best to refrigerate it. It will keep for 4 to 6 weeks. Yield: 1 cup.

You might find these related posts helpful:
How to Make Clarified Butter and Ghee - The Reluctant Gourmet
Ghee: A Wholesome Fat - The Nourished Kitchen
Clarified Butter - Cooking for Engineers

This post is being linked to:
Smiling Sally - Blue Monday

Saturday, May 22, 2010

Rice and Red Lentil Pilaf - Kichiri


From the kitchen of One Perfect Bite...This is the dish you get when an Irish lass decides to make a wonderful Indian comfort food called kichiri. This is an easy, satisfying and cheap eat. I, however, managed to complicate it with a decision to make ghee, an oil that some call the clarified butter of India. Actually clarified butter and ghee are not the same thing. While there are similarities, ghee is cooked until all moisture is removed and the milk solids in the butter are caramelized. This gives it a rich nutty taste and assures that the "butter" has a long shelf life and a higher smoking point than its counterpart. I have a local source for ghee, but I wanted to attempt making it on my own. My curiosity is now satisfied and ghee is now on my been there, done that list. Vegetable oil or a mixture of one part oil to one part butter can also be used to make this pilaf. As you glance through the recipe you'll see that it is one that you can easily make your own. If you are unable to find red lentils substitute yellow. I will also add some heat the next time I make this pilaf. It is a wonderful accompaniment to curry or eggs. Here's the recipe.

Rice and Red Lentil Pilaf - Kichiri...from the kitchen of One Perfect Bite

Ingredients:
2 tablespoons ghee, vegetable oil or a mix of butter and oil
6 large garlic cloves, chopped
1 (1-inch) piece ginger, peeled and chopped
1 cup chopped yellow onion
1 teaspoon kosher salt + salt to taste
3/4 teaspoon ground cumin
1/2 teaspoon ground turmeric
1/4 teaspoon ground coriander
1/4 to 1/2 teaspoon red pepper flakes
1 cup long grain white rice
1/2 cup red lentils (masoor dahl)
3 cups vegetable stock
1/2 cup chopped fresh cilantro

Directions:
1) Heat ghee or oil in a large frying pan that has a lid; set over medium-high heat
and warm until oil shimmers. Add garlic and ginger and toss until it is fragrant, about 30 seconds. Stir in onions and cook until tender, about 5 minutes.
2) Meanwhile, combine salt, cumin, turmeric, coriander and pepper flakes in a small bowl.
3) Stir spice mixture into onions and cook for 1 minute, tossing to make sure everything is combined. Stir in rice and lentils and cook 5 minutes longer. Add vegetable stock and bring to a rolling boil. Stir well, reduce heat, cover pan and cook for 20 minutes. Do not remove lid. Remove pan from heat. Let sit, covered, for 10 minutes. Uncover pan and gently fluff rice with a fork. Stir in cilantro and serve hot or warm. Yield: 4 servings.

You might also enjoy these recipes:
Balti Chicken - One Perfect Bite
Kedgeree - One Perfect Bite
Braised Pork Chops with Homemade Curry and Chutney Sauce - One Perfect Bite

Friday, May 21, 2010

Strawberry Panna Cotta - Pink Saturday


From the kitchen of One Perfect Bite...While local strawberries aren't ready to harvest, those in the supermarkets no longer taste like cardboard and can be used to make some passable desserts. Several years ago, I discovered fruit extracts that can be used to heighten the flavor of less than prime fruit. While I wouldn't use the berries that are currently available for short cake or a glacéd tart, they work perfectly well in desserts such as panna cotta, especially when given the flavor boosts a pure fruit extract can provide. I must admit that those of us who live in Oregon are spoiled by the quality of fruit that is available to us. While markets glorify huge strawberries, most folks never get to taste the small field berries that are available to us in season. Pure ambrosia! I like this version of panna cotta because it's made with buttermilk rather than heavy cream and it has a slight tang that makes it a pleasant way to end a meal. Panna cotta is one of the easiest of all desserts to make, but it needs time, a lot of time, to properly chill. Whenever possible, I make mine the night before I plan to serve it. While most recipes suggest than eight hours is a sufficient time for the gelatin to set, I've found twelve hours to be ideal. Once made, they can be kept for up to 2 days in the refrigerator. I like to serve these with macerated berries or a fruit compote to keep the dessert light. Here's the recipe.

Strawberry Panna Cotta...from the kitchen of One Perfect Bite, inspired by Gourmet magazine

Ingredients:
Panna Cotta
3 cups sliced strawberries (1 pound)
1-3/4 cups well-shaken low-fat buttermilk
6 tablespoons sugar
2-1/2 teaspoons unflavored gelatin, from less than 2 (1/4-oz) envelopes
1/4 cup whole milk
1/4 cup heavy cream
Optional: 1 teaspoon strawberry extract
Fruit Compote
2-1/2 cups strawberries (preferably small; 3/4 lb), trimmed
1/4 cup fresh orange juice
2 teaspoons superfine granulated sugar

Directions:

1) To make panna cotta: Blend strawberries, buttermilk, and sugar in a blender until very smooth, then pour through a very fine sieve into a medium bowl, pressing hard on solids. Discard solids. Sprinkle gelatin over milk in a small bowl and let stand 1 minute to soften. Bring cream to a boil in a small saucepan. Remove from heat and add gelatin mixture, stirring until dissolved. Whisk cream mixture into strawberry purée and pour into 6 (6-oz.) molds. Chill molds, covered, until firm, at least 8 hours. To unmold, dip molds in a small bowl of hot water 2 or 3 seconds, then invert panna cottas onto dessert plates and remove molds. Let stand at room temperature 20 minutes to soften slightly.
2) To make fruit compote: Halve strawberries lengthwise if small or quarter if larger. Whisk together orange juice and superfine sugar in a bowl until sugar is dissolved and add strawberries, tossing to coat. Serve panna cottas with compote.
Yield:6 servings.

You might also enjoy these recipes:
Pumpkin Panna Cotta - One Perfect Bite
Lemon Panna Cotta with Raspberry-Orange Sauce - The Recipe Girl
Toasted Almond Panna Cotta - Cooking for Seven

This post is being linked to:
Pink Saturday, sponsored by Beverly at How Sweet the Sound.

Thank You

We owe special thanks this week to:

Nesting Newbies Magazine for including One Perfect Bite in their End Notes: Best Blogs feature.

Saveur Magazine for featuring another recipe from One Perfect Bite in their Sites We Love feature.

Food News Journal for a second mention of One Perfect Bite in their Best of the Blogs feature.

Thursday, May 20, 2010

Po Cha and Clues to Our Destination


From the kitchen of One Perfect Bite...The suspense is over. Our holiday plans have been finalized. Selection of a location was really difficult this year. Bob and I had different adventures in mind and the final decision was made in the only fair way possible. We quite literally pulled a photo from a stack spread like playing cards of the table. There was a randomness to it that made the whole thing seem more fair than might otherwise have been the case. I'm happy to report we are both happy with the decision the gods of chance made on our behalf. It will be an adventure and I'll be counting the days until it actually begins. October is a ways off but that gives us time to get visas and study more about the places we'll be visiting. I'm going to keep you in the dark for a while longer. I've put together some photos of people and places we'll be visiting to see if you can identify the three countries we'll be touring. I'm also including one recipe associated with the most remote of the places on our itinerary. We have promised the children, who don't like the words trek or safari used in the same breath as their parent's names, that this is absolutely, positively our last visit to remote locales with sometimes fragile political systems. They are dubious. Seems I said that last year as well. I really meant it, but the back and legs and brain have held up well and this seems like the right thing for us to do. At any rate, here is the recipe for a drink that really should be made with yak milk and butter. I must say it is a real challenge to the palate even when made with cows milk and butter from a local creamery. I don't always do well with foods that fall into the acquired taste category. It took me years to enjoy a martini. I comfort myself with the knowledge I tried it, and who knows, it may taste better in country. Here's the scoop for other brave and kindred souls.

Po Cha......from the kitchen of One Perfect Bite

Ingredients:
5 -6 cups water
3 black tea bags or 2 tablespoons loose black tea
1/4 teaspoon salt
2 tablespoons butter
1/2 cup milk, half-and-half or 1 teaspoon milk powder

Directions:
1) Bring five to six cups of water to a boil. Reduce heat. Add tea bags or loose tea and simmer for several minutes more. Remove tea bags or strain loose tea.
2) Pour steeped tea, salt, butter and milk or milk powder into a blender or chandong, a type of churn. You can also shake the tea in a thermos bottle. Churn, blend or shake the mixture for 3 to 5 minutes. Our into cuos and serve piping hot: Yield: 4 servings.


You might also enjoy these recipes:
Ginger Tea - One Perfect Bite
Blueberry Tea - One Perfect Bite
Himalayan Salted Butter Tea - Not Quite Nigella
Yak Butter Tea - The Greedy Glutton

This recipe is being linked to:
Designs By Gollum - Foodie Friday

Wednesday, May 19, 2010

Strawberry Tea Bread - Sweet Cheeks Winery


From the kitchen of One Perfect Bite...We have in our community a winery with a most unusual name. Before that can be shared, I must describe, as best I can, the property on which the winery sits. The acreage is bisected by a service road that cuts through the two rounded hillsides on which the grapes are grown. A contingent of locals insisted the property resembled a well-rounded derriere and conspired to have the winery named Sweet Cheeks. It worked. Now this kind of nonsense can't be plucked from the ether. Every word of this is true. I swear. I'm going to resist jokes about "bottom lands" and instead send those of you who would like to know more about the winery or my veracity here. Now, it is perfectly logical to ask why I bothered to tell you about the winery at all. It's also reasonable to ask what it has to do with a strawberry tea bread. So, here's how we got from there to here. I had promised to bring four loaves of this bread to a meeting this morning. I was in such a rush to finish the breads that I misjudged the distance between oven racks and, as a result, the bottom loaves baked into the racks above them. Bob thought the crease that developed in the two bottom loaves was a lot funnier than was actually the case and dubbed my loaves Sweet Cheeks Strawberry Bread. Those who are fond of European tea breads that are less sweet than their American counterparts will love this bread. If you are accustomed to a really sweet strawberry bread, you might want to take a pass on this. I'll let you judge for yourselves. Here's the recipe.

Strawberry Tea Bread
...from the kitchen of One Perfect Bite, courtesy of Taste of Home magazine

Ingredients:

1/2 cup butter, softened
3/4 cup granulated sugar
2 eggs
1/2 cup sour cream
1 teaspoon vanilla extract
1-3/4 cups all-purpose flour
1/2 teaspoon baking powder
1/2 teaspoon baking soda
1/2 teaspoon salt
1/4 teaspoon ground cinnamon
3/4 cup chopped fresh strawberries
3/4 cup chopped walnuts, toasted, divided use

Directions:
1) Preheat oven to 350 degrees F. Grease an 8 x 4-inch loaf pan. Set aside.
2) In a mixing bowl, cream butter and sugar until fluffy. Beat in eggs, one at a time. Add sour cream and vanilla; mix well.
3) Combine flour, baking powder, baking soda, salt and cinnamon; stir into creamed mixture just until moistened. Batter will be thick. Fold in strawberries and 1/2 cup nuts.
4) Scrape into prepared loaf pan. Sprinkle top with reserved 1/4 cup walnuts. Bake for 65 to 70 minutes, or until a toothpick inserted near the center comes out clean. Cool for 10 minutes; remove from pan to a wire rack to cool completely. Yield: 1 loaf.

You might also enjoy these recipes:
Lemon Poppyseed Bread - One Perfect Bite
Irish Soda Bread - One Perfect Bite
Sugar Crusted Viennese Nut Bread - One Perfect Bite

Tuesday, May 18, 2010

Penne with Asparagus and Lemon Sauce


Photo courtesy of Mark Hoffman

From the kitchen of One Perfect Bite...This is such a lovely dish. Its simplicity works well as a pasta course for more formal meals or as a light entrée for a family supper. It would also be a perfect meal for Meatless Monday. I don't much bother with asparagus once our local season is over. I've become spoiled by the taste and price of the freshly harvested crop. That, of course, means we eat a lot of asparagus in various guises at this time of year. One of the things I love about this recipe, developed by Faith Willinger for her book "Red, White and Greens: The Italian Way with Vegetables," is that no part of the asparagus is wasted. Without the help of butter or cream, the stalks become a wonderfully silken sauce that naps penne pasta in a pale green sauce that speaks of Spring. The dish takes about 30 minutes to prepare and it uses five readily available ingredients. It really gets no easier than this. The pasta should be served as soon as it is dressed and served in warmed bowls if possible. This does not hold up well. The dish tends to lose its silken texture as it sits and it becomes gummy when reheated. The recipe can be halved or doubled if need be, so it is perfect for small families or large gatherings. I know you'll love this. Here's the recipe for a wonderful Spring treat.

Penne with Asparagus and Lemon Sauce
...from the kitchen of One Perfect Bite, courtesy of Faith Heller Willinger

Ingredients:

1 pound fresh asparagus, trimmed
1 teaspoon finely grated lemon zest
1/4 cup extra-virigin olive oil
1 pound penne pasta
1/2 cup finely grated Parmigiano-Reggiano cheese
Salt and pepper to taste

Directions:
1) Cut asparagus into 1-inch pieces, keeping tips separate. Cook stems in a 6-quart pot of boiling salted water until very tender, about 6 minutes. The recommended ratio of salt to water is 1 tablespoon for every 2 quarts of water. Using a slotted spoon, transfer stems to a bowl of cold water to stop cooking and set color. Keep water in pot boiling. Drain stems well and place in a blender jar or bowl of a food processor.
2) Cook asparagus tips in same boiling water until tender, about 3 minutes. Using a slotted spoon, transfer to a bowl of cold water. Let sit for a few minutes, then drain and set aside. Do not put in blender jar.
3) Add lemon zest, olive oil and 1/2 cup of asparagus cooking liquid to asparagus stems and puree. Transfer to a 4-quart saucepan. Set aside.
4) Cook penne in same pot of boiling water for three quarters of recommended cooking time. Reserve 2 cups of boiling liquid. Drain penne and add to sauce along with asparagus tips and 1/2 cup reserved cooking water. Cook over high heat, stirring to prevent sticking, for 3 minutes or until pasta is almost al dente. Add more water, a 1/4 cup at a time until sauce coats pasta but is a little loose. Stir in cheese and add salt and pepper to taste. Stir until cheese is melted. Serve immediately. Yield: 4 to 8 servings.

You might also enjoy these recipes:
Asparagus and Goat Cheese Tart - One Perfect Bite
Asparagus and Lemon Grass Risotto - One Perfect Bite
Spring Vegetable Ragout - One Perfect Bite

Monday, May 17, 2010

Cherry Pie with Streusel Topping


The only thing better than cherry pie is an afternoon with Thomas the Train.


From the kitchen of One Perfect Bite...The highlight of Bob's birthday celebration was a parade of his favorite pies. The first, of course, was the blueberry icebox pie featured here a day or so ago. Today, I want to highlight a sour cherry pie. It's one of the best pies I've ever tasted and it was a regular feature in the summer kitchens of my Midwestern childhood. Bob's family lived about a mile from my own and we were exposed to many of the same foods as children. We both love this dessert and share memories of pitting cherries for the pie. We are of an age when it was not unusual to see children sitting on stoops helping to prepare fruit or vegetables for the dinner table. That means we shelled peas and learned to string beans at a very young age. We also had impressive paring knife skills. For a long period of time, folks my age reveled in the development of frozen food and thought that Clarence Birdseye deserved a special place in heaven for his part in making food preparation so much easier than it had been. The grand irony is that we have come full circle and are now back to shelling peas and stringing beans for our tables. To make this pie you are going to need frozen tart or sour cherries that have been pitted. If you opt to use fresh cherries make sure you weigh them after pitting to assure the proportions in the recipe remain the same. I'd also suggest adding an extra tablespoon of tapioca because they will release more liquid as they cook. You will need enough pastry to form a one crust pie. While a homemade short crust is ideal, a commercial product will also work well. This is an easy pie to make and the streusel topping makes it a bit unusual. Here's the recipe.

Cherry Pie with Streusel Topping...from the kitchen of One Perfect Bite

Ingredients:
Pastry for a single crust pie
Crumb Topping
6 tablespoons butter, room temperature
1/4 cup firmly packed golden brown sugar
1 egg white, lightly beaten
1/2 teaspoon vanilla extract
3/4 cup all-purpose flour
1/4 teaspoon kosher salt
Filling
5 cups (2-lbs.) quick-frozen (IQF) tart pitted cherries
1 cup granulated sugar
4 tablespoons instant tapioca

Directions:

1) Roll pastry to fit a 9-inch pie or quiche pan. Refrigerate until ready to fill. Preheat oven to 425 degrees F.
2) Combine butter and sugar in a small bowl. Blend with a fork until creamy. Mix in egg white and vanilla and stir until incorporated. Sift flour and salt into butter mixture and stir until combined. Refrigerate while making filling.
3) Combine individually frozen cherries, sugar and tapioca in a large bowl. Toss to distribute tapioca and sugar among the cherries. Let stand for 20 minutes. The fruit should still be at least partially frozen.
4) Turn filling into pie shell. Crumble topping over cherries, leaving some fruit showing so steam can escape from filling as pie bakes.
5) Bake for 10 minutes. Reduce oven temperature to 400 degrees F and bake for about an hour until the topping is nicely browned and filling bubbles slightly. If edges darken too quickly cover with aluminum foil. Transfer to rack to cool. Yield: 8 servings.

You might also enjoy these recipes:
Apple Custard Pie with Streusel Topping - One Perfect Bite
Rhubarb and Red Berry Pie - One Perfect Bite
Mile High Apple Pie with Cranberries

Sunday, May 16, 2010

Marinated Portobello Burgers with Caramelized Onions and Roasted Garlic Aioli


From the kitchen of One Perfect Bite...Did you ever wonder if folks who have a meat man or a fish man, also have a muffin man? I've always been slightly uncomfortable when people attach a possessive descriptor to the names of their purveyors. That makes it a bit awkward for me to talk about the person from whom I buy my mushrooms. Saturdays, rain or shine, he sells the treasures he's foraged in the wild or harvested from tunnels that he tends. This past weekend there were morels among the more common mushrooms on his table. Pure gold, and almost as expensive. Now, most mushroom hunters keep what they know to themselves. Not so this man. Save for divulging the actual coordinates of his territory, he will tell you everything he knows about foraging his favorite fungi. That's how I came to know where to look for morels in this area. Strange as it may seem, apple orchards, burned fields and the banks of streams that regularly flood are where you want to be. Using his advice I actually found one. One. Not quite enough to prepare a meal for Meatless Monday, but enough to spark a germ of recollection about a mushroom entree that would be perfect for the day. It's a burger. Strangely enough, the growers I know don't cultivate portobello mushrooms. They think they take up too much space in their limited operations. Getting back to the burgers, you'll find them very easy to make, though there may be some who object to the cost of the balsamic vinegar used to marinate the mushrooms. One thing that I want to point out is the importance of scraping away the gills of the mushrooms. If left in place, they will turn your burgers black and allow them to absorb too much vinegar. It's also important to use good, brioche-type, buns and fully ripe tomatoes. These burgers are particularly wonderful in August when ripened Brandywine tomatoes become available. Here's the recipe for a really great meatless "burger."

Marinated Portobello Burgers with Caramelized Onions and Roasted Garlic Aioli ...from the kitchen of One Perfect Bite, inspired by Cooking Light Magazine

Ingredients:
Marinade
1 cup balsamic vinegar
2 tablespoons olive oil
1 teaspoon dried basil
1/4 teaspoon kosher salt
1/4 teaspoon freshly ground black pepper
2 garlic cloves, minced
.
6 portobello mushroom caps
.
Caramelized Onions
1 tablespoon olive oil
1-1/2 cups sliced onion
Aioli
1/2 cup low-fat mayonnaise
2 teaspoon bottled minced roasted garlic
Burgers
Cooking Spray
6 Brioche rolls or quality hamburger buns
6 curly leaf lettuce leaves
6 large (1/3-inch thick) slices tomato

Directions:
1) Combine vinegar, olive oil, basil, salt, pepper and garlic cloves in a large zip-top plastic bag. Add mushrooms. Marinate in refrigerator for 8 to 24 hours.
2) Heat oil in a medium nonstick skillet over medium-high heat. Add onion, cover and cook for 10 minutes or until golden brown, stirring frequently.
3) Combine mayonnaise and roasted garlic in a small bowl.
4) Prepare grill or broiler. Remove mushrooms from bag, discarding marinade. Place mushroom caps on grill rack or broiler pan coated with cooking spray; cook 5 minutes or until tender.
5) Lightly toast buns. Spread top and bottom of each bun with aioli. Place a lettuce leaf on bottom half of each bun, top with a tomato slice, a mushroom cap, 1 tablespoon caramelized onion and top half of bun. Serve immediately. Yield: 6 servings.

You might also enjoy these recipes:
Baked Portobello Parmesan - One Perfect Bite
Mushroom Lasagna Florentine - One Perfect Bite
Wild Mushroom Ragu - One Perfect Bite

This recipe is being linked to Meatless Monday at My Sweet and Savory

Saturday, May 15, 2010

Blueberry Glacé Pie - Blue Monday


From the kitchen of One Perfect Bite...I am readying myself for a feast of epic proportions. Tomorrow is Bob's birthday and I've spent a good part of the day preparing for the celebration. Bob is a pie person, so, while there will be a token cake holding a passel of candles, the real emphasis will be on some of his favorite pies. The pie I'm featuring today has been around for quite awhile. Before image consultants took it uptown, it was called an icebox pie. For better or for worse, it's now referred to as a glacéd pie. Fortunately, it has remained easy to do and it's a wonderful recipe to have on hand for berry season. It is a pure berry tart and, unlike many icebox pies, this one has no custard filling. While I used a crumb crust for this occasion, short crusts are also wonderful with this tart. Be sure to use fresh berries when making this pie. Frozen berries exude too much liquid and will keep the filling from setting properly. Those of you who love fruit will love the zen-like simplicity of this pie. Here's the recipe.

Blueberry Glacé Pie...from the kitchen of One Perfect Bite

Ingredients:

1/2 to 3/4 cup sugar
2-1/2 tablespoons cornstarch
1/4 teaspoon salt
2/3 cup water
3 to 4 cups fresh blueberries
2 tablespoons unsalted butter
1-1/2 tablespoons fresh lemon juice
1-1/2 tablespoons orange liqueur
1 8 or 9-inch pastry shell, baked
Optional: whipped cream for garnish

Directions:
1) Combine sugar, cornstarch and salt in a saucepan. Whisk in water. Stir in 1 cup blueberries. Bring to a boil, stirring constantly, and cook until very thick, about 15 minutes. Remove from heat. Stir in butter, lemon juice and orange liqueur. Let cool.
2) Fold reserved blueberries into blueberry sauce. Refrigerate for 1 hour. When chilled, spoon into cooked pastry shell and refrigerate for 1 hour longer. Garnish with whipped cream if desired. Yield: 6-8 servings.

You might also enjoy these recipes:
Strawberry Glace Tart - One Perfect Bite
Chocolate and Hazelnut Pie with Vanilla Cream - One Perfect Bite
Apple Custard Pie with Streusel Topping

This post is being linked to:
Smiling Sally - Blue Monday

Friday, May 14, 2010

Cream Cheese and Pepper Jelly Spread - Pink Saturday


From the kitchen of One Perfect Bite...This is a new take on an old party favorite. Most folks have been at casual affairs where a brick of cream cheese, covered with pepper jelly, is served to guests. Many of us have prepared it for parties of our own and would agree that it is great football food. It's the essence of simplicity and, as such, is a boon for a busy host or hostess. While it's delicious, I do have a problem with its appearance. Once touched, the offering quickly begins to look like the remains of a massacre. Now I probably have a newfangled version of the "princess and the pea" syndrome, but I hate the way it looks, so, I took it upon myself to make something that would hold up better on the table. The ingredients have been only slightly altered and this new version retains the flavor of the old but is prettier for a longer period of time. It is important to note that the proportion of pepper jelly added to the cheese should not be increased. If that measurement is wrong you'll end up with a dip rather than a spread. The cheese will also need some additional heat added to it as it's whipped. While the recipe calls for cream cheese, you can replace one-third of that with chevre if you'd prefer another layer of flavor in the spread. I have also added additional heat to the mix. While I use Sriracha because I like its finished taste, any hot chili sauce sauce can be used. Just remember the pepper jelly adds heat as well, so go at it carefully. Red pepper jelly and chili sauce will give the spread a salmon hue. If you prefer a colorless spread, a plain pepper jelly can be used. Here's how the spread is assembled.

Cream Cheese and Pepper Jelly Spread...from the kitchen of One Perfect Bite

Ingredients:

1 (10.5-oz.) jar red pepper jelly
12 ounces cream cheese
1 to 2 teaspoons hot chili sauce (i.e. sriracha)

Directions:

1) Place jelly in bowl of a small food processor or blender. Pulse until mixture becomes spreadable. Set aside.
2) Beat cream cheese in a small bowl until light and fluffy. Stir in 1/3 cup pepper jelly and 1 to 2 teaspoons hot chili sauce. Mix well.
3) Turn half of cheese mixture into a small serving bowl. Gently spread 1/3 cup pepper jelly over surface of cheese. Top with remainder of cheese. Spread top with remaining pepper jelly. Serve with rice crackers or another cracker of your choosing.
Yield: 1-1/2 cups.

You might also enjoy these recipes:
Liptauer Cheese Spread - One Perfect Bite
Roasted Red Pepper and Sun-Dried Tomato Spread - One Perfect Bite
Pumpkin Butter - One Perfect Bite

This post is being linked to:
Pink Saturday, sponsored by Beverly at How Sweet the Sound.

Thursday, May 13, 2010

Chicken Enchiladas Verdes - Daring Cooks May Challenge


From the kitchen of One Perfect Bite...The Daring Cook's challenge for May was hosted by Barbara of Barbara Bakes and Bunnee of Anna + Food . The recipe they selected was a Stacked Green Chile and Grilled Chicken Enchilada which can be found here. I opted to make a tomatillo salsa verde using a recipe I've had for years, but I made the corn tortillas from the one Barbara and Bunnee provided for us. I have a neighbor who assisted me with equipment and advice that made the tortillas possible. Even with help, mine were a pretty raggedy affair. Fortunately, my efforts were hidden by copious amounts of sauce and no one, other than me and a neighbor sworn to silence, was the wiser. I can say with certitude that corn tortillas are worth every cent that local markets charge for them. The recipe I used for the enchiladas is a decade old and originally came from Cooking Light magazine. I obviously love it or would not be sharing it with you. It's fairly easy to do and the lighter ingredients do nothing to harm the taste of the finished enchiladas. Here's the recipe I used.

Chicken Enchiladas Verdes...from the kitchen of One Perfect Bite, courtesy of Cooking Light Magazine, January 1999

Ingredients:
Salsa Verde
1 pound tomatillos (about 15)
1-1/4 cups fat-free, less-sodium chicken broth
1/4 teaspoon salt
1 jalapeño pepper, seeded and chopped
Enchiladas
2-1/2 cups shredded cooked chicken breast
1/2 cup shredded asadero cheese or Asiago cheese
1/3 cup finely chopped onion
1/3 cup minced fresh cilantro
1/3 cup fat-free, less-sodium chicken broth
1/3 cup fat-free sour cream
1 tablespoon fresh lime juice
1/2 teaspoon ground cumin
1/4 teaspoon salt
1/8 teaspoon black pepper
8 (6-inch) corn tortillas
3 tablespoons shredded asadero or Asiago cheese (optional)
Cooking spray

Directions:
1) To prepare salsa verde, discard husks and stems from tomatillos; cut into quarters. Combine tomatillos, broth, salt, and chopped jalapeño in a saucepan over medium heat. Bring to a boil; reduce heat, and simmer 15 minutes or until tomatillos are tender. Cool slightly. Place salsa verde in a blender or food processor, and process until smooth or mash with a potato masher if you like your sauce more rustic and chunky. Heat a large nonstick skillet over medium-high heat. Add salsa verde; cook until reduced to 2 cups (about 1 minute).
2) Preheat oven to 400 degrees F.
3) To prepare enchilada filling, combine chicken, cheese, onion, cilantro, broth, sour cream, lime juice, cumin, salt and pepper in a large bowl.
4) Spread 1/2 cup salsa verde in bottom of a 13 x 9-inch baking dish coated with cooking spray. Warm tortillas according to package directions. Spoon about 1/3 cup chicken mixture down the center of each tortilla and roll up. Arrange enchiladas, seam sides down in baking dish. Pour remaining salsa verde evenly over enchiladas. Sprinkle with optional cheese if using. Cover and bake at for 10 minutes or until thoroughly heated.
5) Serve with additional sour cream, and garnish with sliced jalapeño, if desired. Yield: 4 servings.

You might also enjoy these recipes;
Camarones a la Mexicana - One Perfect Bite
Chicken Mole Poblano - One Perfect Bite
Shrimp Enchiladas Verde - One Perfect Bite

Wednesday, May 12, 2010

Greek-Style Yogurt Pie with Fruit Preserves


From the kitchen of One Perfect Bite...Tonight, out of an abundance of yogurt, I have yet another custard dessert to share with you. Not all stores in this area carry Greek yogurt, so, when it's available, I've been known to buy more than I really need and then end up scrambling to use it before it goes bad. This pie is an example of where my over exuberance in the dairy aisle leads. It's a Greek-style yogurt pie that, despite similar ingredients, is creamier and slightly sweeter than the yogurt pie we made and posted here a few days ago. It also has an interesting crust that is made from a mixture of white and whole wheat flour that is fortified with wheat germ. There are no berries in the pie but it is topped with a copious quantity of fruit preserves. You may prefer to use macerated fruit as a topping. You will find the pie needs the sweetness the fruit provides. While it is easy to make, there is significant wait time before the pie can be served. It's best to make the pie the night before you plan to serve it. It's worth the wait. Here's the recipe.

Greek-Style Yogurt Pie with Fruit Preserves
...from the kitchen of One Perfect Bite, courtesy of Kyra at TasteBook

Ingredients:
Crust
2/3 cup all-purpose flour
1/3 cup whole-wheat flour
3 tablespoons wheat germ
1/2 teaspoons salt
1/4 teaspoon ground cinnamon
1/2 cup (1 stick) unsalted butter, softened
1/3 cup packed light-brown sugar
Filling
2 cups whole-milk Greek yogurt
1 teaspoon vanilla extract
1/2 teaspoon finely grated lemon zest
1/4 cup unsalted butter, melted
4 large egg yolks
1 cup sugar
1/4 cup all-purpose flour
1/4 teaspoon salt
2 cups fruit preserves, such as plum or strawberry

Directions:

1) To make crust: Preheat oven to 350 degrees F. Place flours, wheat germ, salt, and cinnamon in food processor bowl. Process to combine. Add butter and sugar; process until dough holds together. Press crust mixture into bottom and up sides of a 9-inch pie plate. Freeze 15 minutes. Cover edge with foil. Bake until beginning to dry out, about 15 minutes. Transfer to a wire rack; let cool completely. (Leave oven on.)
2) To make custard: Stir yogurt, vanilla and zest in a bowl. Stir in butter and yolks. Stir sugar, flour, and salt in a bowl; stir into yogurt mixture until smooth. Pour into crust.
3) Bake, with foil covering edge of crust, until just set in center, 45 to 55 minutes. Transfer to a wire rack; let cool 1 hour. Spread jam over center of pie. Refrigerate at least 3 hours (up to overnight). Yield: 10 servings.

You might also enjoy these recipes:
Frozen Lemon Yogurt - One Perfect Bite
Yogurt Cheese Cake - One Perfect Bite>
Raspberry Yogurt Parfait - One Perfect Bite
Peach and Cream Fraiche (or Greek Yogurt Pie) - Smitten Kitchen
Yogurt Panna Cotta - Taste with the Eyes

Tuesday, May 11, 2010

Tomato Coconut Rice


Flooded Rice Paddy

From the kitchen of One Perfect Bite...Years ago, Bob and I spent several weeks traveling through the American South. We were, of course, charmed by the people and the compelling history of the region. I loved the whole of the Natchez Trace and I wasn't sure that Bob, having found Savannah, would ever leave her. Savannah, save for its famed red rice, spoke to his sensibilities. Now in fairness to him, I must tell you that Spanish rice was a dinner staple when we were children and I think he simply had had his fill of anything that resembled it. Even Savannah Red Rice couldn't tempt him. I wanted to try some Southern meals this week, so I spent some time looking for side dishes that would work nicely with our main courses. I can happily report that I found one that is so delicious that even Bob will eat it. It comes from Joyce White's cookbook "Soul Food." It is very loosely based on the red rice that is served across the South, but there are decided Asian overtones as well. The secret ingredient is the coconut milk and that's decidedly unsouthern unless you find yourself in Thailand or South Vietnam. The rice bakes in the oven and uses every day ingredients to produce a unique accompaniment to grilled meat or poultry. The recipe can be doubled and brown basmati rice can also be used to prepare it. If you opt to use brown rice you should add an additional 20 minutes to the baking time that's stated in the recipe. I really think you'll love this. I know I did. Here's the recipe.

Tomato Coconut Rice...from the kitchen of One Perfect Bite, courtesy of Joyce White

Ingredients:
2 to 3 tablespoons canola oil
1 small onion, finely chopped
1 tablespoon chopped fresh basil or parsley
1 red bell pepper, cored and chopped
1 cup basmati rice rice
2 cups finely chopped plum tomatoes or well-drained petite diced tomatoes
1 cup unsweetened coconut milk
1 teaspoon kosher salt
1/2 teaspoon freshly cracked black pepper
1/4 to 1/2 teaspoon dried red pepper flakes

Directions:
1) Preheat oven to 350 degrees F. Spray a 2-quart ovenproof baking dish with cooking spray and set aside.
2) Heat oil in a medium skillet. Stir in onion, herb and bell pepper and sauté 4 or 5 minutes, stirring. Stir in rice and sauté 2 or 3 minutes longer, stirring. Remove pan from heat.
3) Spoon rice mixture into baking dish. Stir in tomatoes, coconut milk, salt, black pepper and pepper flakes. Mix well. Cover baking dish tightly with a lid or aluminum foil.
4) Place dish on the lower oven rack and bake for about 40 minutes, or until he rice is tender, and all liquid is absorbed, stirring a couple times. Cook for another 20 minutes if using brown rice. Serve hot as a side dish to baked fish, roast chicken or meat dishes. Yield: 6 servings.

You might also enjoy these recipes:
Yangzhou Fried Rice - One Perfect Bite
Wild Rice, Celery and Walnut Salad - One Perfect Bite
Warm Asian-Style Rice Salad - One Perfect Bite

Monday, May 10, 2010

Spoon Bread with Leeks and Gruyere Cheese


From the kitchen of One Perfect Bite...I rarely make fish and chips, but I had some catfish fillets that had to be used and thought a Southern-style fish fry would be a nice change of pace for our supper. Bob and I completed the river walk at a brisk pace this morning, so I felt less guilty about frying than might otherwise have been the case. I did rule out French fries, but only because I had two other Southern recipes that I wanted to try. We Northern gals rarely have spoon bread. As a matter of fact, I'll wager there are some Northern gals who have never had spoon bread. I'd only had it once before tonight's dinner. Although it's called a bread, it's really more like a cornmeal souffle or savory pudding than a bread. It has a moist, custard-like interior. That interior is probably what led to the practice of always serving the pudding with a spoon. I'm told Southerners wouldn't dream of using a knife and fork to move a serving from the casserole to a plate. The true history of spoon bread is not well documented, so I think some conjecture is fair. Corn was used because it was more readily available than flour. Leaveners, other than yeast, were not generally available until the middle part of the 19th century. Yeast breads take time to make. Cooks, early on, discovered that eggs could be used to quickly leaven certain dishes. Early versions of spoon bread used eggs as a leavener and that moved it into the category of a colonial quick bread. Quick breads, then and now, are popular. This recipe takes spoon bread to another level. It is flavored with leeks and cheese and it is altogether delicious. It's also very easy to make. If you like polenta, I think you'll love this. While Gruyere cheese adds a lovely nutty flavor to the dish, Swiss cheese can also be used. Here's the recipe.

Spoon Bread with Leeks and Gruyere Cheese
...from the kitchen of One Perfect Bite, adapted from Savoring America

Ingredients:

2 tablespoons unsalted butter
1 cup chopped leeks (white and tender green of 3 leeks)
2 cups whole milk
1/2 cup water
1 teaspoon salt
1/2 teaspoon freshly ground black pepper
1 cup yellow cornmeal
2/3 cup sour cream
4 eggs
1-1/2 cups shredded Gruyere cheese
2 scallions (white and tender green), chopped

Directions:

1) Preheat oven to 350 degrees F. Spray a 1-1/2-quart casserole with nonstick cooking spray. Set aside.
2) Melt butter in a 3-quart saucepan set over medium-high heat. Add leeks and saute until soft and translucent, about 5 minutes. Add milk, water,salt and pepper and bring to a boil. Slowly whisk in cornmeal and return mixture to a boil. Reduce heat to medium and continue to stir until mixture thickens and pulls away from sides of pan. Remove from heat and stir in sour cream.
3) In bowl of an electric mixer, beat eggs until thick and pale lemon yellow in color, about 5 minutes. Stir 1/4 cup of cornmeal mixture into eggs. Then fold egg mixture into remaining cornmeal mixture, stirring constantly to prevent eggs from scrambling. Fold in cheese and scallions.
4) Scrape mixture into prepared pan. Bake for 35 to 40 minutes, or until a toothpick inserted into center comes out clean. Serve at once directly from casserole. Yield: 6-8 servings.

You might also enjoy these recipes:
Lemon Poppy Seed Bread - One Perfect Bite
Three Savory Quick Breads the French Way - One Perfect Bite
(Almost) Irish Soda Bread - One Perfect Bite