Friday, April 30, 2010

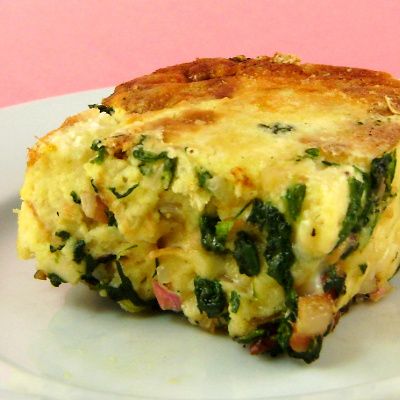
Spinach and Pancetta Strata - Pink Saturday


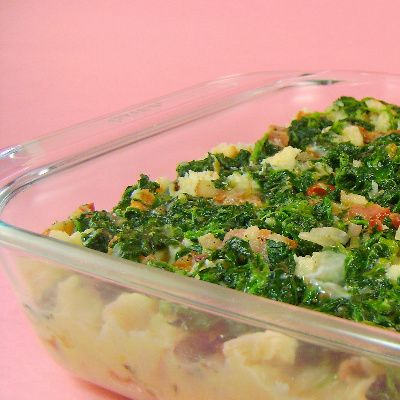
From the kitchen of One Perfect Bite...It's time for the April challenge at Recipes to Rival. This month's challenge, chosen by Temperama of High on the Hog, was a Giada De Laurentis recipe for a Spinach and Pancetta Strata. It's a wonderful recipe for this time of year. It can be assembled the night before serving and that makes it a natural for for a Mother's Day brunch. I cut all the ingredients in half, but made no other changes to the recipe we were asked to prepare. Those of you who have large families to entertain will appreciate the ease with which this can be assembled. The strata is simple to make and it uses readily available ingredients. It is also delicious. One of the nice things about Giada's recipes is their consistency. They are never great but they are always good and visually appealing. I hope you'll try this. You won't be disappointed. Here's the recipe.

Spinach and Pancetta Strata
...from the kitchen of One Perfect Bite, courtesy of Giada De Laurentis from Everyday Italian episode: My Family Favorites

Ingredients:
2 tablespoons olive oil
4 ounces thinly sliced pancetta, coarsely chopped
1 small onion, chopped
1 (10-ounce) box chopped frozen spinach, thawed, squeezed dry
2 garlic cloves, minced
1 teaspoon salt
1/2 teaspoon freshly ground black pepper
1/8 teaspoon freshly grated nutmeg
8 cups cubed Italian bread, from a 1-pound loaf
1/2 cup finely grated Parmesan
3 cups whole milk
10 large eggs

Directions:

1) Heat oil in a heavy large skillet over medium heat. Add pancetta and saute until crisp and golden, about 5 minutes. Using a slotted spoon, transfer pancetta to a bowl. Add onion to pan drippings in same skillet and saute until translucent, about 4 minutes. Add spinach and garlic. Saute over medium-low heat until garlic is tender, about 2 minutes. Stir in 1/2 teaspoon of salt, 1/4 teaspoon of pepper, nutmeg, and cooked pancetta.
2) Place half of bread cubes in a buttered 3-quart baking dish. Sprinkle half of cheese over the bread, then top with half of spinach mixture. Repeat layering.
3) Whisk milk, eggs, remaining 1/2 teaspoon of salt and 1/4 teaspoon of pepper in a large bowl and pour evenly over strata. Chill strata, covered with plastic wrap, at least 2 hours and up to 12 hours.
4) Preheat oven to 350 degrees F.
5) Bake strata uncovered until puffed, golden brown, and cooked through, about 40 minutes. Let stand 5 minutes before serving. Yield: 8 servings.

You might also enjoy these recipes:
Frittata with Spring Herbs and Leeks - One Perfect Bite
Smoked Salmon Frittata - One Perfect Bite
Individual Baked Omelets - One Perfect Bite

This post is being linked to:
Pink Saturday, sponsored by Beverly at How Sweet the Sound.
Thursday, April 29, 2010

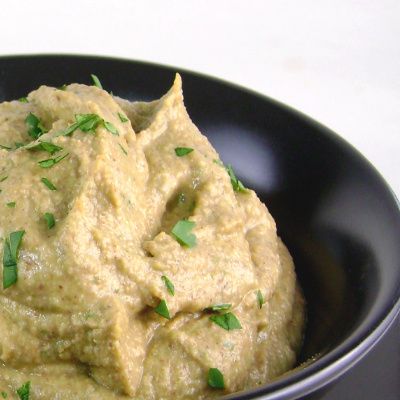
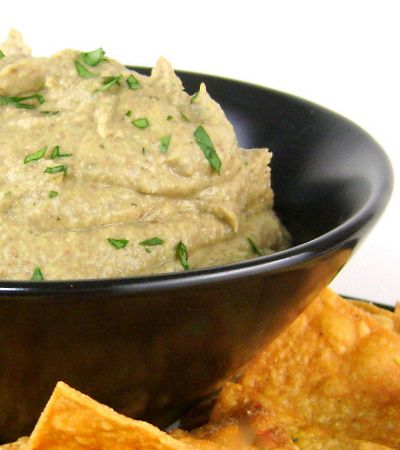
Black Bean Hummus with Crispy Corn Chips


From the kitchen of One Perfect Bite...Saturday marks the 136th run of the Kentucky Derby and I thought it would be nice to provide some snacks for nibbling as we watched the race and procession of hats at Churchill Downs. I'm a "people watcher", and, to Bob's dismay, I have more fun with before and after events than I do with the race itself. Fortunately food is our great equalizer. I want to serve something outside the pale of standard derby fare, so I decided to try a recipe developed by the chefs at Kai Restaurant in Phoenix, Arizona. The restaurant specializes in Native American food and this dip is their interpretation of hummus. It's extremely easy to make and is quite unlike its Middle Eastern cousin in all but texture. While bagged chips could certainly be used, I've decided to serve it with homemade tortilla chips. The corn flavored chips will nicely balance the citrus in the dip and give it a more Southwestern flavor. I cut my corn tortillas into quarters and deep-fried them. If you are watching calories they could be crisped in the oven. Either way, they are a perfect accompaniment to the dip. Here's the recipe for the black bean hummus.

Black Bean Hummus...from the kitchen of One Perfect Bite, inspired by a recipe from Michael Dowd and Jack Strong appearing in the book The New Native American Cuisine

Ingredients:

1/2 cup chopped red onion
1 (14.5-oz.) can garbanzo beans, drained and rinsed
1 (14.5-oz.) can black beans, drained and rinsed
5 teaspoons chopped garlic
1/2 to 1-1/2 teaspoons chipotle adobe pepper
1-1/2 teaspoons ground cumin
3 tablespoons minced fresh basil leaves
3 tablespoons minced fresh cilantro leaves
1/2 cup fresh lemon juice
1/4 cup fresh lime juice
Salt and pepper to taste
1/3 cup extra virgin olive oil

Directions:
Combine all ingredients except olive oil in a blender. Process until smooth. Slowly add oil to puree. Serve with crisp corn tortilla chips. Yield: 2 cups.

You might also enjoy these recipes:
Red Pepper Hummus - One Perfect Bite
Chunky Clam and Bacon Dip - One Perfect Bite
Liptauer Cheese Spread - One Perfect Bite

Wednesday, April 28, 2010

Fry Bread - School Project


From the kitchen of One Perfect Bite...It's not much of a recipe, but it comes with a fascinating history that curious minds and my older grandsons might find interesting. Fry bread is the politically correct name that has been given to what was once called squaw bread. For my friends in Asia, Africa and Europe, and others not schooled in American history, the word squaw was once used to describe native American women in an insulting and derogatory way. Native tribes across the United States have been working for decades to remove this, and other demeaning words used to describe their people, from the English lexicon. They are slowly making progress. The bread that carried that offending name was not part of their diet until the tribes were forcibly removed from their ancestral lands and placed on reservations. The Navajo call this period of their history the "Long Walk", while the Cherokee, also subject to the forced march, referred to it as the "Trail of Tears". To supplement meager food stores and prevent starvation, they were given allotments of white flour, baking powder, salt and lard by the army. They used it to fashion a simple skillet bread that became a staple of their diets while they were kept on the reservations. While no longer commonplace, it is still served at tribal feasts and gatherings and some believe that eating the bread is a sacred tradition that must be continued until the earth is again purified. Bob and I first had fry bread at a ceremony called a Tsalila that is held on the Oregon coast. The bread is traditionally made with lard and its texture depends on how it is fried. When deep fried it is fluffy and has a texture similar to Yorkshire pudding or popovers. When shallow fried, it is crisp and has a decided cracker-like crunch when bitten. This bread, like all fried doughs, is best eaten straight from the fryer. The dough can, however, be made ahead of time and be stored in the refrigerator for a day or so before cooking. The finished bread can be split and filled with meat or other fillings, but most prefer it spread with jam or sprinkled with cinnamon sugar. It is very easy to make and would be wonderful for a school project. Here's the recipe.

Fry Bread
...from the kitchen of One Perfect Bite

Ingredients:

2 cups all-purpose flour
1 tablespoon baking powder
1/2 teaspoon salt
1-1/2 tablespoons lard, melted (butter may be substituted)
1/2 cup warm water
1/4 cup room temperature milk
4 cups oil for deep frying

Directions:

1) Combine flour, baking powder and salt in a large bowl. Set aside.
2) Combine water, milk and lard or butter in a large measuring cup.
3) Slowly add liquids to flour and mix just until dough forms a ball. Knead in the bowl, about 10 times, to form a smooth ball that is not sticky. A small amount of flour may be added if needed. Cover dough with a damp towel or plastic wrap and let sit for 30 minutes.
4) Heat oil in a deep fryer or a high-sided pan. If using an electric pan set thermostat to 350 degrees F.
5) Divided dough into 8 approximately equal pieces. Pat on a floured board or with floured hands to form circles about 5 to 6-inches in diameter. Place dough, a piece at a time, into hot oil and cook for 2 minutes per side. Drain on paper towels. Repeat until all dough is used. Yield: 8 pieces.

You might also enjoy these recipes:
Indian Pudding - Simply Recipes
Navajo Fry Bread and Navajo Tacos - Commonplace Kitchen
Cherokee Fry Bread - Bake Space

Food for Thought - Bill Gates, Charles Sykes and an Urban Myth


While these rules have been attributed to Bill Gates, I've recently learned that the speech attributed to him is an urban myth and was never delivered to a graduating class. That does not, however, change the validity or import of the list which was written by Charles Sykes and attributed to Gates. It still should be read. I apologize for my part in proliferating the myth, but will leave the list here for latecomers to read. Here's the list as it was written and compiled by Charles Sykes.

Rule 1: Life is not fair - get used to it!

Rule 2: The world doesn't care about your self-esteem. The world will expect you to accomplish something BEFORE you feel good about yourself.

Rule 3: You will NOT make $60,000 a year right out of high school. You won't be a vice-president with a car phone until you earn both.

Rule 4: If you think your teacher is tough, wait till you get a boss.

Rule 5: Flipping burgers is not beneath your dignity. Your Grandparents had a different word for burger flipping: they called it opportunity.

Rule 6: If you mess up, it's not your parents' fault, so don't whine about your mistakes, learn from them.

Rule 7: Before you were born, your parents weren't as boring as they are now. They got that way from paying your bills, cleaning your clothes and listening to you talk about how cool you thought you were. So before you save the rain forest from the parasites of your parent's generation, try delousing the closet in your own room.

Rule 8: Your school may have done away with winners and losers, but life HAS NOT. In some schools, they have abolished failing grades and they'll give you as MANY TIMES as you want to get the right answer. This doesn't bear the slightest resemblance to ANYTHING in real life.

Rule 9: Life is not divided into semesters. You don't get summers off and very few employers are interested in helping you FIND YOURSELF. Do that on your own time.

Rule 10: Television is NOT real life.. In real life people actually have to leave the coffee shop and go to their jobs.

Rule 11: Be nice to nerds. Chances are you'll end up working for one.

Tuesday, April 27, 2010

Turnip Griddle Cakes


From the kitchen of One Perfect Bite...I periodically have a taste for something outside my culinary comfort zone. It doesn't have to be gourmet or high-end, just different. Today was one of those days. Cabin fever, triggered by a rain of deluge proportions, sent me to my cookbooks. I was looking for a recipe, that while unusual, wouldn't involve a trip to the store and could be made from ingredients I had in my pantry or freezer. I had turnips that I wanted to use before they became fodder for the compost heap and I found a, new to me, recipe in Savoring America, a Williams-Sonoma cookbook. For whatever reason, I don't often cook turnips. I remember disliking them as a child and the only time I've used them as an adult was in a lovely, but fat-packed, turnip bisque. This offering is much healthier. I'm really happy to report that these unusual griddle cakes are fast, easy and really delicious. The crisp exterior masks a surprisingly creamy interior that is wonderfully flavorful. I certainly would make these again. Here's the recipe.

Turnip Griddle Cakes...from the kitchen of One Perfect Bite, courtesy of Williams-Sonoma's Savoring America

Ingredients:
2 packed cups peeled, shredded turnips (about 1 pound)
2 tablespoons + 1/4 cup melted butter, divided use
1 cup half-and-half (whole milk may be substituted)
1 large egg
1/2 teaspoon kosher salt
1 cup all-purpose flour
Garnish:
Sour cream (optional)
Minced fresh chervil (optional)

Directions:
1) Place turnips in a medium bowl. Toss with 2 tablespoons butter.
2) In another large bowl, beat half-and-half with egg and salt. Stir in flour and mix just to combine. Add turnips and fold until evenly coated.
3) Heat a large, heavy frying pan or griddle. Coat bottom with enough of reserved butter to prevent sticking.
4) For each griddle cake, spread a heaping spoonful of batter on grill to form a 3-inch cake. Fry, turning once, until both sides are a deep brown, about 5 minutes per side. Transfer to a platter and keep warm in a low oven until all batter has been used. Serve immediately with sour cream and chervil if desired. Yield: 20 to 24 3-inch cakes.

You might also enjoy these recipes:
Turnip Gratin - Poor Girl Gourmet
Scalloped Turnips - Simply Recipes
Turnip Cake - Appetite for China

Monday, April 26, 2010

Southwestern-Style Potatoes Roasted with Peppers and Herbs


From the kitchen of One Perfect Bite...
If you like roast potatoes, chances are you'll love this version which has a slightly Southwestern twist. The potatoes are topped with a medley of herbs and absorb additional flavor from three types of fresh peppers that roast along side them. There are a couple of tricks to making this dish work, but I assure you they are simple. To prevent the peppers and onions from releasing juices that would braise, rather than roast, the potatoes, hot becomes the operative word. The oven must be hot and the pan on which the vegetables roast must be hot enough to sizzle when the vegetables are dumped onto it. To assure a hot pan, place it in the oven as it preheats. Spray it with a nonstick vegetable spray or olive oil just before you place vegetables in it. Resist the temptation to oil the pan while it preheats. You'll end up with enough smoke to set off your alarms. This lesson comes from the been there, done that school of life which I've completed with high honors. These potatoes are a wonderful accompaniment to steaks and roasts and can make a plain meal sparkle with flavor. If I can get you to make them, I know they'll become a favorite of yours as well. While I make this with baby Yukon Gold, any small potato, including fingerlings, can be used with similar result. Leftovers can be warmed the following day and served with poached or fried eggs for a quick and easy feast. Here's the recipe for roast potatoes made new again.

Southwestern-Style Potatoes Roasted with Peppers and Herbs...from the kitchen of One Perfect Bite

Ingredients:

2-1/2 to 3 pounds small new potatoes, cut in half lengthwise
1 large red bell pepper, cut in 1/2-inch dice
1 large poblano pepper, cut in 1/2-inch dice
1 large jalapeno pepper, stemmed, seeded and cut in very thin crosswise slices
1 large sweet onion cut into 1/2-inch chunks
2 teaspoons dried basil
1 teaspoon dried thyme
1 teaspoon sweet smoked Spanish paprika (pimenton)
1 heaping teaspoon kosher salt
1/2 teaspoon coarsely cracked black pepper
1/4 cup extra virgin olive oil
1 tablespoon Worcestershire sauce
Juice of 1 large lemon

Directions:
1) Place a large baking sheet into oven. Preheat the oven to 425 degrees F.
2) Place potatoes, red pepper, poblano pepper, jalapeno pepper, sweet onion, basil, thyme, paprika, salt, pepper, olive oil, Worcestershire sauce and lemon juice in a large bowl and toss well to coat all ingredients. Quickly spray hot pan with nonstick spray. Dump potato mixture in a single layer onto pan. Return to oven.
3) Bake, turning mixture every 15 minutes, until potatoes are soft and brown, about 50 minutes. Yield 6 to 8 servings.

You might also enjoy these recipes:
Savory Roasted Potatoes for a Crowd - One Perfect Bite
Mustard Glazed Potatoes - One Perfect Bite
Caramelized Potatoes (Brunede Kartofler )- One Perfect Bite

Sunday, April 25, 2010

Goat Herder's Mac 'N' Cheese - Blue Monday


Mustard Field - Alvadore Oregon


From the kitchen of One Perfect Bite...If goat herder's actually made mac 'n' cheese this is what they'd eat. This creamy pasta is made from goat's milk and chevre with bits of hot pepper and tomato added for a splash of color. I've used small shells as a vehicle to capture the lovely sauce the macaroni is warmed in, but any pasta could be used. Those who love the crunch of a classic mac 'n' cheese will probably be disappointed with this version, but anyone who is willing to experiment and is looking for a new approach to an old favorite will be pleased. Goat's milk has a salty undertone and is a bit sweeter that cow's milk. While the milk is not popular in the United States, it is the milk of choice in other parts of the world. You should be able to find it in most large grocery chains or in the dairy section of health food stores. This version of mac 'n' cheese is assembled from fully cooked ingredients that are combined and warmed just before serving. The final dish is creamier than it's more common counterpart and it is wonderful as a side with plain grilled meat or poultry. It is very rich so keep serving portions slight smaller than you would normally serve. This is a lovely pasta and, fortunately, it is also easy to do. While I doubt you'll have to worry about leftovers, they will keep for several days if well-wrapped and refrigerated. I hope you'll give this a try. Here's the recipe.

Goat Herder's Mac 'N' Cheese
...from the kitchen of One Perfect Bite

Ingredients:

3 cups goat's milk
1/2 teaspoon kosher salt
1/4 teaspoon freshly ground black pepper
2 tablespoons butter
2 tablespoons all-purpose flour
Juice of 1/2 lemon
1 jalapeno pepper, seeded and very finely diced
1 large Roma tomato, seed and very finely diced
4 ounces crumbled goat cheese
8 ounces cooked shells or other small pasta

Directions:
1) Place goat's milk, salt and pepper in a 3-quart sauce pan and bring to a simmer. Simmer until reduced by one-third. Lower heat and keep warm.
2) Combine butter and flour in a small skillet and whisk over moderate heat until a roux forms. Whisk into goat's milk. Bring mixture back to the simmer and cook until sauce thickens. Adjust salt and pepper to taste. Stir in lemon juice, jalapeno, tomato, cheese and pasta and cook until cheese melts and pasta is warmed through. Again check for seasoning. Serve hot. Yield: 4 to 5 servings.

You might also enjoy these recipes:
Truffled Mac 'N' Cheese - One Perfect Bite
Chili-Mac Skillet - One Perfect Bite
Heaven-Sent Macaroni and Cheese - Food Blogga
Caramelized Shallots and Sage Mac and Cheese - Nosh and Tell
Mac and Cheese to Please - The Life and Loves of Grumpy's Honeybunch
Quick Macaroni and Cheese - I'm Running to Eat

This post is being linked to:
Smiling Sally - Blue Monday

Pink Lemonade Granita - Pink Saturday


From the kitchen of One Perfect Bite...Years ago, some folks affectionately named their cars. It was throwback to the days when horses pulled the family wagon. I came from that kind of family and, to this day, cars in our family are given names. I call mine Bessie. I must admit that I've carried the naming of inanimate object even further. My computer also has a name. We call her Carmen. I've just brought Carmen back from a 48 hour stay in the emergency room at the Geek Squad hospital. She's a headstrong flirt and, despite repeated warnings, she invited trouble with a virus that seems to have come from Facebook. She has been very, very sick but the guys brought her back from the brink of self-destruction and she's lived to blog another day. Beware of requests that come from Facebook, especially those that pop-up and ask if you want to share or approve a new follower. The request may or not be legitimate. I'm now a couple of hundred dollars in the hole but a lot wiser than I was on Friday. Carmen has been grounded. This is probably the latest Pink Saturday post since the inception of the meme. I am sorry, but it could not be helped. Today's feature is a simple palate cleanser that I think you'll enjoy. Let's get right to it. Here's the recipe.

Pink Lemonade Granita...from the kitchen of One Perfect Bite, courtesy of Nicole Plue

Ingredients:

1-1/2 cups water
3/4 cup plus 2 tablespoons granulated sugar
3/4 cup fresh lemon juice (from 3 to 4 lemons)
2 teaspoons grenadine

Directions:

1) Combine water, sugar, lemon juice, and grenadine in a medium bowl. Stir with a large spoon or whisk until sugar has thoroughly dissolved, about 1 minute.
2) Pour mixture into a 9-inch-square shallow baking pan. This pan size works best ­because it provides a large surface area, a key point in speeding up freezing process. To further hasten freezing, use a metal pan (metal conducts cold well).
Put pan in freezer and stir every 30 minutes, being sure to scrape ice crystals off sides and into middle of pan, until mixture is too frozen to stir, about 3 hours, depending on how cold your freezer is (some granitas can freeze in as ­little as 1 hour). Use tines of a large dinner fork to stir, scrape and break up ice crystals.
3) Cover pan with plastic and freeze over­night. When ready to serve granita, place a fork at the top of the dish and pull it toward you in rows, moving from left to right ­and ­rotating the pan as well. Scape up the shaved ice and fill your chilled glasses or bowls. Yield: 4 cups shaved ice.

This post is being linked to:
Pink Saturday, sponsored by Beverly at How Sweet the Sound.

Thursday, April 22, 2010

Lime and Coconut Chicken


From the kitchen of One Perfect Bite...I had a lovely surprise today. I, quite by chance, discovered that One Perfect Bite had been featured, along with seven other blogs, in the prestigious Food Journal News:Best of the Blogs segment. My yelp and holler nearly scared Bob to death and were admittedly undignified for a woman my age, but they were a sincere measure of my excitement and delight. Those of you who have followed my blog from its inception, know that while I'm generally modest, I occasionally succumb to what I call powder pigeon moments. This was one of them, but I recovered quickly and went on to scrub the bathroom floor. Fame is fleeting and housework is a great equalizer. Now to the real find of the day. The Journal also selects a recipe each day and today's feature looked wonderful. It was Lime and Coconut Chicken from Chaos in the Kitchen, a blog that was new to me. I linked to the blog and discovered this and other wonderful recipes. What a treat! I urge those of you who are unfamiliar with Katie's work to visit her blog. You won't be disappointed. As it happened, I had everything needed to make the dish and it became tonight's dinner. I think you will really like this chicken. Bob loved it and he isn't always easy to please. My only suggestion would be to cut back slightly on the amount of salt you use. Another afterthought regards the sauce that is used in the recipe. I would double it. Until recently, we were told that marinades could be used for saucing if they were boiled for five minutes. Apparently, the ubiquitous "they" now feel this is not sufficient to kill contaminants that might cause food poisoning. The final choice is, of course, up to you. Here's the recipe. Enjoy!

Lime and Coconut Chicken
...from the kitchen of One Perfect Bite, courtesy of Chaos in the Kitchen and Fine Cooking, Winter 2006

Ingredients:
2 pounds boneless, skinless chicken breasts
3 tablespoons vegetable oil
Zest of 1 lime
1 teaspoon ground cumin
1-1/2 teaspoons ground coriander
2 tablespoons soy sauce
1-1/2 teaspoons kosher salt (I used 1-1/4 teaspoons)
2 tablespoons granulated sugar
2 teaspoons curry powder
1/2 cup coconut milk
Pinch cayenne (I did not use this)
1 small fresh hot chili, such as Thai or Serrano, minced (optional)
1/4 cup chopped fresh cilantro
Fresh limes, cut into wedges

Directions:
1) Trim fat from chicken breasts. Starting on thick side of the breasts slice chicken breasts almost in half, then open each like a book. Place each open breast between two pieces of plastic wrap, wax paper or inside a large, open, Ziploc bag. Using a small heavy pan, bottle or smooth meat mallet lightly pound out each breast into even thickness.
2) Mix all remaining ingredients except fresh cilantro and lime wedges.
3) Add chicken and marinade to a large bowl or ziploc bag and chill in refrigerator for up to two hours.
4) Remove chicken from marinade. Pour the marinade into a small saucepan and bring to a rolling boil. Boil continuously for at least 2 minutes, stirring occasionally so it doesn’t burn.
5) In a heavy skillet or grill pan, heat a splash of oil over high heat. Cook chicken in batches to prevent over crowding in pan. Place breasts in the hot pan and cook without turning for a couple minutes. Flip breasts over and cook until other side is golden, it shouldn’t take long depending on the thickness of your chicken.
6) Place cooked breasts on a plate in a warm oven or under foil while cooking next batch.
7) Sprinkle with fresh lime juice and cilantro. Serve sauce separately. Yield: 4 servings.

You might also enjoy these recipes:
Yucatan-Style Chicken, Lime and Orzo Soup - One Perfect Bite
Tom Kah Gai - One Perfect Bite
Chicken with Lemon and Rosemary - One Perfect Bite

This recipe is being linked to:
Designs By Gollum - Foodie Friday

Wednesday, April 21, 2010

Old-Fashioned Applesauce Cake


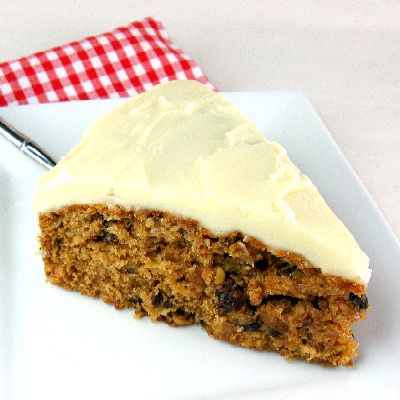
From the kitchen of One Perfect Bite...An egg salad sandwich began the reverie that led me to this cake. My love affair with egg salad began in elementary school, soon after the second world war ended. It wasn't something that appeared on rationed tables, so this pedestrian sandwich was a real treat once eggs again became available. During the war years, eggs were precious and saved for special occasions. Popular cakes used few or no eggs and were sweetened with small amounts of sugar extended with pureed fruit or fruit syrup. Adults, as I remember it, really enjoyed this cake. It was chock full of dried fruits and nuts and had a holiday air about it that brightened those bleak times. It's probably no surprise to learn that this cake had less appeal for children. During the war years, the cake was dusted with sugar rather than frosted, but the original recipe called for a powdered sugar icing which is delicious. As you read through the ingredient list, you'll be able to see that a cream cheese frosting would also be wonderful with this cake. Purists still make the cake with homemade applesauce but a thick commercial variety can be used by those pressed for time. I know that's most of us. These days this treat falls more into the category of snack cakes. It is very easy to make and I think you'll enjoy it. Like all cakes of this type, it is better when allowed to sit a day or two and it stays moist if well wrapped. Here's the recipe.

Old-Fashioned Applesauce Cake...from the kitchen of One Perfect Bite

Ingredients:
Cake
1/2 cup raisins
1/2 cup currants
1/2 cup chopped walnuts
1-1/2 cups sifted all-purpose flour, divided use
1/2 cup unsalted butter, softened
1 cup granulated sugar
1 large egg
1 teaspoon baking soda
1/2 teaspoon baking powder
1/2 teaspoon ground nutmeg
1/2 teaspoon ground cloves
1 teaspoon cinnamon
1-1/4 cups thick applesauce
Frosting:
1/4 cup unsalted butter, softened
1-1/2 teaspoons vanilla extract
3 cups sifted confectioners' sugar
3 to 4 tablespoons cream or milk

Directions:
1) Preheat oven to 350 degrees F. Grease and flour 9-inch spring form pan. Set aside.
2) Combine raisins, currants and walnuts in a small bowl. Add 1/4 cup flour and mix well. Set aside.
3) Beat butter in bowl of an electric mixer until light and fluffy. Slowly add sugar. When incorporated add egg and mix to combine.
4) Sift remaining 1-1/4 cup flour with baking powder, baking soda, nutmeg, cloves and cinnamon in a large bowl. Add flour mixture to batter in 3 parts, alternating with applesauce. Stir in raisin-currant and nut mixture.
5) Spoon batter (it will be thick) into prepared springform pan. Bake until toothpick inserted in center comes out clean, about 50 minutes. Cool in pan on a wire rack. Remove sides of pan.
6) While cake cools, beat butter with vanilla in bowl of an electric mixer. Slowly add sugar, beating until mealy. Add just enough cream to make icing spreadable. Spread over top and sides of cooled caked. Yield 8 to 10 servings.

You might also enjoy these recipes:
Apfel Sahne Torte - One Perfect Bite
One Bowl Gluten-Free Spice Cake
Okanagan Apple Bread - One Perfect Bite

Tuesday, April 20, 2010

Frittata with Spring Herbs and Leeks


From the kitchen of One Perfect Bite...I so look forward to the opening of our Saturday Market and farm stands. Their first offerings are paltry and pretty much limited to root vegetables, but the color and attractive displays really get my blood running and my mind spinning with thoughts of what's to come. It also adds an interesting dimension to our Saturday morning and offers the opportunity to visit with friends and acquaintances who have been hibernating for the winter. My first purchases are small. A peek in my basket would show carrots, white turnips, mushrooms, some fresh herbs and leeks. The leeks are spectacular. They are long and narrow, the kind you know will be sweet and add great flavor to any meal. I took one look at them and immediately started menu planning. I decided to make a frittata that uses both leeks and spring herbs. This is an extremely flavorful dish and I think those of you who enjoy robustly flavored food will love this. It's a great dish for brunch or a light supper and it's also very easy to do. Here's the recipe I use for a lovely spring frittata.

Frittata with Spring Herbs and Leeks
...from the kitchen of One Perfect Bite inspired by Willama-Sonoma

Ingredients:

2 tablespoons butter
4 cups thinly sliced leeks, white and tender green
Salt and pepper to taste
6 large eggs
1/2 cup mixed minced parsley, basil and mint
1/4 cup grated Parmesan cheese

Directions:
1) Melt butter in a large nonstick skillet set over medium heat. Add leaks, season with salt and pepper, and saute until softened, about 15 minutes.
2) Beat eggs in a large bowl. Whisk in herbs, cheese and a pinch of salt. Pour into skillet, stirring quickly to distribute leeks evenly. Reduce heat to low and cook very slowly until sides of eggs are set but center is still a bit moist, about 15 minutes.
3) Preheat broiler. When eggs are set, place skillet under broiler several inches from heat source and broil until top is lightly colored and center firm, about 1 minute. Slide frittata onto a board or serving plate. Cut into wedges. Serve warm. Yield: 4 servings.

You might also enjoy these recipes:
Smoked Salmon Frittata - One Perfect Bite
Tortilla Espanola - One Perfect Bite
Individual Baked Omelet - One Perfect Bite
Squash and Tomato Oven Baked Frittata - The Recipe Girl
Fresh Thyme and Vegetable Frittata - Iowa Girl Cooks
Asparagus and Fresh Mozzarella Frittata - Kalyn's Kitchen

Monday, April 19, 2010

Salmon Soup with Tomato and Dill


From the kitchen of One Perfect Bite...This is another light soup developed to span the seasons. It's substantial enough for a meal but lacks the heaviness associated with winter soups and chowders. It's often served in fishing camps and it's familiar to folks who live in Oregon and Washington, especially those who live on the islands in San Juan archipelago. This is really simple to assemble and its another great way to use the tail ends of whole salmon. The one ingredient that might cause some consternation is the fish stock. It can, of course, be purchased, but there are less expensive alternatives that can be used. Bottled clam juice, diluted with an equal measure of water, is the easiest alternative, but my favorite substitute is a light broth made from shrimp shells. We have shrimp frequently and rather than throw the shells away I freeze them until I need fish stock. I simply cover the shells with cold water, bring it to a boil and simmer for about 30 minutes. Once strained, it makes a perfect stock for soup. I keep the other ingredients in this soup to a minimum so the flavor of the salmon stays the star. If you prefer a thicker soup, puree a portion of the soup, just before adding the salmon. Here's the recipe for this spring favorite.

Salmon Soup with Tomato and Dill...from the kitchen of One Perfect Bite

Ingredients:
2 tablespoons butter
1-1/2 cups finely chopped onion
1 teaspoon minced garlic
3 cups fish stock
1 cup chicken stock
1-1/2 cups crushed tomatoes
1/2 teaspoon sugar
1/8 teaspoon died thyme
2 cups cubed potato
1 teaspoon lemon juice
12-oz. salmon, cut into 1/2-inch pieces
3 tablespoons chopped fresh dill or parsley

Directions:
1) Melt butter in 4-5 quart saucepan or soup pot over medium heat. Add onions and saute for 5 to 6 minutes. Stir in garlic and cook until fragrant, about 1 minute longer. Add fish stock, chicken stock, tomatoes, sugar and thyme. Bring to a boil, reduce heat and cook, uncovered, for 5 minutes. Add potatoes, lemon juice and salt and pepper to taste. Cook, covered, until potatoes are tender but still retain their shape, about 12 minutes.
2) Stir salmon into soup and cook until fish flakes easily, about 3 to 4 minutes. Sprinkle with dill. Yield: 4 servings.

You might also enjoy these recipes:
Spring Salmon and Leek Soup - One Perfect Bite
Salmon Chowder - One Perfect Bite
Shrimp Chowder - One Perfect Bite
How to Make Shellfish Stock - Simply Recipes
Homemade Italian Shrimp Stock - New Italian Recipes

Sunday, April 18, 2010

Eggs in Purgatory - Blue Monday


...and my favorite "blue" boys


From the kitchen of One Perfect Bite...What do you have for dinner after a day of hiking in paradise? Ever the contrarian, I settled on a dish called Uova in Purgatorio, or Eggs in Purgatory. This remarkably versatile Neopolitan dish is the poor man's version of Eggs Benedict. It consists of eggs that are "poached" or baked in a spicy tomato sauce and then spooned over a base that is limited only by the imagination of the cook. I was particularly unadventurous tonight and served ours on thick crusty slices of Portuguese bread. Giada De Larentis has a version of the eggs that she serves on mashed potato cake. It sounds wonderful and I'm sure it's delicious, but this is one of my go-to meals for days where the clock has run out and we have yet to eat. The potatoes would edge the dish into a category more substantial that I wanted to deal with. I'll admit it. I settled, but in doing so I kept the focus of the dish of a wonderful puttanesca sauce and perfectly poached or baked eggs. The eggs absorbed the flavor of the sauce as they cook, so what would seem to be a bland choice for a meal actually becomes something that can excite the palate. While I love this dish made with puttanesca sauce, any good tomato sauce, even the kind that comes in a jar, can be used without compromising your results. This, by the way, is a wonderful choice for a brunch. It can be assembled the night before it's needed and baked off just before serving. Here's a recipe that would make even Dante happy.

Eggs in Purgatory...from the kitchen of One Perfect Bite and countless Neopolitan peasant tables

Ingredients:
Puttanesca Sauce
2 tablespoons olive oil
1 tablespoon minced garlic
1/4 to 1 teaspoon red pepper flakes
1 heaping tablespoon anchovy paste or 1 tablespoon minced canned anchovies
1 can (28-oz) crushed tomatoes
3 tablespoons capers, rinsed and drained
1/2 cup kalamata olives pitted and coarsely chopped
1/4 cup fresh minced parsley
4 - 8 whole eggs
4 - 8 thickly sliced peasant bread
Optional: 1/4 cup grated Parmigiano Reggiano cheese
Directions:

1) To make Puttanesca sauce: Heat 2 tablespoons olive oil in a large skillet set over medium heat. Add garlic, pepper flakes and anchovies to pan and cook just until garlic is fragrant. Stir in tomatoes and simmer for 10 minutes. Add capers, olives and parsley and heat to warm through. Season to taste with salt and pepper.
2) Meanwhile, preheat oven to 375 degrees F. Transfer sauce to a baking pan large enough to hold whatever number of eggs you are using. Crack eggs onto surface of sauce, keeping the eggs yolks intact. Whites may overlap but that's fine. Bake uncovered for 12-15 minutes, until whites are set and yolks are still a bit runny. Add bread to oven about five minutes before eggs finish cooking. Serve eggs over toast and sprinkle lightly with Parmesan cheese. Drizzlw with olive oil and serve hot. Yield: 4 to 8 servings.

You might also enjoy these recipes:
Oven Baked Scrambled Eggs - One Perfect Bite
Piperada Bocadillo - One Perfect Bite
Individual Baked Omelets - One Perfect Bite
Eggs in Purgatory - Serious Eats
Eggs in Purgatory - A Feast for the Eyes

This post is being linked to:
Smiling Sally - Blue Monday

Saturday, April 17, 2010

Greek-Style Flatbread Pizza


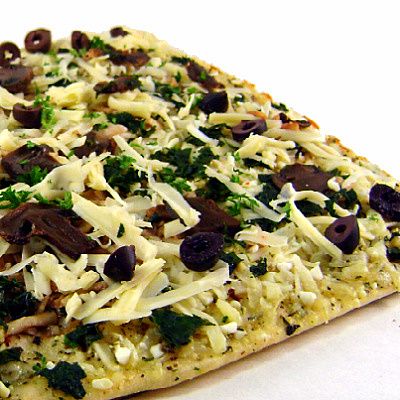
From the kitchen of One Perfect Bite...It was a wonderfully busy day today. We headed into the Lorane Valley to look at property and on our way back stopped for a quick visit with friends who have just opened their nursery and farm stand for the season. We did a quick walk through of our Saturday Market and had a very late lunch at a favorite local Thai restaurants. By the time we reached home the sun had set and we knew that dinner would be light and late. I decided to make Greek pizzas that use lavash as a base for Mediterranean-style ingredients. They are much lighter than their doughy cousins and I actually prefer the thin crisp crust to that of a standard pizza. These are easy to do. If you don't care for the Greek version, use standard pizza ingredients or better still use the flatbread for a wonderful pissaldiere. I think many of you will like this light pizza. Here's the recipe.

Greek-Style Flatbread Pizza
...from the kitchen of One Perfect Bite

Ingredients:
1 soft lavash bread
3 tablespoons olive oil
1/2 cup minced pitted Kalamata olives
1 cup grated Monterey Jack cheese
1-3/4 cups crumbled feta cheese
1-1/2 cups baby spinach, wilted
1-1/2 cups thinly sliced cremini mushrooms

Directions:

1) Preheat broiler. Place lavash on large baking sheet; brush with 1 1/2 tablespoons oil and broil until it begins to crisp, about 1 minute.
2) Reduce oven temperature to 450 degrees F. Turn lavash over on baking sheet, broiled side down. Brush with remaining 1-1/2 tablespoons oil. Sprinkle with Monterey Jack and feta cheese. Top with wilted spinach, olives and mushrooms. Sprinkle with salt and pepper. Using a wide spatula, slide lavash dierectly onto an oven rack. Bake until pizza is heated through and cheeses melt, about 5 to 7 minutes. Cut into squares. Yield 2 to 3 servings.

You might also like these recipes:
Mexicali Pizza - One Perfect Bite
Focaccia Bread - One Perfect Bite
Whole Wheat Olive Bread - One Perfect Bite

Friday, April 16, 2010

Papaya-Lime Fool - Pink Saturday


From the kitchen of One Perfect Bite...I'm really a mango person, but when life gives you papayas.....deal with it! Several days ago, a well-meaning friend gave me several red-hued papayas. It is not my favorite fruit for eating out of hand, so, I fell back on a recipe that I've had for years but rarely use. I decided to play the fool. While that's a role I relish and play well, I'm really talking about a Papaya Fool. This is an old-fashioned, but delicious dessert, that came to the Americas from England. It is a mixture of strained pureed fruit that is chilled and then folded into whipped cream. It's thought that the name comes from the French verb, fouler, which means to crush or press, though many would argue the point. These days any fruit can be used to make a fool, but in England the gooseberry was the fruit usually associated with this classic dessert. I know that many of you are not keen on using heavy cream in your desserts. A whipped topping will work here, but the finished fool will lack creaminess and feel different on the tongue than the real deal. If you are looking for a dessert that will bring the flavors of the Caribbean to your table you might like to try this. It's nice. It won't make your socks go up and down but it really is a pleasant dessert. The version of the recipe I use comes from Gourmet magazine. Here it is.

Papaya-Lime Fool...from the kitchen of One Perfect Bite Courtesy of Gourmet Magazine

Ingredients:
1 large (2 1/2- to 3-lb) firm-ripe papaya (preferably Caribbean or Mexican), peeled, seeded, and coarsely chopped (2 cups)
5 to 8 tablespoons vanilla granulated sugar (see cooks' note, below)
2 to 3 tablespoons fresh lime juice
1-1/4 cups chilled heavy cream

Directions:
1) Mash papaya flesh with a fork until smooth or pulse in a food processor until coarsely puréed. Add 5 tablespoons sugar and 2 tablespoons lime juice and stir or pulse to combine. Add more sugar and lime juice to taste (papayas vary in sweetness and acidity).
2) Beat cream in a large bowl until it holds soft peaks, then fold in papaya mixture gently but thoroughly.
3) Divide among 8 (6-ounce) glasses and chill at least 1 hour to allow flavors to develop.

Cooks' note: To make vanilla granulated sugar, combine sugar and 1 vanilla bean, halved lengthwise and chopped, in an airtight container and let stand, covered, at least 24 hours. Sift before using.

You might also like these recipes:
Old-Fashioned Blackberry Pudding - One Perfect Bite
Raspberry Yogurt Parfait - One Perfect Bite
Apricot Souffle - One Perfect Bite

This post is being linked to:
Pink Saturday, sponsored by Beverly at How Sweet the Sound.
Thursday, April 15, 2010

Chili Los Mariscos


From the kitchen of One Perfect Bite...This chili is a great way to use frozen shrimp and scallops. In the grand scheme of things, it's not hard to do and its a great way to waken tired taste buds. I am always leery of recipes that put delicate seafood in heavy or spicy sauces that are bound to overwhelm its lovely briney taste. This is a mild chili and you can add heat using pepper flakes, cayenne pepper, hot sauce or chipotles in adobo sauce. I prefer to use red pepper flakes or a bit of mashed chipotles in this dish. There is a harshness to cayenne and hot sauce that I find unpleasant when used with seafood. There is a bit of chopping and some wait time required to make this dish. The fish is marinated in a seviche type dressing for about an hour. While it stews the chili in which the fish will cook can be made. Any type of firm fleshed fish can be used to make this dish. I prefer to use shrimp and scallops because I love their texture. The only trick to making this dish work is to have the vegetables and seafood in pieces that are approximately the same size to ensure even cooking. I serve this over a mound of white or yellow rice in shallow soup bowls. I think you'll like this dish. Here's the recipe.

Chili Los Mariscos
...from the kitchen of One Perfect Bite

Ingredients:

1/2 pound large raw shrimp, shelled and deveined
1/2 pound sea scallops
2 limes, peeled and thinly sliced
1 tablespoon + 1/2 teaspoon chili powder, divided use
1 tablespoon + 1/2 teaspoon ground cumin, divided use
1/4 cup chopped fresh cilantro, divided use
4 teaspoons minced garlic, divided use
1 fresh serrano chile, seeded and finely chopped
1/4 cup vegetable oil, divided use
1 medium onion, coarsely chopped
1 large red bell pepper seeded and roughly chopped
1 yellow bell pepper, seeded and roughly chopped
1/4 teaspoon ground cloves
Pinch of cinnamon
1/4 to 1/2 teaspoon red pepper flakes or 1/2 teaspoon mashed chipotle in adobo sauce
Salt and pepper
1-1/2 cups fish stock
1 (14-oz.) can Mexican-style stewed tomatoes
1 (14-oz.) can red kidney beans, drained and rinsed
2 cups hot cooked rice

Directions:
1) Place shrimp, scallops and lime slices in a large bowl. Add 1/2 teaspoon chile powder, 1/2 teaspoon ground cumin, 2 tablespoon cilantro, 2 teaspoons minced garlic, chopped chile and 2 tablespoons oil and toss to coat. Cover. Let sit at room temperature for one hour. Set aside.
2) Meanwhile, heat 1 tablespoon oil in a large skillet set over medium-high heat until it shimmers. Add onions, reserved 2 teaspoons garlic, red and yellow peppers
and cook over low heat until soft, about 5 minutes. Add remaining 1 tablespoon oil, reserved 1 tablespoon chile powder, reserved 1 tablespoon cumin, cloves, and pepper flakes or mashed chipotle. Season to taste with salt and pepper. Cook for 5 minutes. Add stock and stewed tomatoes and cook, partially covered, for 25 minutes.
3) Add beans to tomato mixture and spoon fish or shell fish on top. Cover and cook for 10 minutes longer, or until fish is cooked through. Divide rice between four bowls. Spoon chili over rice. Sprinkle with remaining cilantro. Yield: 4 servings.

You might also enjoy these recipes:
Camarones a la Mexicana - One Perfect Bite
Chocolate and Black Bean Chili - One Perfect Bite
Vegetable and Black Bean Chili - One Perfect Bite

Wednesday, April 14, 2010

Chocolate Babka


From the kitchen of One Perfect Bite..."The Queen is dead. Love live the Queen." I've long fancied myself a babka expert. It was a proud product of the Swedish and German kitchens in which I leaned to cook and I became reacquainted with it as a bride living in the South Shore and Hyde Park areas of Chicago. For the uninitiated, babka is a sweet bread that is a bit like a light textured coffee cake. It is made from a butter rich dough that rises slowly and is then rolled around a filling of nuts, fruit or chocolate. Traditional versions of the bread originally came from the shtetls of Eastern Europe and were filled with fruit and nuts. The more popular modern versions is filled with a nut paste and really good chocolate. Last week I had some extra time and was surfing through some blogs that had been recommended to me. One of them was Trissalicious. It happened that a chocolate babka from the "Australian Gourmet Traveller" was being featured and it looked gorgeous. I was, of course, hooked and it was just a matter of time before I tried the recipe. This is its maiden voyage and I'm really happy to report that it is delicious. The chocolate and hazelnut filling is marvelous, but the dough is what makes this loaf stand head and shoulders above any I've had to this point. It is quite simply wonderful. It should be served warm if at all possible. The babka will stay fresh for about 3 days if it is properly wrapped. I hope you will try this. Here's the recipe.

Chocolate Babka
...from the kitchen of One Perfect Bite courtesy of Trissalicios and Australian Gourmet Traveller

Ingredients:
3/4 cup lukewarm milk
4-1/2 teaspoons active dry yeast
1/2 cup granulated sugar, divided use
1/4 teaspoon salt
3-1/4 cups all-purpose flour
2 whole eggs + 1 egg yolk
1 cup softened butter, divided use
1 cup coarsely chopped, toasted hazelnuts
1 bar (4-oz.) dark or bittersweet chocolate, coarsely chopped
For glaze:
Eggwash
Coarse sugar

Directions:
1) Combine milk, yeast and 1 tablespoon sugar in bowl of a stand mixer fitted with a paddle attachment. Let sit until foamy, about 5 minutes. Add 1/2 cup flour and mix on low speed to combine. Add whole eggs and yolk, reserved sugar and salt and mix to combine. Turn mixer to low speed. Gradually add reserved flour. When combined, add 2/3 cup butter, a little at a time, beating until smooth and elastic, about 5 minutes. Turn soft dough into a greased bowl, cover, and let rise until double in bulk, about 1-1/2 hour.
2) Place hazelnuts in a food processor with reserved 1/4 cup butter. Process until a paste is formed. Set aside.
3) Grease 2 (3-1/2 x 8-inch) loaf pans. Line bottom with parchment paper and grease again. Punch dough down and divide into two pieces. Working with one piece at a time, roll dough on a lightly floured surface to an 8 x 14-inch rectangle. Working from long side nearest you, spread half the hazelnut paste over dough to within 1-1/2 inches of all sides. Scatter with half of chopped chocolate. Roll into a cylinder, brush ends with eggwash and join ends to form a loop, then twist into a figure eight and place in prepared pan. Repeat with remaining dough. Cover pans with plastic wrap and let rise until loaves reach top of pans, about 1 hour.
4) Preheat oven to 350 degrees F. Brush loaves with eggwash and sprinkle with coarse sugar. Bake for 35 to 40 minutes. Remove from oven. Let cool in pans for 10 minutes before turning onto cooling racks. Serve warm or at room temperature. Yield: 2 loaves.

This post is being linked to:
Wild Yeast - Yeast Spotting

You might also enjoy these recipes:
Sugar Crusted Viennese Nut Bread - One Perfect Bite
Very Berry Lemon and Blueberry Sweet Bread - One Perfect Bite
Lemon Poppyseed Bread - One Perfect Bite

Tuesday, April 13, 2010

Corn and Edamame Succotash - Outdoor Wednesday


...and for Outdoor Wednesday, covered bridges.


More covered bridges of Lane County Oregon can be seen
here.
From the kitchen of One Perfect Bite..."Sufferin' succotash!" I loved it as a child when it was made with lima beans and I love it now when it's made with edamame. American Indians taught the colonists how to make this dish. We can be pretty certain that they didn't use lima beans in those early versions because the beans, brought here by Europeans from South America, weren't native to North America. They did, however, have other types of beans at their disposal and they used used what was locally available. Over time, other regional additions were made to the mixture. Purists, and I happen to be one of them, insist the dish should be made only with corn, shell beans, butter and cream. Unfortunately, it had been so ineptly prepared and served, that millions remember it as the bad joke that sat in a cafeteria steam table throughout much of the 20th century. Efforts to improve its flavor led to the addition of other vegetables and it became a hodepodge of waring elements. We owe the green movement and its push for simplicity for restoring the dish to its original elements. The only trick to preparing succotash is to make sure the vegetables are cooked, but still retain a bit of crispness. Undercooked they are like rabbit pellets and overcooked they are like mush. The use of edamame has taken a nice dish and made it really special. This is the kind of supper that I make for my self when Bob is traveling. It's very easy to do and quite delicious. Here's the recipe.

Edamame and Corn Succotash...from the kitchen of One Perfect Bite

Ingredients:

1 tablespoon butter or vegetable oil
1-1/2 cups cooked corn kernels
1-1/2 cups shelled, cooked edamame
1/4 cup cream or half-and-half
1 teaspoon salt
1/4 teaspoon freshly ground pepper
Optional garnish: diced red bell pepper or finely chopped parsley

Directions:
Place butter in a large skillet and melt over medium heat. Add corn, edamame and cream. Cook, stirring constantly, until mixture is warmed through. Do not let the mixture boil. Add salt and pepper. Garnish with bell pepper or parsley if using. Serve warm. Yield: 4 servings.

You might also enjoy these recipes:
Brown Buttered corn with Basil - One Perfect Bite
Corn Salad with Edamame and Tomatoes - One Perfect Bite
Golden Corn and Potato Mash - One Perfect Bite

This is being linked to:
Outdoor Wednesday - A Southern Daydreamer

Covered Bridges of Lane County Oregon


Galen Fry Singer

Centennial Covered Bridge


Galen Fry Singer

Currin Covered Bridge


Galen Fry Singer

Dorena Covered Bridge


Galen Fry Singer

Earnest Covered Bridge


Galen Fry Singer

Good Pasture Covered Bridge


Galen Fry Singer

Lowell Covered Bridge


Galen Fry Singer

Office Covered Bridge


Galen Fry Singer

Wendling Covered Bridge

Monday, April 12, 2010

Spring Salmon and Leek Soup


From the kitchen of One Perfect Bite...
I was digging through my freezer today, searching for the last vestiges of some salmon I knew was hiding at the bottom. Salmon season is here and it's time to use the old to make room for the new. It proved to be a good day to undertake the search. The arctic blasts of winter are past, but our weather can still be unpredictable. Late this afternoon, our glorious weather changed and we had a fierce, if short, hail storm followed by heavy rains and rapidly dropping temperatures. It turned into a perfect day for soup. I used the tail ends of the resurrected salmon, quite literally, to make two soups we love. Both are fast, simple and light. They are what I call cusp soups. They are much lighter than the heavy soups of winter but have enough substance to make a meal. I thought we'd do one of them tonight and the other next week. This is the lighter of the two soups and it's my personal favorite. The recipe calls for fish stock. I make mine from shrimp shells that I freeze until I need stock. You can also dilute bottled clam with water to make a serviceable fish stock. Here's the recipe for a light and lovely salmon soup that's perfect for spring.

Spring Salmon and Leek Soup
...from the kitchen of One Perfect Bite

Ingredients:
1 tablespoon vegetable oil
1 cup finely chopped onion
3 large leek, white and tender green, sliced
1 large potato, diced
2 cups fish stock
3 cups water
1 bay leaf
Salt and pepper
3/4 pound skinless salmon cut into 1/2-inch cubes
1/3 cup cream or half and half
Optional: lemon juice, parsley for garnish

Directions:

1) Heat oil in a heavy bottomed soup pan over medium heat. Add onions and leeks and cook until softened, about 5 minutes.
2) Add potatoes, fish stock, water, bay leaf and a large pinch of salt to pan. Bring to a boil, reduce heat, and simmer, covered, until vegetables are tender, about 30 minutes. Remove bay leaf.
3) Let soup cool slightly. Transfer half of soup solids to a blender and puree until smooth. Be careful not to burn yourself. Return to pan. Heat soup to a simmer. Season salmon with salt and pepper. Add salmon to soup and cook until tender, about 5 minutes. Stir in cream. Adjust to taste with salt, pepper and lemon juice. Ladle into soup bowls and garnish with parsley. Serve warm. Yield: 4 servings.

You might also enjoy these recipe:

Tortilla Soup - One Perfect Bite

Yucatan-Style Soup with Chicken, Lime and Orzo - One Perfect Bite
Roasted Yellow Pepper Soup - One Perfect Bite

Sunday, April 11, 2010

Black-Eyed Pea Casserole - Blue Monday


Photo Courtesy of EV Photos

From the kitchen of One Perfect Bite...Barbecue season is rapidly approaching and with it come large gatherings of family and friends. This casserole is wonderful for picnics, barbecues or covered dish suppers. It was develop years ago for my Southern son-in-law who, as luck would have it, has yet to taste it. It is an economical dish and that makes it perfect for church suppers or organization picnics. Anyone who has ever managed one of these affairs knows the importance of foods that are inexpensive and allow dollars to be stretched as far as possible. The black-eyed pea, which is actually a bean, originated in Asia and was brought to the United States by slave traders. This small beige bean has a black circular "eye" at its inner curve. While originally grown as animal fodder, the beans, which are also called cowpeas, have become popular and are associated with good luck. Prior to the siege of Vicksburg during the American Civil War, the beans were used exclusively for feeding cattle. The siege lasted for 40 days and the people of the town were forced to eat cowpeas to avoid starvation. That started a southern tradition and nowadays they are eaten by some on New Year's Day to bring good luck in the coming year. The beans have been associated with luck and fortune since the days of the pharaohs. The superstitious believe that those who eat the humble cowpea show humility and will be protected from the wrath that will be visited on the vain. Fortunately, there are no meteor showers or thunderbolts tonight, so we can talk a bit about the casserole. It is very easy to make but plan on lead time for soaking the beans. Many feel this is not necessary, but I think the dish has better texture when the beans are soaked for 8 hours before proceeding with the recipe. If you want a completely vegan dish, saute the onions in vegetable oil. If you love bacon, fry four rashers of diced bacon and use the drippings to saute the onions. The bacon adds enormous flavor to the dish and I recommend using it if you can. As with all casseroles, flavor improves if the dish is allowed to sit overnight. That's it. Here's the recipe.

Black-Eyed Pea Casserole...from the kitchen of One Perfect Bite

Ingredients:
2 cups dried black-eyed peas, rinsed and soaked overnight in cold water
1 tablespoon vegetable oil
Optional: 4 slices bacon, diced
2 cups finely chopped onion
1 tablespoon honey
2 tablespoons molasses
1/4 cup soy sauce
1 teaspoon ground mustard powder
1/4 cup tomato paste or tomato catsup
2 cups vegetable or chicken broth
1 large bay leaf
1 spring each fresh rosemary, thyme and sage
1 small orange
1/2 teaspoon freshly ground pepper
1 tablespoon cornstarch
2 red bell peppers, cored, seeded and diced
2 tablespoons fresh Italian parsley, chopped

Directions:
1) Preheat oven to 300 degrees F. Drain and rinse soaked beans. Place in a heavy bottomed sauce pan, cover with water and bring to a boil. Boil for 5 minutes. Drain and rinse again. Place into a 3-quart to 4-quart casserole.
2) While beans are boiling, heat oil in a large skillet. If using bacon, add to skillet and saute until bacon is brown. Add onions and saute over medium heat until softened and transparent, about 5 minutes. Stir in honey, molasses, soy sauce, mustard and tomato paste or catsup. Pour in stock and bring to a boil. Pour mixture over beans in casserole.
3) Tie bay leaf and herbs together with a piece of string and add to pot. Pare 3 wide strips of zest from orange. Mix zest and black pepper into bean mixture. Bring to a boil. Cover pot and transfer to oven. Bake for 1 hour.
4) Meanwhile, combine juice from orange with cornstarch and blend to form a smooth paste.
5) At end of hour, remove casserole from oven. Stir in paste and diced red peppers. Return casserole to oven, cover, and bake for 1 hour longer, or until beans are very tender.
6) Remove orange rind and herbs. Garnish with parsley and serve while hot. Yield 4 to 6 servings.

You might also enjoy these recipes:
Tuscan Bean Soup - One Perfect Bite
Chocolate and Black Bean Chili - One Perfect Bite
Mexican Black Bean Salad - One Perfect Bite
Smoked Ham Soup with White Beans - The Recipe Girl
Creamy Navy Bean Soup with Chicken - Poor Girl Eats Well
Navy Bean and Refried Bean Stew - Kalyn's Kitchen

This post is being linked to:
Smiling Sally - Blue Monday

Homemade Ginger Ale and Candied Ginger


From the kitchen of One Perfect Bite...I'm usually careful with my purchases, but ginger root got the better of me and I ended up far more of it than could normally be used. I can't bare waste. My search to avoid the compost pile led to a few interesting alternatives and I decided to make candied ginger and use the syrup in which it steeped for ginger ale. I've made candied ginger in the past, but never saved the syrup for other uses, so this was a bit of an experiment for me. There are three types of simple syrup and each is identified by the ratio of water to sugar in the mix. Thin simple syrup is used to glaze cakes and cookies and has a ratio of 3 parts water to 1 part sugar. Medium simple syrup is used to make beverages and sweeten ice tea and has a ratio 2 parts water to 1 part sugar. Thick simple syrup has a ratio of 1 part water to 1 part sugar and it's used as a base for cold drinks and to glaze candied fruits. I'm not fond of overly sweet drinks, so I decided to go with a medium simple syrup. This process requires a lot of ginger and a bit of straight forward knife work or a mandoline. All told, you'll need 1-1/2 cups of peeled, thinly sliced ginger. Quick work can be made of this if you use the edge of a spoon to scrape the ginger clean. Try to keep the slices of ginger uniform in size for even cooking. A thickness of an eighth to a quarter of an inch is ideal. Time takes care of the rest. I was really pleased with how well the ginger ale turned out. It has a really fresh sharp taste that's missing from its commercial counterpart. I added slices of fresh lime to ours and can happily report this would make a wonderful warm weather beverage. Here are the recipes.

Homemade Ginger Ale and Candied Ginger...from the kitchen of One Perfect Bite

Ingredients:
1-1/2 cups ginger, peeled and thinly sliced in 1/8 to 1/4-inch slices
1-1/2 cups sugar, divided use
2 cups water
1 quart club soda
1 lime cut in wedges
Optional garnish: lime slices, mint sprigs

Directions:

1) To make ginger ale: Combine ginger, 1 cup sugar and water in a saucepan. Simmer slowly for 1 to 2 hours, until sugar is dissolved and ginger is softened. Strain warm syrup and allow to cool. Save the ginger pieces to make crystallized ginger. Fill a tall glass with ice, add mint sprig and lime slices, 2 ounces ginger syrup and 6 ounces of club soda. Squeeze lime wedge into glass. Use more syrup if desired. Stir. Yield: 4 servings.
2) To make candied ginger: Line a cookie sheet with wax or parchment paper. Place a cooling rack on top. Place reserved 1/2 cup sugar in bowl. Toss ginger in sugar and dry on rack for 1 to 2 days. Store in airtight container or a zip lock bag for up to 3 months.

You might also enjoy these recipes:
Candied Orange and Lemon Peel - One Perfect Bite
How to Make Candied Ginger - David Lebovitz
Homemade Ginger Ale - Simply Recipes

Friday, April 9, 2010

Kedgeree - Pink Saturday


From the kitchen of One Perfect Bite...Grandma Maude was not an Anglophile. Famine Irish had long memories and the only good thing she would attribute to the British was the Magna Carta. She did, however, love to cook and tell tales - some tall, some true - that were sure to make us smile. She'd let novel bits of England into her kitchen to assure those smiles. Bubble and Squeak was a favorite of hers and she, of course, had a tale to match the dish. For the uninitiated, Bubble and Squeak is a homely dish made mostly of potatoes and cabbage. It is twice cooked. The bubble represents the boiling of vegetables and the squeak is the noise made when they are turned into a skillet and fried. This was heady information for five year olds. Almost as good as Bangers and Mash and Kedgeree. In our world, Kedgeree was an exotic dish that set us apart from those who had tuna casserole on Friday nights. In truth, Kedgeree is a lightly curried breakfast dish made from rice, smoked fish, boiled eggs, parsley and some lemon juice. While its considered an English dish, it roots are Indian and it is probably an adaption of a rice and lentil dish called Khichari. The British altered the dish to suit their tastes and Grandma Maude altered it to suit hers. She dropped the eggs and the curry and created a thirty minute meal that would make the most harried of cooks smile. This is not company fare, but it is wonderful for a family lunch or supper. Here's the recipe we use.

Kedgeree...from the kitchen of One Perfect Bite

Ingredients:

2 tablespoons butter
1 tablespoon vegetable oil
1 medium onion, finely chopped
1 teaspoon minced garlic
1 cup long grain rice
1-3/4 cup fish stock or reduced-sodium chicken broth
8 ounces salmon fillet, skinned and chopped
3 ounces smoked salmon, chopped
2 tablespoons heavy cream
2 tablespoons chopped fresh dill
3 scallions, finely chopped
Salt and pepper
Garnish: dill sprigs and lemon slices

Directions:
1) Combine butter and oil in a large saucepan. Cook until butter melts. Add onion and cook over low heat until soft but not brown, about 10 minutes. Add garlic and cook until fragrant, about 30 seconds.
2) Add rice and cook, stirring constantly, until it is transparent, about 3 minutes. Add stock and stir well. Bring to a boil, cover pan, and simmer gently, for 10 minutes.
3) Add fresh and smoked salmon. Stir well. If rice seems dry add more stock. Cook until fish and rice are tender and all liquid has been absorbed, about 6 minutes.
4) Remove pan from heat. Stir in cream, dill, and scallions. Season to taste with salt and pepper. Garnish and serve immediately. Yield: 4 servings.

You might also enjoy these recipes:

Yangzhou Fried Rice - One Perfect Bite
Shrimp Risotto - One Perfect Bite
Asparagus and Lemon Grass Risotto - One Perfect Bite

This post is being linked to:
Pink Saturday, sponsored by Beverly at How Sweet the Sound.

Thursday, April 8, 2010

Carrot Timbales


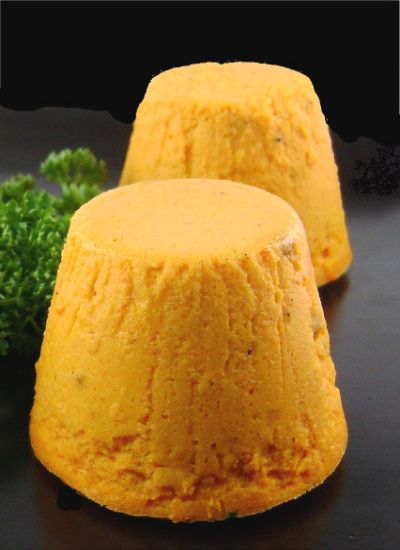
From the kitchen of One Perfect Bite...When Julia Child first captured the culinary airways she taught her viewers how to make timbales of spinach and mushrooms. The timbales were delicious and easy to make, and that first venture led many of us to explore other varieties. Timbales became popular at dinner parties and holiday celebrations. Then food styles changed and they seemed to disappear from the culinary scene. While there are many types, the most common timbale is a savory custard or pudding that is baked in a drum shaped mold. It is heartier than a souffle and has the consistency of a rich pudding. I use to make them on a regular basis. Now before you start to roll your eyes and think I'm putting on airs, I must quickly add that I had a sick child who didn't eat a lot and need to be coaxed - bribed - to eat. There was a period when the only thing she would touch was pudding. I very quickly learned how to make egg-enriched vegetables look like pudding. This recipe survived that era and I still serve these timbales for an occasional guest dinner. Their great advantage is that they can be made ahead of time, unmolded and reheated before serving. A true timbale uses copious quantities of heavy cream and is usually served with an additional dollop of sauce. This recipe has been pared way back and uses buttermilk or yogurt in place of cream and is served without an additional sauce. These are lovely with roast pork or ham and are as easy to assemble as the parent recipe from which they sprung. I no longer have timbale molds, so I use my popover pans to achieve a drum-like shape. If you have neither, feel free to use custard cups. Here's the recipe for a pretty dish that is simple to make but worthy of your guests.
Carrot Timbales...from the kitchen of One Perfect Bite with inspiration provided by the Vegetable Gardene

Ingredients:
1-1/4 pounds carrots, peeled and thinly sliced
3 tablespoons vegetable oil or butter
3 eggs
1/4 teaspoon salt
1/2 teaspoon sweet paprika
Pinch of nutmeg
1/3 cup buttermilk or plain yogurt
Parsley or scallion for garnish

Directions:

1) Heat oil or butter in a heavy saucepan. When oil shimmers or butter has melted, add carrots and toss to coat. Cook, covered, over medium heat until tender, about 30 to 40 minutes. Cool for 5 minutes.
2) Preheat oven to 325 degrees F. Lightly grease or spray four (6-oz.) molds. Set aside.
3) Scrape carrots into bowl of food processor. Add eggs, salt, paprika, nutmeg and yogurt. Puree for 1 minute or until mixture is perfectly smooth. Spoon carrot purée into molds until they are 7/8th full. Place timbales into a roasting pan. Bring a kettle of water to a boil. Pour water into roasting pan until it comes 2/3 of the way up the sides of molds. Bake in hot water bath for 30 to 35 minutes. Unmold gently by running a knife around sides of timbales. Serve warm or slightly chilled. Yield: 4 servings.

You might also enjoy these recipes:
Moroccan Carrots - One Perfect Bite
Braised Carrots and Shallots - One Perfect Bite
Herb Roasted Carrots - One Perfect Bite

Wednesday, April 7, 2010

Pasta with Pungent Parsley Pesto


From the kitchen of One Perfect Bite...Forgive the alliteration. I know it's bad, but my children named this dish years ago while making merry at the dinner table. It was a working mother's secret weapon and I made it a lot when I needed something fast and easy to pair with broiled steak, chicken or, in a pinch, even poached eggs. The making merry part was usually at my expense and the alliteration was the result too many good teachers and overactive, albeit creative, imaginations. This was back in the day when we didn't grill, we broiled and at that time pesto, the basil and pine nut variety, was sweeping the country. My children didn't care for the standard version, so I had to search for and experiment with other types. The one I found for our use is based on a recipe developed Patricia Wells and it is much easier to make than its more familiar cousin. The pungent portion of the alliteration comes from a few anchovies that are added to parsley as it's processed. Unless you let it sit too long you won't know they're in the sauce, though I must admit their flavor can become harsh if it sits for too long before being served. This is one of those rare sauces that I like to make just before I add it to the pasta. Freshly made, it is delicious and the anchovies are barely discernible. This is very easy to make if you have a food processor. There are folks who insist it is more flavorful if made in a mortar and pestle. I leave the method up to you. Here's the recipe.

Pasta with Pungent Parsley Pesto...from the kitchen of One Perfect bite, inspired by Patricia Wells

Ingredients:
1-1/2 to 2 tablespoons fresh minced garlic
1/2 teaspoon kosher salt
6 oil-packed anchovy fillets, drained and minced
3 cups loosely packed Italian parsley
3 tablespoons fresh lemon juice
1/2 cup extra-virgin olive oil
1 pound capellini
1 to 2 tablespoons extra-virgin olive oil

Directions:
1) Combine garlic, salt, anchovies and parsley in bowl of a food processor. Pulse 2 or 3 times, or until the sauce is well-mixed. Scrape down sides of bowl. While machine is running, add lemon juice and olive oil in a slow stream. Adjust salt and pepper to taste. Set aside.
2) Bring 6 quarts of water to a boil. Add 2 to 3 tablespoons of salt and return to a boil. Add capellini and cook according to package instructions. Drain, reserving about 1 cup of water, and transfer to a very large bowl. Add 3/4 of pesto to pasta and toss to coat strands evenly. Add water by tablespoons if it seems to dry. Cover bowl for 1 minute. Toss again and add oil to moisten pasta. Transfer pasta to serving bowls, adding a spoonful of reserved pesto to each bowl. Serve immediately. Yield: 6 servings.

You might also enjoy these recipe:
Pasta Puttanesca - One Perfect Bite
Capellini Capricciosi - One Perfect Bite
Fusilli with Fennel, Sausage and Wine - One Perfect Bite